


I have to say, I am no expert when it comes to photography. I received my DSLR almost a year and a half ago, for my birthday, from my lovely husband and I have loved using it for all my photos. It has simply been a trial and error learning experience for me. I have not taken any photography classes or really learned every bit of how the camera works. I just go for it!
That’s pretty much how I am in in life with most things. I am not one to research a lot (except for in blogging) and I usually like to jump right in and try to teach myself. This can definitely be a down fall in a lot of areas because I am not learning to my fullest potential, but between my busy schedule and how my brain works…that’s how it goes.
Anyhow, My DSLR is a middle range camera, a great beginners camera in my eyes. It is a SONY 3000 which for blogging and taking photos of my kids has worked out very well. I probably will upgrade down the road but being that it is not extremely expensive and takes great photos I am happy with it!
After receiving my camera and being at the beginning of my blogging journey I watched how amazing my photos could take a so-so blog to a blog with eye catching photos that really grab the readers attention. Let’s face it our society is very visual! We love beauty and we can’t help but want to see beautiful photos when reading an article or blog post. This is where I needed a great photo editing page that can really help brighten my photos and help them stand out, let alone add banners and text to create a great pinterest photo.
I did not want something that would be too expensive but I also needed something that would really have all the tools that I needed. Well, Picmonkey is all that! Especially since upgrading I have been able to use all the tools I need and the text without feeling that I am losing tons of money while doing so.
Well, just like anything in life practice makes perfect and the more you use something the more you learn how to use it better, including new tricks and shortcuts.
Picmonkey has been this for me…in the beginning I use to add so many effects to get my photos right. Too much playing with the lighting and the fading and somehow it still did not feel right. I am not saying I have the best photos out there in blog land, but with 2 simple shortcuts and ONE small tool, I have taken my photos from good to great, while saving myself time on editing each photo. Too funny while at Haven Bre from Rooms for Rent mentioned in her course how there should only be about 3 steps to editing a photo or else it is way too much. I could not agree any more as soon as I simplified my editing methods keeping it to on average 2-3 effects, my photos felt natural and right. Also, for me I have very little light in my house. We have 3 trees that are in our front yard and no side windows on our main level in the house. This makes taking photos very tricky, I always have to time it right and if I can’t I really need a way to brighten my photos up the best I can.
Okay…so my steps to editing a photo
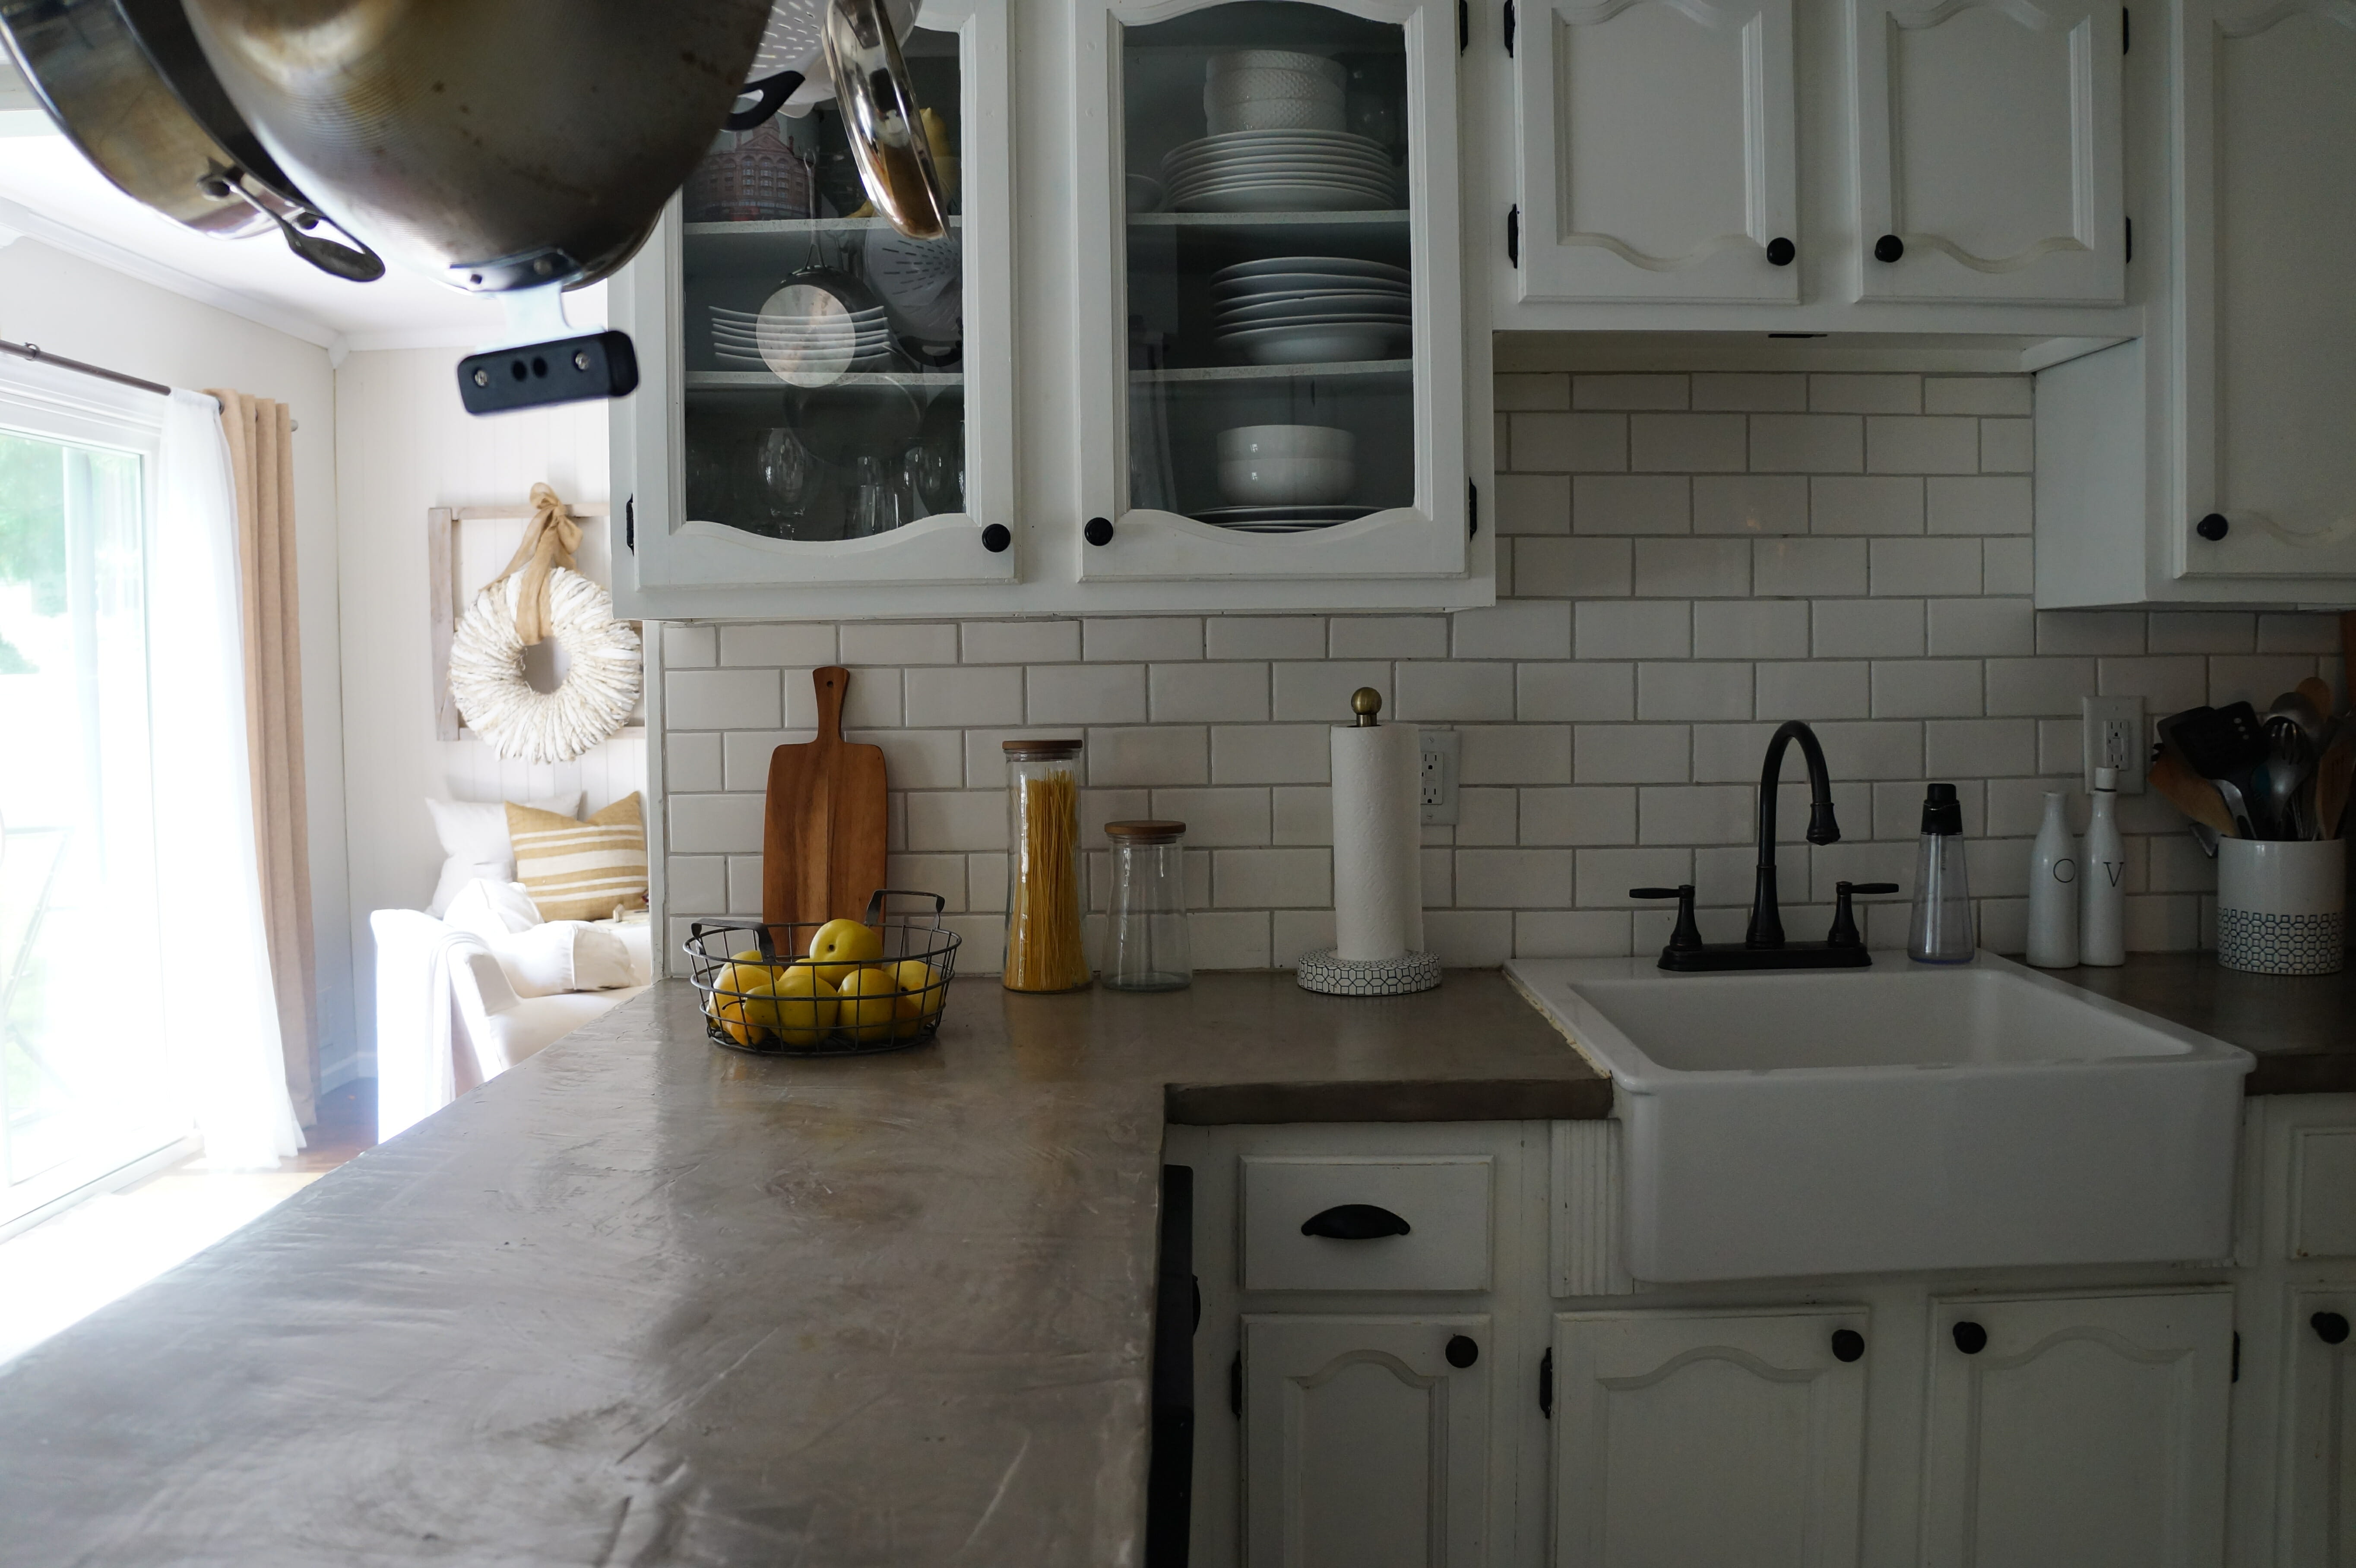
Here I am comparing two photos of the BEFORE and the AFTER


What is the biggest difference with the second photo? The brightness, right? Having a brighter photo without fading the picture is so important. Have you tried brightening your photos with picmonkey using the light tool? and you notice it just ends up fading your picture? That is how I was originally editing my photos until I realized what I really wanted to do is HIGHLIGHT my photo!
Okay I am going to show you that tool right now…but before I do I want to give you the very first step that I do on almost every single photo. There are occasions where I can not use this tool and you will only realize that after you have used it and the photo coloring does not look right.
STEP 1: Auto Adjust
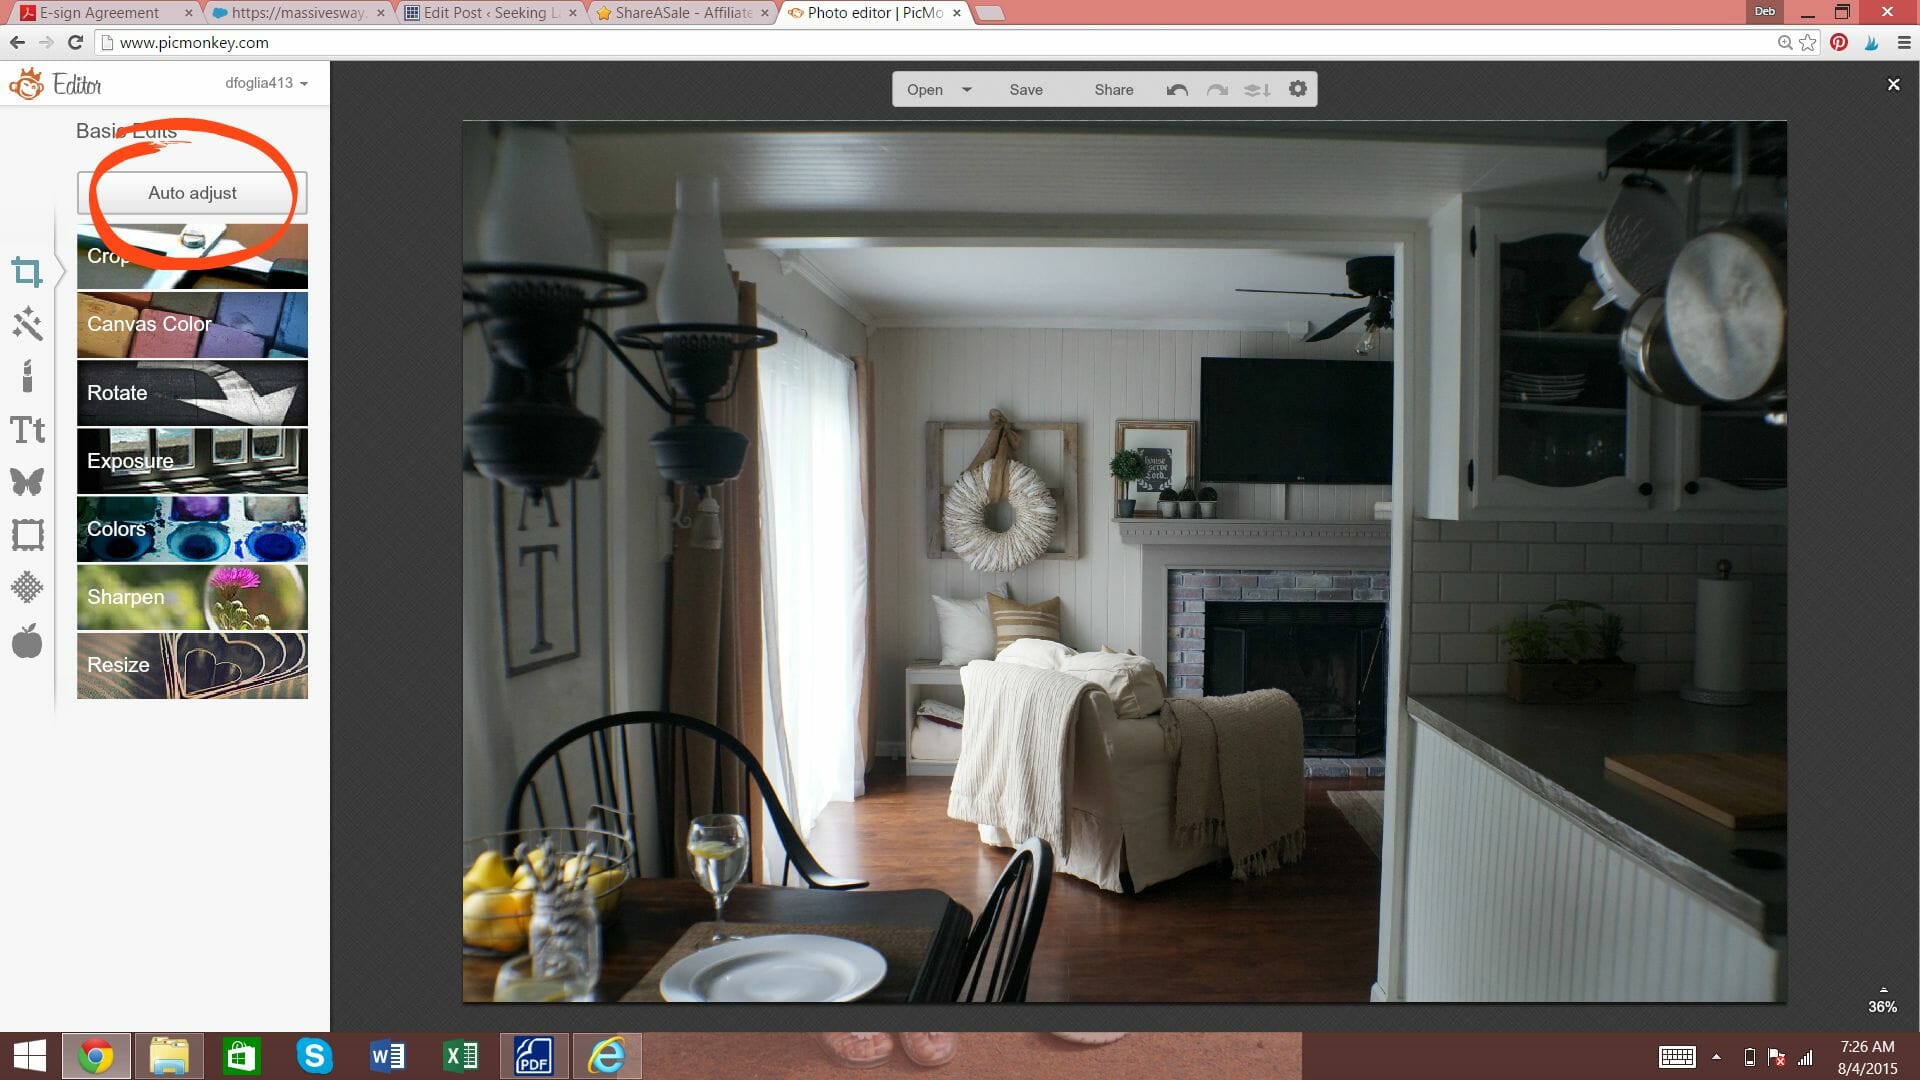
Now I am sure that is a basic step for anyone who has used Picmonkey. It is nothing complicated and besides cropping is the first button I click to see my photo bright and with potential. As I mentioned before, this sometimes does not work, but you will have to make the best judgment of that. Most photos look great after this step. And you can honestly stop here if you want to I will show you the difference with this step alone in my photo.

See the lighting difference definitely appears much brighter than the above picture. Also, if you can not locate, the auto adjust is under the crop page.
NEXT my #1 Tool the HIGHLIGHTER
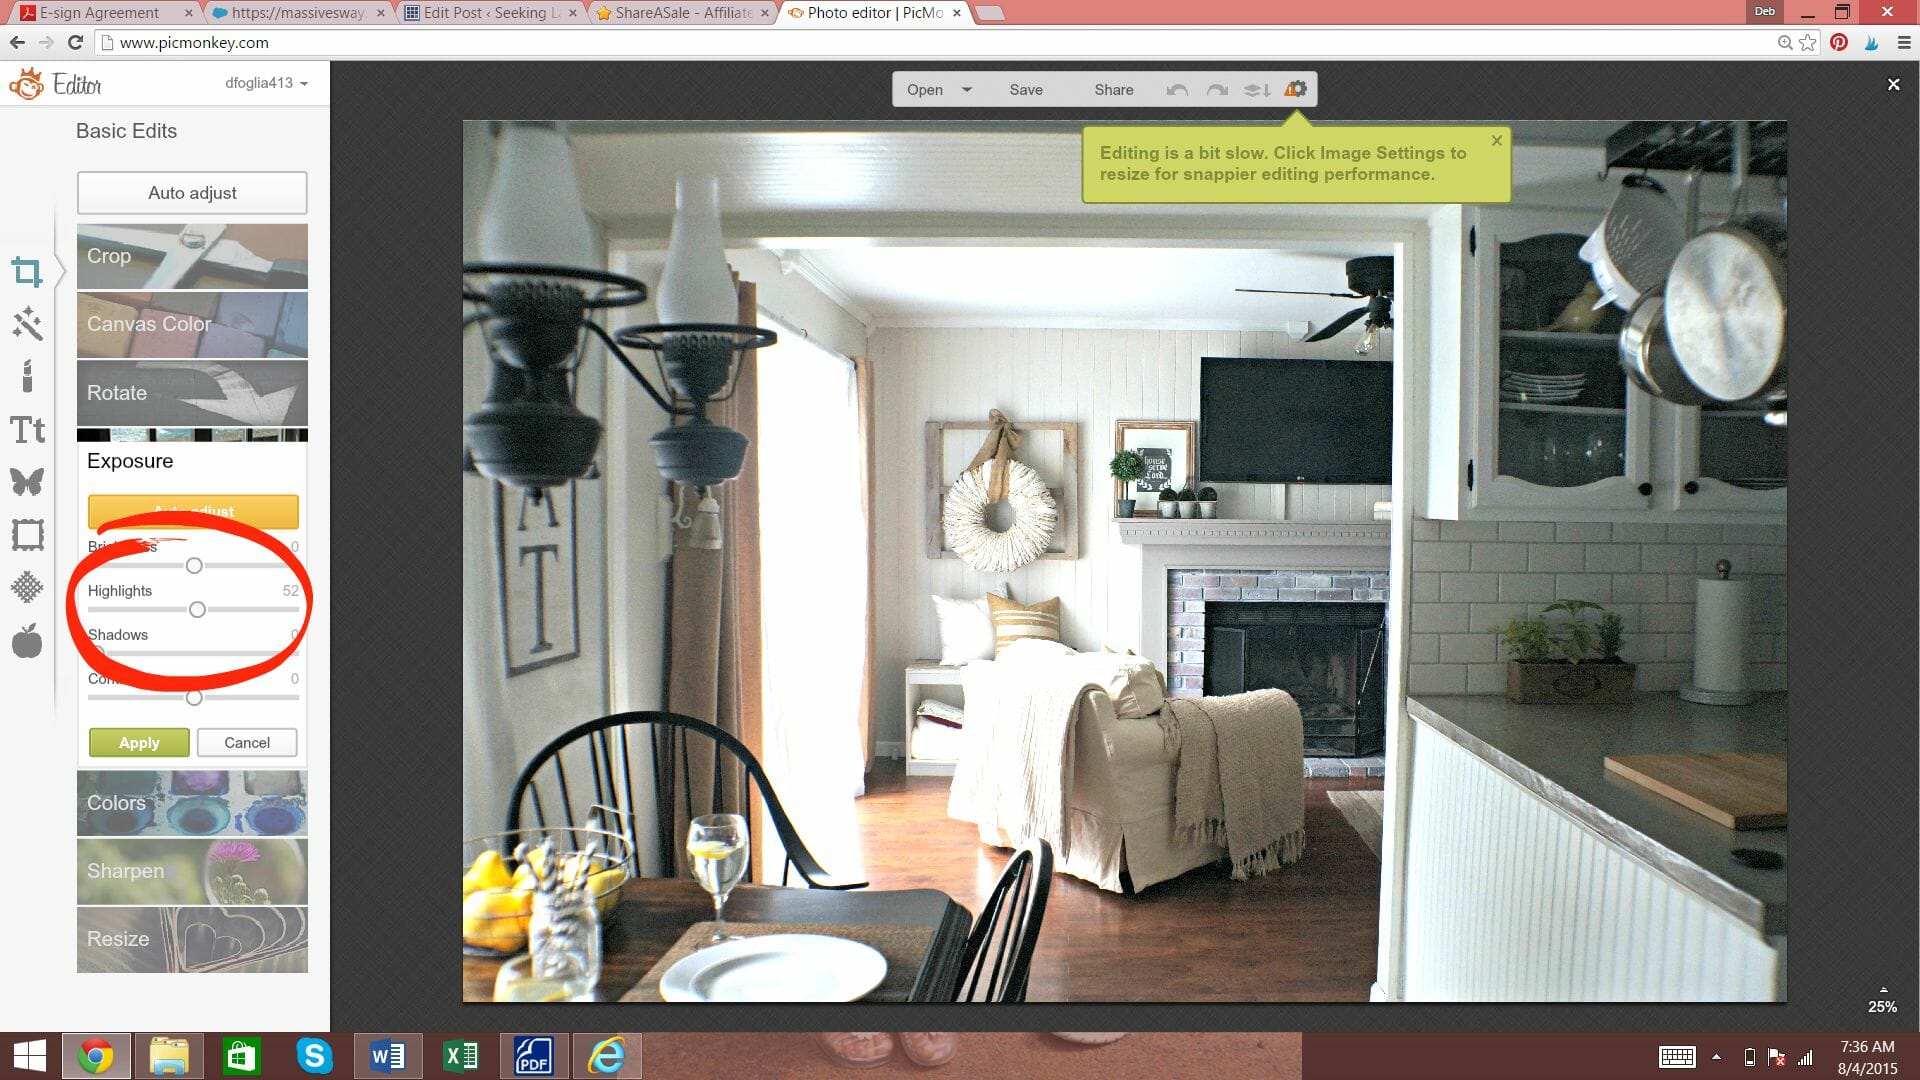
use your discretion when highlighting, some photos you can bring the highlighter bar up far and some just a little bit is enough.
Can you see the difference from the top photo to the bottom?
I do usually Sharpen the photo a bit after this too, but once again not on every photo. I promise you though if you want an easy trick to editing your photos a simple highlighting adjustment will do the trick. Your photos will seem brighter and more professional looking.
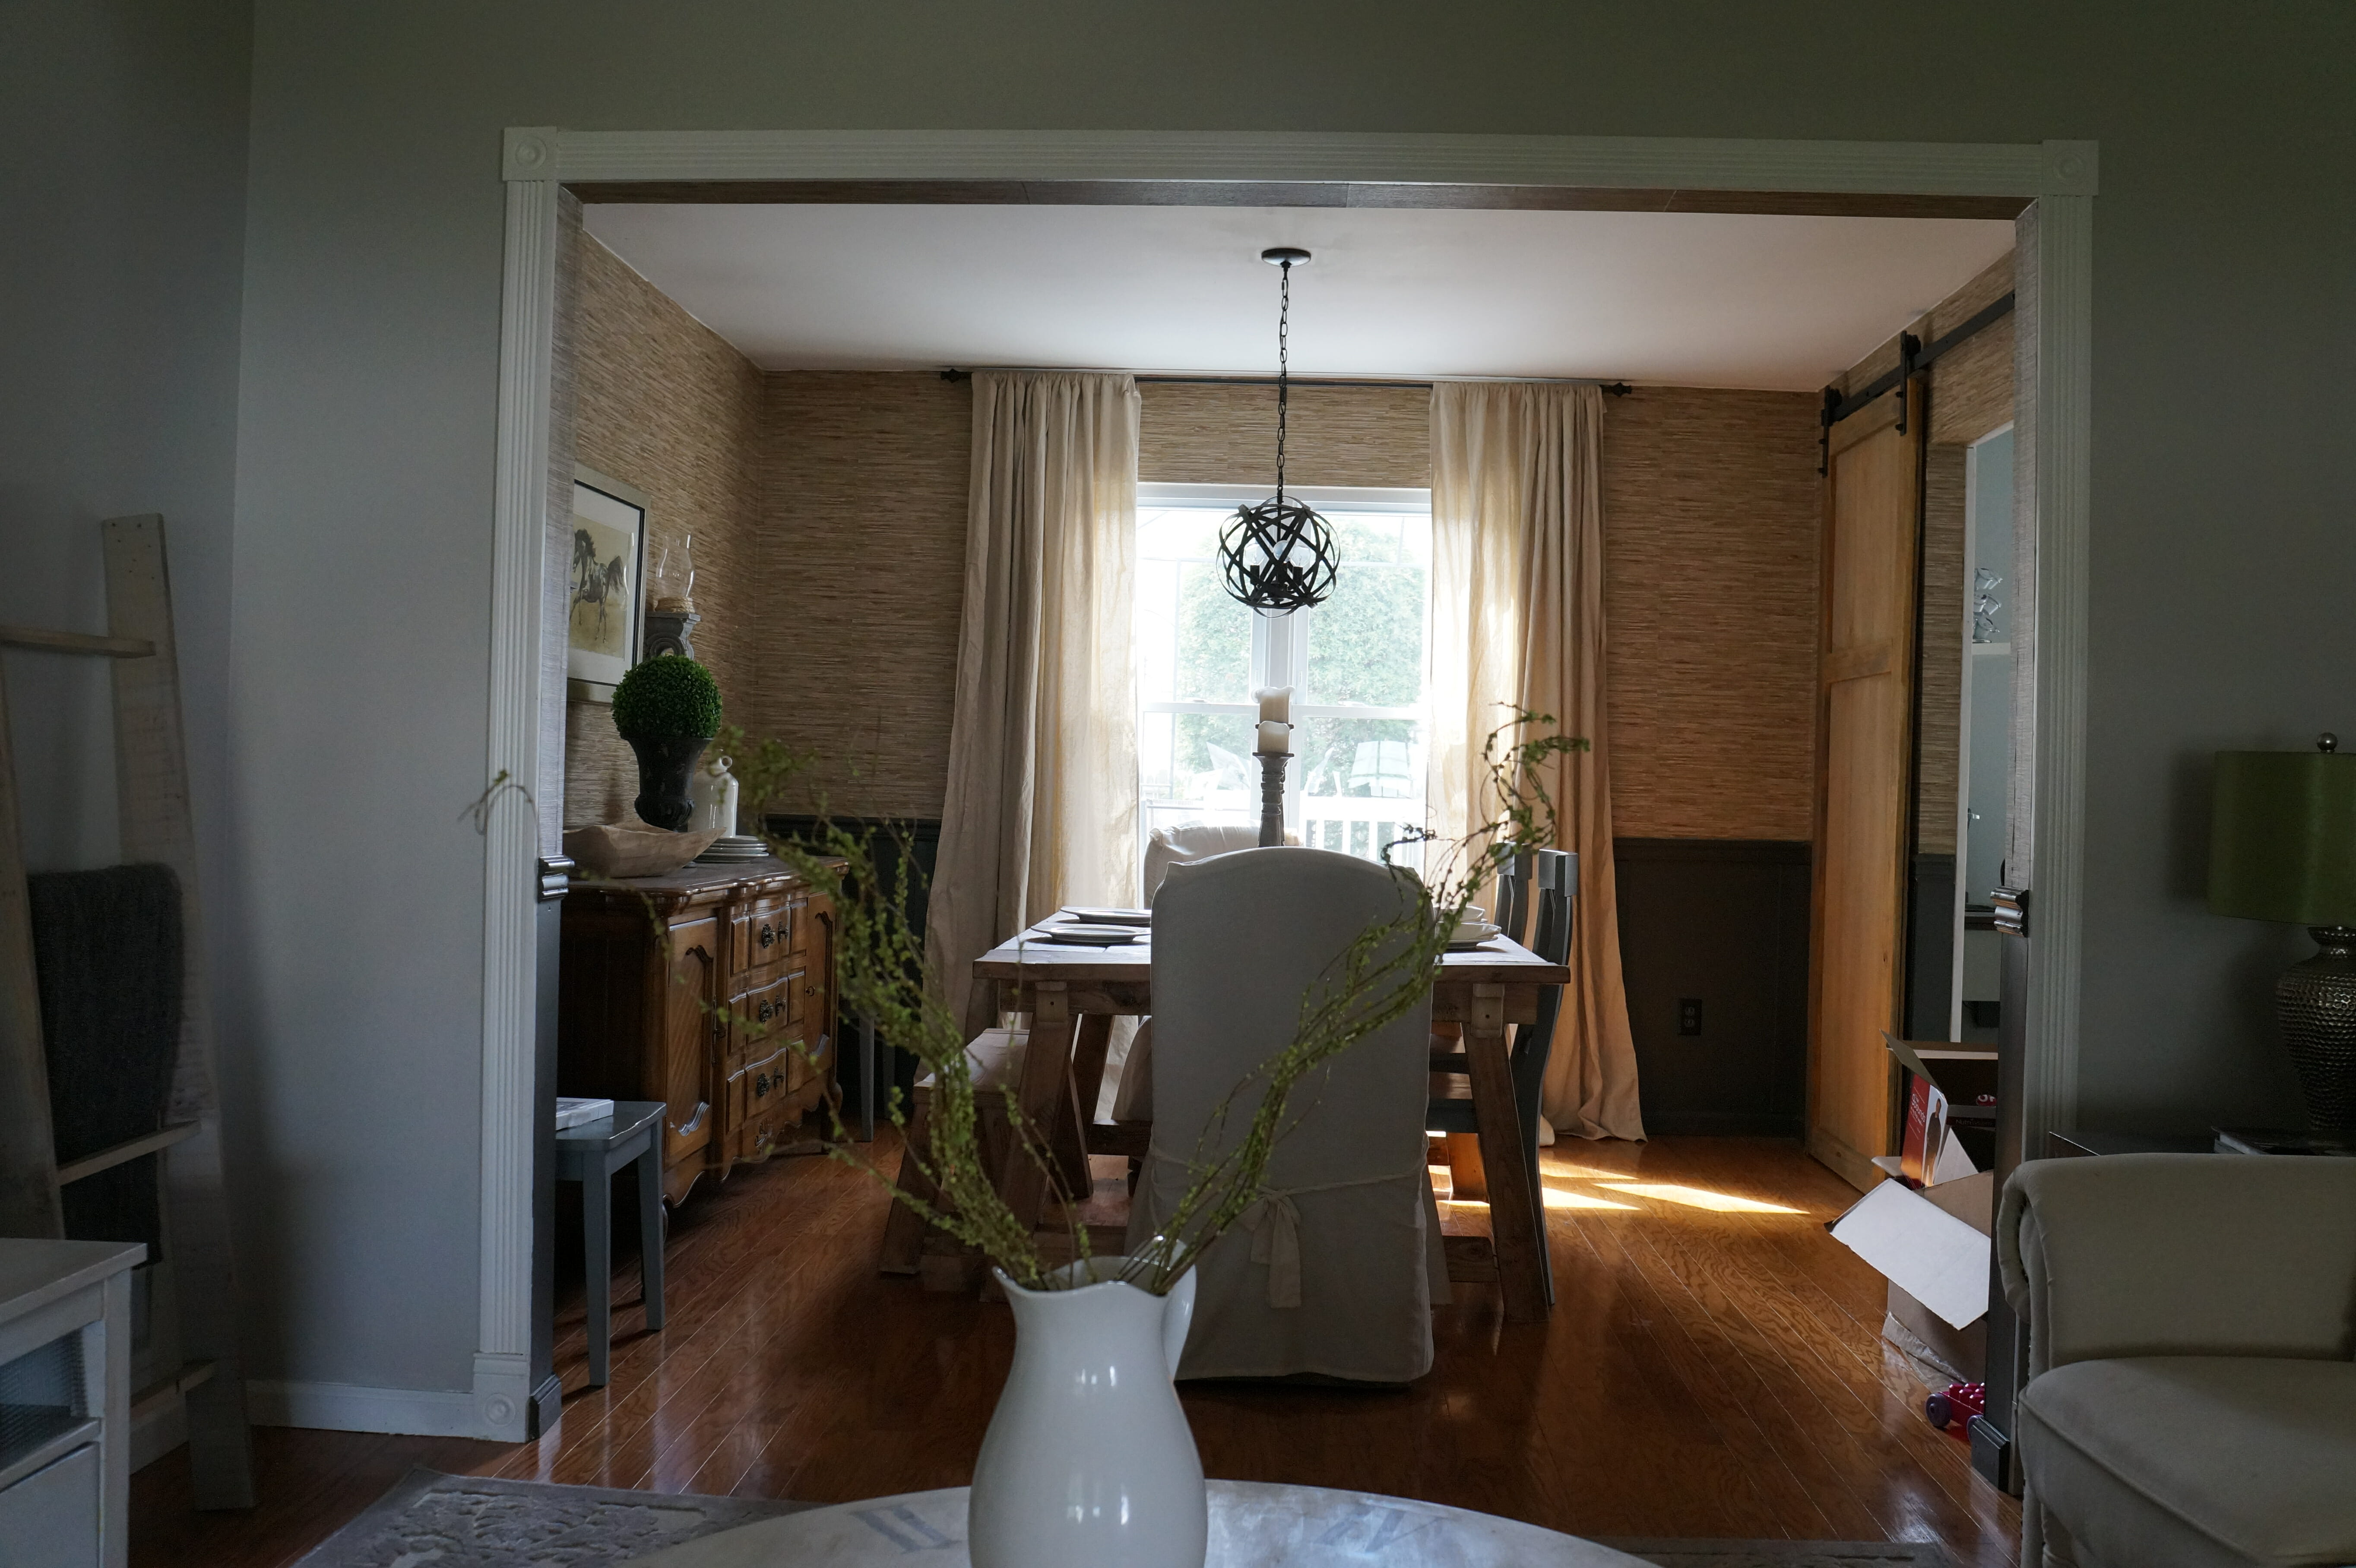
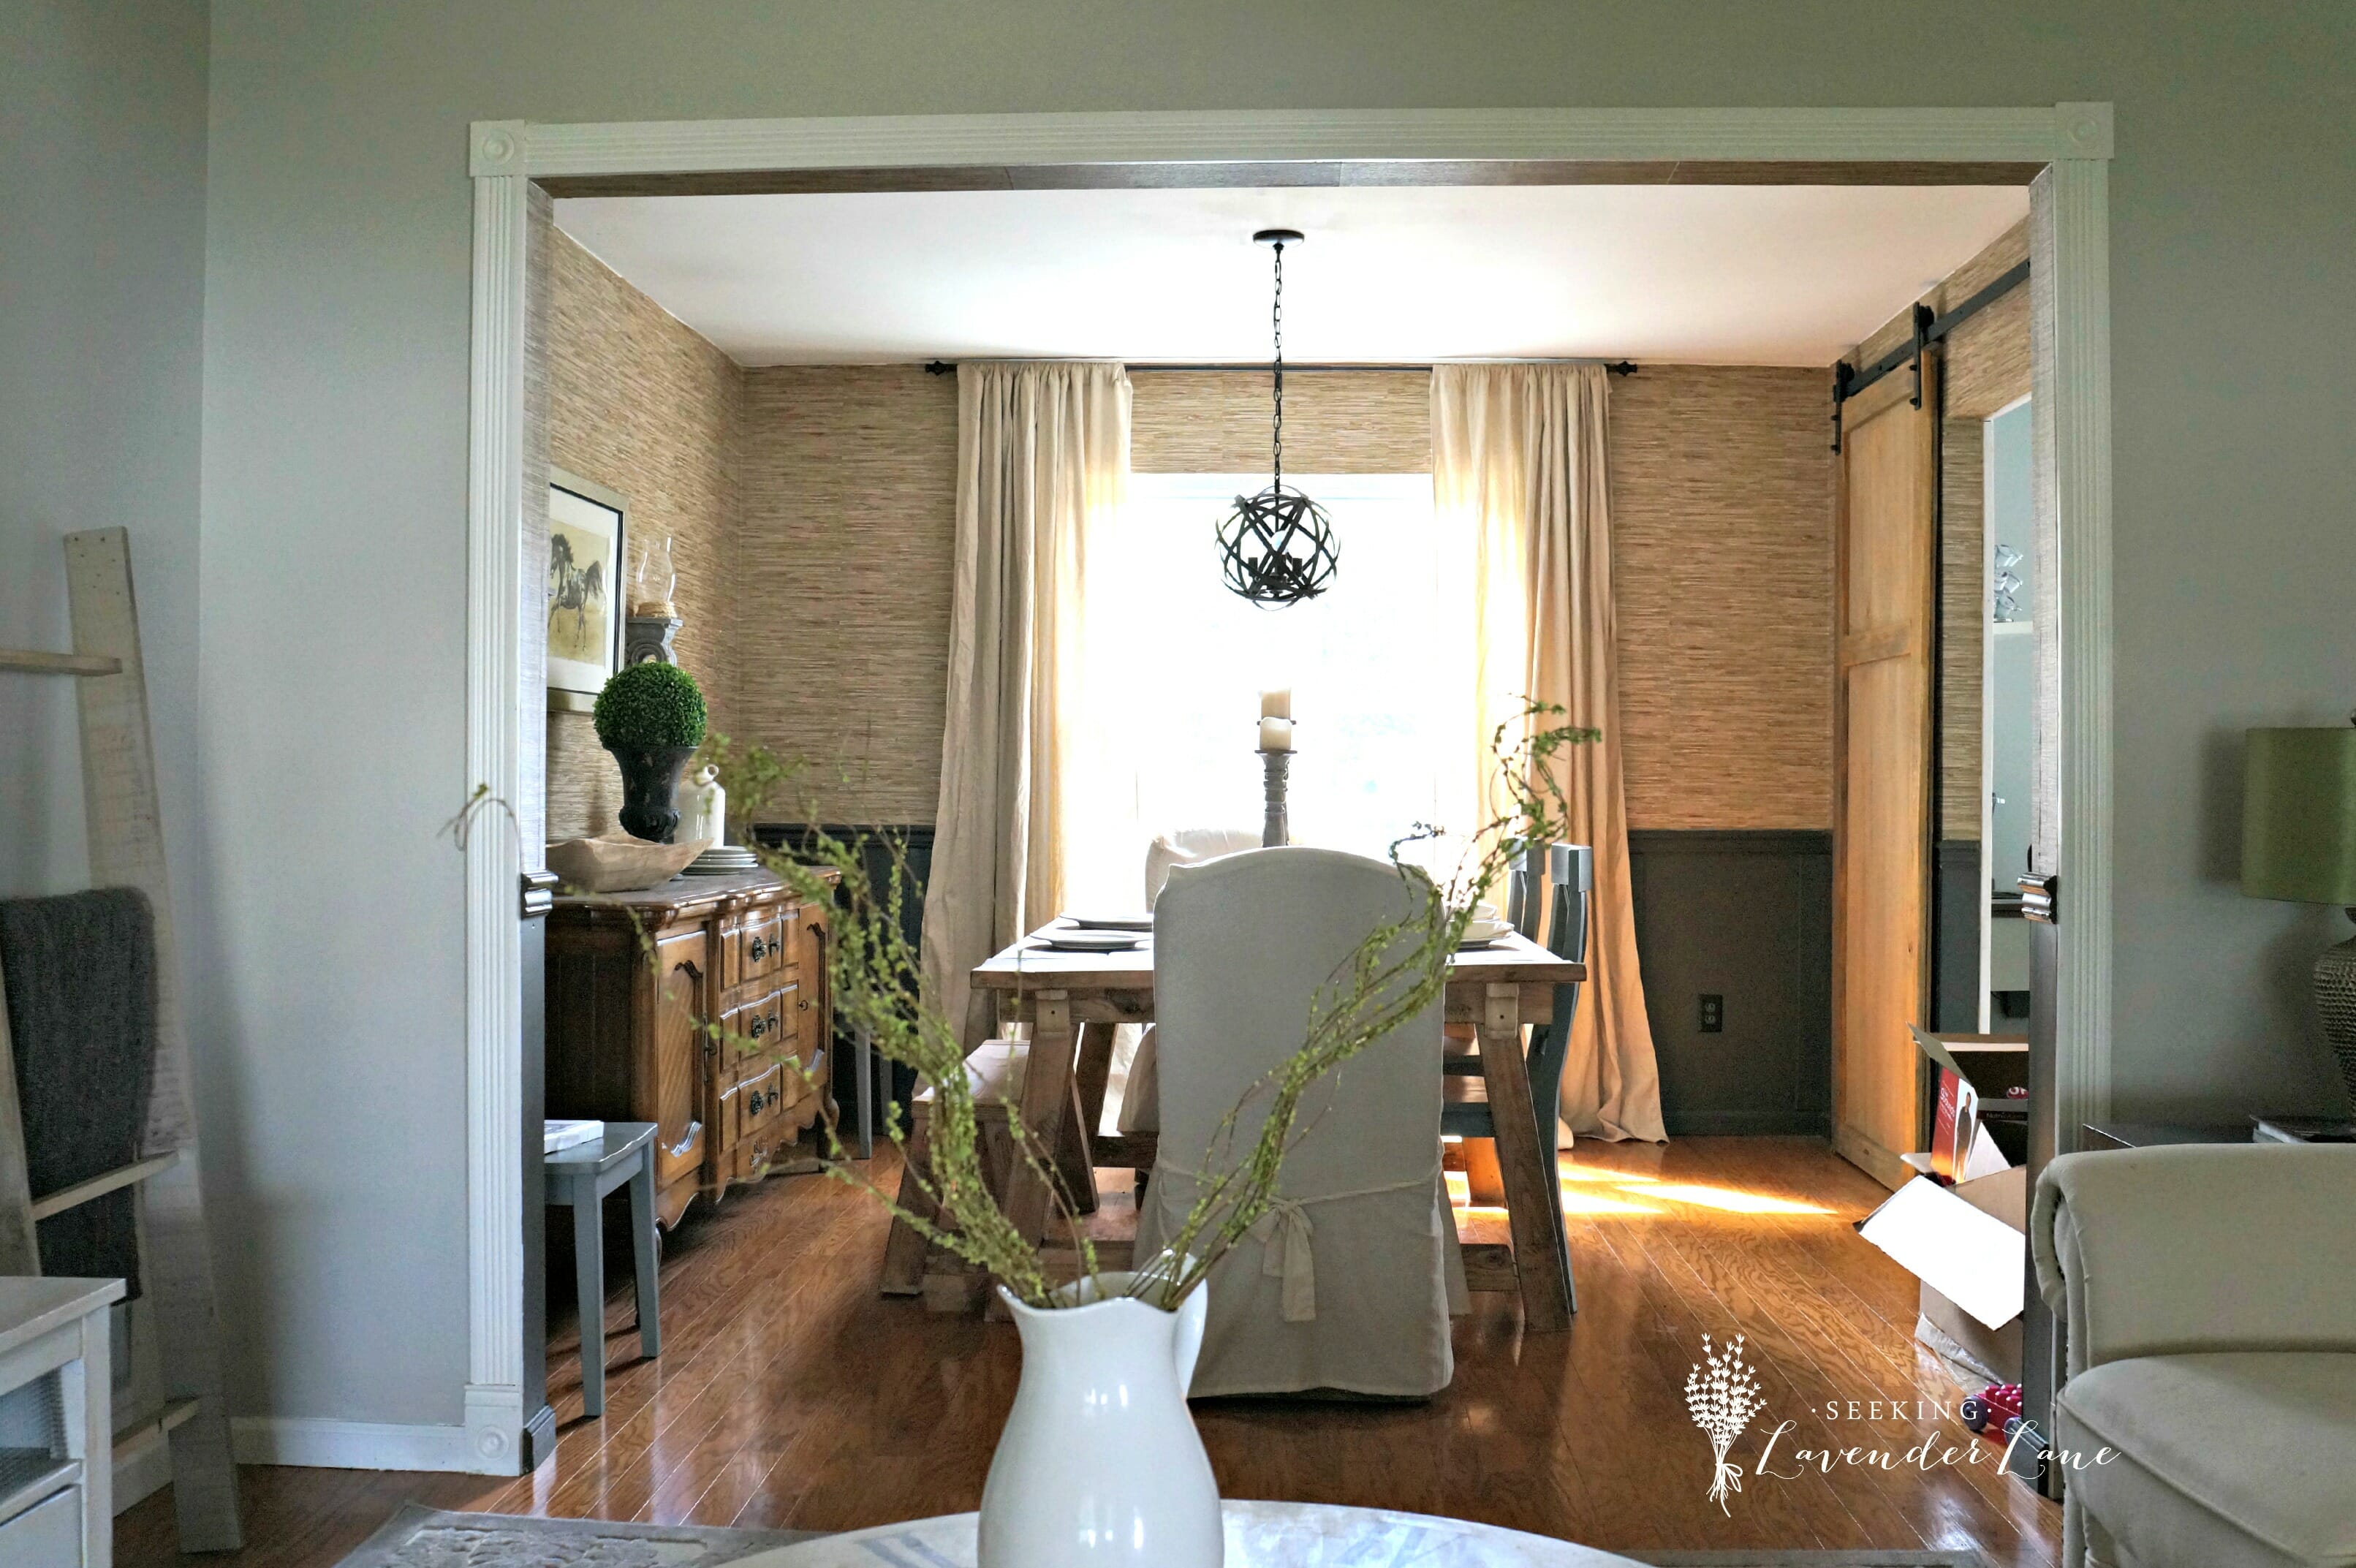
Here are just a few more BEFORE and AFTER photos of me using the same techniques.
BEFORE
AFTER

Psst, you can also see how I cropped this photo a bit too, focusing in on what is important in this photo.
BEFORE
AFTER
And that is all!
I want to remind you I am not a complete pro, I just have used trial and error to make my photos the best they can be. I am also always up for more tips from any of you. We all find ways that work for us and sharing them is so important. Also, if you are not a blogger these tips are great for when you’re taking photos of your kids, or vacation,or pets. Don’t feel that you need to be using these to take photos of projects and room reveals to use the tools I’ve shared.
I hope this little tip helps and that you find Picmonkey just as helpful to you as it has been for me!


21 Responses
I love Pic Monkey. I would always over edit in the beginning too Deb! You’re so right, less is more 🙂
Thank you for sharing this information. The difference in the pics is amazing.
Oh my pleasure…it has worked so well for me I had to share!
Great post and great tip! I am taking an online photography course and cannot afford photoshop. This little free tool makes all fo the difference. Thanks!
Judith recently posted…Liebster Award and Interview
Oh you’re welcome Judith I hope it helps! Good luck with your photography class that sounds fun!
I completely agree, Deb. Not only is that Sony a fantastic camera, but PicMonkey is a steal considering all the tools they’ve built in.
Great post!
Thank you! Not to mention it makes it super simple for gals like me that don’t want to research and learn a complex program!
Deb, thanks so much for sharing this, I didn’t know! I use Photoshop usually and just brighten my pics, which often washes them out. Pinning!!!
Roxanne recently posted…DIY Barn Wood Cabinets
Oh I’m so glad this was hepful Roxanne! Yea… once I discovered the highlighter it made such a difference.
We just got a new laptop and until I buy Photoshop for the Mac, I’ve been using Picmonkey to adjust photo size and make them suitable for my blog. Thank you for your easy to do suggestions.
Oh great Carol, I am so glad this could be helpful!
Thanks so much for these great tips. I need all the help I can get.
Trish recently posted…DIY Faux Silk Floral Arrangement
You are very welcome Trish, sometimes it’s the easy little tips that can make a big difference.
This is great Deb! I use PicMonkey so often and never use the editing tools so it looks like I need to! 🙂 Your photos are beautiful!
Ruthie recently posted…Guest Room Must Haves
Hi Ruthie, yes it makes quite the difference…so glad this could be helpful!
These are some great tips, Deb! I love PicMonkey – it makes photo editing so easy!
Thanks Amy! Yes it does…fast and easy and ready to go for a blog post!
Thanks for sharing! I am trying to figure out photo editing, and this was so helpful!
Erin @ the-organized-life recently posted…Back to School: Homework Organization
Hi Erin! Wonderful, so glad that was helpful : )
OMG – I just spent the afternoon re-editing photos I was going to post today! Love this!!! So much faster than what I was doing 🙂 Thanks!
Carlyn Bullock recently posted…Easy How to Recipe Make Warm Cinnamon Churros at Home
Oh that’s so great Carlyn…I am so glad this could be helpful!