


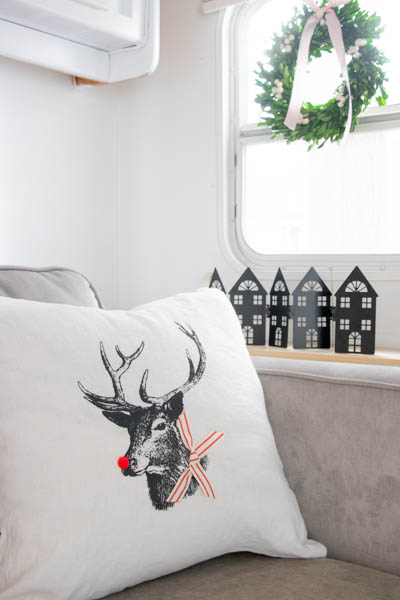
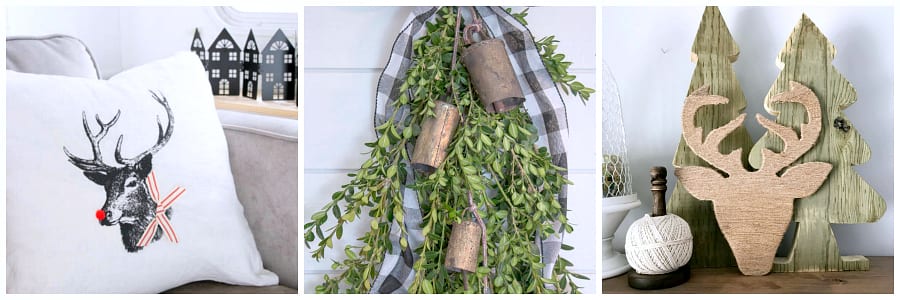
Rudolph the Red Nosed Reindeer Christmas Pillow
I have to thank my friend Kelly, from the Tattered Pew for inviting me on this DIY Christmas blog hop with a bunch of talented ladies. If you are stopping by from Chelsea’s beautiful blog,welcome! You will most definitely get inspired with all the creative projects shared in the two days of blog hops. See the links below before you head out today. I am sharing another Maker’s Studio project of mine that is with one of my absolute favorite stencils. This stencil I feel can be used almost anytime of the year but most definitely during the Fall and Christmas holidays. I decided to change my “deer” in a festive Rudolph the Red Nosed Reindeer Christmas pillow. Now, I feel my taste has become more simple then ever. It may have to do with living in an RV this five months or maybe just looking back at previous Christmas tours and realizing how much “stuff” I used. Whatever the reason I have leaned towards simple decorating and simple projects. Ones that bring that afternoon hour some creativity while feeling accomplished and impressed with what you’ve created. This one is def one for the books of simple Christmas crafts. See the supplies below and be sure to grab a girlfriend to make together!
This post contains affiliate links that I make a small commission from with no added cost to your purchase.
Supplies to create Rudolph the Red Nosed Reindeer pillow
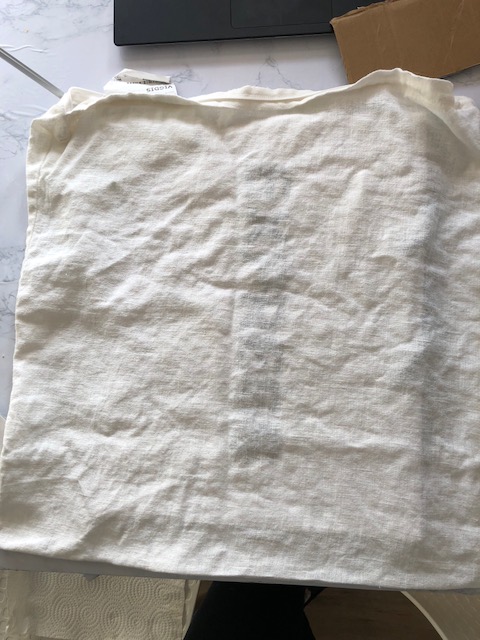
Plain Pillow Cover (I bought mine at IKEA for $6)
Black Chalkart (permanent ink coming out November 20th)-You can use either one ink will last through washes.
.5″ red pom pom
Ribbon
Apply Deer Stencil
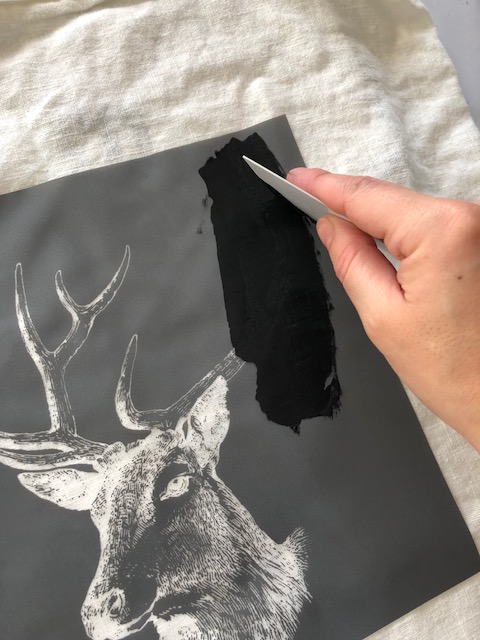
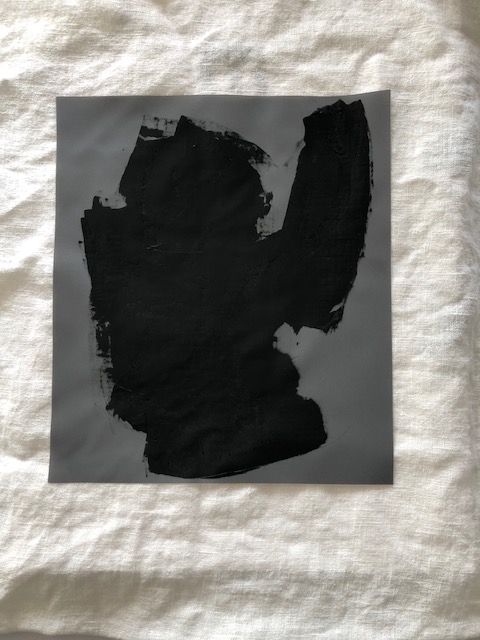
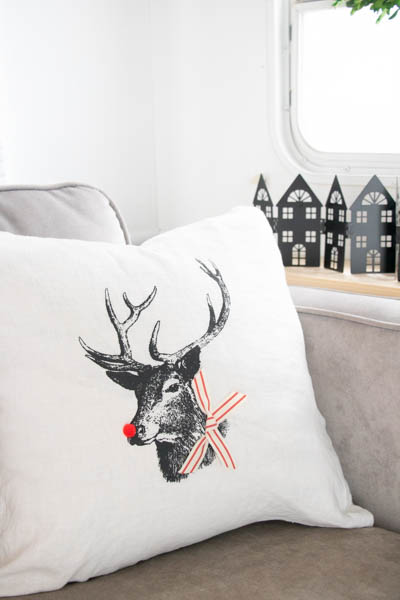
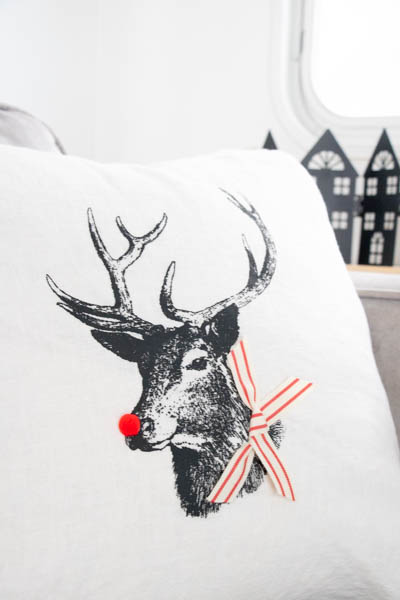
Start with a clean pillow cover, you can steam or press before if you desire. Then add cardboard or shopping bag something with a hard surface inside pillow cover to protect from bleeding through. Apply your deer stencil to center of pillow. I used chalkart for my print, but a Maker’s Studio is coming out as of November 20th with a permanent ink so you can always try that as well. These mesh stencil are incredibly easy to use, but be sure when peeling from back that you peel back slowly not to rip stencil. Once you have peeled back your stencil apply to your cover. Then from there start to apply a small amount of chalk paste onto your spreader and begin at top working your down and being sure to cover enire stencil. You don’t need a very heavy coat of the paste so don’t be too generous. Once in covered peel back your stencil and be sure to wash right away with soap and water. These stencils are reusable so you can wash them place them back onto backing and save them for another project or make more then one pillow.
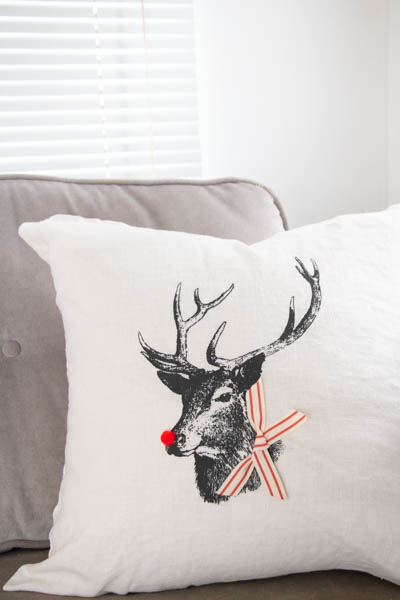
Once you have your deer dried (you can also use blow dryer to dry it completely) then apply a red pom for it’s nose using hot glue or glue of choice and create a ribbon by tying two ribbons together and apply to collar of deer.
Then you have this cute Rudolph Christmas Pillow
Please Pin

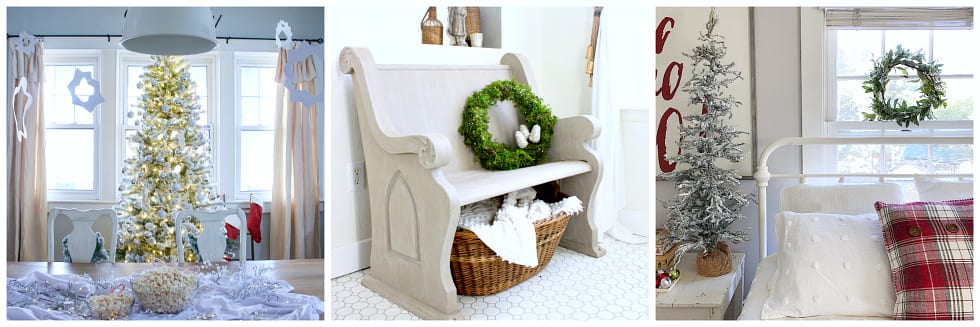
See More Amazing Christmas DIY’s below!

Wednesday
Aratari At Home // The Tattered Pew // My 100 Year Old Home

Crisp Collective // Bless This Nest // Adored House
Thursday
Seeking Lavender Lane // The Honeycomb Home // Joy In Our Home
She Gave It A Go // Grace In My Space // Little Nest of Four


11 Responses
I absolutely love your DIY pillow! This is adorable my friend, can’t wait to try it myself. It’s a joy being on this tour with you. xoxo-Brendt
thank you so much Brendt!
I love how you added turned the deer into Rudolph! What a great idea and so festive for the holiday season!
This is the cutest Deb! I love how it turned out. So perfect.
thank you so much Sarah
Deb this is truly a darling pillow! I love how easy it is to make!
Thanks for joining me on this fun DIY hop!
Thank you sweet Kelly! I so appreciate your inviting me along on your Hop!
This pillow is SO cute, Deb! Can hardly believe you didn’t pay a ton for it! I need to try this technique! Fun to be on this blog hop with you!
Thank you so much Kendra xoxo
Did you use a certain kind of stuffing for the pillow?
Hi Polly, No I just decorated the pillow cover and then added one of my down pillows inside.