


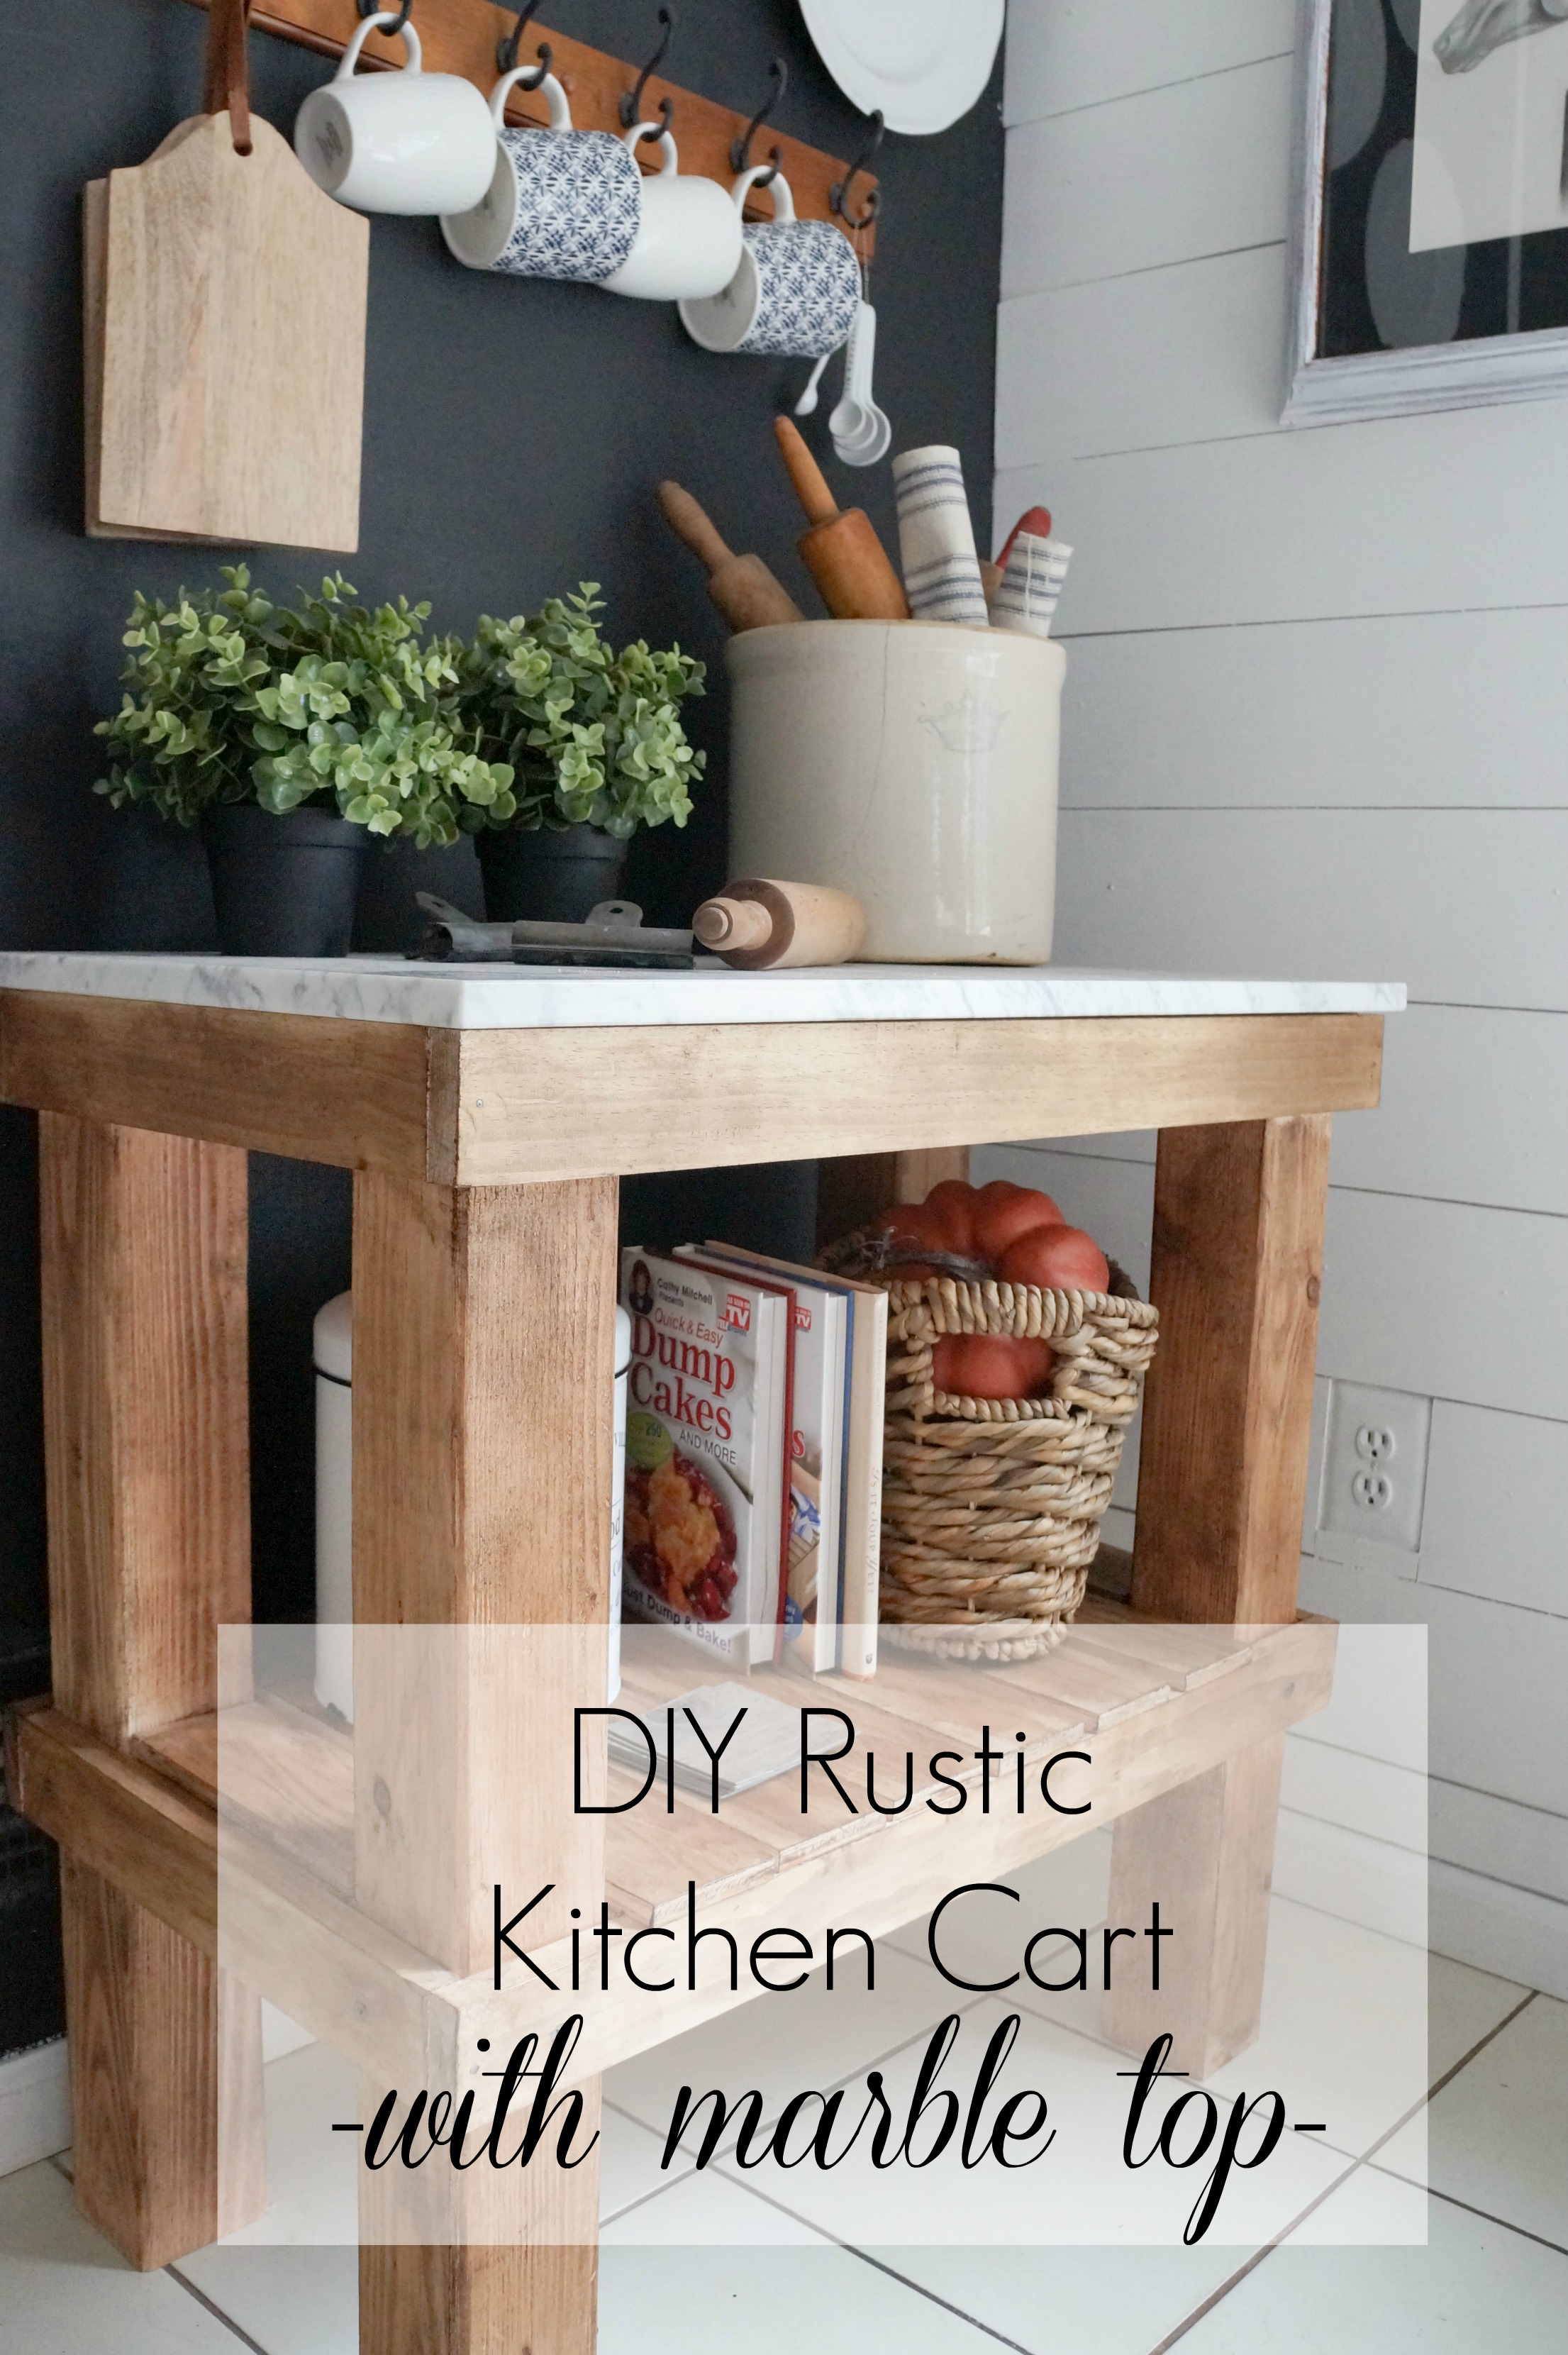
Kitchen Cart: DIY Rustic Cart with Marble Top
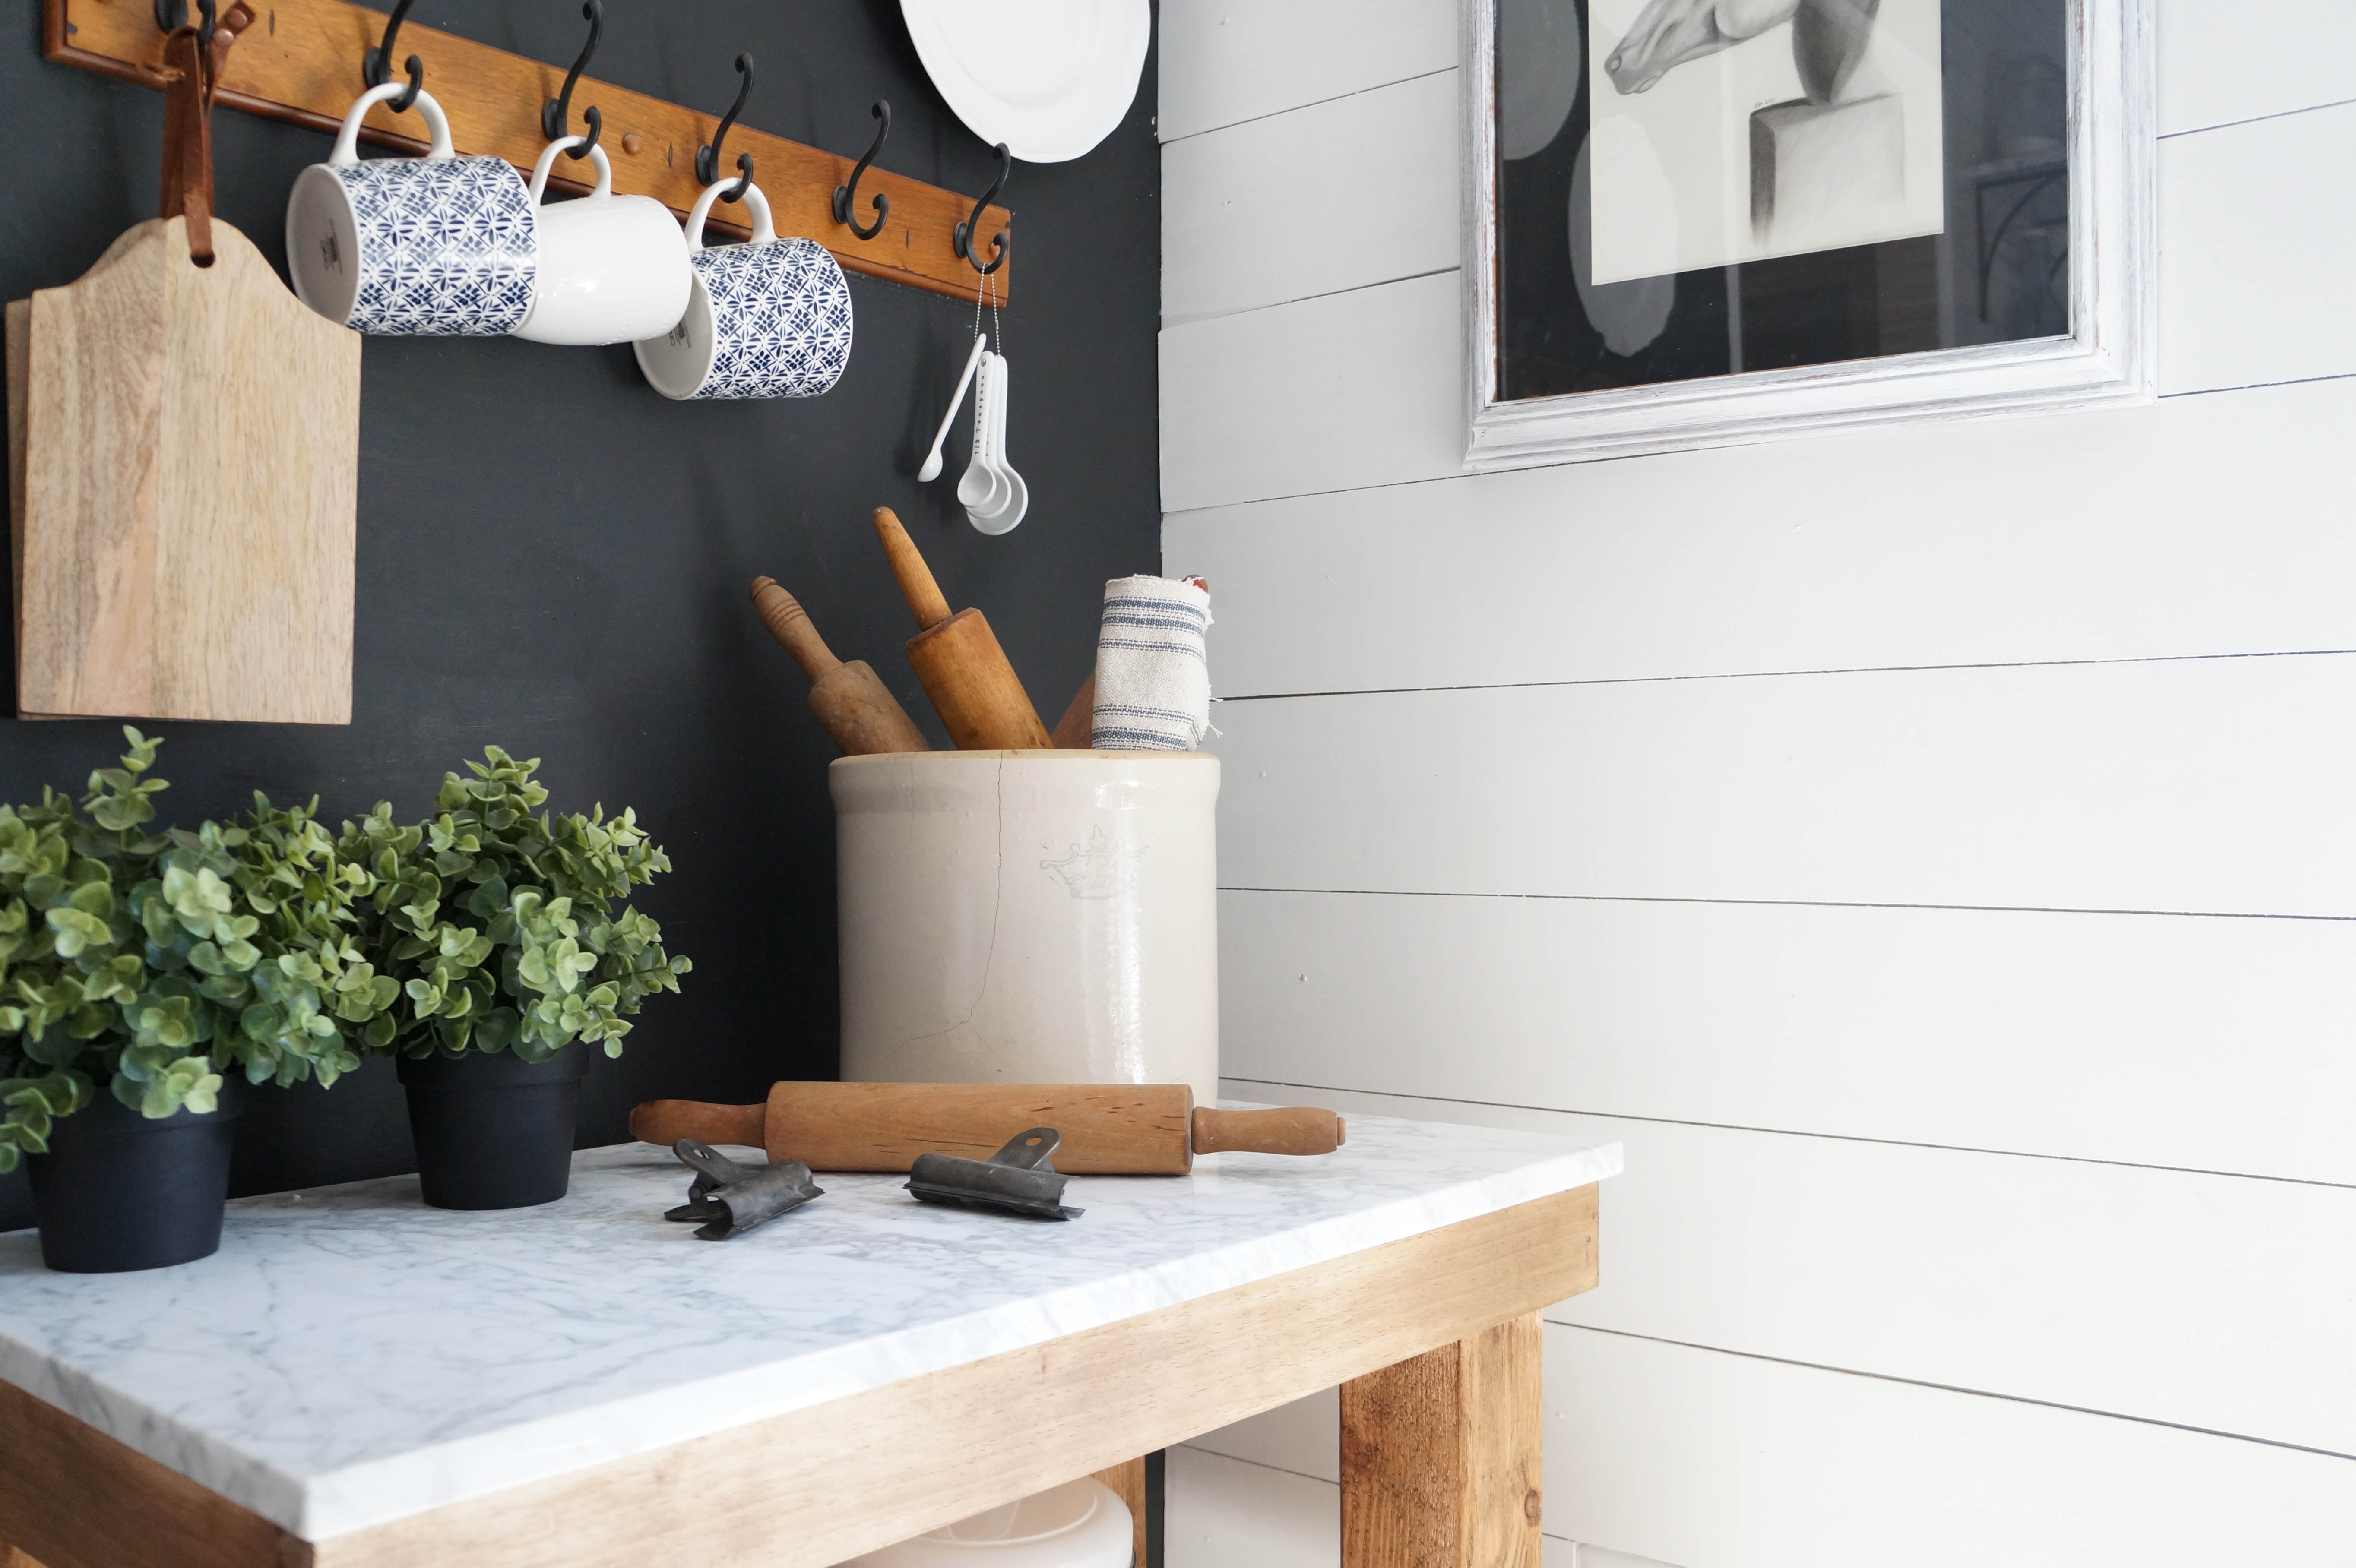
My love for Rustic and French decor has truly evolved over the years of decorating. I don’t really know how to guide anyone to finding their home decor taste…but I guess I’d say follow your heart, and see where your mind wanders too. Is it a minimal room with mid century furniture? Are you a leather and nail head kind of guy or gal? or do you find bright white airy spaces to be your thing? I can say I definitely appreciate all styles and design…but my heart is full when I bring French Farmhouse touches into my space. This project I have for you all today is nothing short of Rustic French Farmhouse. Dreamy Marble prep space, meets warm wood tones with chunky rustic style. A place to gather your morning coffee mugs, a prep space to roll out Christmas cookies, or host a great party with a rolling kitchen island. A multi functional Rustic Kitchen Cart with simple DIY plans and major functionality.

Materials
2: 8ft (1×4) for frame and shelf
2 8ft (4×4) for legs
1/4″ plywood for top and top of tray
Marble cut to size, we used 31″x 18″
Casters (optional)
Drill
Screws

Sizing
Marble: 31″ x 18″
Legs: 29″
Top Frame:30.1/4″, 15 3/4″ (Front and Back wood should sandwich two side pieces)
Bottom Shelf: Same as Top Frame
Planks on Shelf: 17 1/4″ (cut from remaining 1/4″ plywood)
DIRECTIONS
Day 1
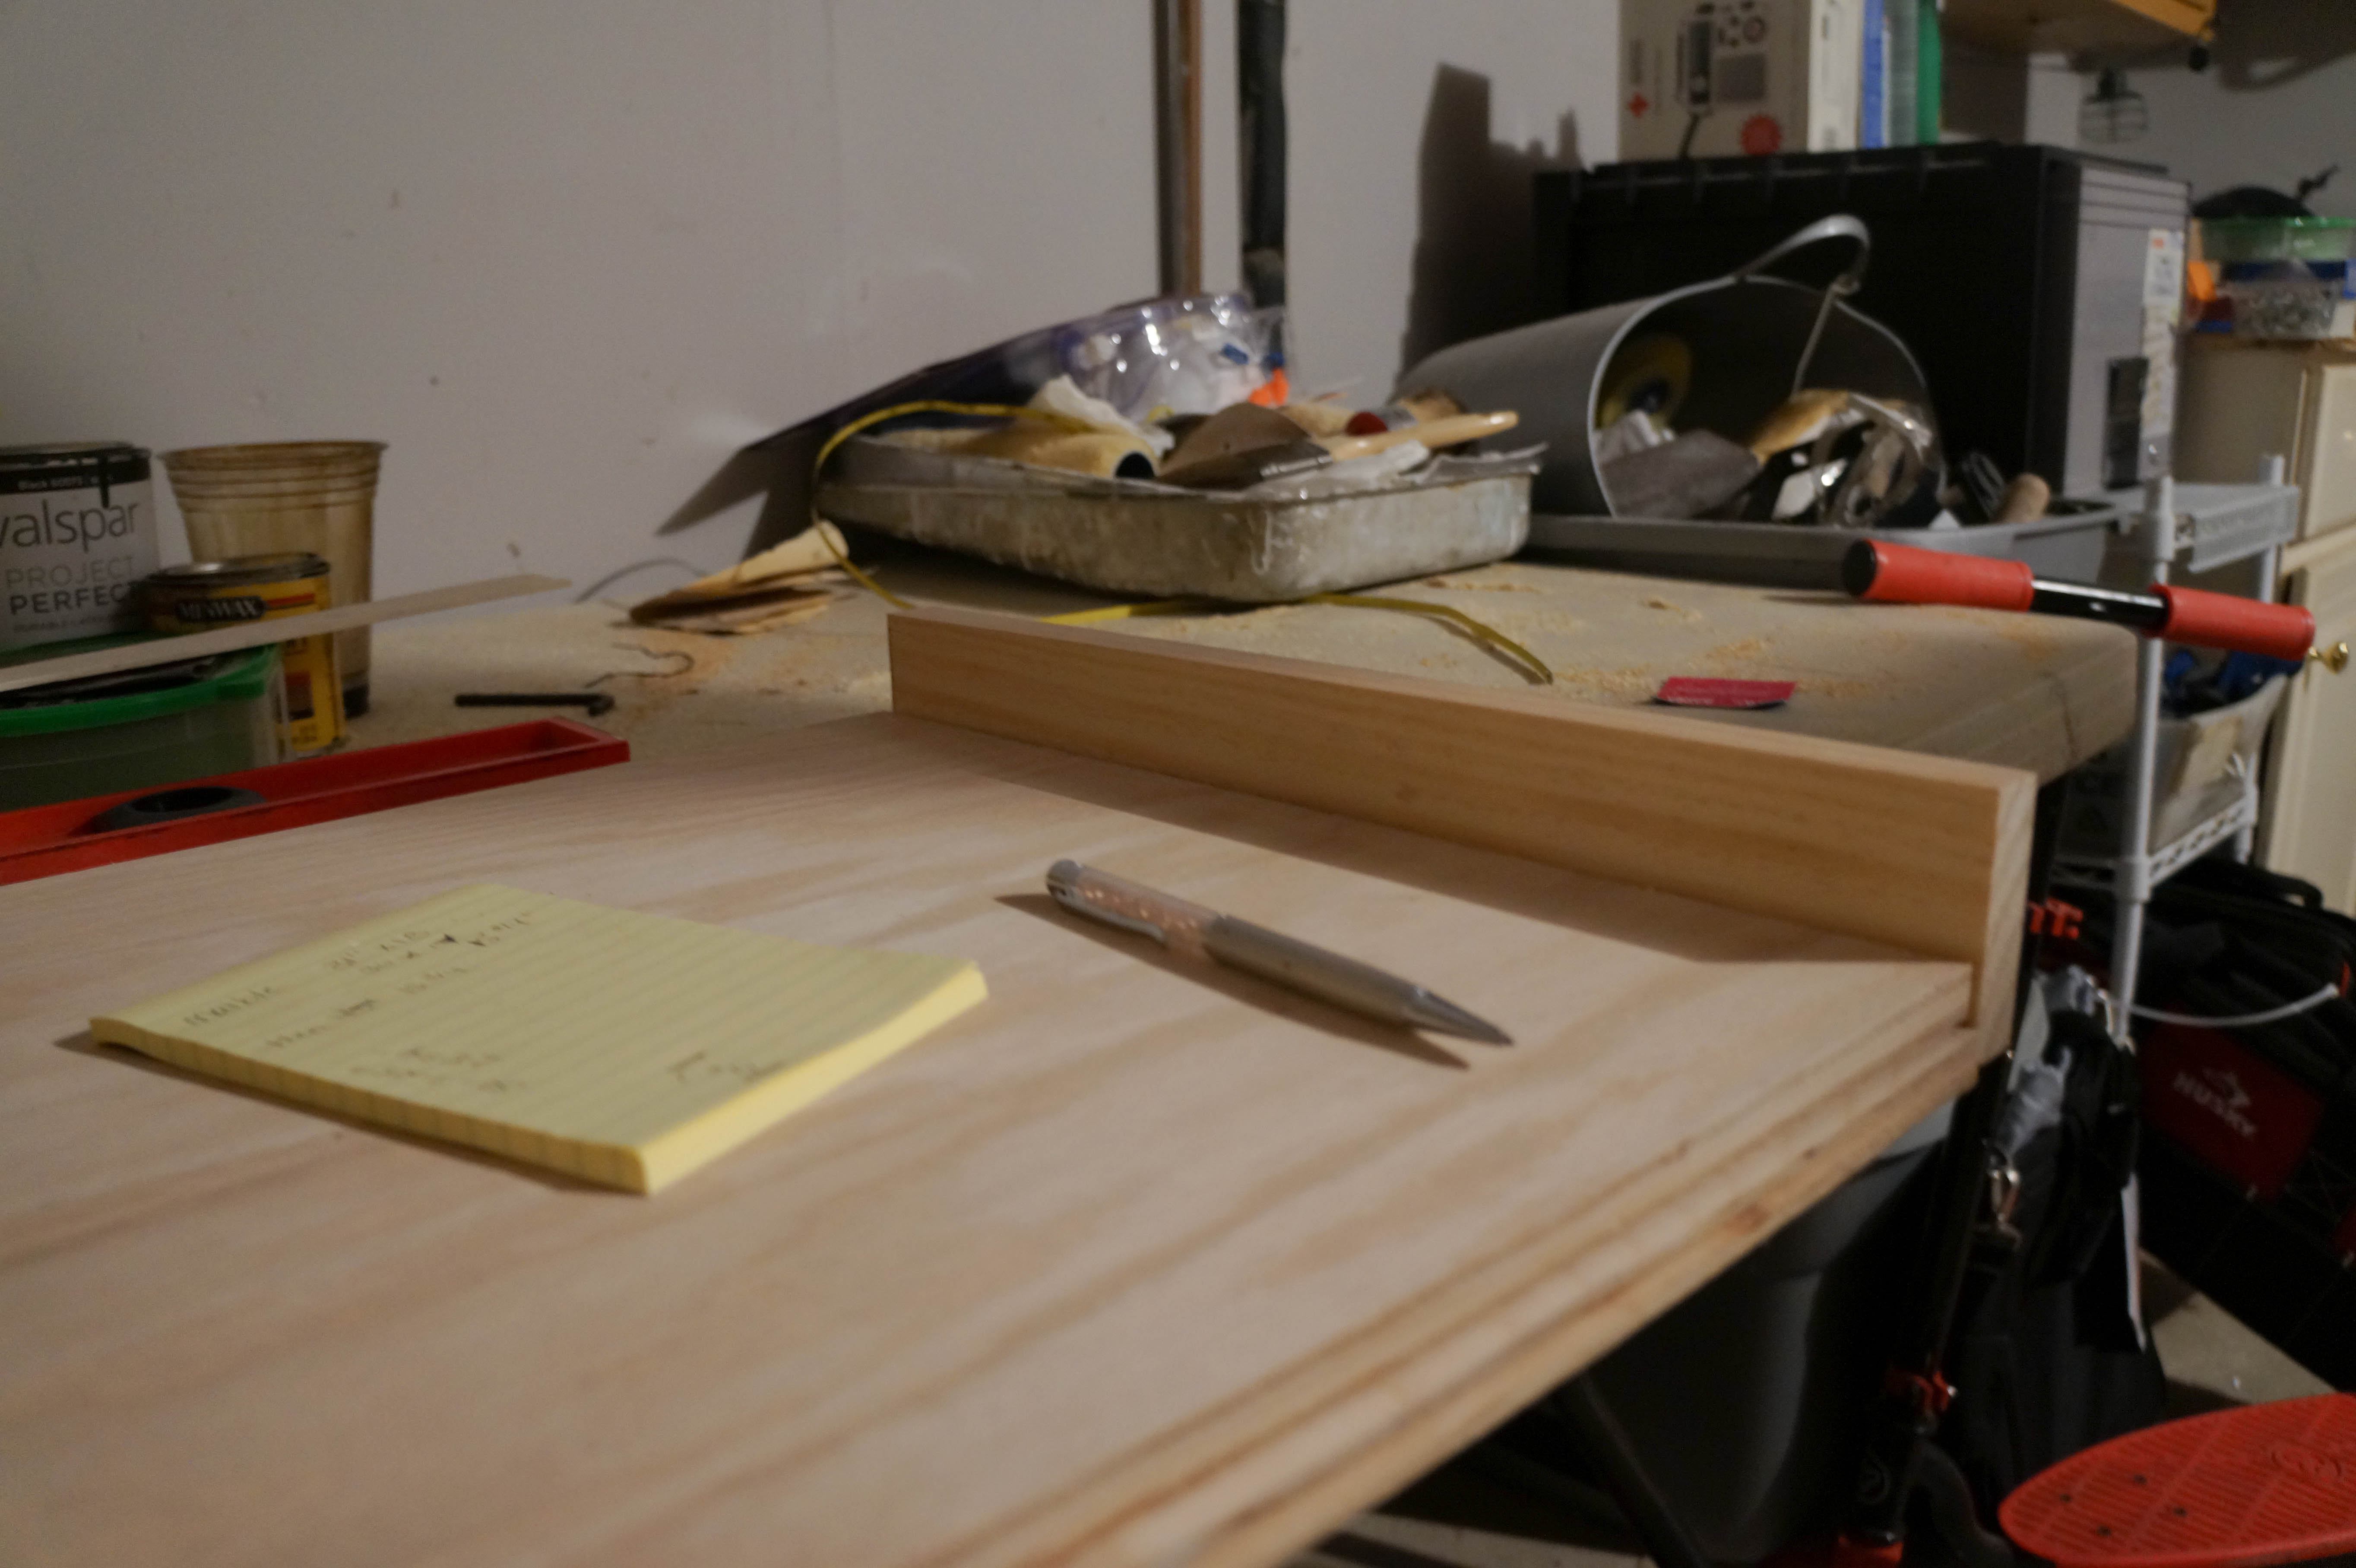
Cut Plywood to size. If you choose to go with a different size cart then we had made, be sure that the plywood is 1/2″ shorter then marble on each side. Marble should have an over hang.
2. Begin to build frame around plywood. Sandwiching the side wood between the front and back wood frame.
I apologize for these dark garage photos.
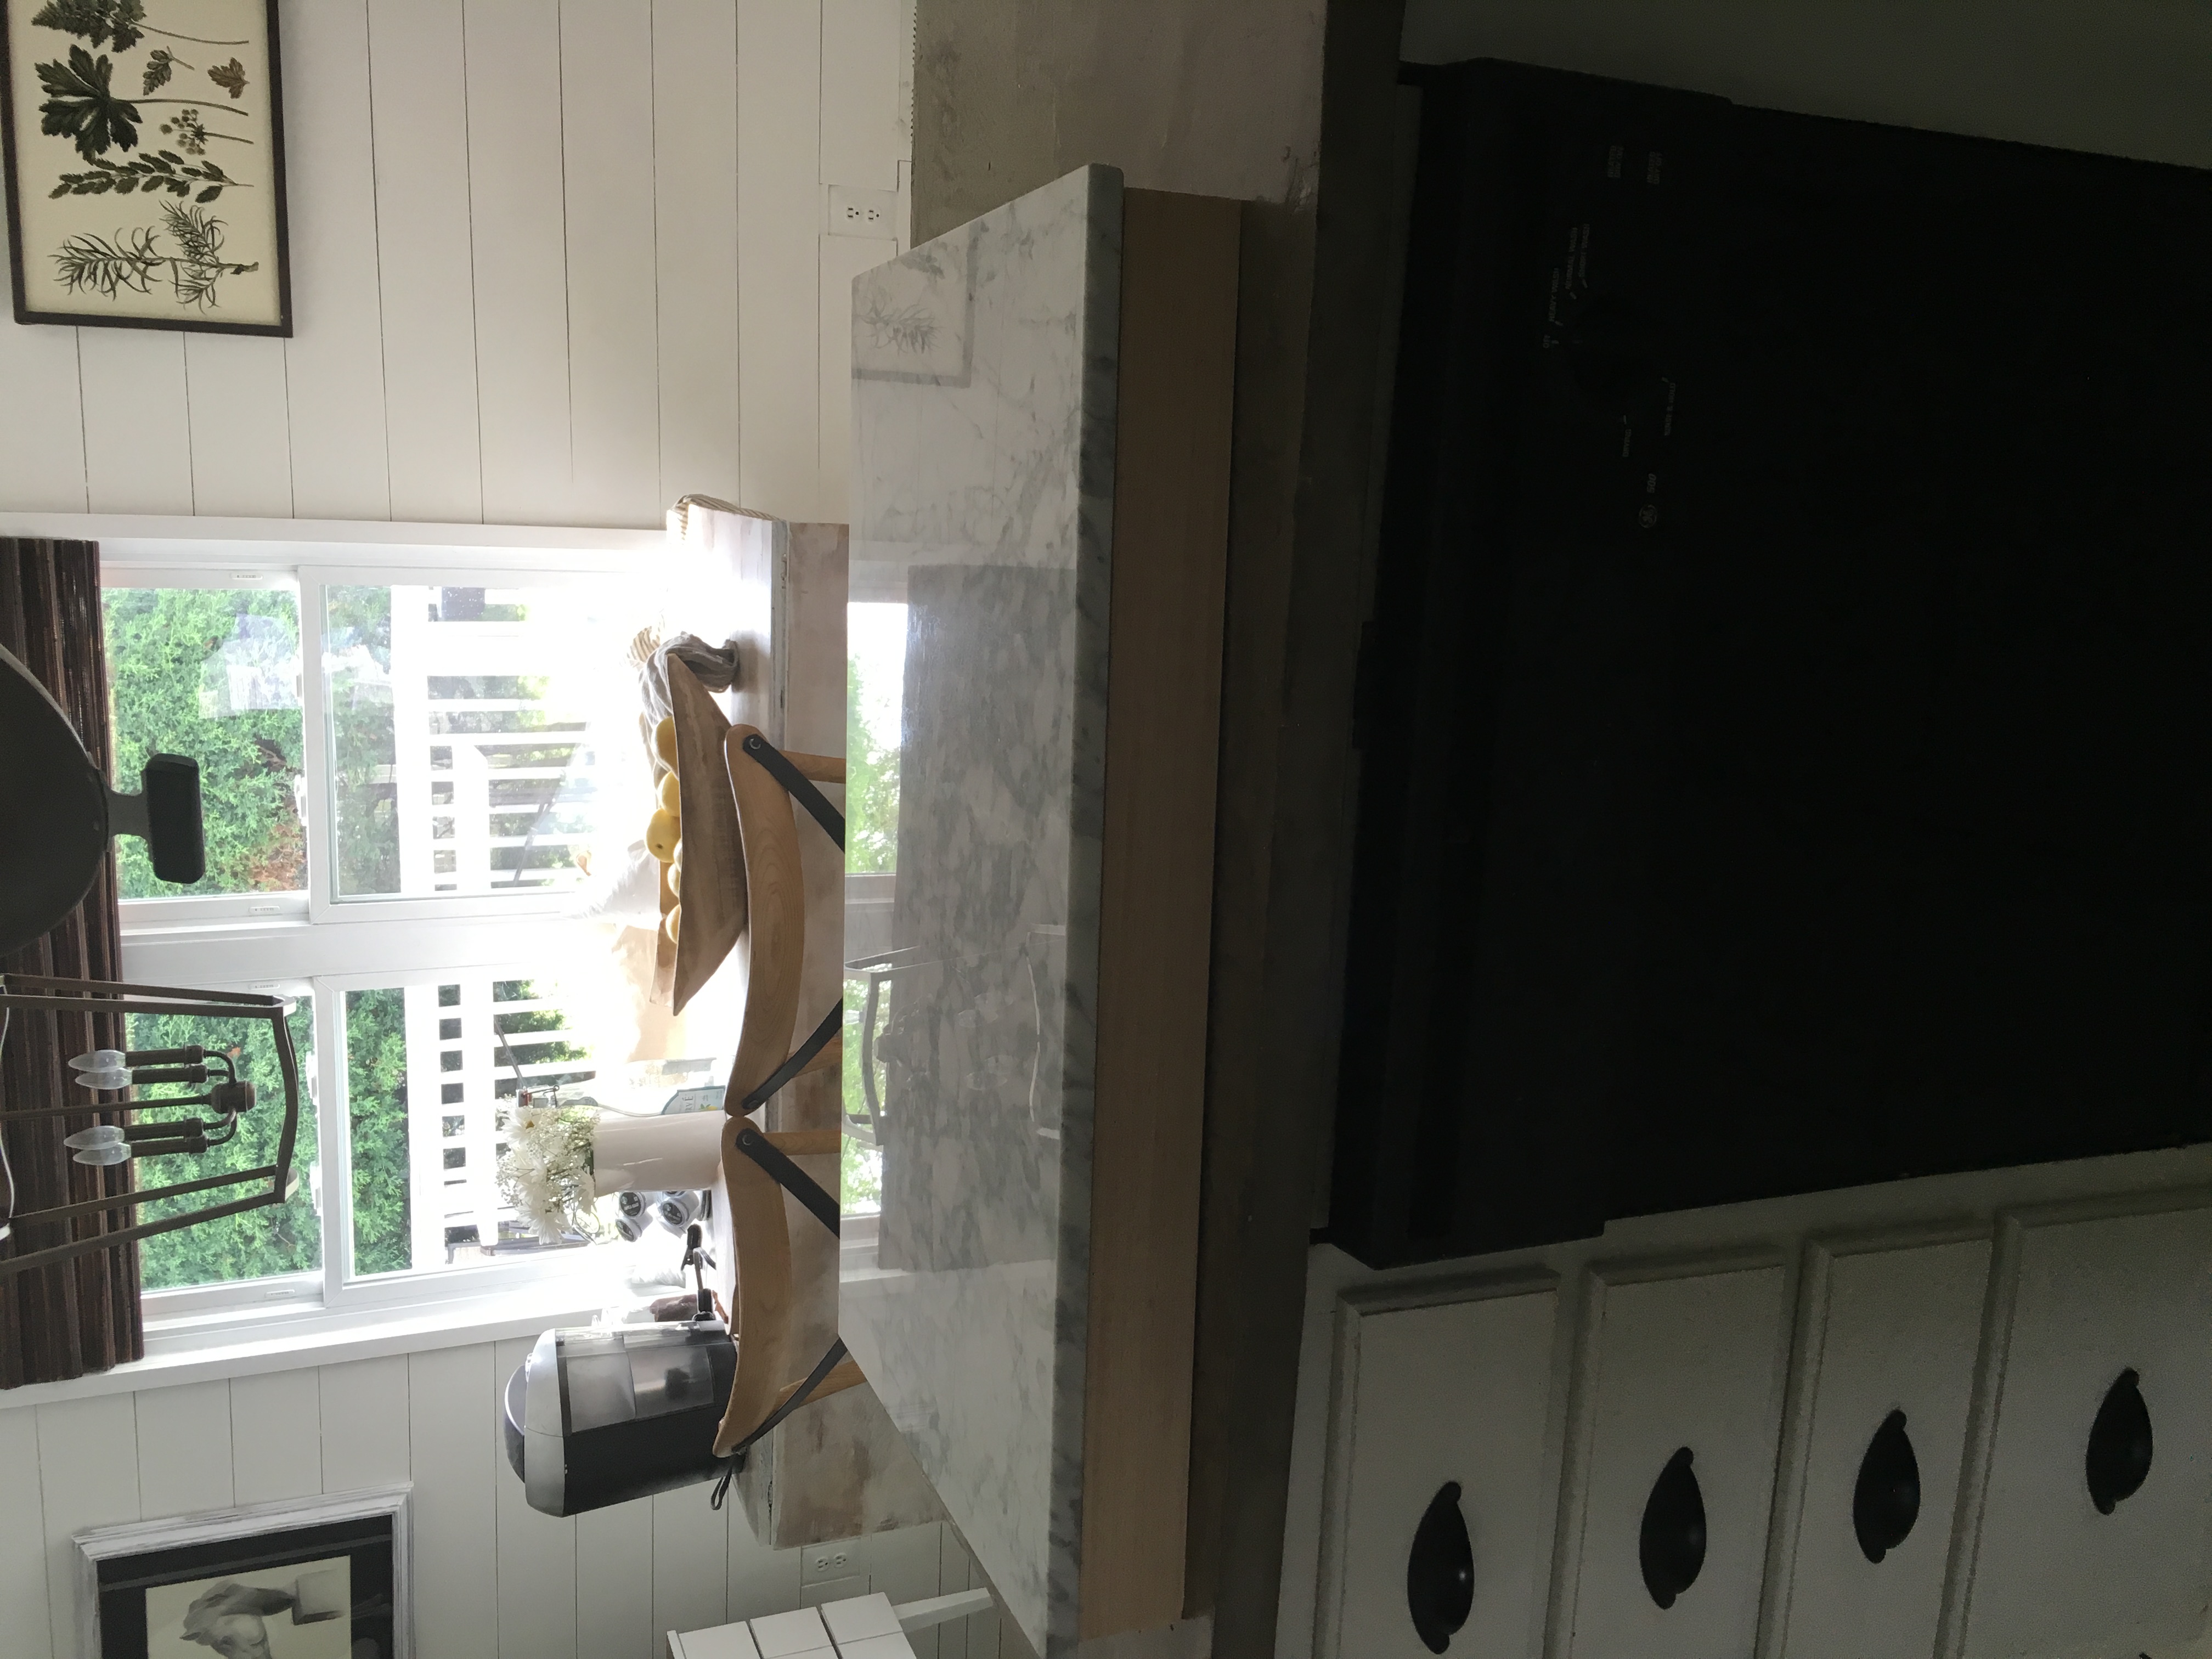
See below frame with marble on top. I chose not to epoxy my marble only because It’s an expensive investment and I may want to use it elsewhere in the future. For those that do not want to purchase marble or want to find a more affordable way to get the look, use marble paper to apply to wood. Another option is to use butcher block as a top.
Day 2
3. Cut each leg to size.
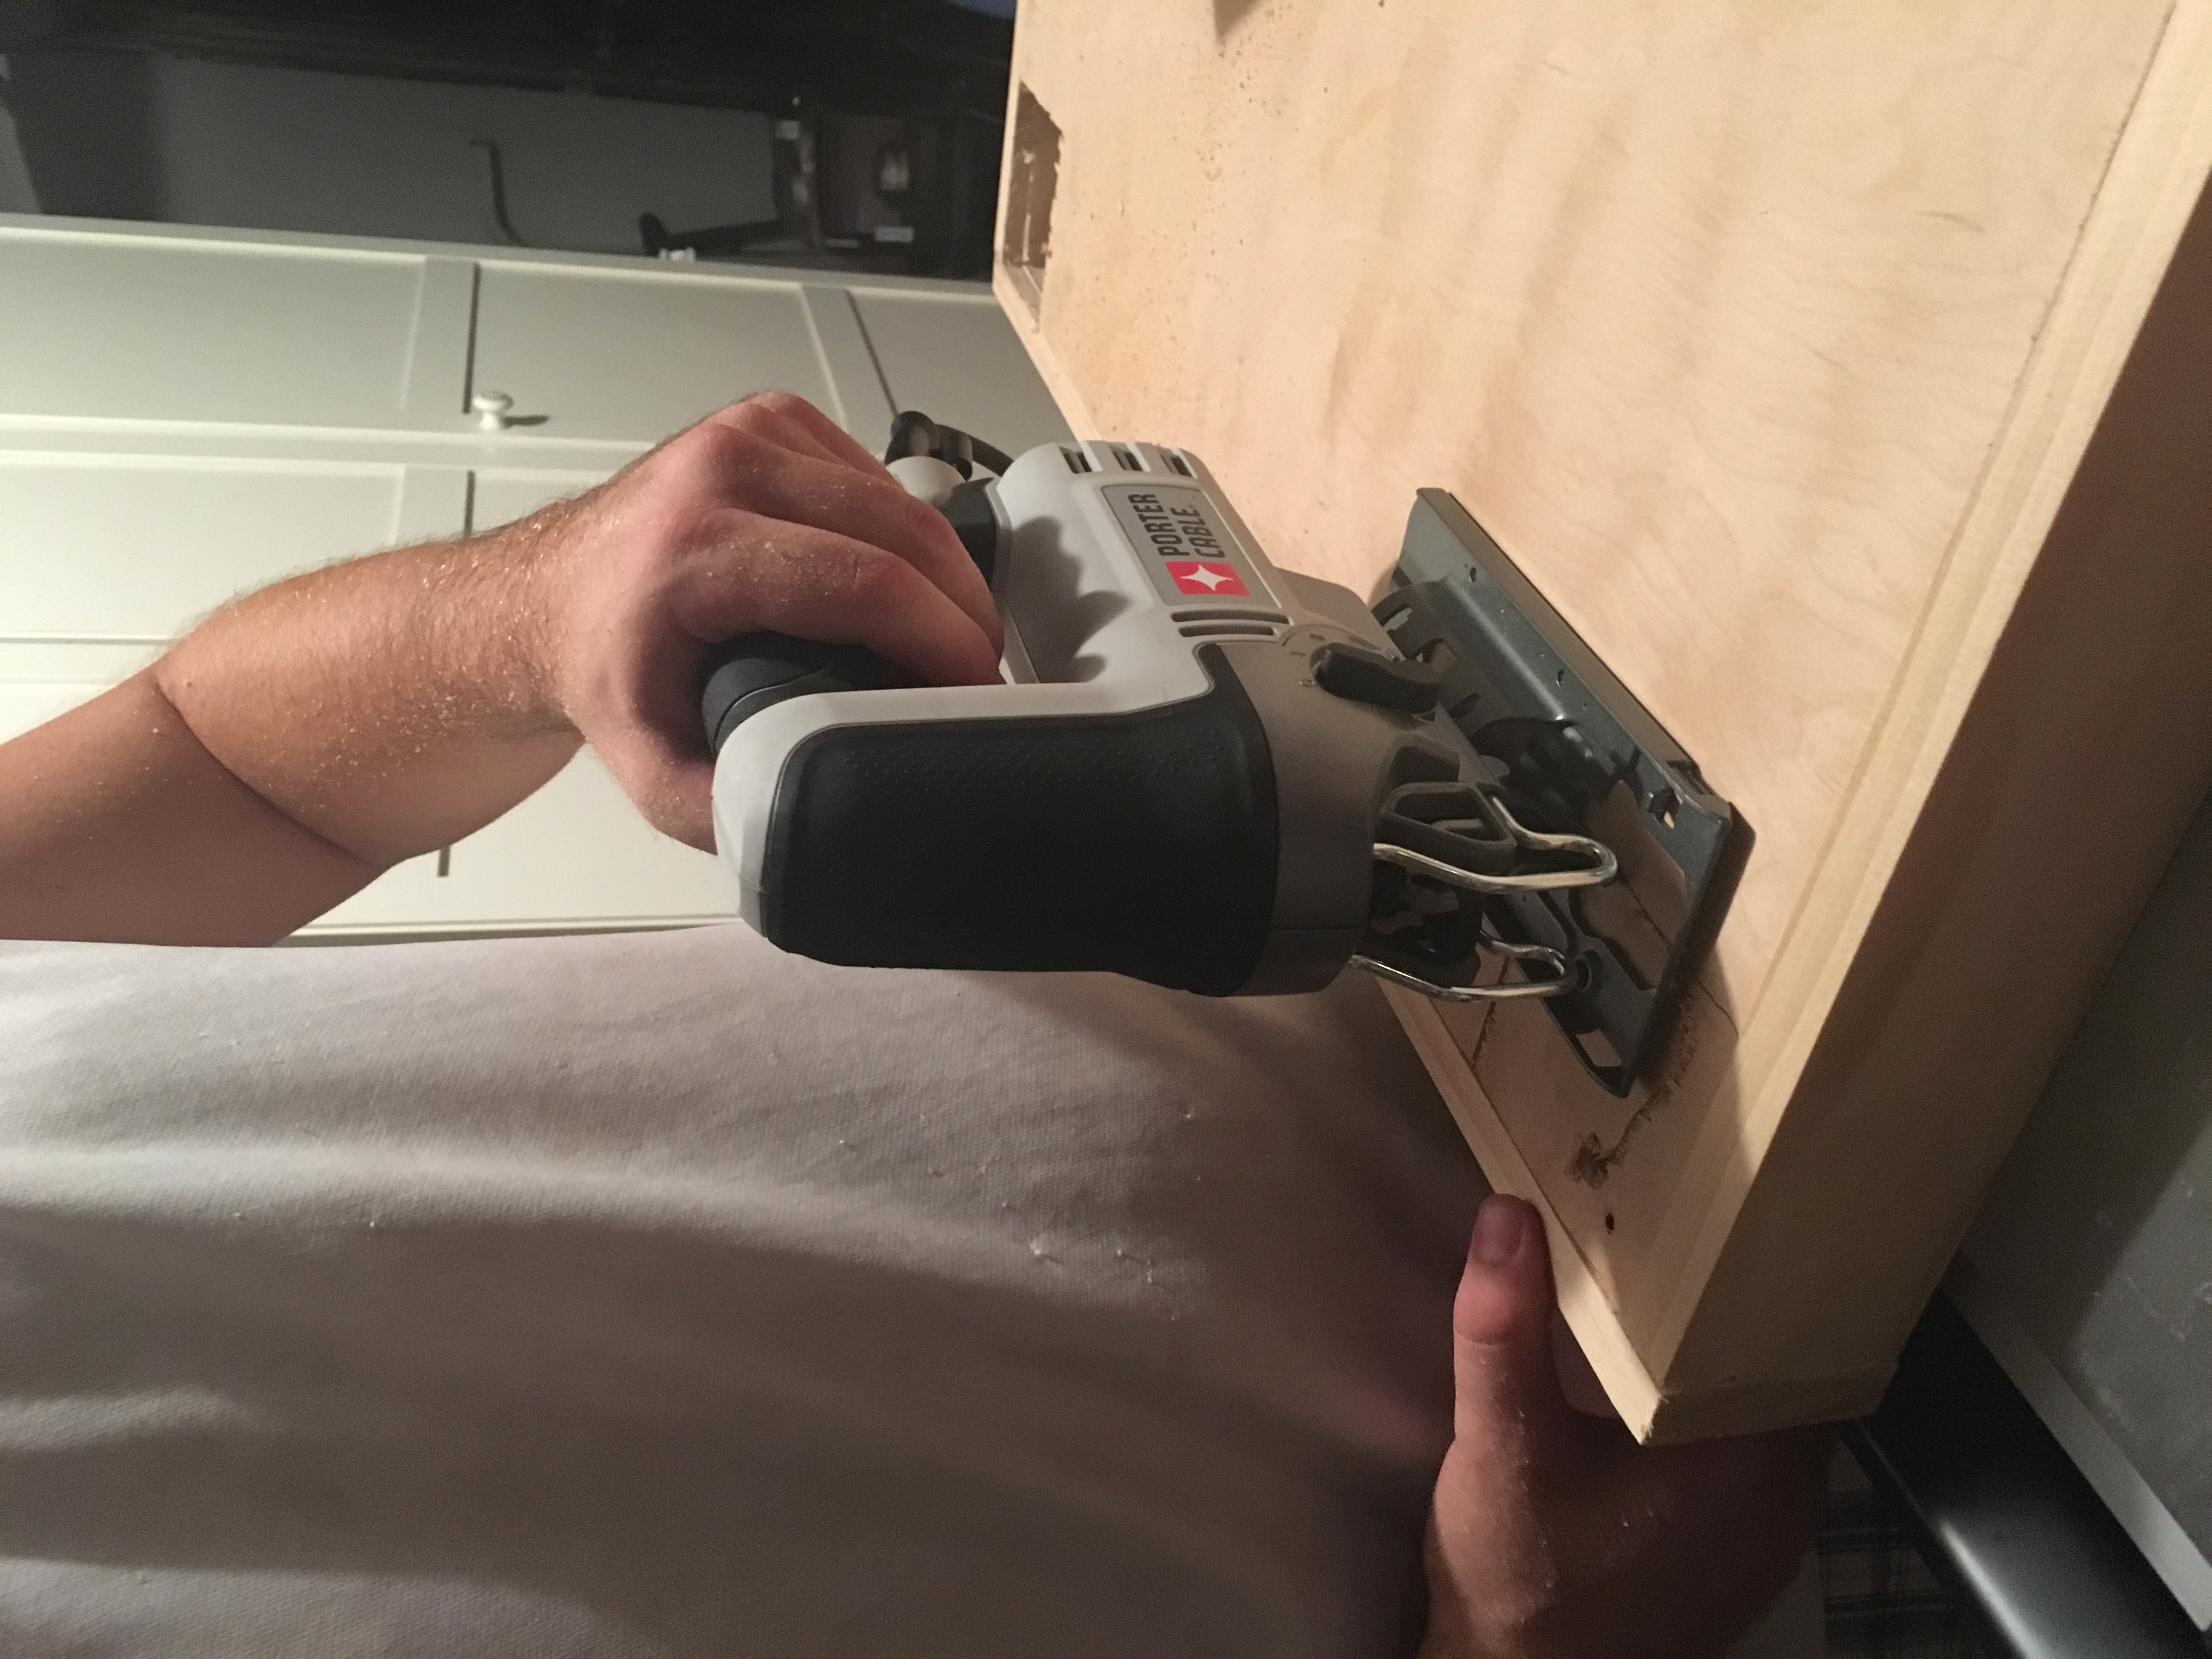
4. Drill Hole into bottom shelf to create space to fit jig saw.

5. Mark lines where 4×4 leg will fit (inside of frame)
6. Use jig saw to cut out square
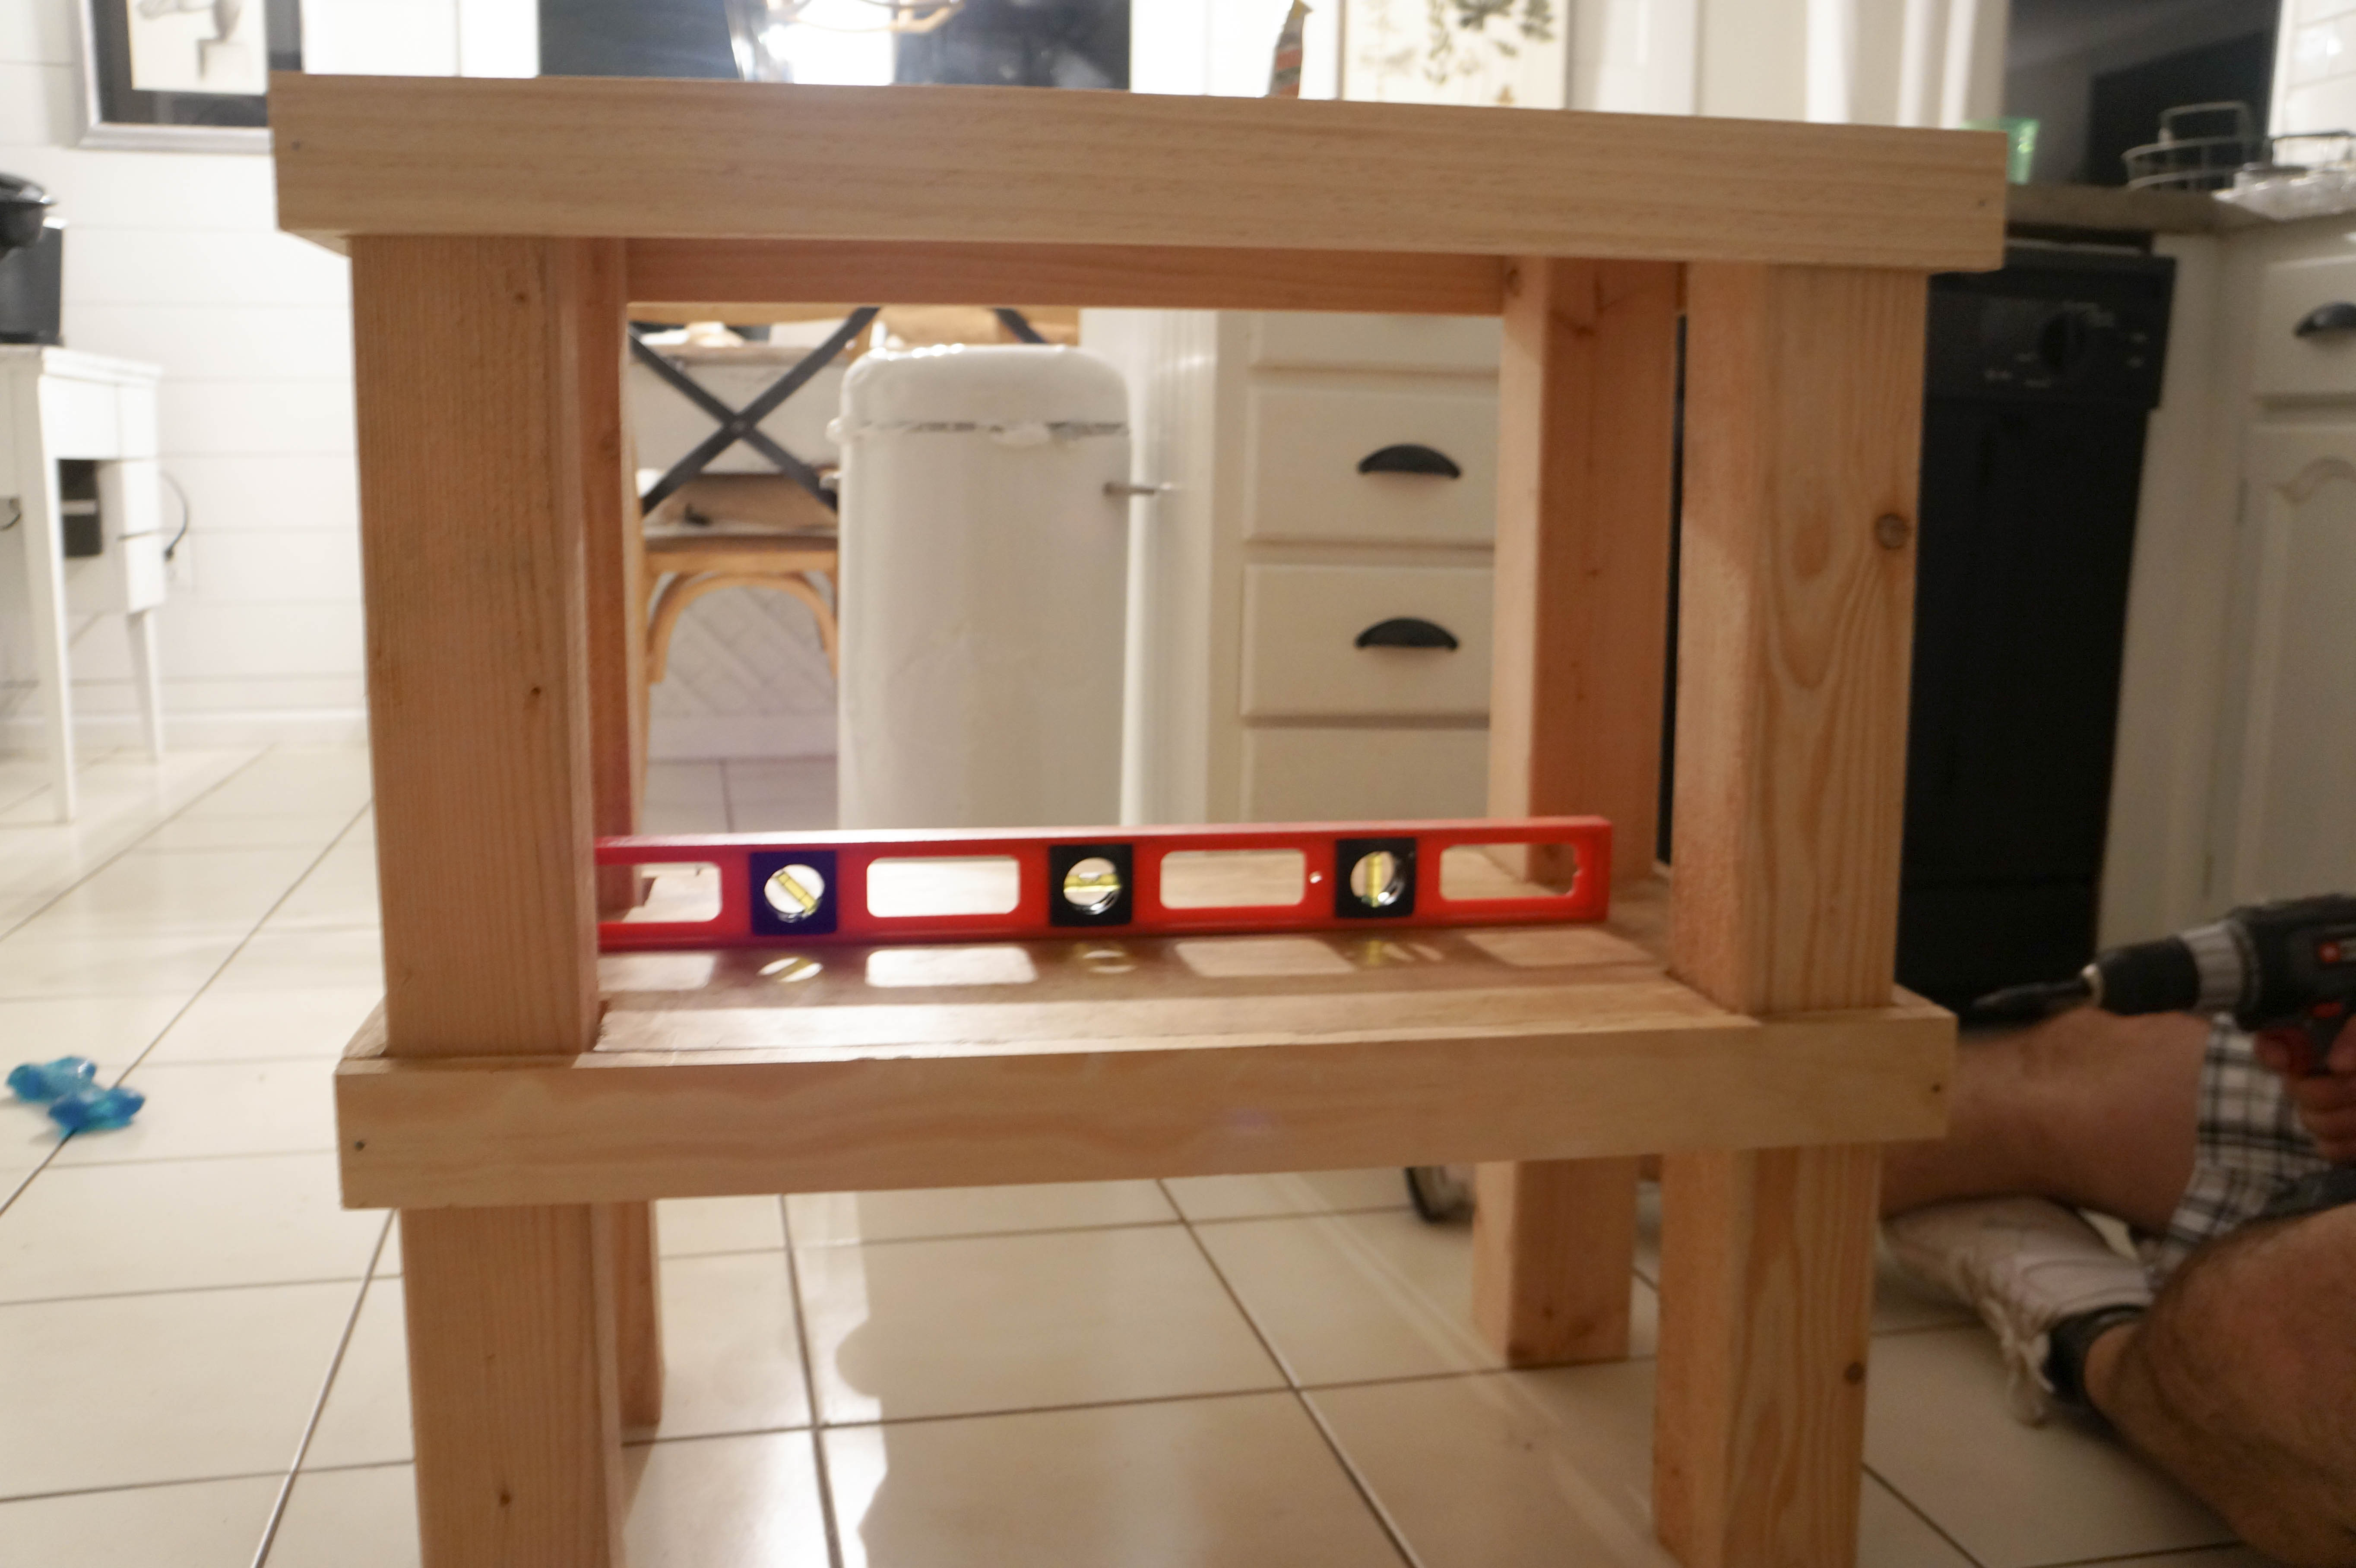
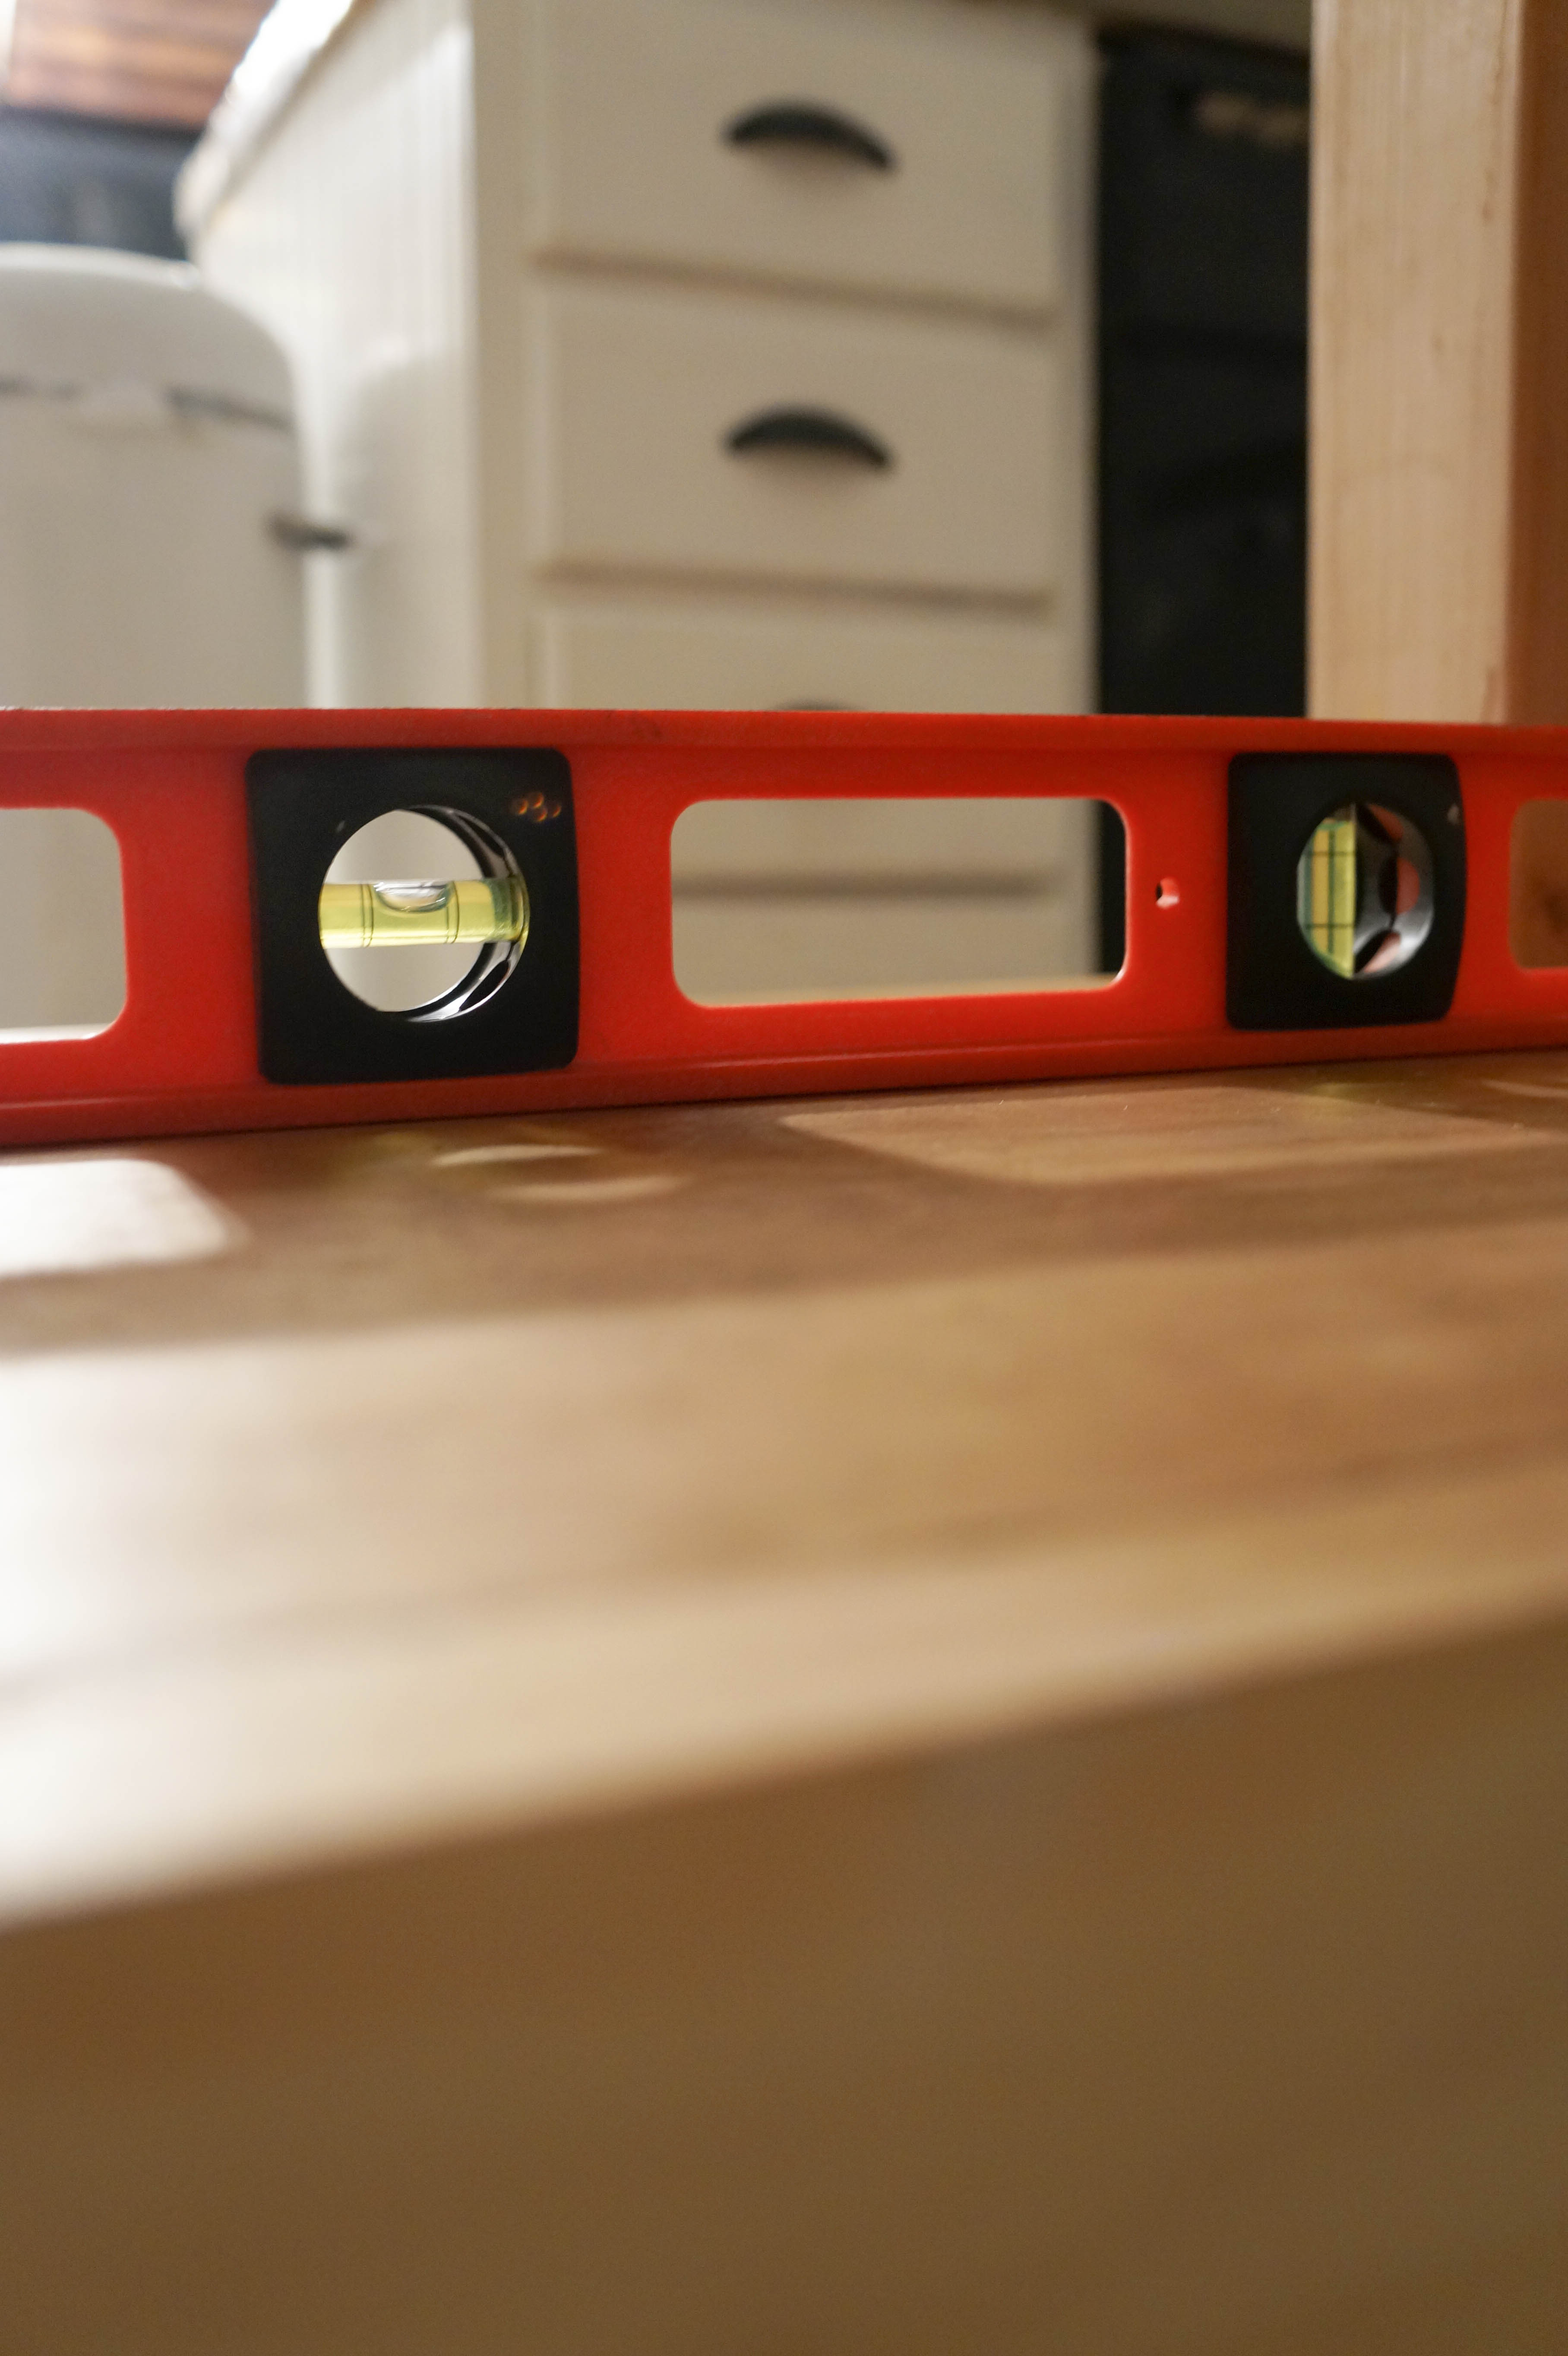
7. Assemble top shelf to legs (drill into place)
8. Slide Tray to desired height (drill into place)
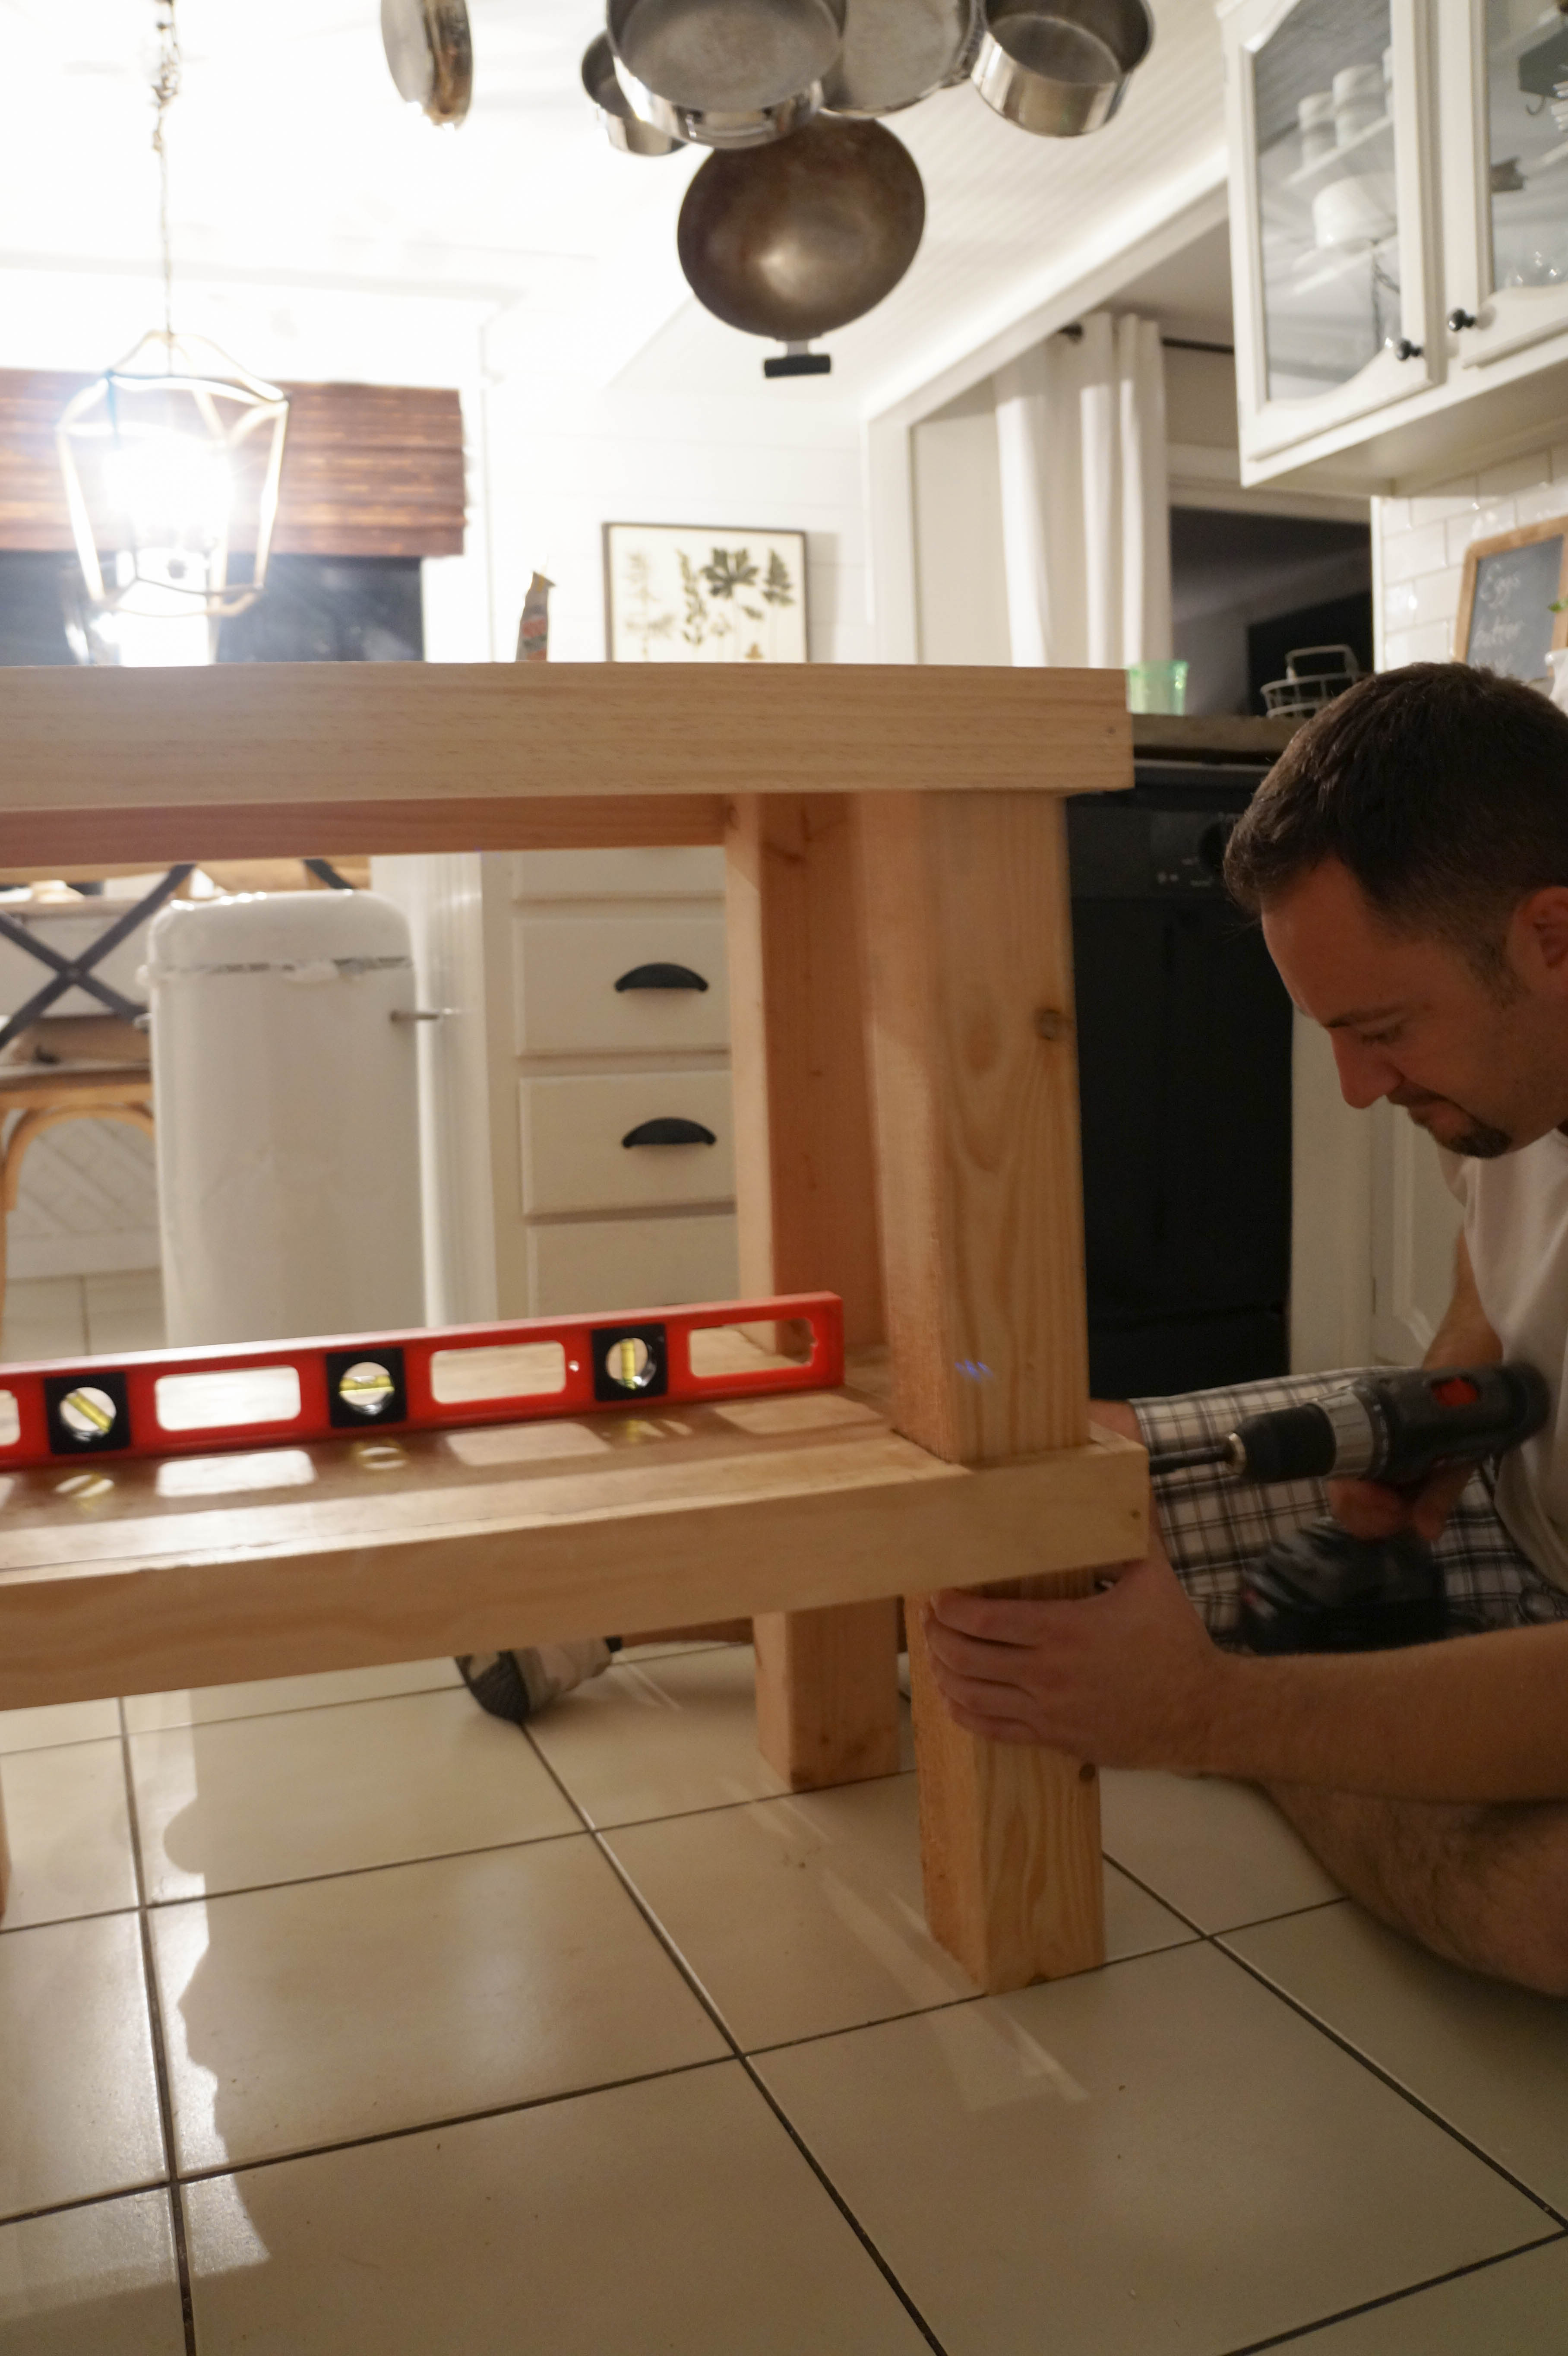
9. Be sure that tray is level
10. Then cut 1/4″ planks to apply to bottom shelf to add interest.
11. Sand
12. Stain or paint to desired color. I chose to use dark wax on mine. I just love the color of the dark wax on the bare wood.
13. Apply Casters (I still have yet to apply mine, but eventually it will be a great rolling kitchen island.
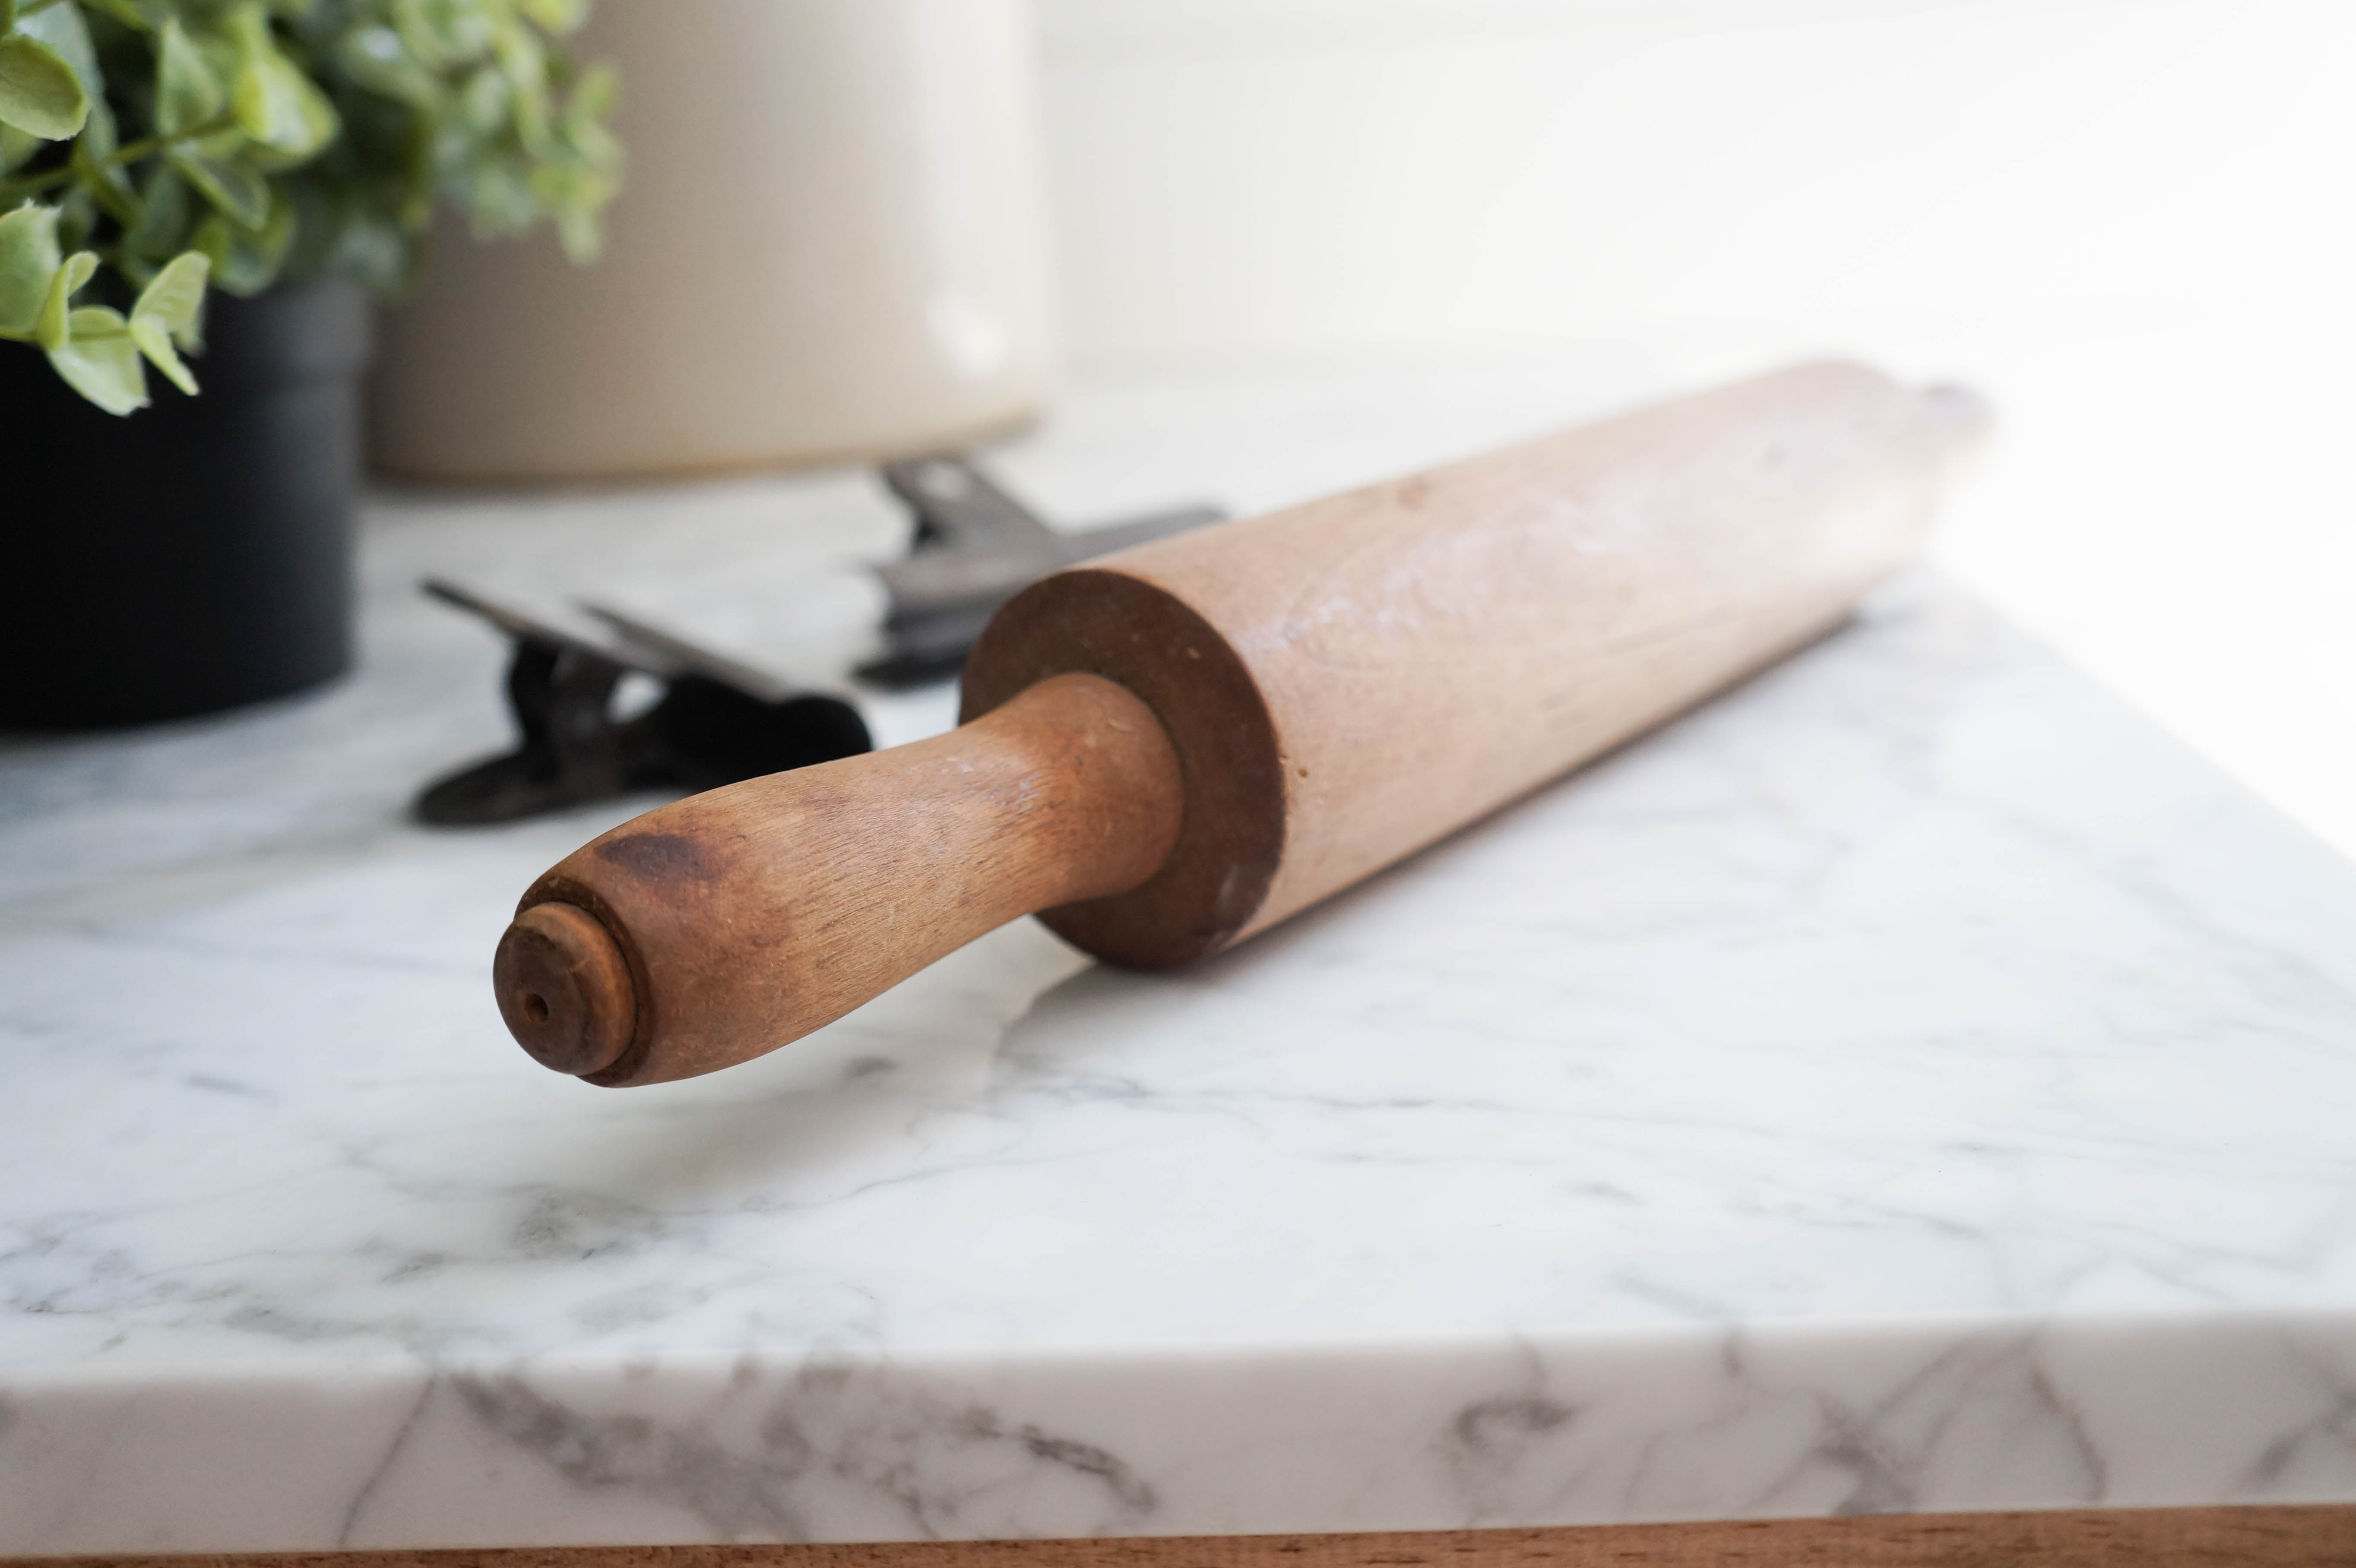
Here you have yourself a perfectly easy and affordable Rustic Bar Cart. I am loving the way the wood tone pops against my Chalkboard Wall.
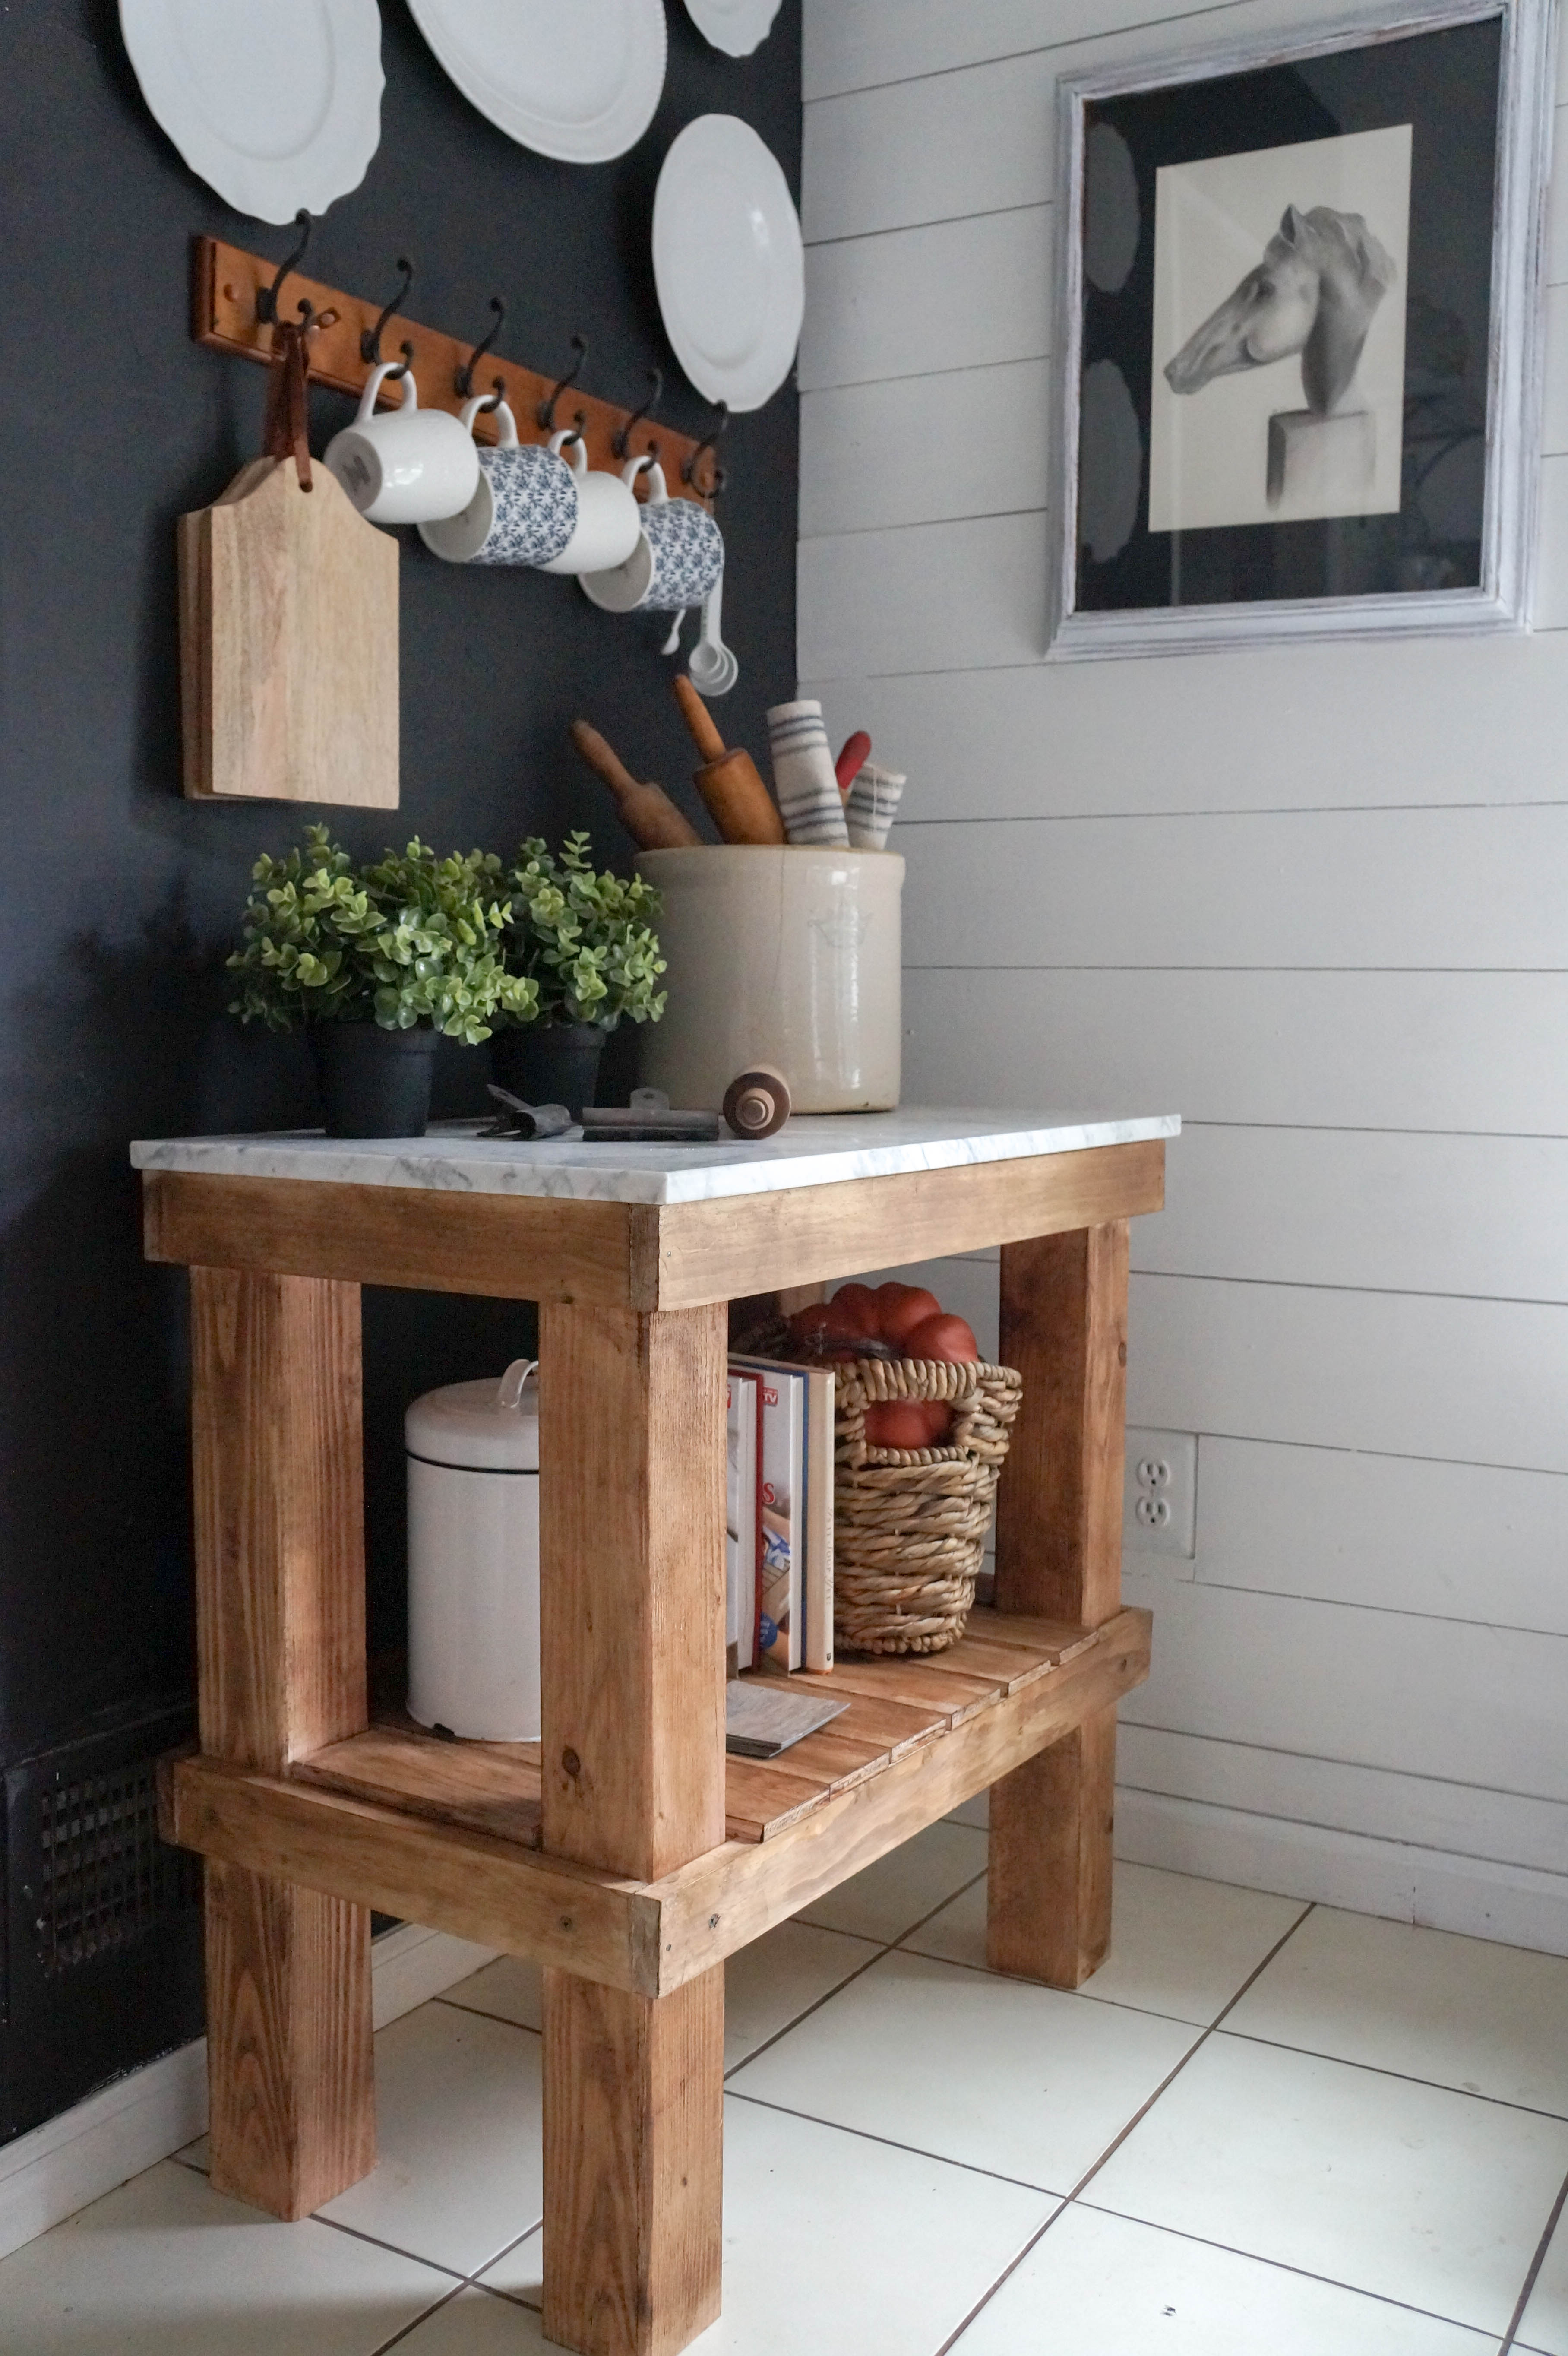
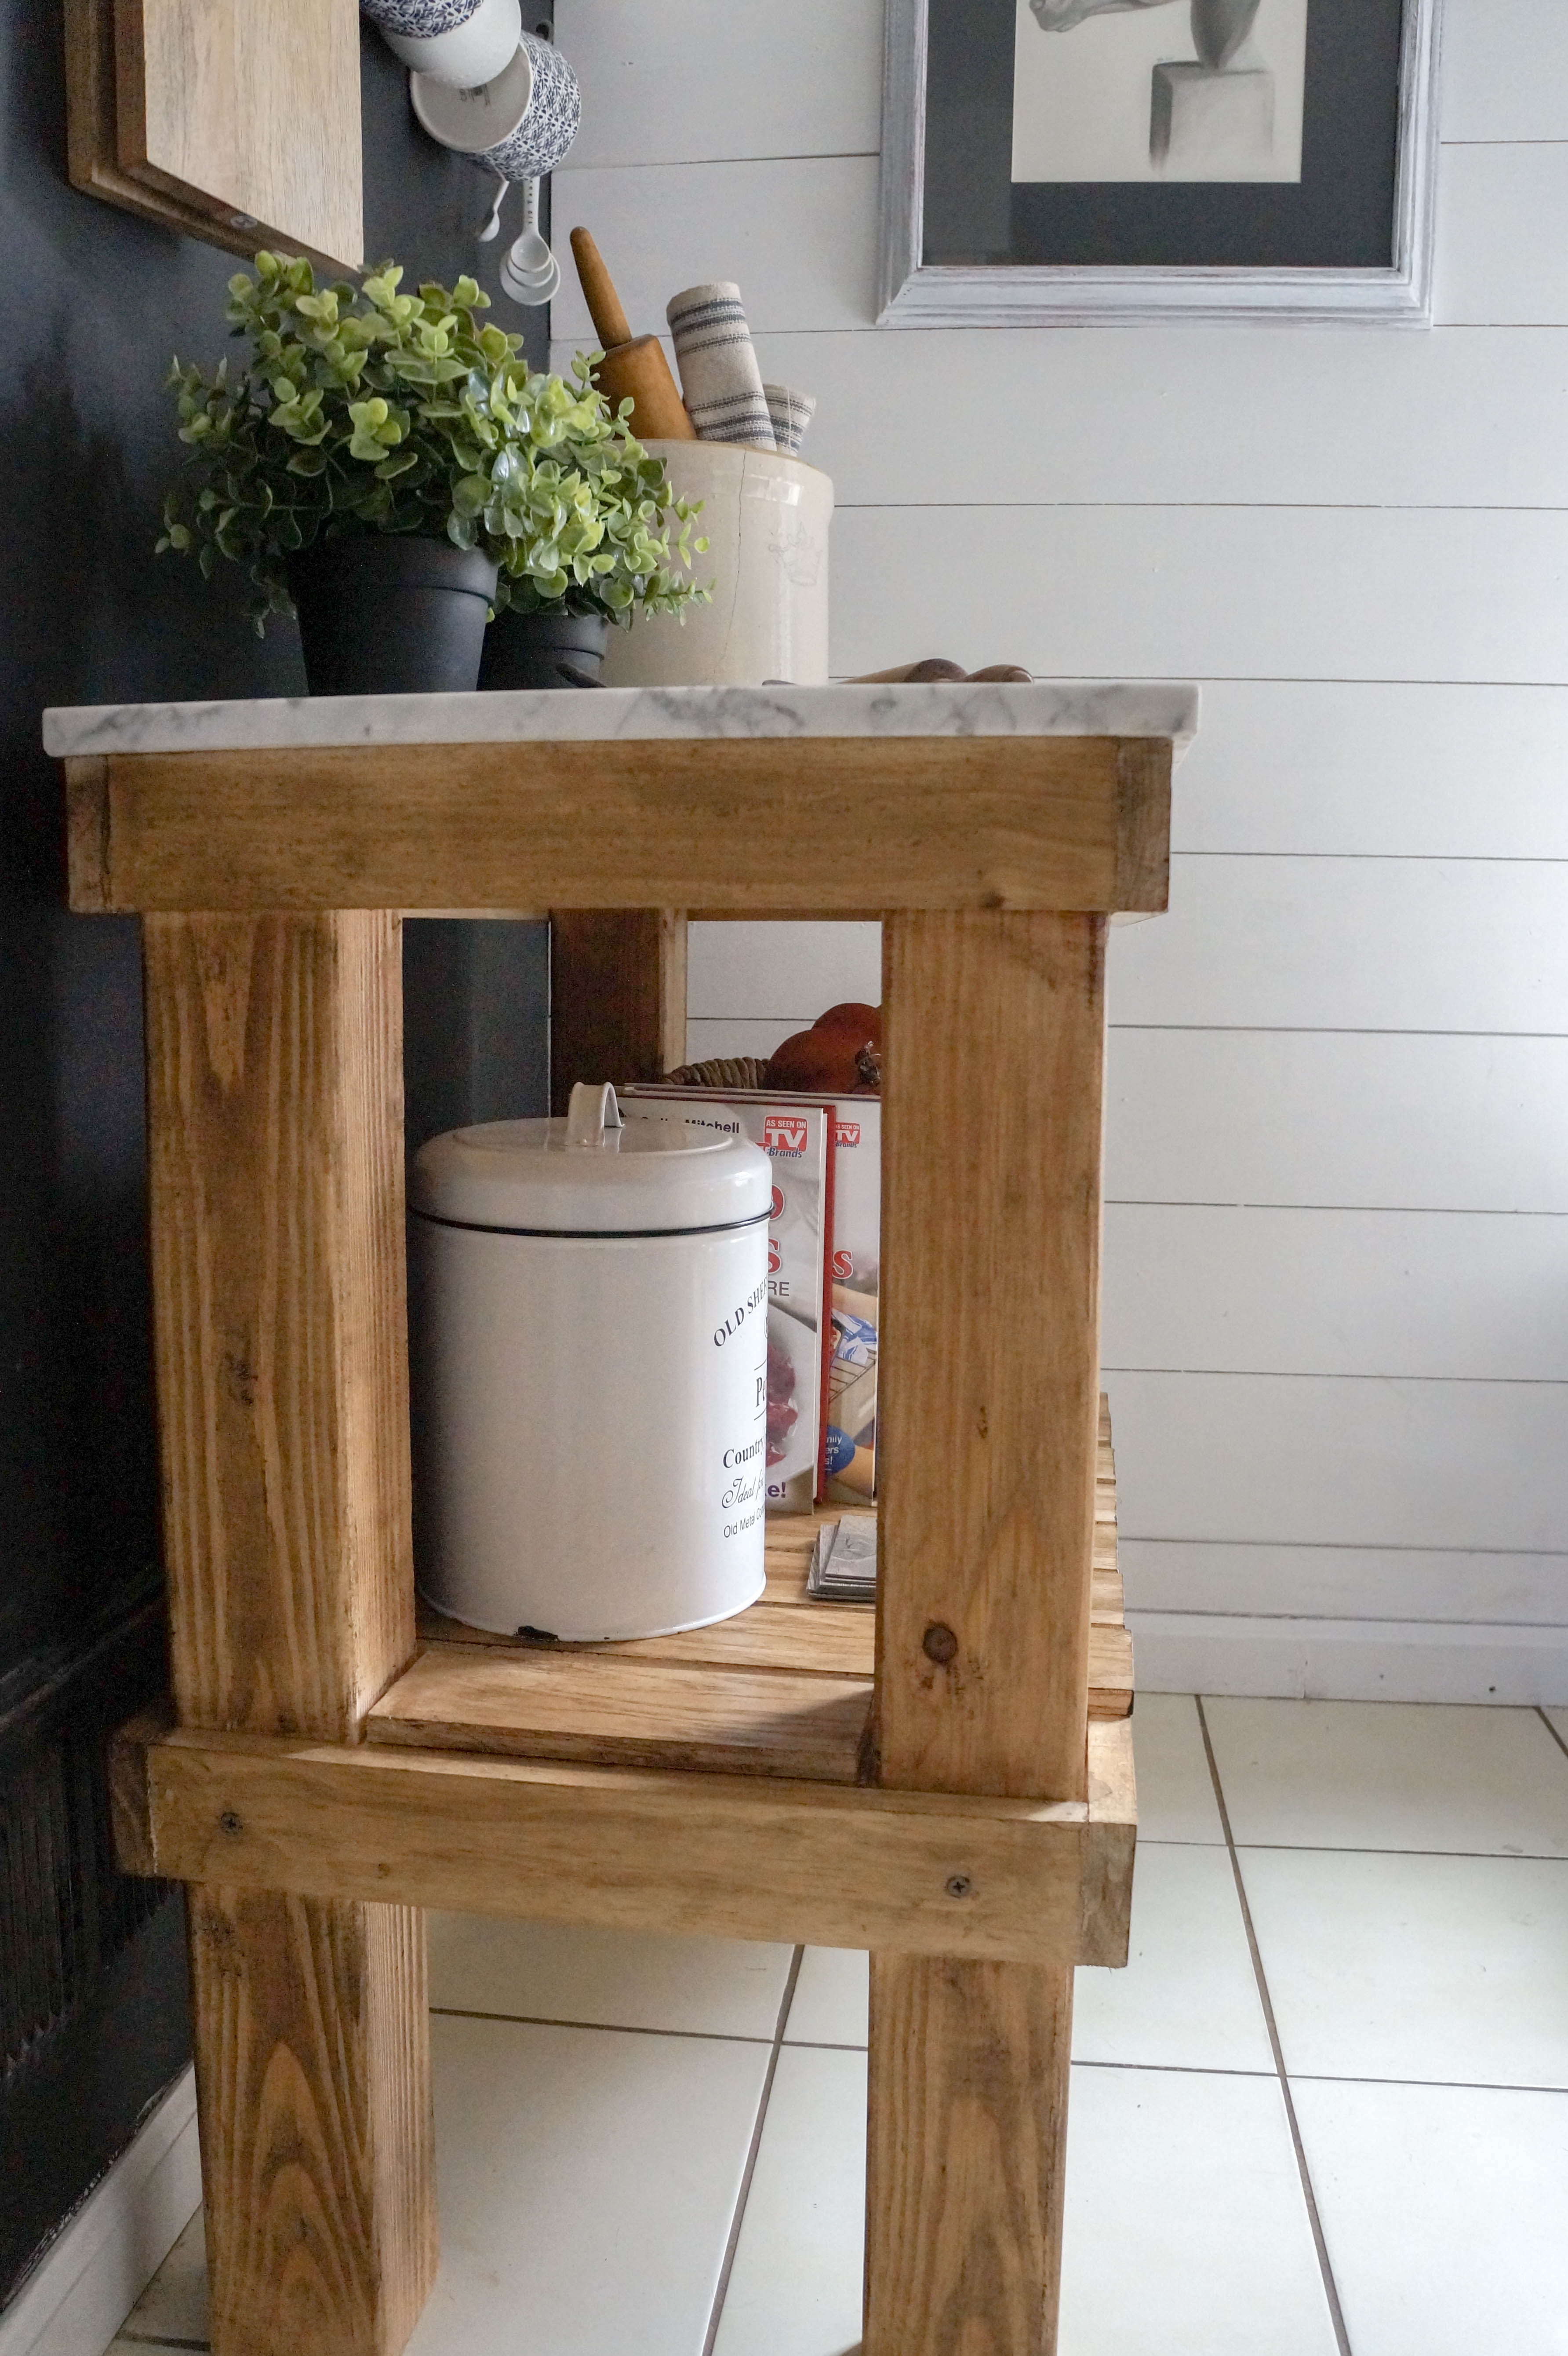

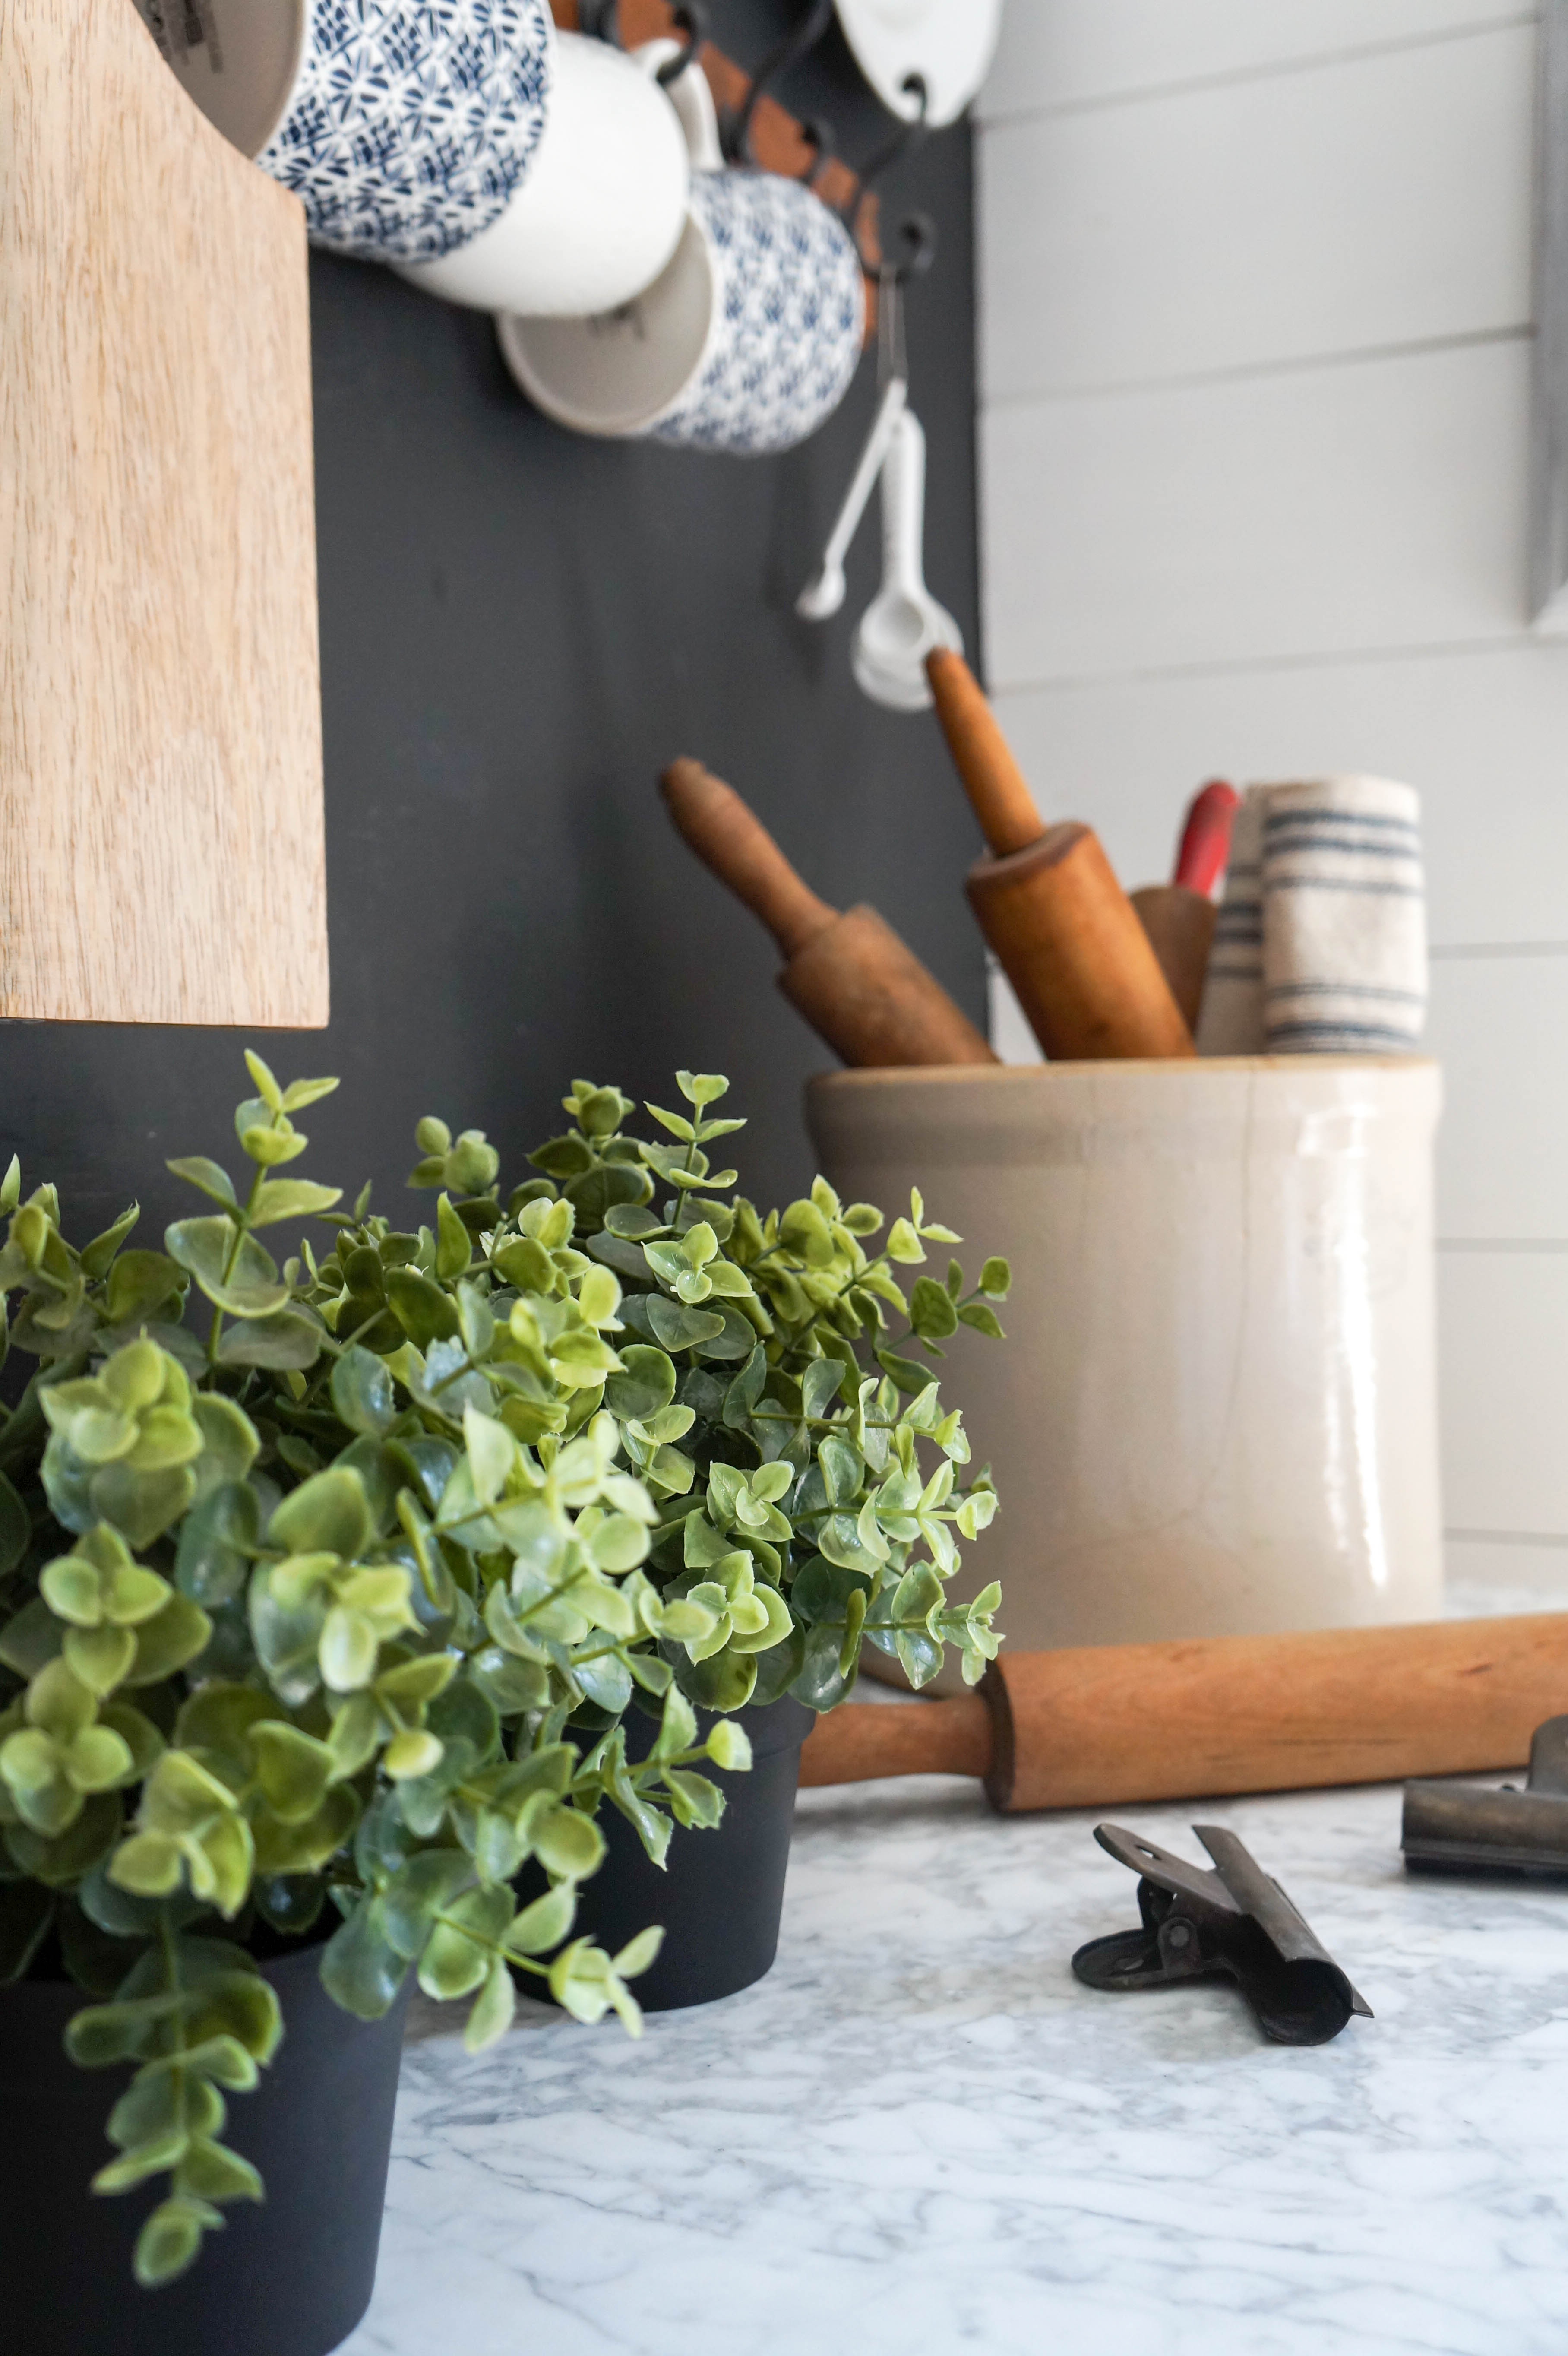

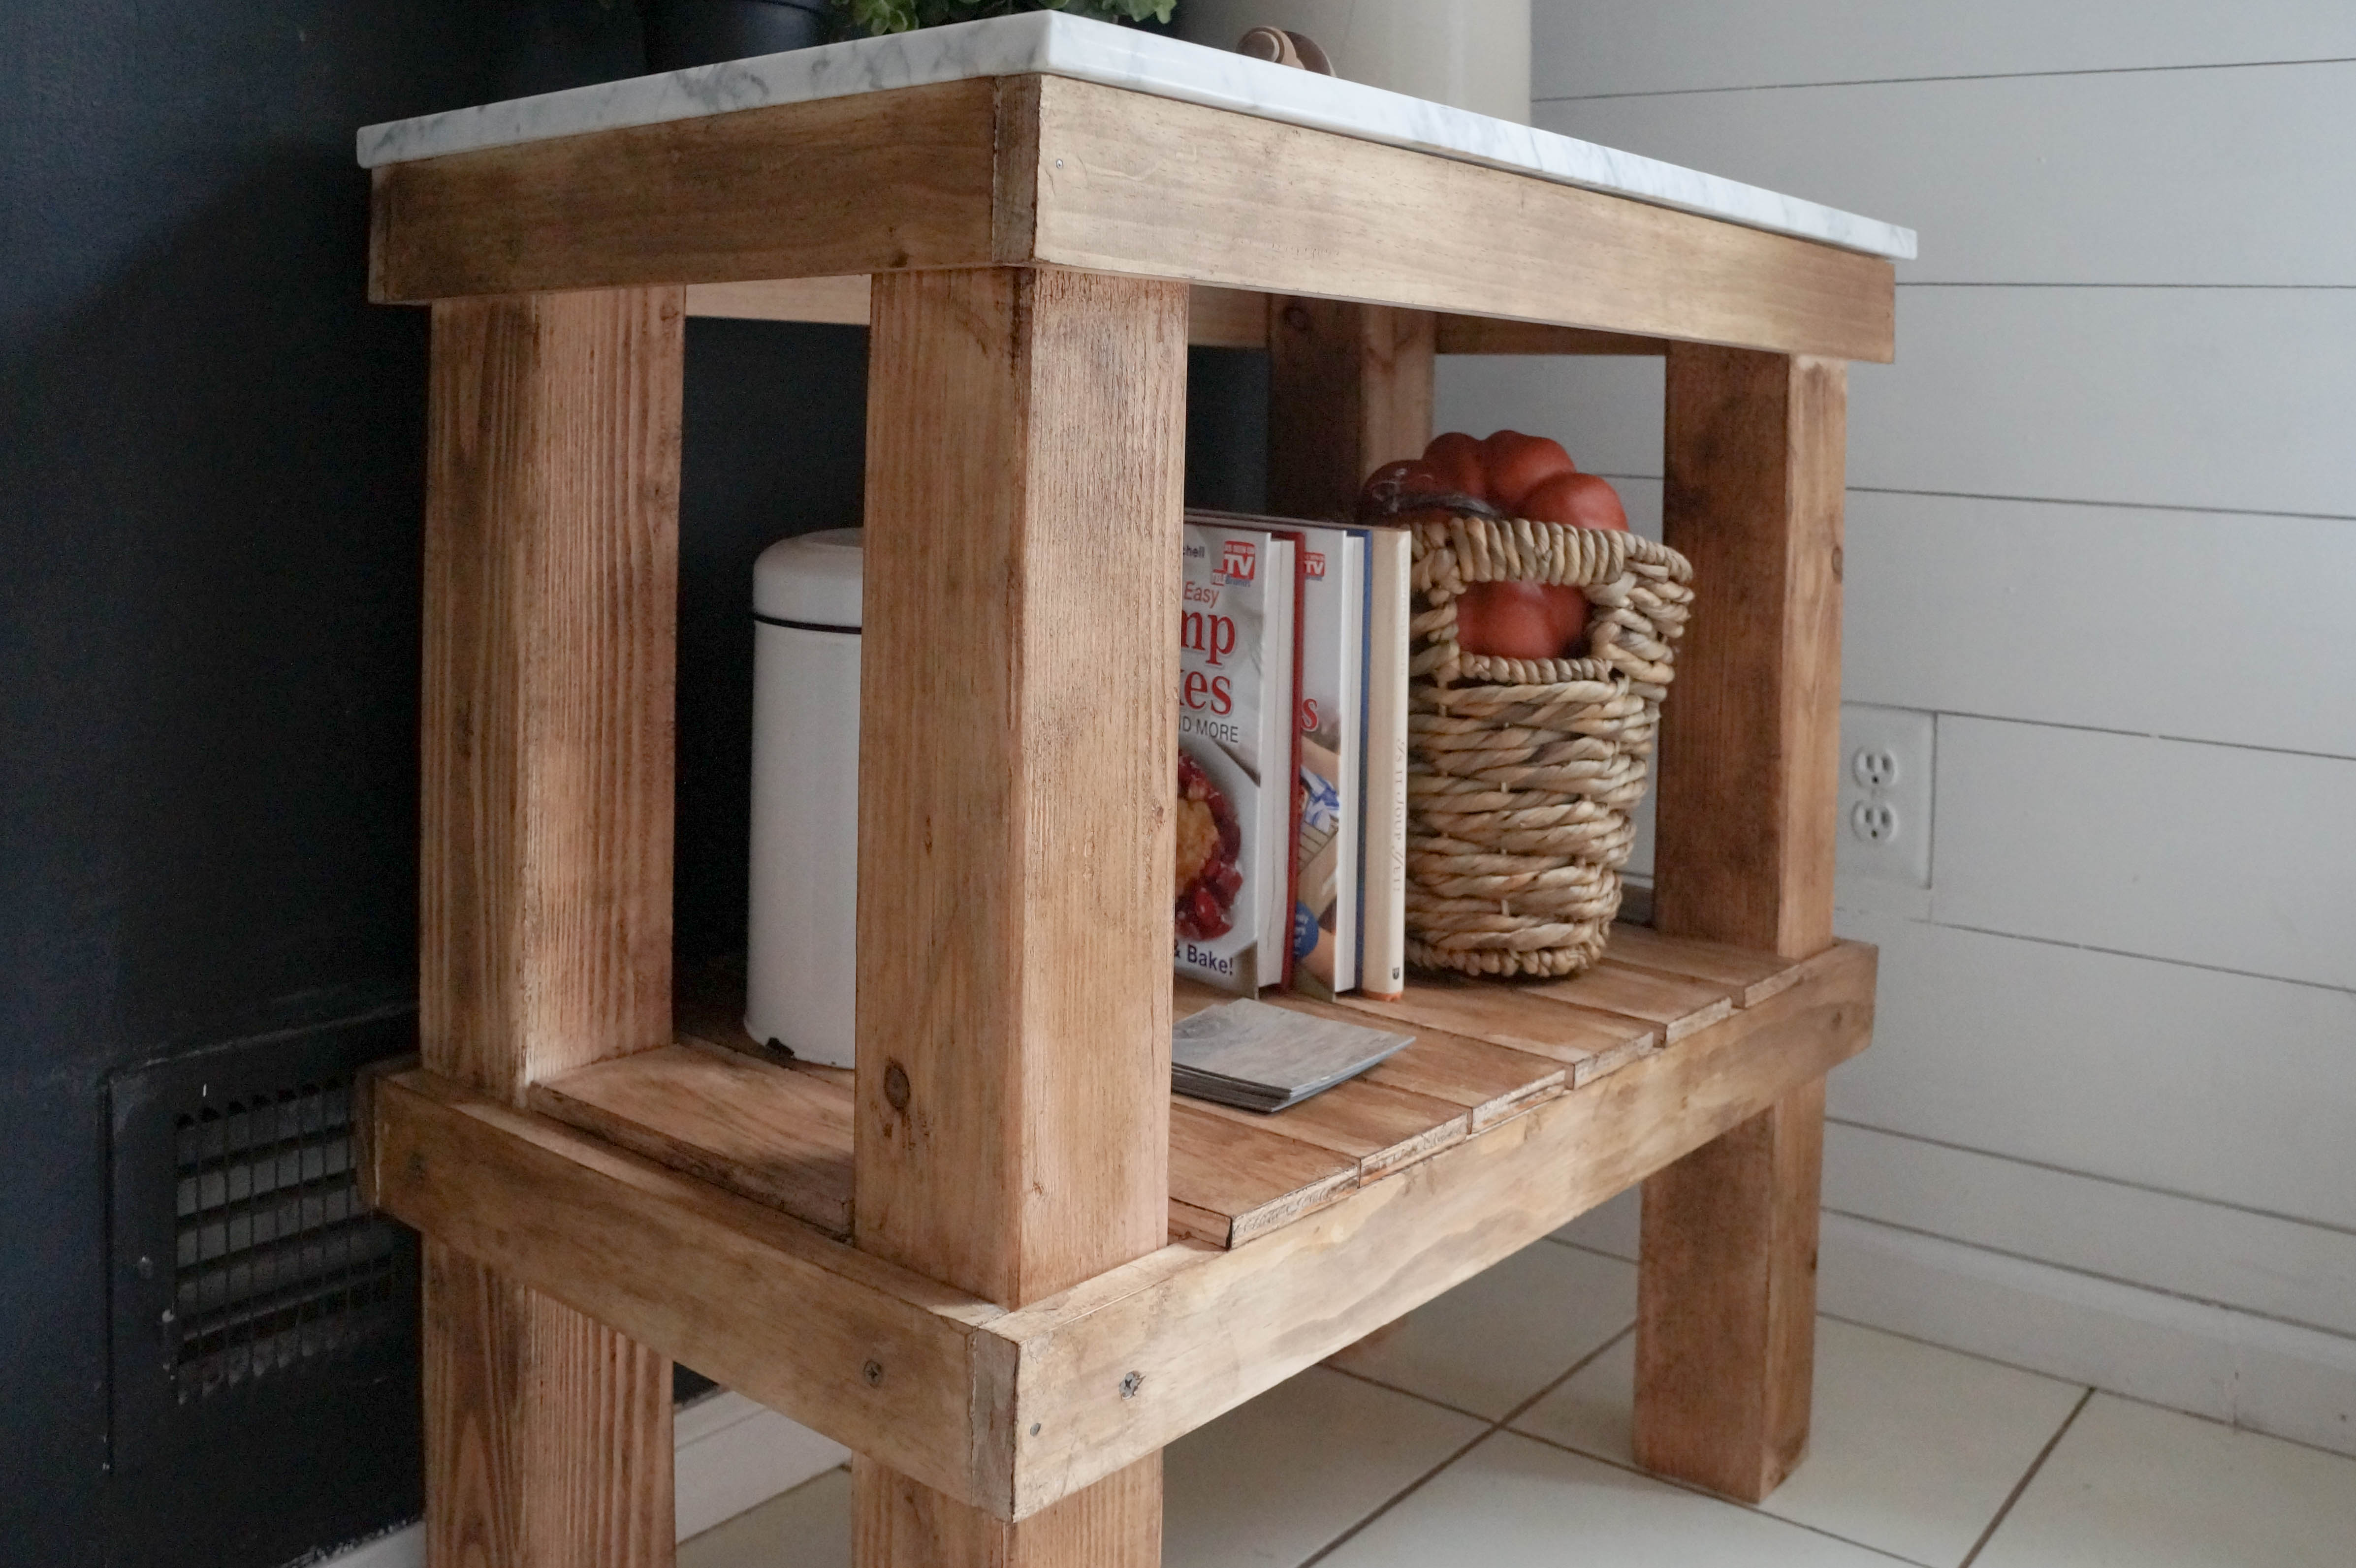
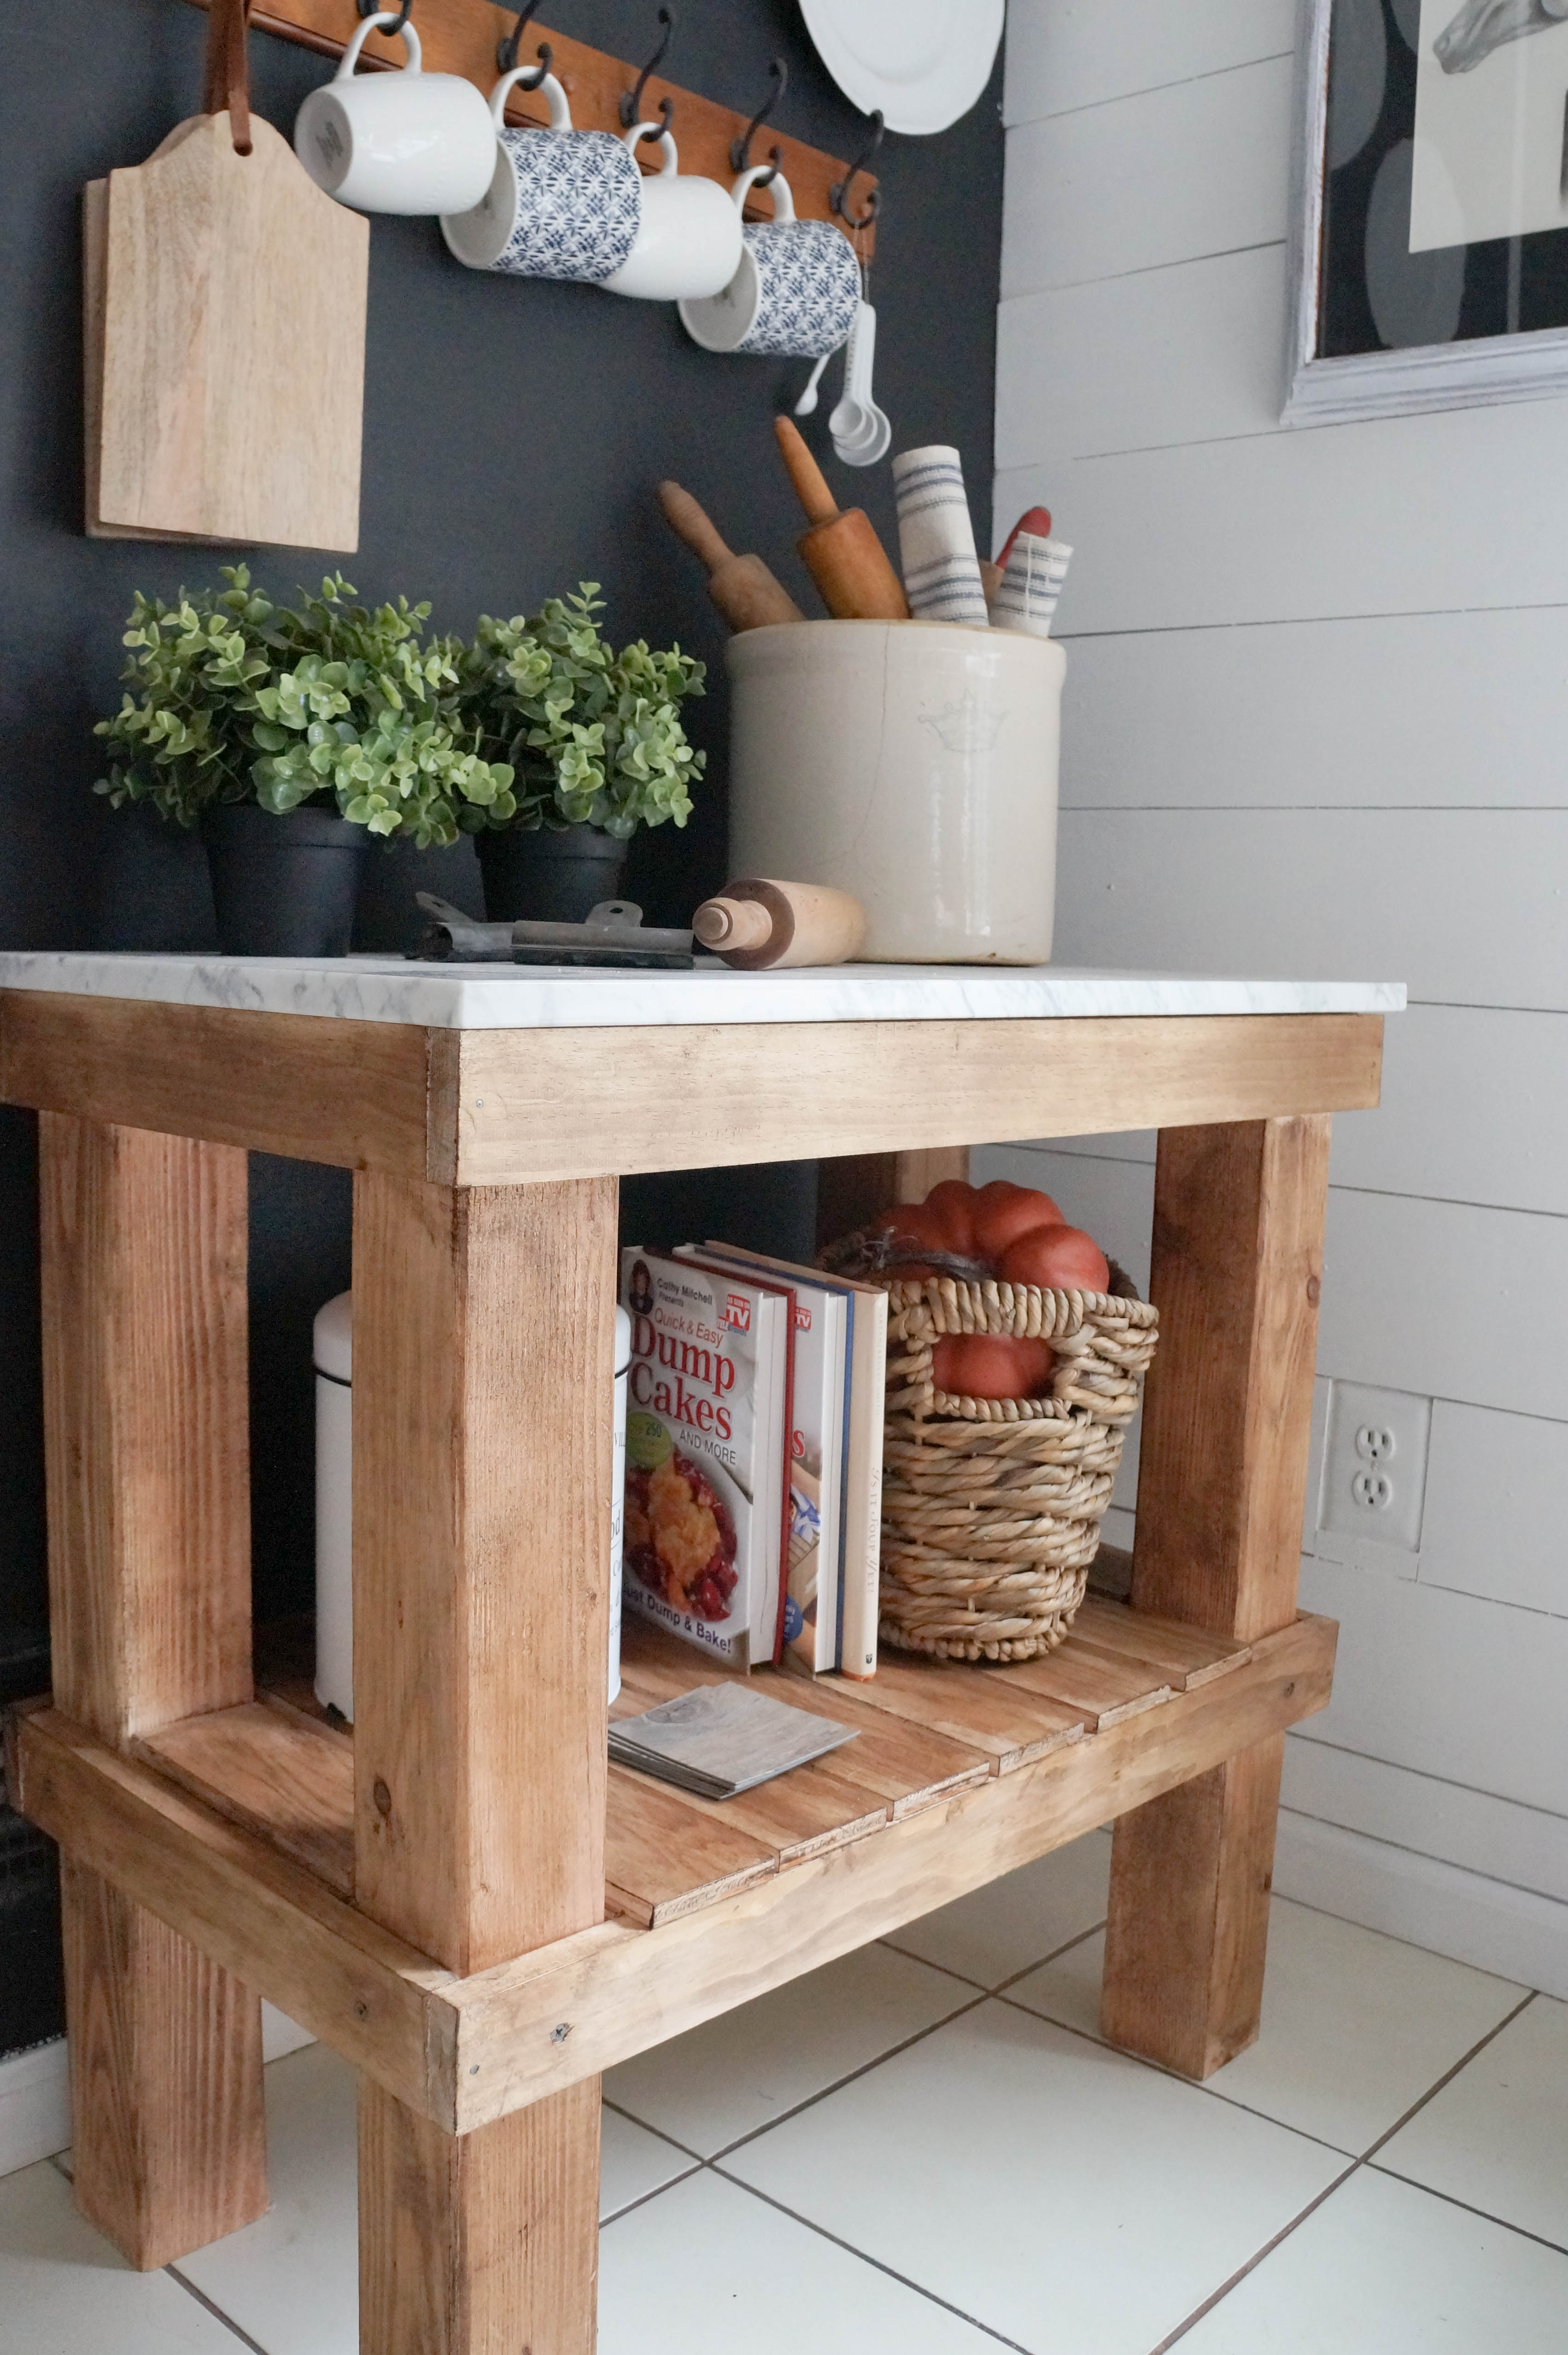
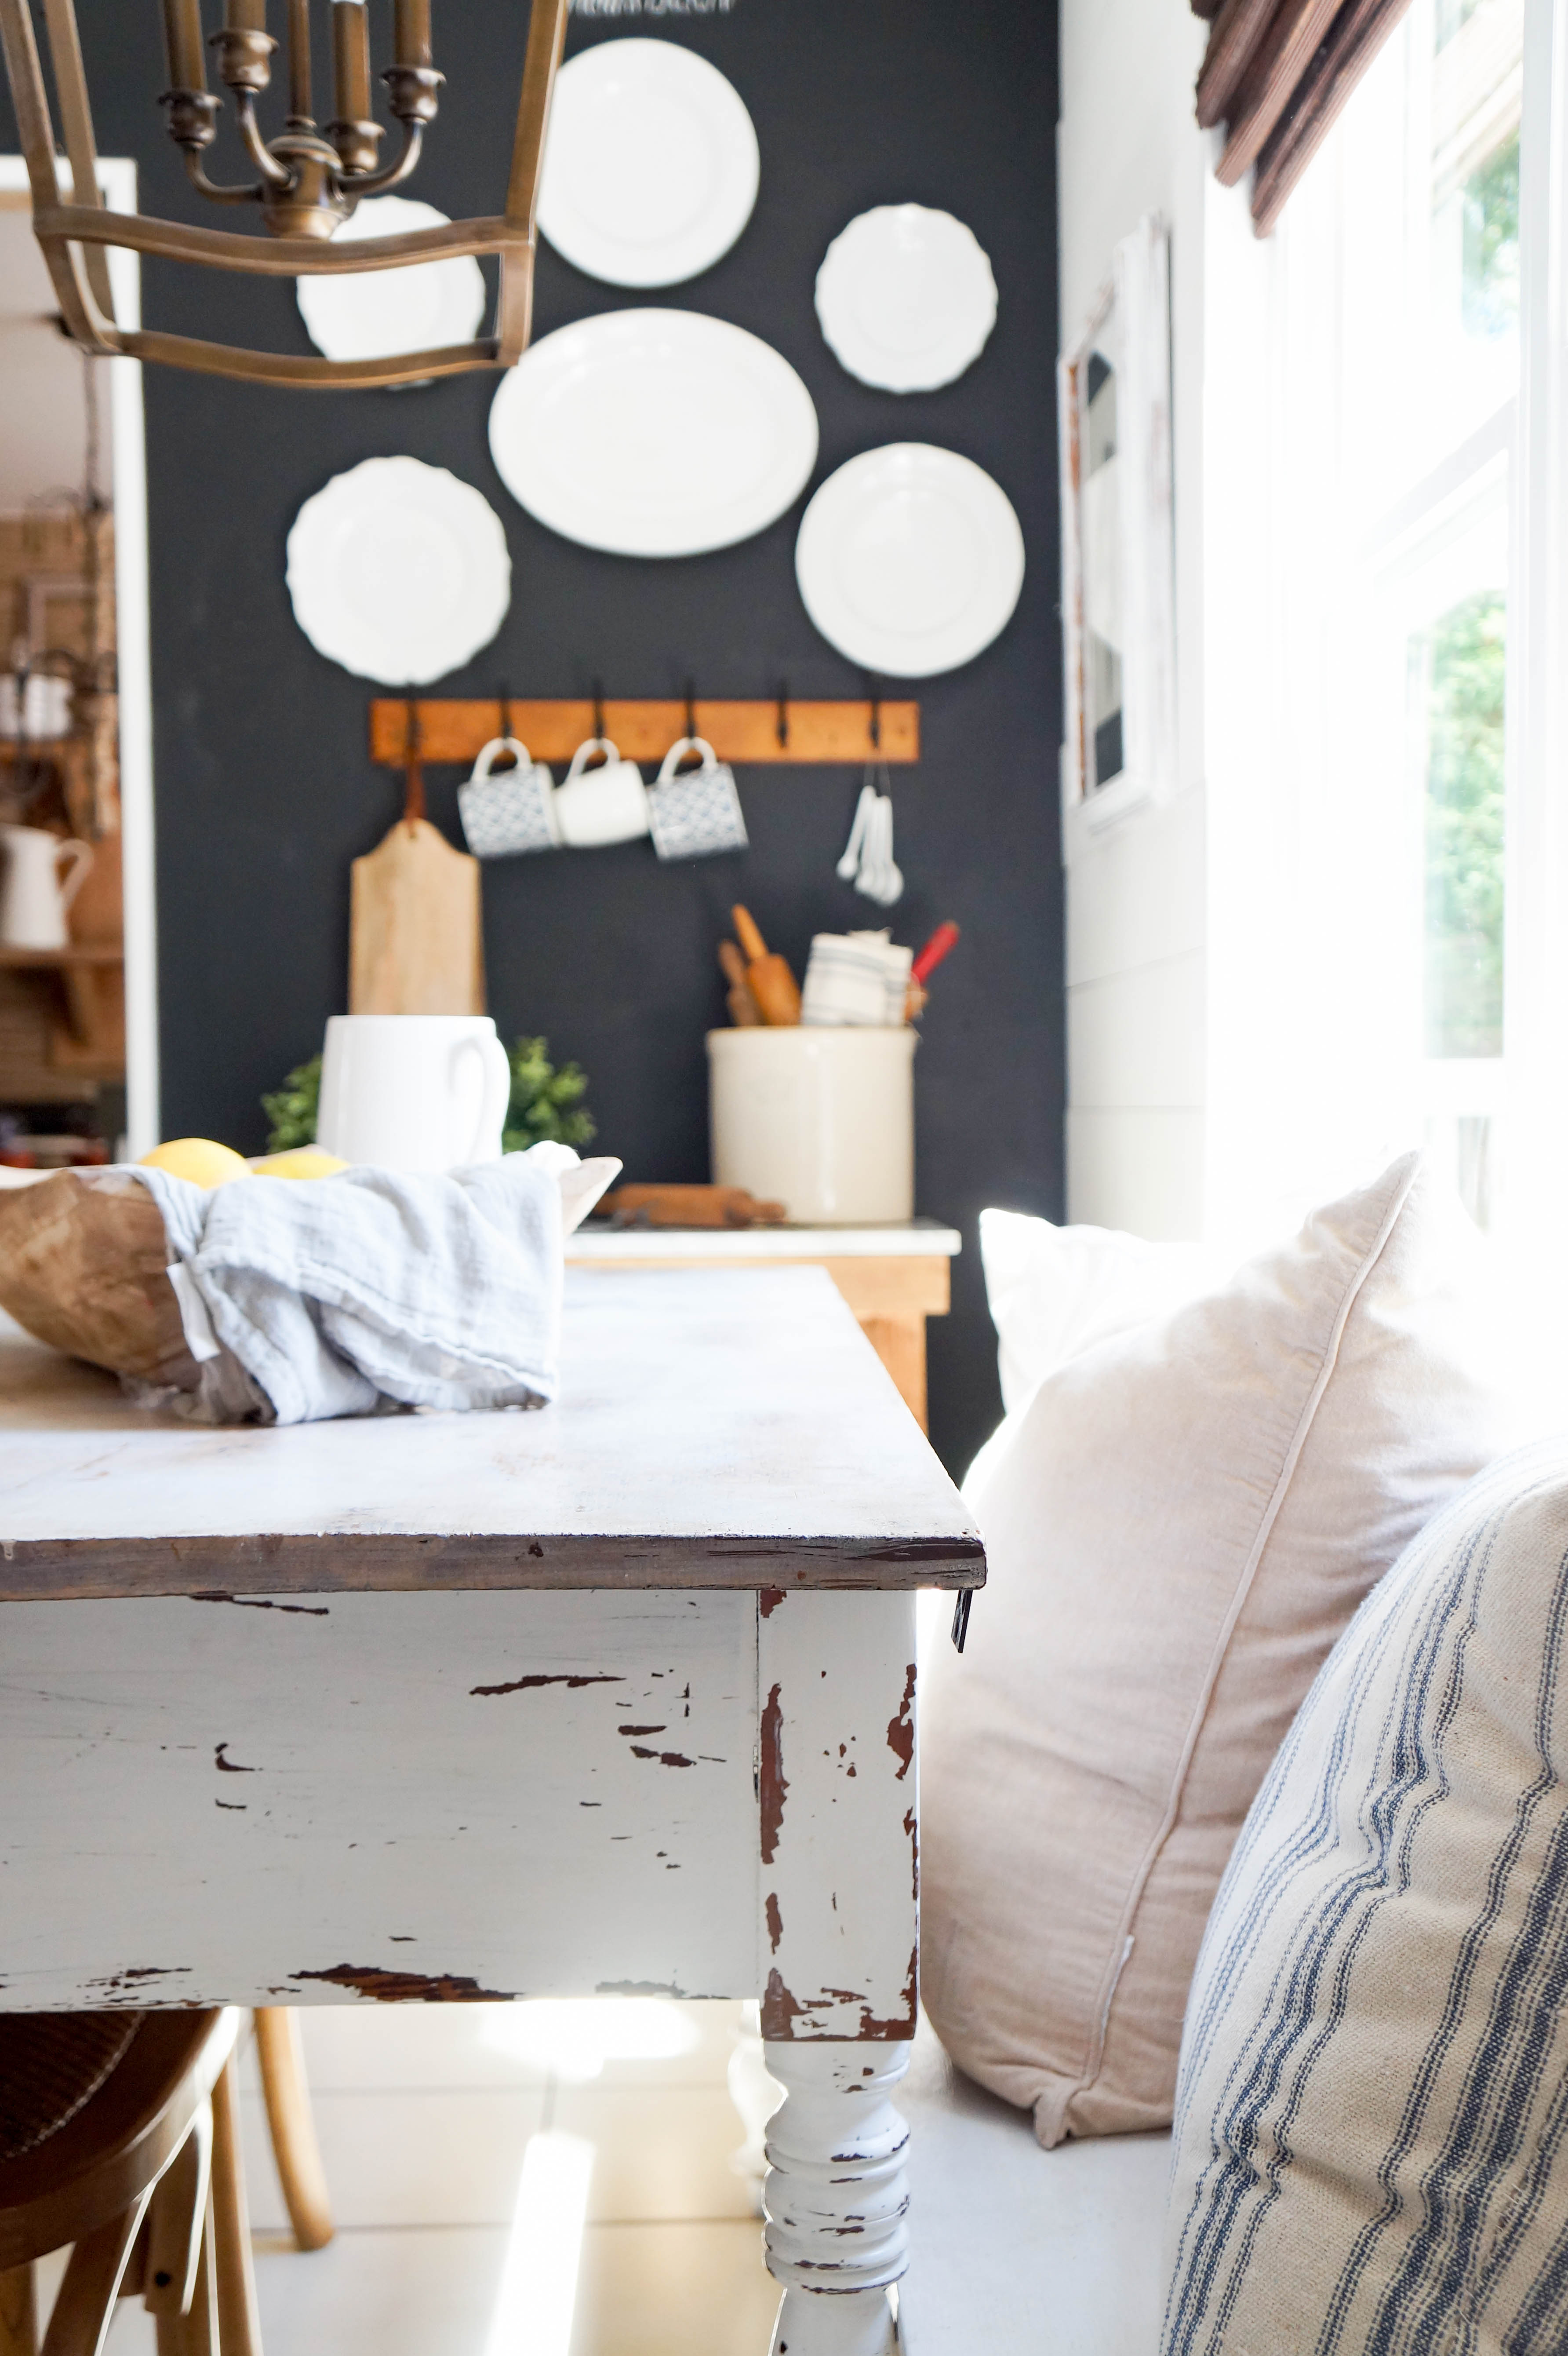
The options are endless with this! We just love having it for extra storage space, and it definitely has become the conversation piece! I love that it adds the feel of a small kitchen island, even though our home doesn’t quite have room for one.
love for you to share!
PLEASE STAY A WHILE
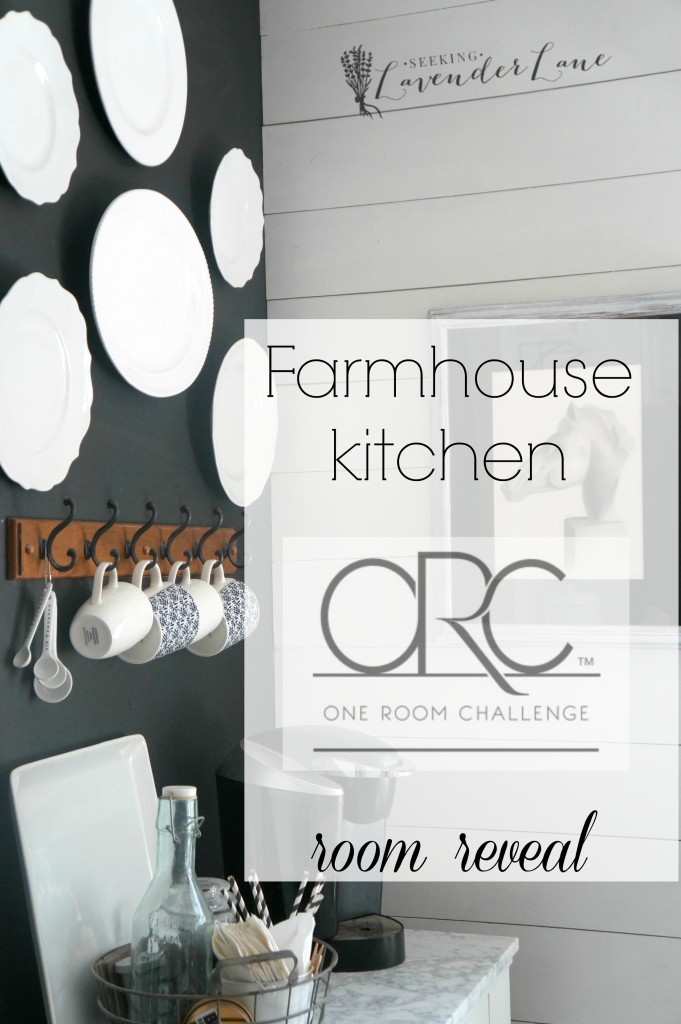
Farmhouse Kitchen One Room Challenge


19 Responses
Get out of town! This is adorbs. Your styling is rocking too, as always!
Thanks so much Sara!!! you’re too sweet!
OMG…love love love this! It looks absolutely fabulous in your kitchen! Heads up, if I’m ever in Jersey don’t be surprised when I come knocking on your door to hang out with you and your gorgeous house 😉
Laura Jo recently posted…The Saturday Savor #37
Thanks Laura Jo! Please do drop by sometime lol. Then we can go shopping together too! I need some creative local design friends.
I’m loving that cart! You set it up perfectly as usual. I was thinking about making a cart for outside dining but I have different materials. I’ll put it on the creative circle when I get to it. I have to pin down hubby to help because he knows way more about putting things together and it just makes it easier.
Thanks Patty! Yes, I hear ya…I still can’t quite do any of the building stuff. Thankful for a hubby who’s willing to help once in a while : )
beautiful! i love the chunky legs.
b
Thanks so much!
I love that you just put marble and rustic in the same project! I love how it turned out 🙂 Love that its both girly and lovely and yet still really masculine and rustic! Saving to my build projects board, and I also wanted to mention that the Wednesday “To Grandma’s House We Go” link party just started over at grandmashousediy.com and I thought you might be interested in joining it, thanks!
Thanks so much for pinning! Sounds awesome love the name! Thanks for the invite.
It looks so sturdy, rustic, and modern! I bet it’s nice to have and use. Thanks for showing all the construction details!
Jen Panguluri recently posted…Using Latex Paint To Tint DIY Cement Decor
Thanks Jen! Yes loving it!
I’ve been wanting to make a table with a marble top but was concerned about the cost. Where you able to find the marble for less? Just curious! Love how it looks btw.
ashley@biggerthanthethreeofus recently posted…Simple, Rustic and Modern Cabin Renovation
Thanks Ashley! I have family that work in the Kitchen Cabinet business. They were able to get me the marble at cost. I know super lucky!
I just love this bar cart!!!! So great in your kitchen and such a great project even for a beginning builder like me. 🙂
This is sheer perfection! Pinned!
Anne recently posted…2016 In Review
Hi Anne, thank you so much!!
Looks really awesome and sturdy! Where do you get your talent, Deb? You rock!
Thank you so much Mari! That means so much : )