About two months ago I purchased a vintage gorgeous buffet table and the top hutch from craigslist for an amazing price. I already knew when purchasing that the hutch would overwhelm our dining room so I did not want to use the two pieces together. I planned on making over the hutch and using it elsewhere in our house. I decided it would be a perfect bookcase/armoire focal point for my daughters room.
Supplies I used
- ASCP French Linen
- Michael’s Craft Store Chalk Paint White
- ASCP Dark and Clear Wax
- Antique Gold Spray Paint from Michael’s
- 4 furniture feet- found mine at Lowes
- Mirror Spray Paint
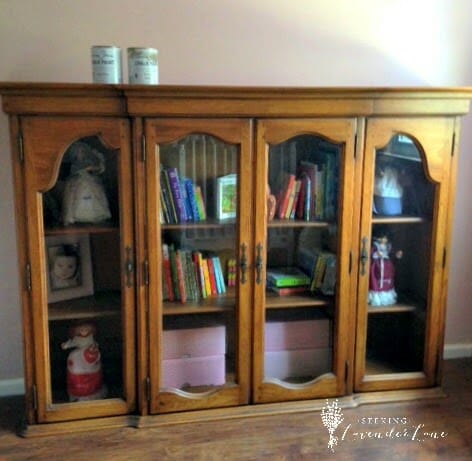
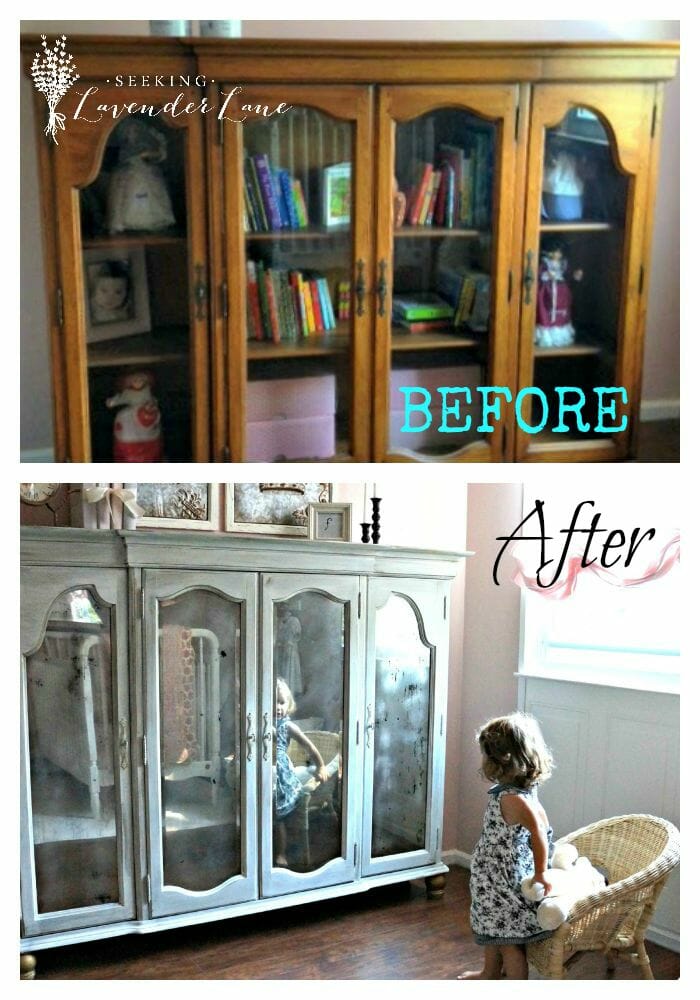
Here is what the hutch looked like when we first placed it in the room.
I did think about leaving it with the natural wood, but to work with the rest of her room I decided to use some chalk paint to keep with the soft pallet.
This was the first coat using French Linen (sorry for the blurry photos camera phone)
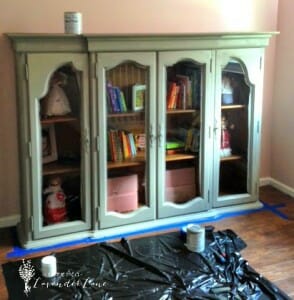
Though French Linen is one of my favorite Annie Sloan shades, I wanted a lighter color and a layered paint effect. So I decided to use some more of the Michael’s Craft Store White Chalk Paint that I had used for the Curb side Treasure piece. I used a dry brush technique with the white to add that layered effect and to still be able to see the grey underneath. I finished off with ASCP Clear wax and a very light layer of the dark wax.
Once I finished painting the outside and waxing I got a little lazy lol. Not sure if any of you have painted either a bookcase or a dining room hutch before but it is a lot of work…especially once you commit to painting inside. Well…I came up with a solution! Mirror spray paint …
…
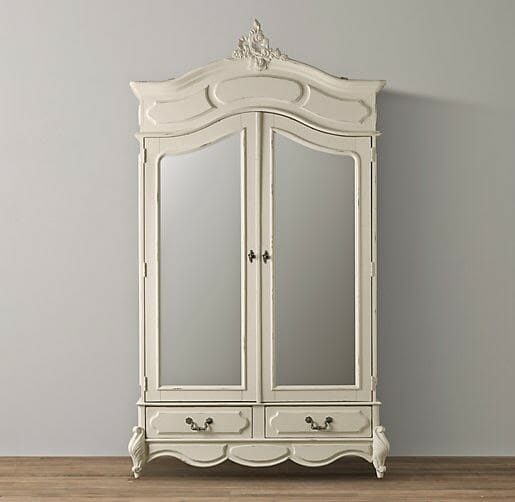
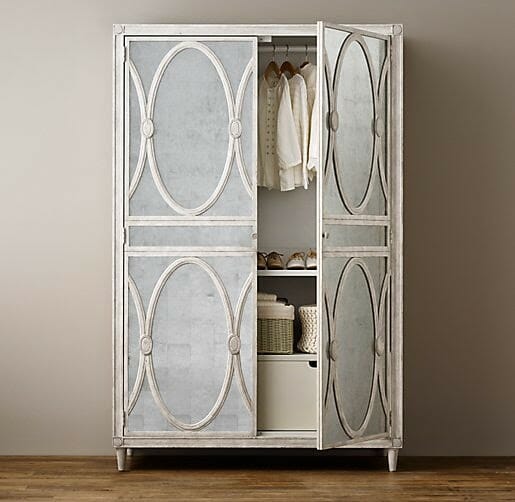
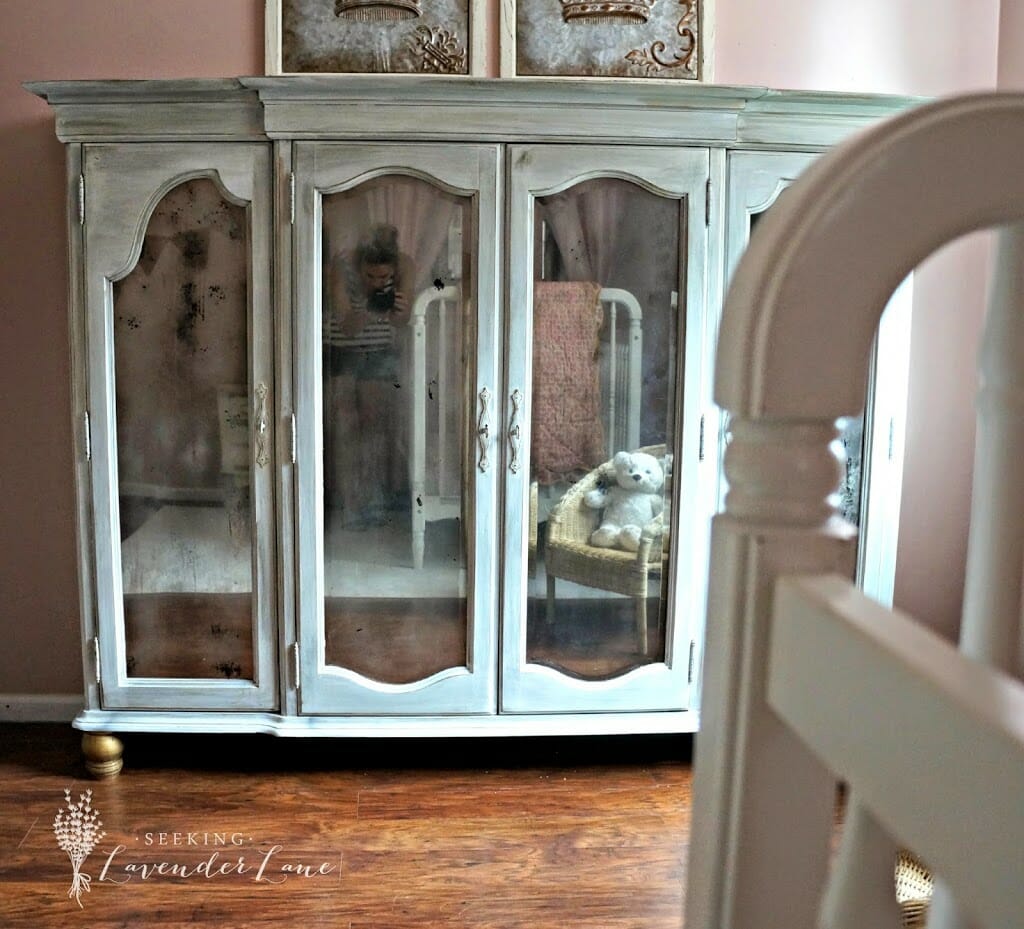
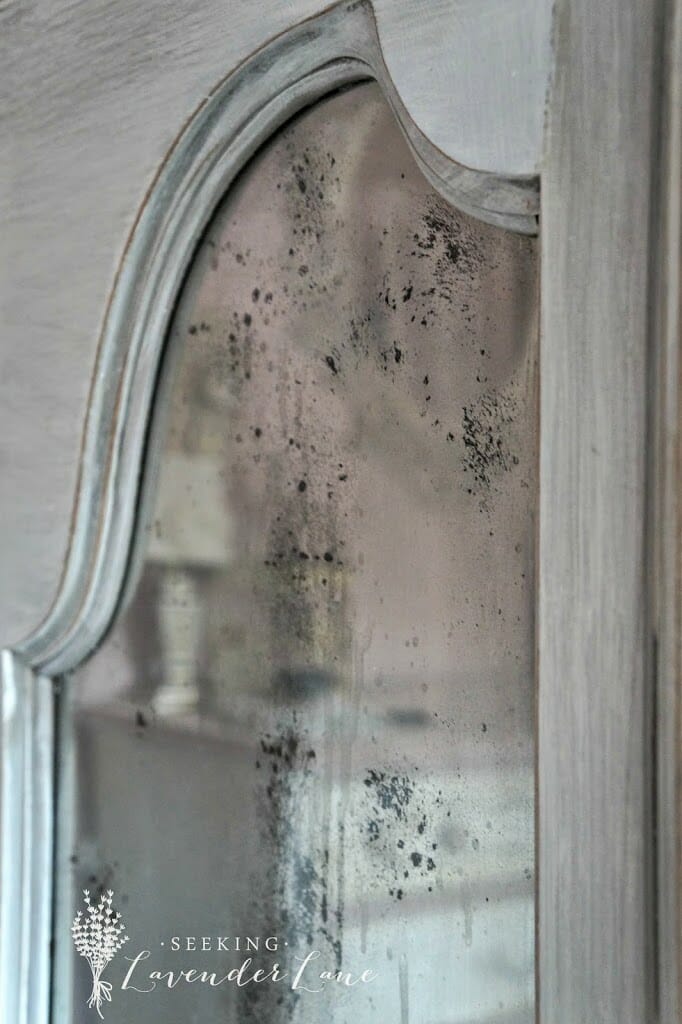
Adding the mirror spray paint helps hide the inside as well as create an antique look. Some of my inspirations behind this piece were from the gorgeous armoires from RH Baby. Do you think I have an obsession with this company? Yea pretty much haha. If you have followed along with my Son’s Industrial Transportation Room post, I admitted my obsession there and clearly it just continues.
Some Armoire from RH that inspired me.
The Mirror Spray Paint Step
The mirror spray paint was a little tricky to use. Unfortunately, I was unable to take the doors off since the piece is so old some of the screws were impossible to take out. I was hoping this would not be a problem when spraying them, and unfortunately it did. I had the spray paint dripping down in some spots and when looking at the piece up close it is still noticeable : (
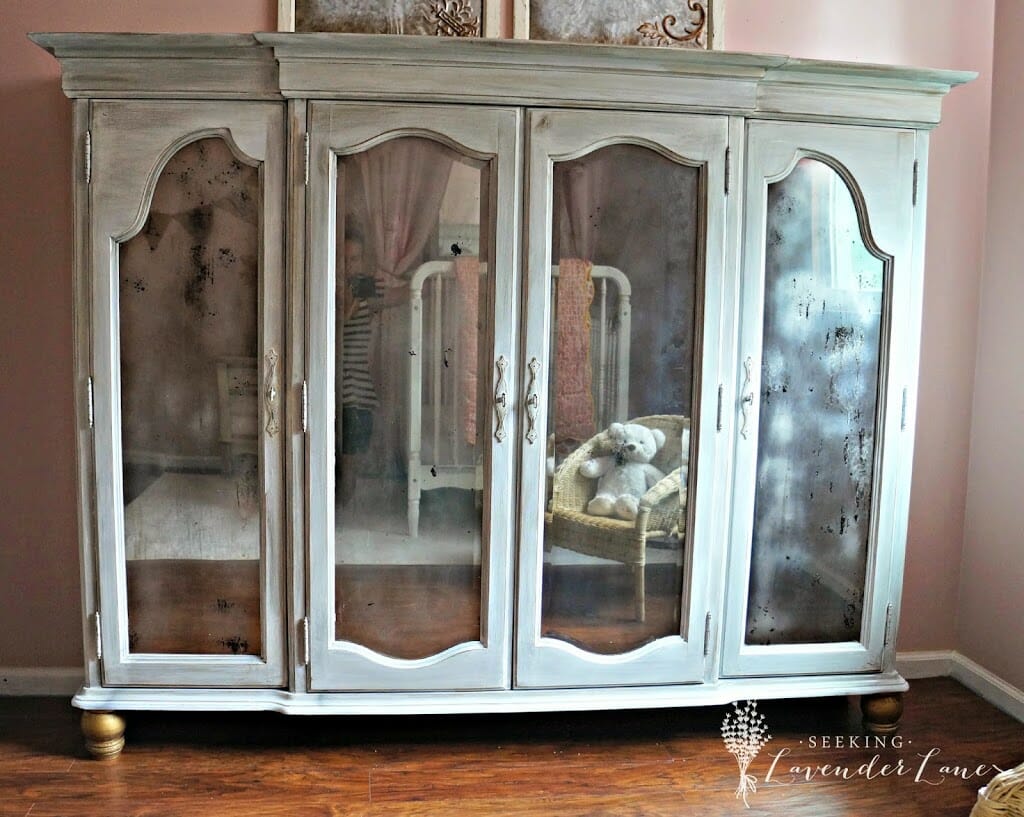
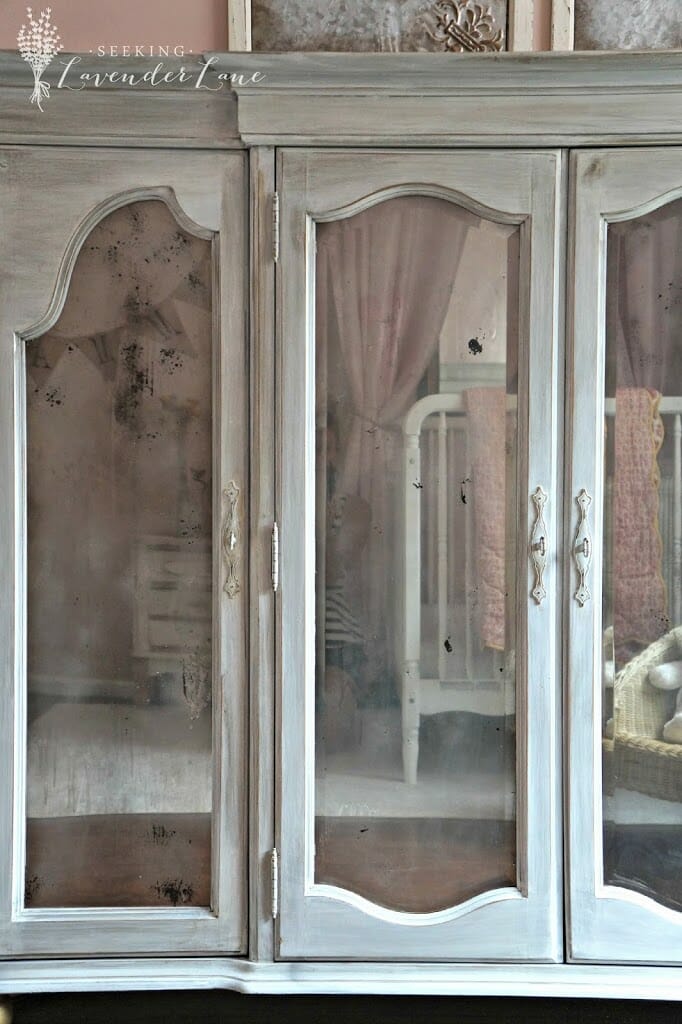
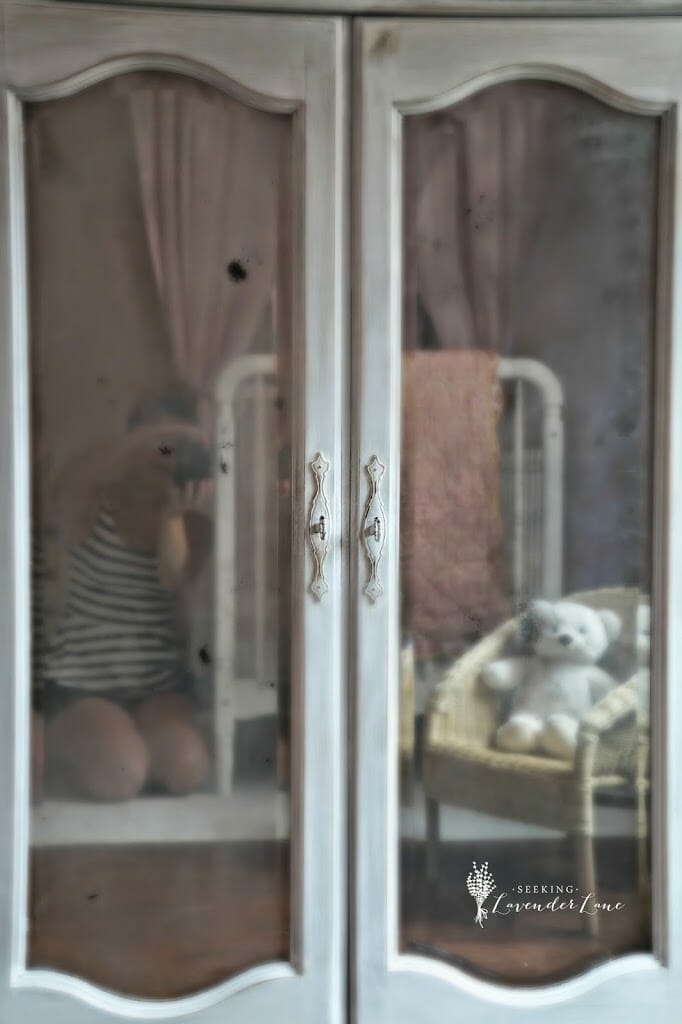
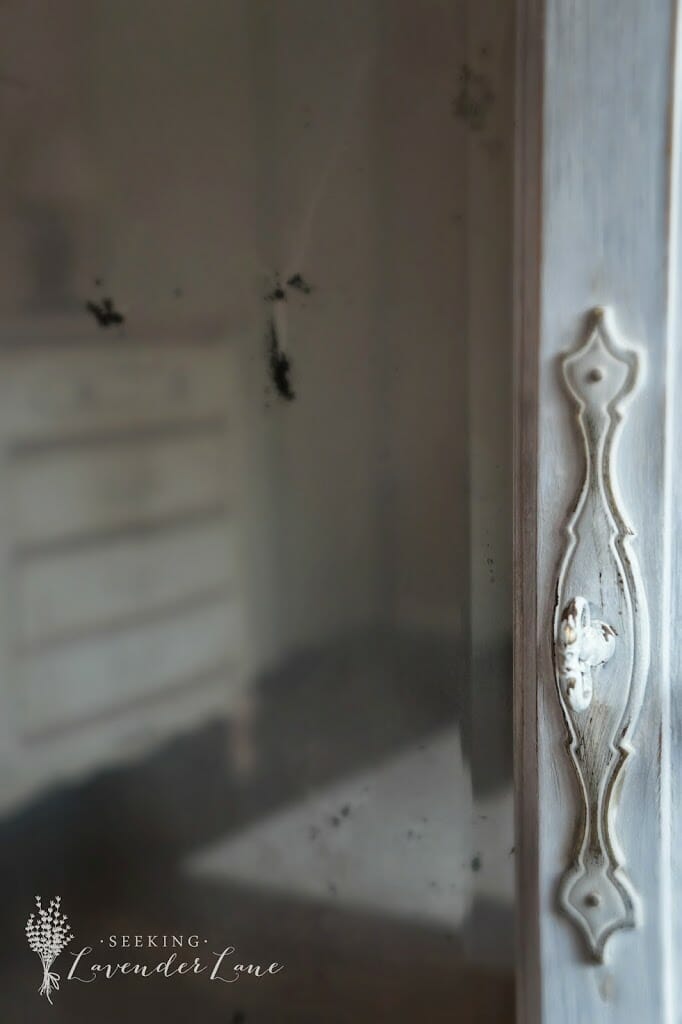
I decided to go with an antique mirror effect especially since the spray paint was looking slightly imperfect so I found a great tutorial at Little Green Notebook. It worked really well with the vinegar and water mixture but I did dab my paint brush in certain sections to help take some of the paint off and blend the streaky parts.
All in all…the mirror spray paint would have been easier to work with if I had laid out the doors. Out of the four doors I did, two came out really great, one was ok, and one was kinda bad Ooops! My son likes to point at that not-so-great door and remind me how messed up it came. Something I can live with, but wish I had been able to take the doors off to get a better finish.
Adding Feet
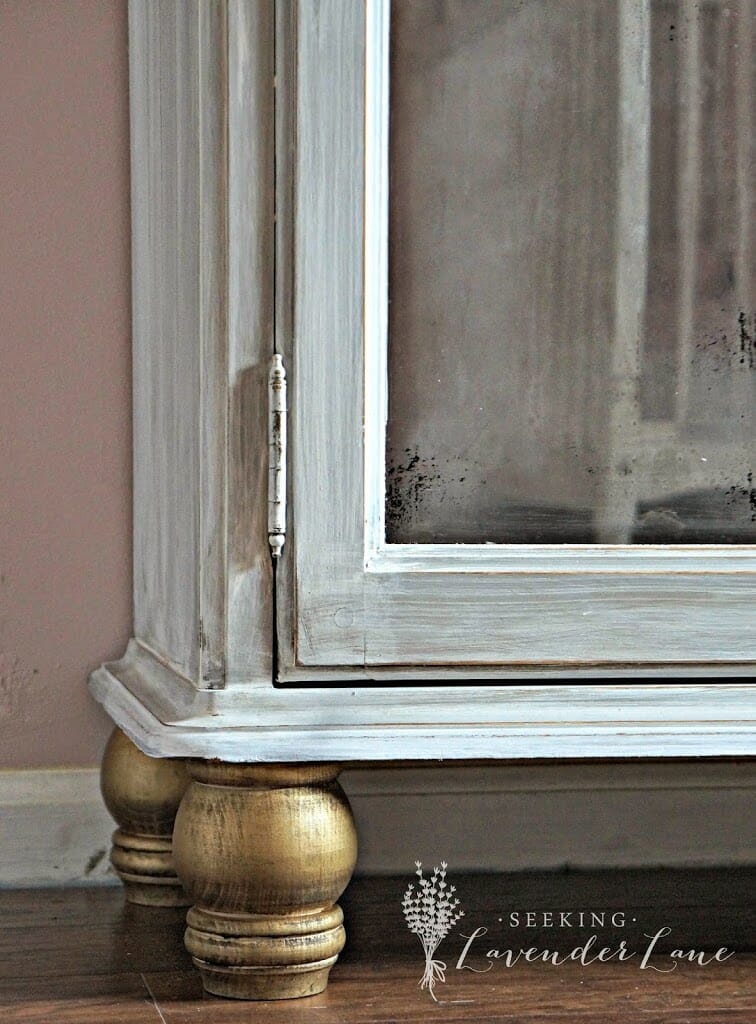
The Last step to this makeover was adding some feet. Unfortunately, the hutch is low to the ground and it should be raised slightly with some feet that can be screwed into the bottom. I needed something chunky enough to hold the furniture since it is quite a heavy antique. I found the wooden feet at Lowes for $4.99 each. I added a little gold spray paint to tie in with some gold that is in the room and gave it a dark antique look with some Annie Sloan Dark Wax.
The hubs screwed on the feet for me and lastly screwed the armoire into the wall to make sure it would never be pulled down if ever climbed on by my little one. Safety First!
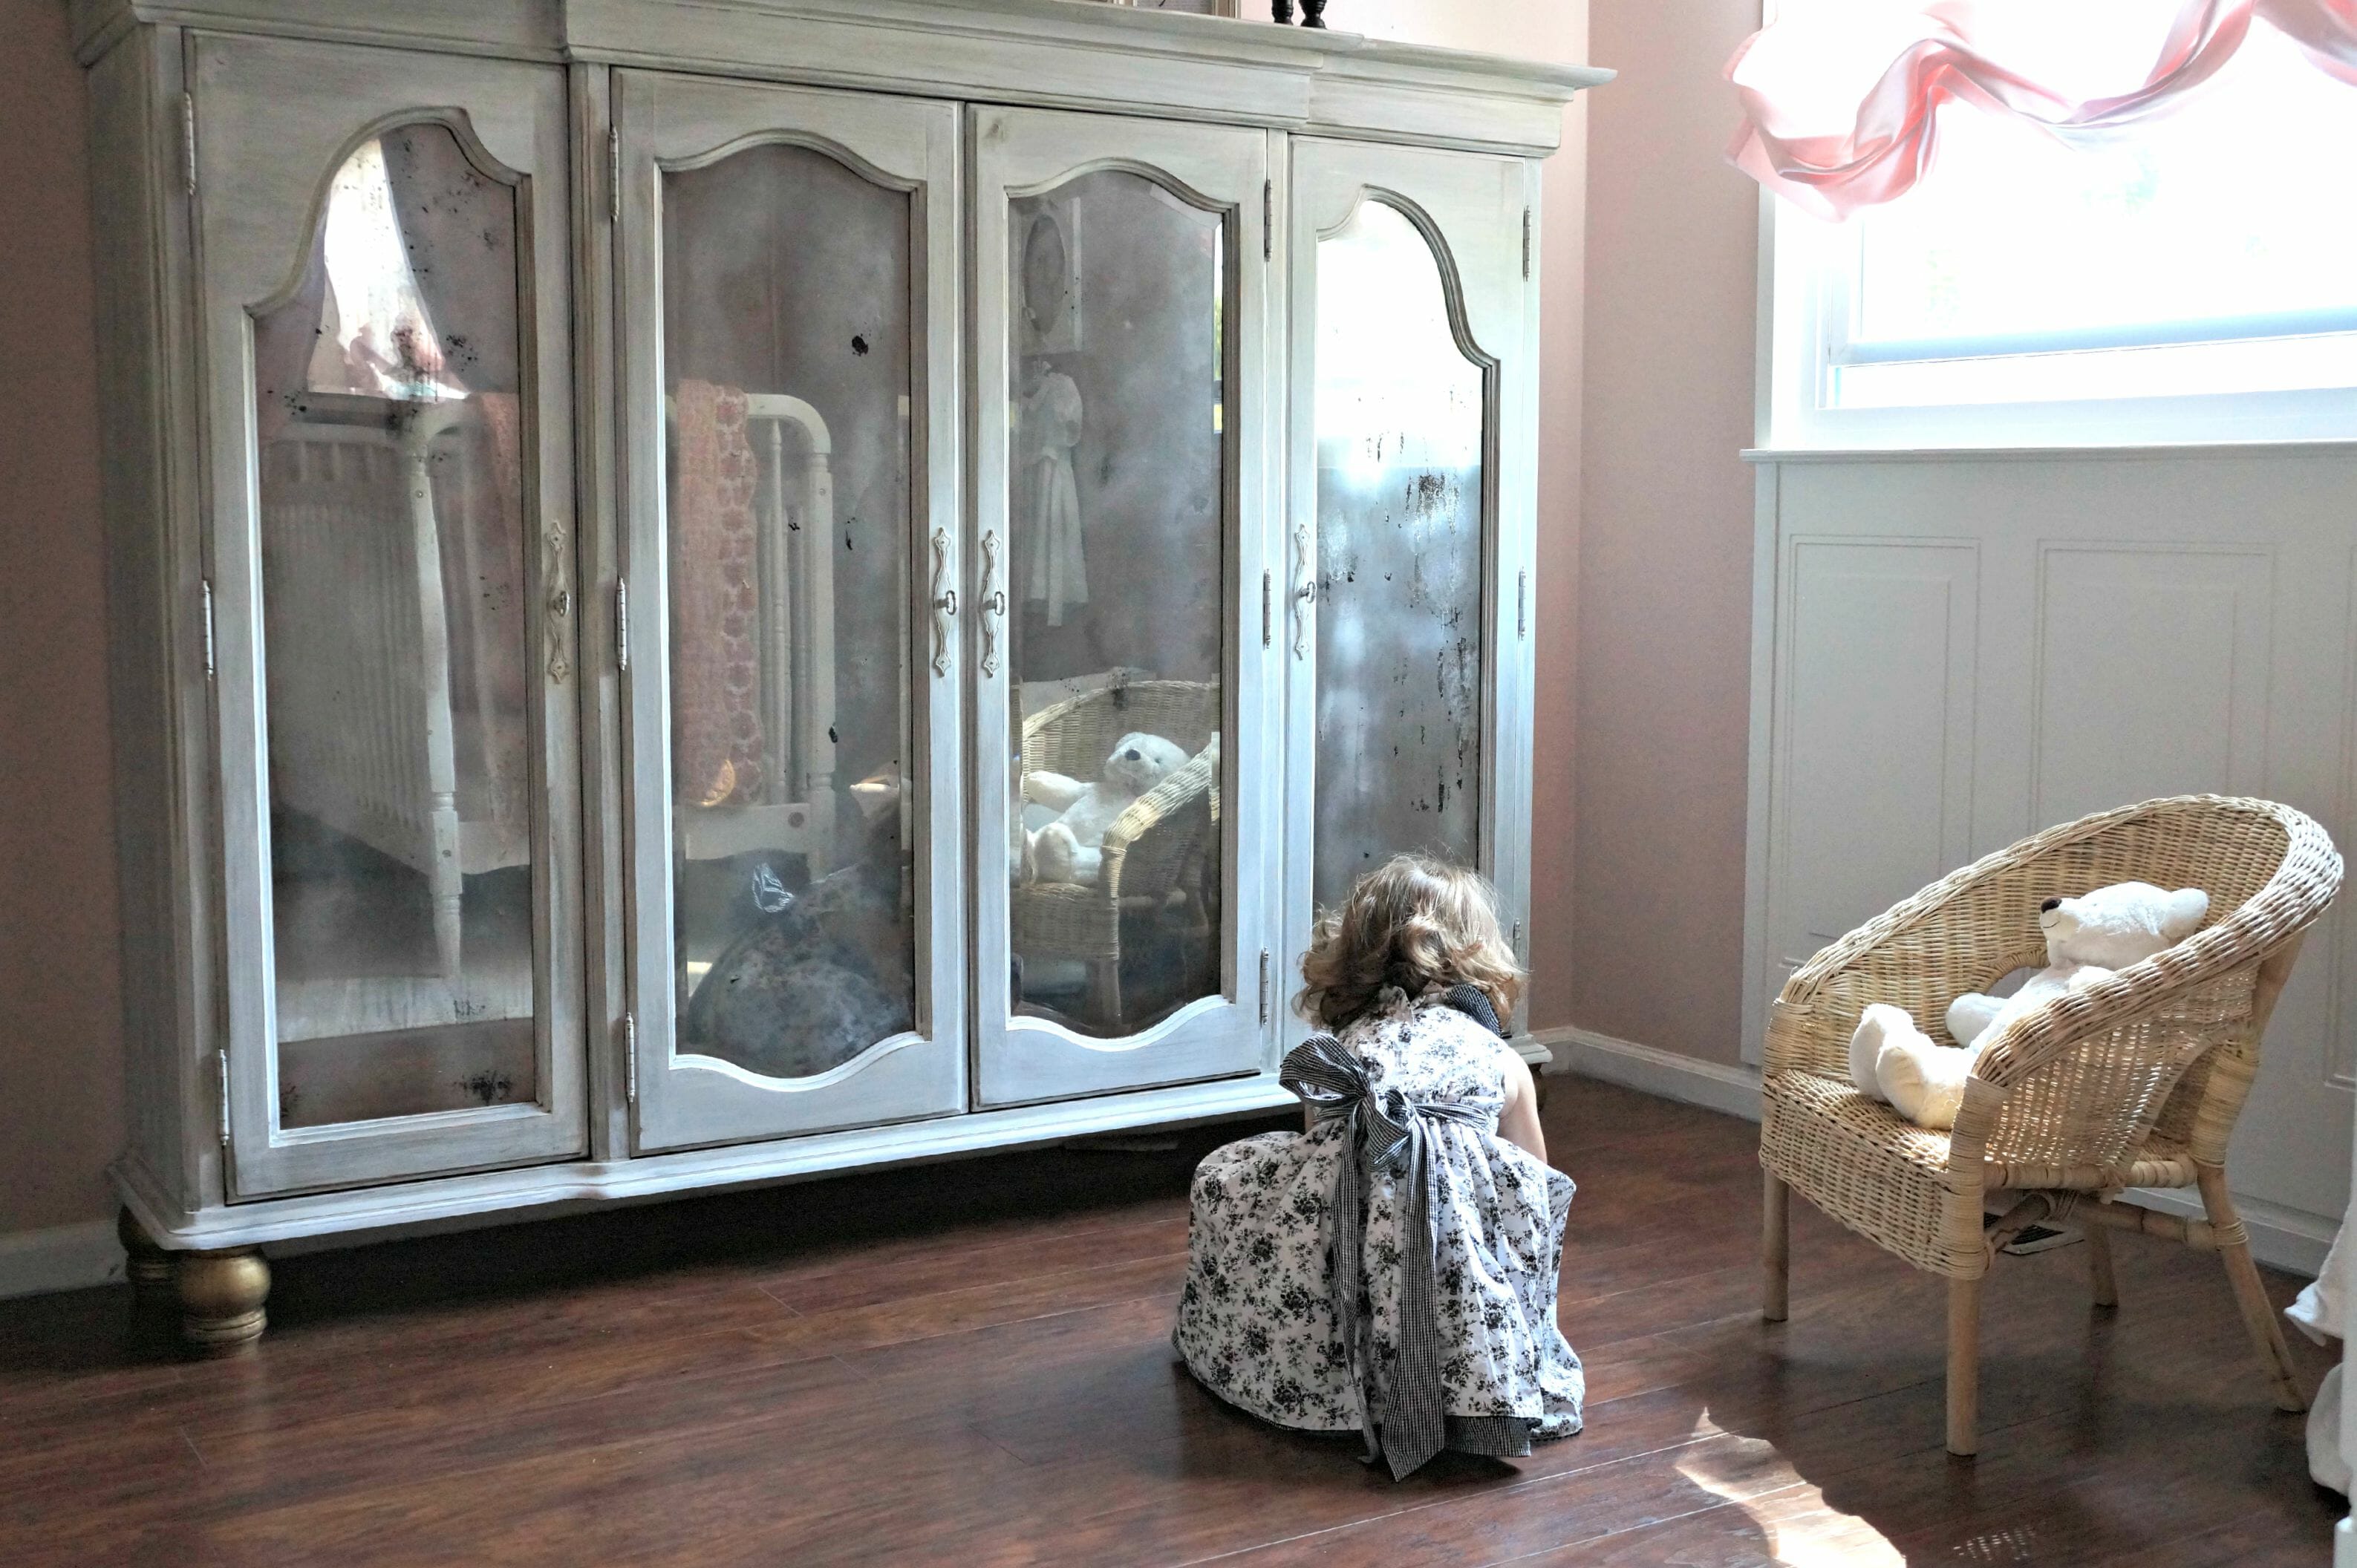
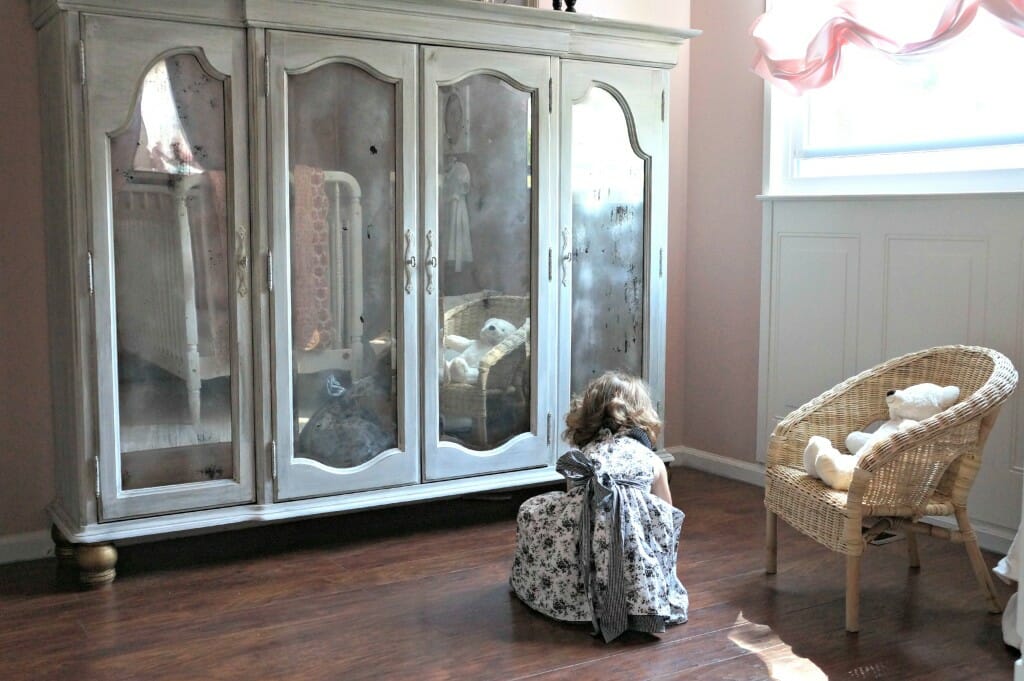
For now enjoy some photos of this Armoire at it’s finished, slightly imperfect, but still wonderful state.





68 Responses
Wow! This makeover is crazy incredible!!! You did a beautiful job – love the aged glass and bun feet you added – it took it to the next level for sure!
Coming over from Coastal Charm –
Thanks so much….I really appreciate your comment!
Pretty! I actually love the antique mirror effect. I think it worked in your favor. I can’t wait to see your little girl’s room reveal when you get to it. I just started finalizing paint choices and ordering fabric samples for my daughter’s room so I’m really anticipating what you do with yours. 🙂
Thanks Lauren! Ohh my Im sure your little ones room is going to come out spectacular! Hoping to get my post up of her room by next week. Every time I turn around there is a new project I want to do. Hoping I get it all done by then.
This is such a great idea–or ideas! I love how you used the top of the hutch off the base and then how you painted the glass an added the feet. Really awesome!
Thanks so much Susan!
Deb, this is gorgeous! What a great idea! Blessings, Cecilia
Thanks so much Cecilia!
Absolutely gorgeous!
Thank you Maureen : )
Whoa! Great update! Thanks for sharing on Show-Licicous. Pinning!
~ Ashley
Thanks so much Ashley! Appreciate the pin ; )
I am visiting from the Inspiration Exchange Linky Party. What a great transformation and I love the use of the mirror spray. Good job on creating such a beautiful piece. I hope you enjoy the rest of your week.
Renee @ The Refined Relic
Thanks so much Renee! So glad you stopped by!
So wonderfully charmingly beautiful!!! The antique mirror doors… oh la la!
Thank you so much love this comment ; )
I adore how this turned out. Now I need to search on Craigslist for a similar piece to do this to. I have just the spot for it. I love how the mirrors turned out. I love it that you gave them an antique effect. I’d love it if you’d link it up at my weekly party at ModVintageLife.com.
Thank you for your sweet comment Nita. I added you on google so I can be sure to Link up to your next link party…thanks for inviting me!
Wow, you did a lot of work on this and it looks terrific! I am very impressed. I didn’t even know about “mirror” spray paint…I should really get out more! ha ha…Thank you for sharing, I love it! Leticia
Bet you get noticed by MMS for sure! This turned out lovely! Well done!
Smiles!
Terry
Thanks Terry! What an honor that would be : )
This looks so great! WOW!!! I totally need to try the antiqued mirror effect! Awesome job.
Thanks so much : )
Thanks for sharing this great idea. I have the same piece but I will be using it together as a china cabinet. It will be my 4th.! Yikes! I just love old china. Stop by and see how I painted mine. Check back in the posts to see them all.
I love how your mirrors turned out. Great vintage look.
~ ~Ahrisha~ ~
That is an amazing idea! I see these posted for free fairly often on our local version of Craigslist. I saw a to-die for one the other day, but had no idea what to do with it. My husband will groan, but I’m so excited!
Oh I hope you get to pick up that piece…lol all husbands groan! Especially if you make yours carry it up a flight of stairs like mine : 0
This pièce is fabulous!!
Anything little Girl grown up is a perfect infant piece, it’s something she will never out grow.
It’s so inspiring I hope that I can find a hutch top to create something similar for the book case use.
You have created a nursery to love.
Fondly,
Dore
Thank you so much Dore…I really hope this piece will be great for her room for years to come.
It’s imperfections make it perfect! Such a smart way to salvage an old hutch top! Love it!
Thanks so much!
I just saw a hutch with no base at the thrift store this week – may have to go back and get it now that I have seen this. GORGEOUS!
Oh I hope you do Christy! Thanks so much for your comment!
What an amazing idea! I just love it and am kicking myself for all the gorgeous opportunities I’ve let get away! Love the way you silvered the glass, BEAUTIFUL!!! We’d love to have you share it with us at WIW, hope you can join us.
Hugs,
Patti
Thank you Patti! I will for sure come share at WIW…thanks so much for your invite : )
This is really amazing! I have not heard of or used mirror spray, but it is something I will keep in mind… I love the antique mirror look. Thank you for posting this. 🙂
It’s darling! I love, love the mirrored doors.
This is gorgeous! Which mirror spray paint did you use? Krylon Looking Glass? I love how it came out so antique-y looking! 🙂
Thanks so much Andrea! Yes I used Krylon which I purchase at Hobby Lobby.
*WOW* What a transformation! Brilliant idea to add feet and repurpose this item. I didn’t know you could “antique” the glass like that- it adds a lot of character to your piece. Thanks for sharing with Pin Your Friday Favorite!
Thanks so much Nicki…I appreciate your comment and you stopping by!
Your makeover is right up there with your inspiration! I loved the mirrored glass effect. Well done!
Thanks Joselyn…I really hope so…hard to compare but pretty close to it ; )
I love everything about it! Great makeover with the color and the mirror for the glass.
Thanks Michelle!
very pretty, i love the mirror glass, i would love to feature it, if that would be ok please let me know
laruen
Absolutely! Thanks so much!
Love this!!! I cannot even tell you how much! I’m totally inspired by the mirrored doors and bun feet! Thanks, pinned 🙂
Thank you Cindy that means a lot coming from someone as talented as you! Hope it inspires you for a future project!
Thank you for posting this. I have a hutch that I spent a lot of time painting, but after we moved, it no longer works in our home as one unit. The base became our TV stand but the top has been homeless for 6 months. I believe I can now give it a job (linen cabinet) and save the cost of buying another piece of furniture.
oooh perfect for a Linen closet!
I had no clue that mirror spray paint existed….thank you thank you!! Gorgeous job on this.
haha I got that comment a lot…yep it’s out there and pretty awesome! and thank you!
That looks INCREDIBLE!!!!! Fantastic Job!!!
Thanks so much Junitta!
I absolutely LOVE what you did with this hutch…..it’s GORGEOUS…….BUT…..I would really, really, really…..reconsider having a piece of furniture with that type of glass on the doors low to the ground with children. Let me tell you why I feel this way and want to warn you….I wouldn’t want ANYONE to have to go through what we did with our daughter. It was an accident…..she got too close and was moving too fast……but before we knew it ….our little 8 year old had put her arm through a glass door. Her little arm was cut open from her wrist all the way down to her elbow with another huge gash along the back of her arm…..plus a gash across her eyelid…which we didn’t even notice til the rescue crew got there. The Emergency Room Dr. told us it’s a miracle she didn’t cut any tendons or her major blood artery which would have killed her! I cannot tell you, as a mother, how totally helpless I felt to see my little one cut open….blood everywhere….calling 911….racing to the hospital and then her having to be x-rayed…stitched and bandaged up. We had to take her to a hand specialist a week later….but everything was fine. She lives with two massive scars on her arm and a scar across her eyelid…..but she’s as gorgeous as ever! Please, please, please reconsider leaving the glass in the cabinet or else put the hutch back up high where it should be….and learn from our horrible experience that glass and children don’t mix. My husband refuses to have any furniture with glass doors in our home anymore. I’m sorry to sound so negative, and I LOVE cabinets with glass doors..,,but I would HATE to have anyone go through this type of experience like we did!!!!!
Hi Sharon,
Thank you for your concern…I too was afraid of the glass and I plan on adding a protective acrylic paper or some sort to keep from the glass shattering. If you have any other suggestions I would appreciate that as well! So sorry to hear of your daughters injury, but glad she is doing well!
This is such a stunningly beautiful piece. Bravo!
Thank you so much Laurel!
This project is amazing. I have a piece similar in my basement wondering what to do with it. Now I know. Just one question, you didn’t say anything about sanding the original, did you. It would save alot of work if I didn’t have to 🙂
Hi Mary! Thank you so much. I did not sand the piece, because the DIY Chalk paint is able to stick to the furniture well that it does not require any sanding or priming. I think if I had to sand furniture before, I would never have painted half the furniture in my house lol way too much work! Hope this helps : )
I know I am late to the party but oh my goodness you are a furniture GENIUS!!! I love this, I wish I had the perspective to see furniture and do something like this!!! It is absolutely gorgeous!!!
Thank you so much Lisa! So sweet of you to say : )
This is gorgeous!!!! I an inlove with the antiqued mirrors!!! Genius!!!!
Thank you so much Jessica! I love the antique mirrors, I wish I could them some where else in my home!
Thank you so much for your wonderful tutorial! I am redoing a hutch that is almost identical to yours. I need to add the bun feet as well and am researching how to do it. I have used the looking glass spray before and just love it, but I had not thought of using it on the glass doors! How clever! I think I will have to try that! I think I will do them while I have the hutch on its back to attach the feet though so I can avoid the dripping issue with the glass spray. A million thanks!
That’s awesome Kitty! You’ll have to send me a photo when it’s complete. Definitely, recommend spraying while the piece is on it’s back it will make it 10 times easier.
This is adorable! I love the idea of feet and the mirrored effect is perfect for any little girl. Love!
Thank you so much Larissa!