Restoration Hardware Look for a DIYer’s budget
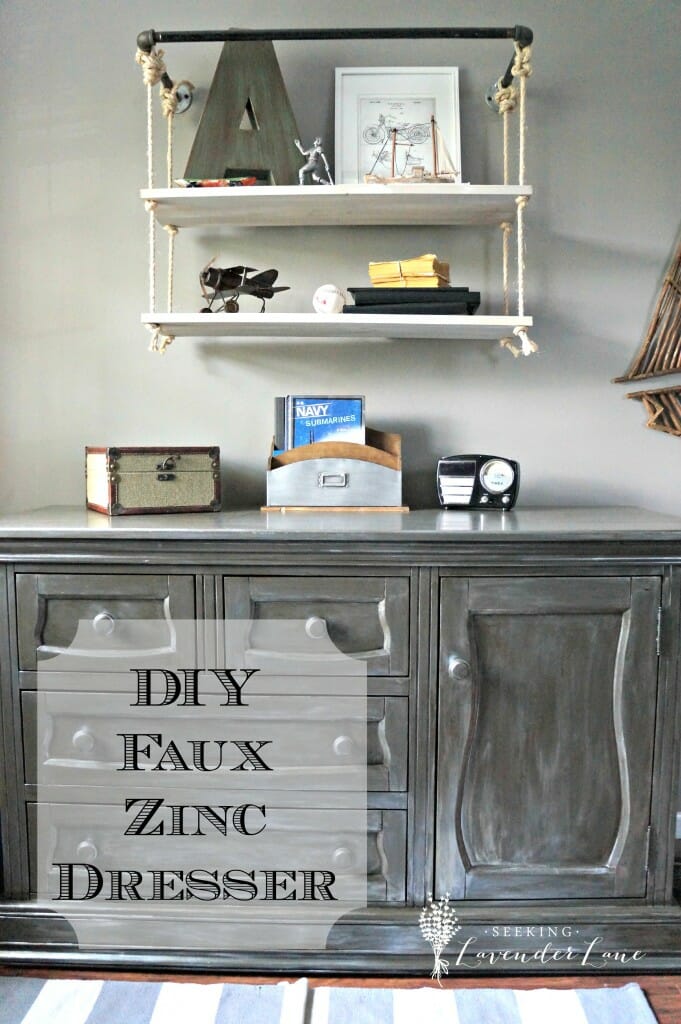
Well…9 months later and my dreams came true…the shelf is done and yep it looks pretty industrial and marvelous too me : )
I thought since this project was pretty much put together by my man I’ll have him fill you in on all the details and materials to make this one possible. I have to admit I would be a pretty sad DIYer without him. He is not only my best friend but now he’s my partner in DIY!
Let me introduce you to the man behind the scenes…my hubs Dan!
How you doin’ How you doin’, So I’m the unsung hero, the Offensive Lineman and my Wife is the quarterback. I do all the work and but she gets all the glory! So I relished this opportunity to guest star on this family sitcom of DIY and reveal how the magic happens…
First off I must say that every time Wifey leans over to me, in the middle of me watching the game, and says “Babe this is so cute, I’m obsessed, We have to do this!” I begin thinking how ridiculous this next brilliant idea will be and how much it will most likely frustrate me. So I wait…A silent protest if you will… Naturally, it will take her 3 or 4 times to get my attention as I sit there in my vegetated state hypnotized by how much the NY Mets drive me crazy. Then I tell myself “Don’t make eye contact” The same type of eye contact you should never make with a puppy at a pet shop, because when you do…you fold like a lawn chair.
So in this case, I accidentally made eye contact with “the look” and I could not resist the piercing eyes and pretty eyelashes batting at me coupled with that angelic smile… Yeah, I folded…However not before I was able to negotiate a deal…I’ll just leave it at that, lol.
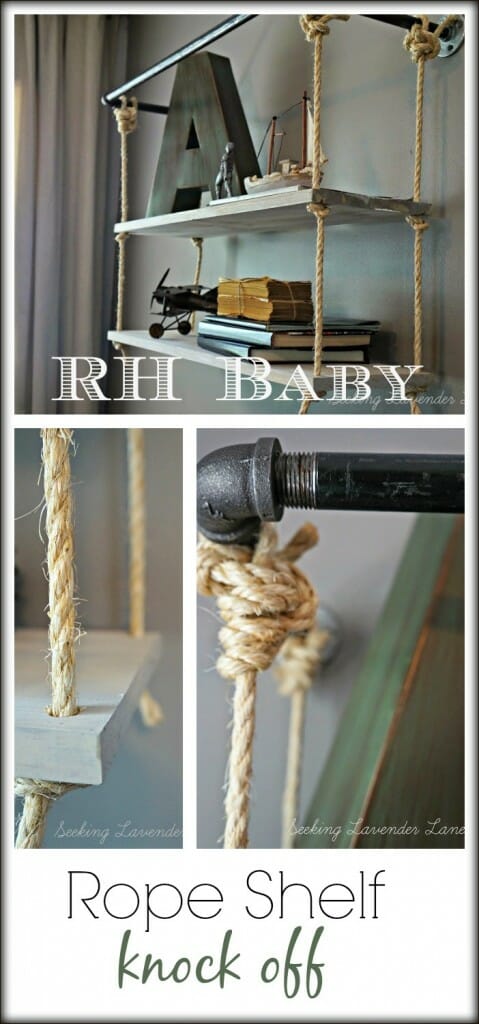
Now the project. She showed me a picture of this shelf thing. Looks so easy, doesn’t it! To a decorator – Yes, to a Builder – No.
Here’s what I first thought:
-How do we make the shelves level by tying knots in rope?
-Where am I going to find pipe the same size as the shelves?
-How am I going to make this heavy pipe frame sturdy hanging off the wall?
-Why do people like Jello…?
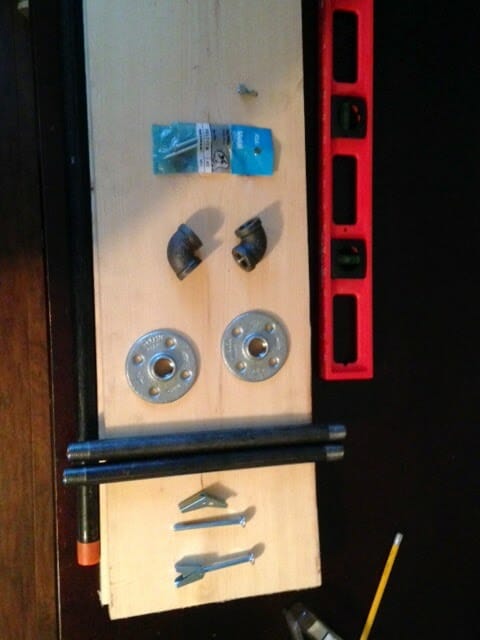
So off to Loews I go to begin my Quest! Below is exactly what I bought:
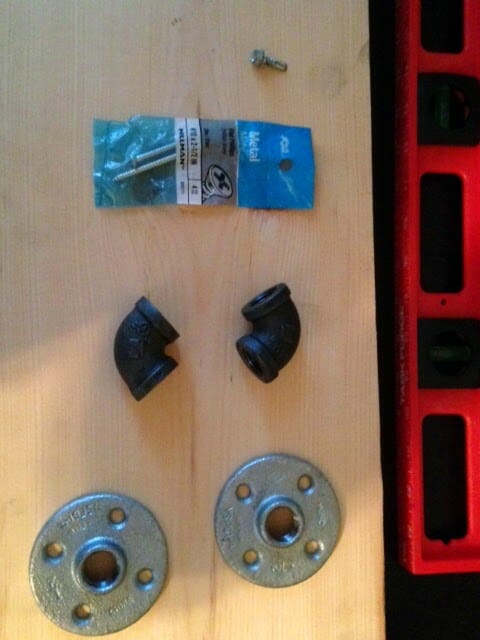
-Pipe aka Conduit. They only come in certain sizes so I picked the length that most resembles the size of the shelf. 1 longer and 2 shorter
-90 degree (angle) Elbows to connect the pipes.
-2 Flanges to screw to the wall to hold everything
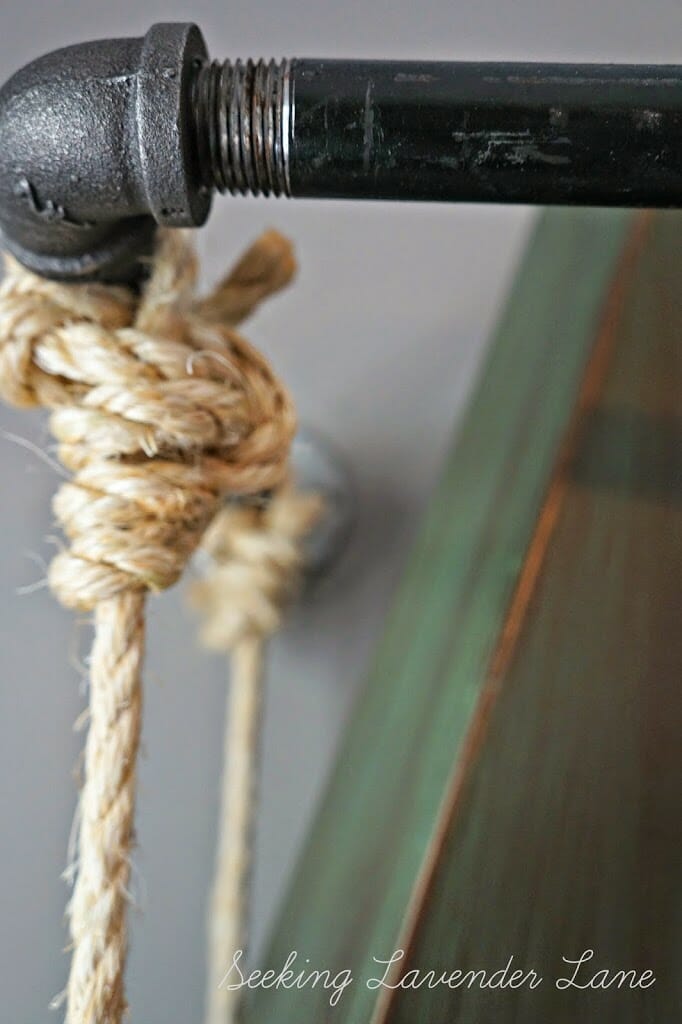
-Toggle bolts – this is key! do not use screws and plastic anchors, it’s not strong enough. Use toggle bolts which you fold down the wing nut and push it through the wall (and the flange of course) and then it opens up like an umbrella behind the wall for a stronghold.
-Wood for shelves – I took the pieces of pipe I bought and put them all together to make the frame, got a piece of wood, brought it to the Cutting Machine in Lowes, and asked the guy: Do you like Jello?? No answer, so then I told him to cut me out 2 shelves the exact size of this pipe frame that I made. Of course, he looked at me curiously…so I said: “My wife made me do this.” Right then he totally understood and smiled and shook his head; symbolic that he understands my pain…Its a guy thing…
I’m home now ready to build, Wifey is beyond excited. So here’s how the magic happened:
-Hold the pipe frame up to the wall (with flanges on) and mark out the holes with a pencil.
-Disassemble Pipe frame
-Put toggle bolts through the flanges, then put the wingnuts on behind the flanges.
-Line them up with holes, insert toggle bolts, screw tightly, but not to tight.
-Re-Assemble frame – a bit tricky actually because one section will not be able to be tightened fully, so you will have to tighten one pipe halfway between two points. No matter how I explain this it makes absolutely no sense, but just do it and you’ll see what I’m sayin’
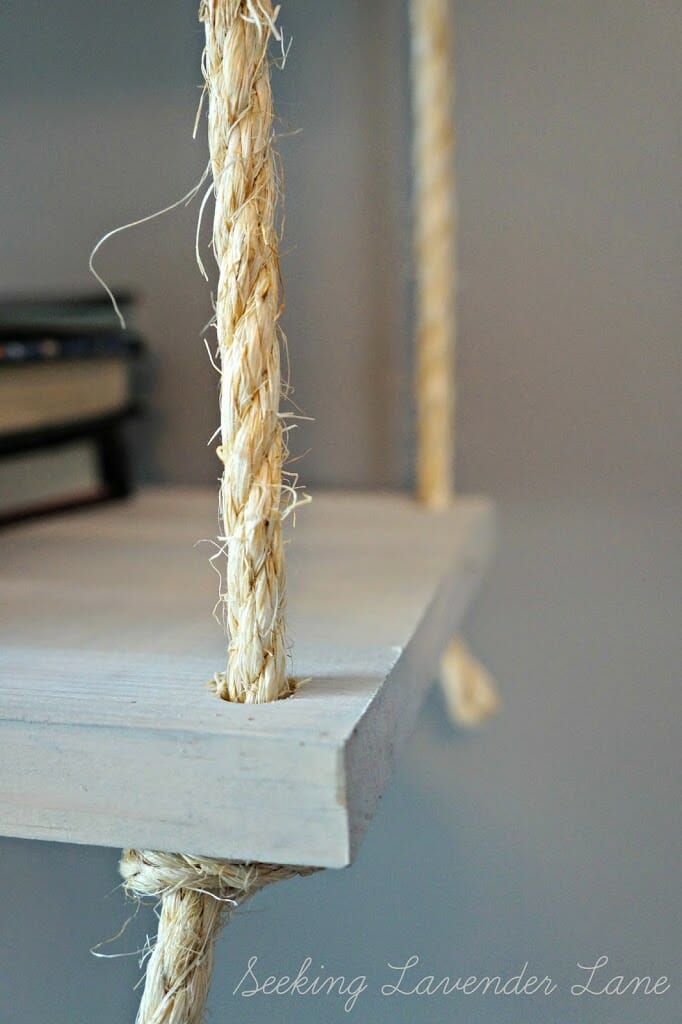
-Drill 4 holes in each shelf (the size of rope) A small spade bit works well.
-Tie 4 long pieces of rope to pipe frame (the sides) Good luck with the fancy knot at the top, if your an eagle scout your good, if you have fat fingers like I do, you tie one giant knot
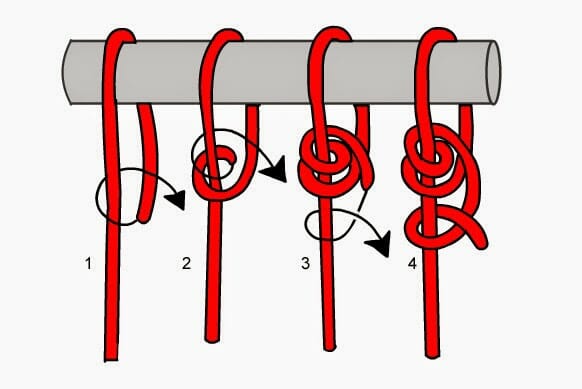 |
| Hitch Knot is what we attempted |
-shove rope through holes of the first shelf.
-Use a level while tying knots under the shelf to ensure even
-do again for the second shelf
-Pour mixture into a bowl, add 2 cups of water, whisk vigorously, set in the fridge and be amazed the next day.
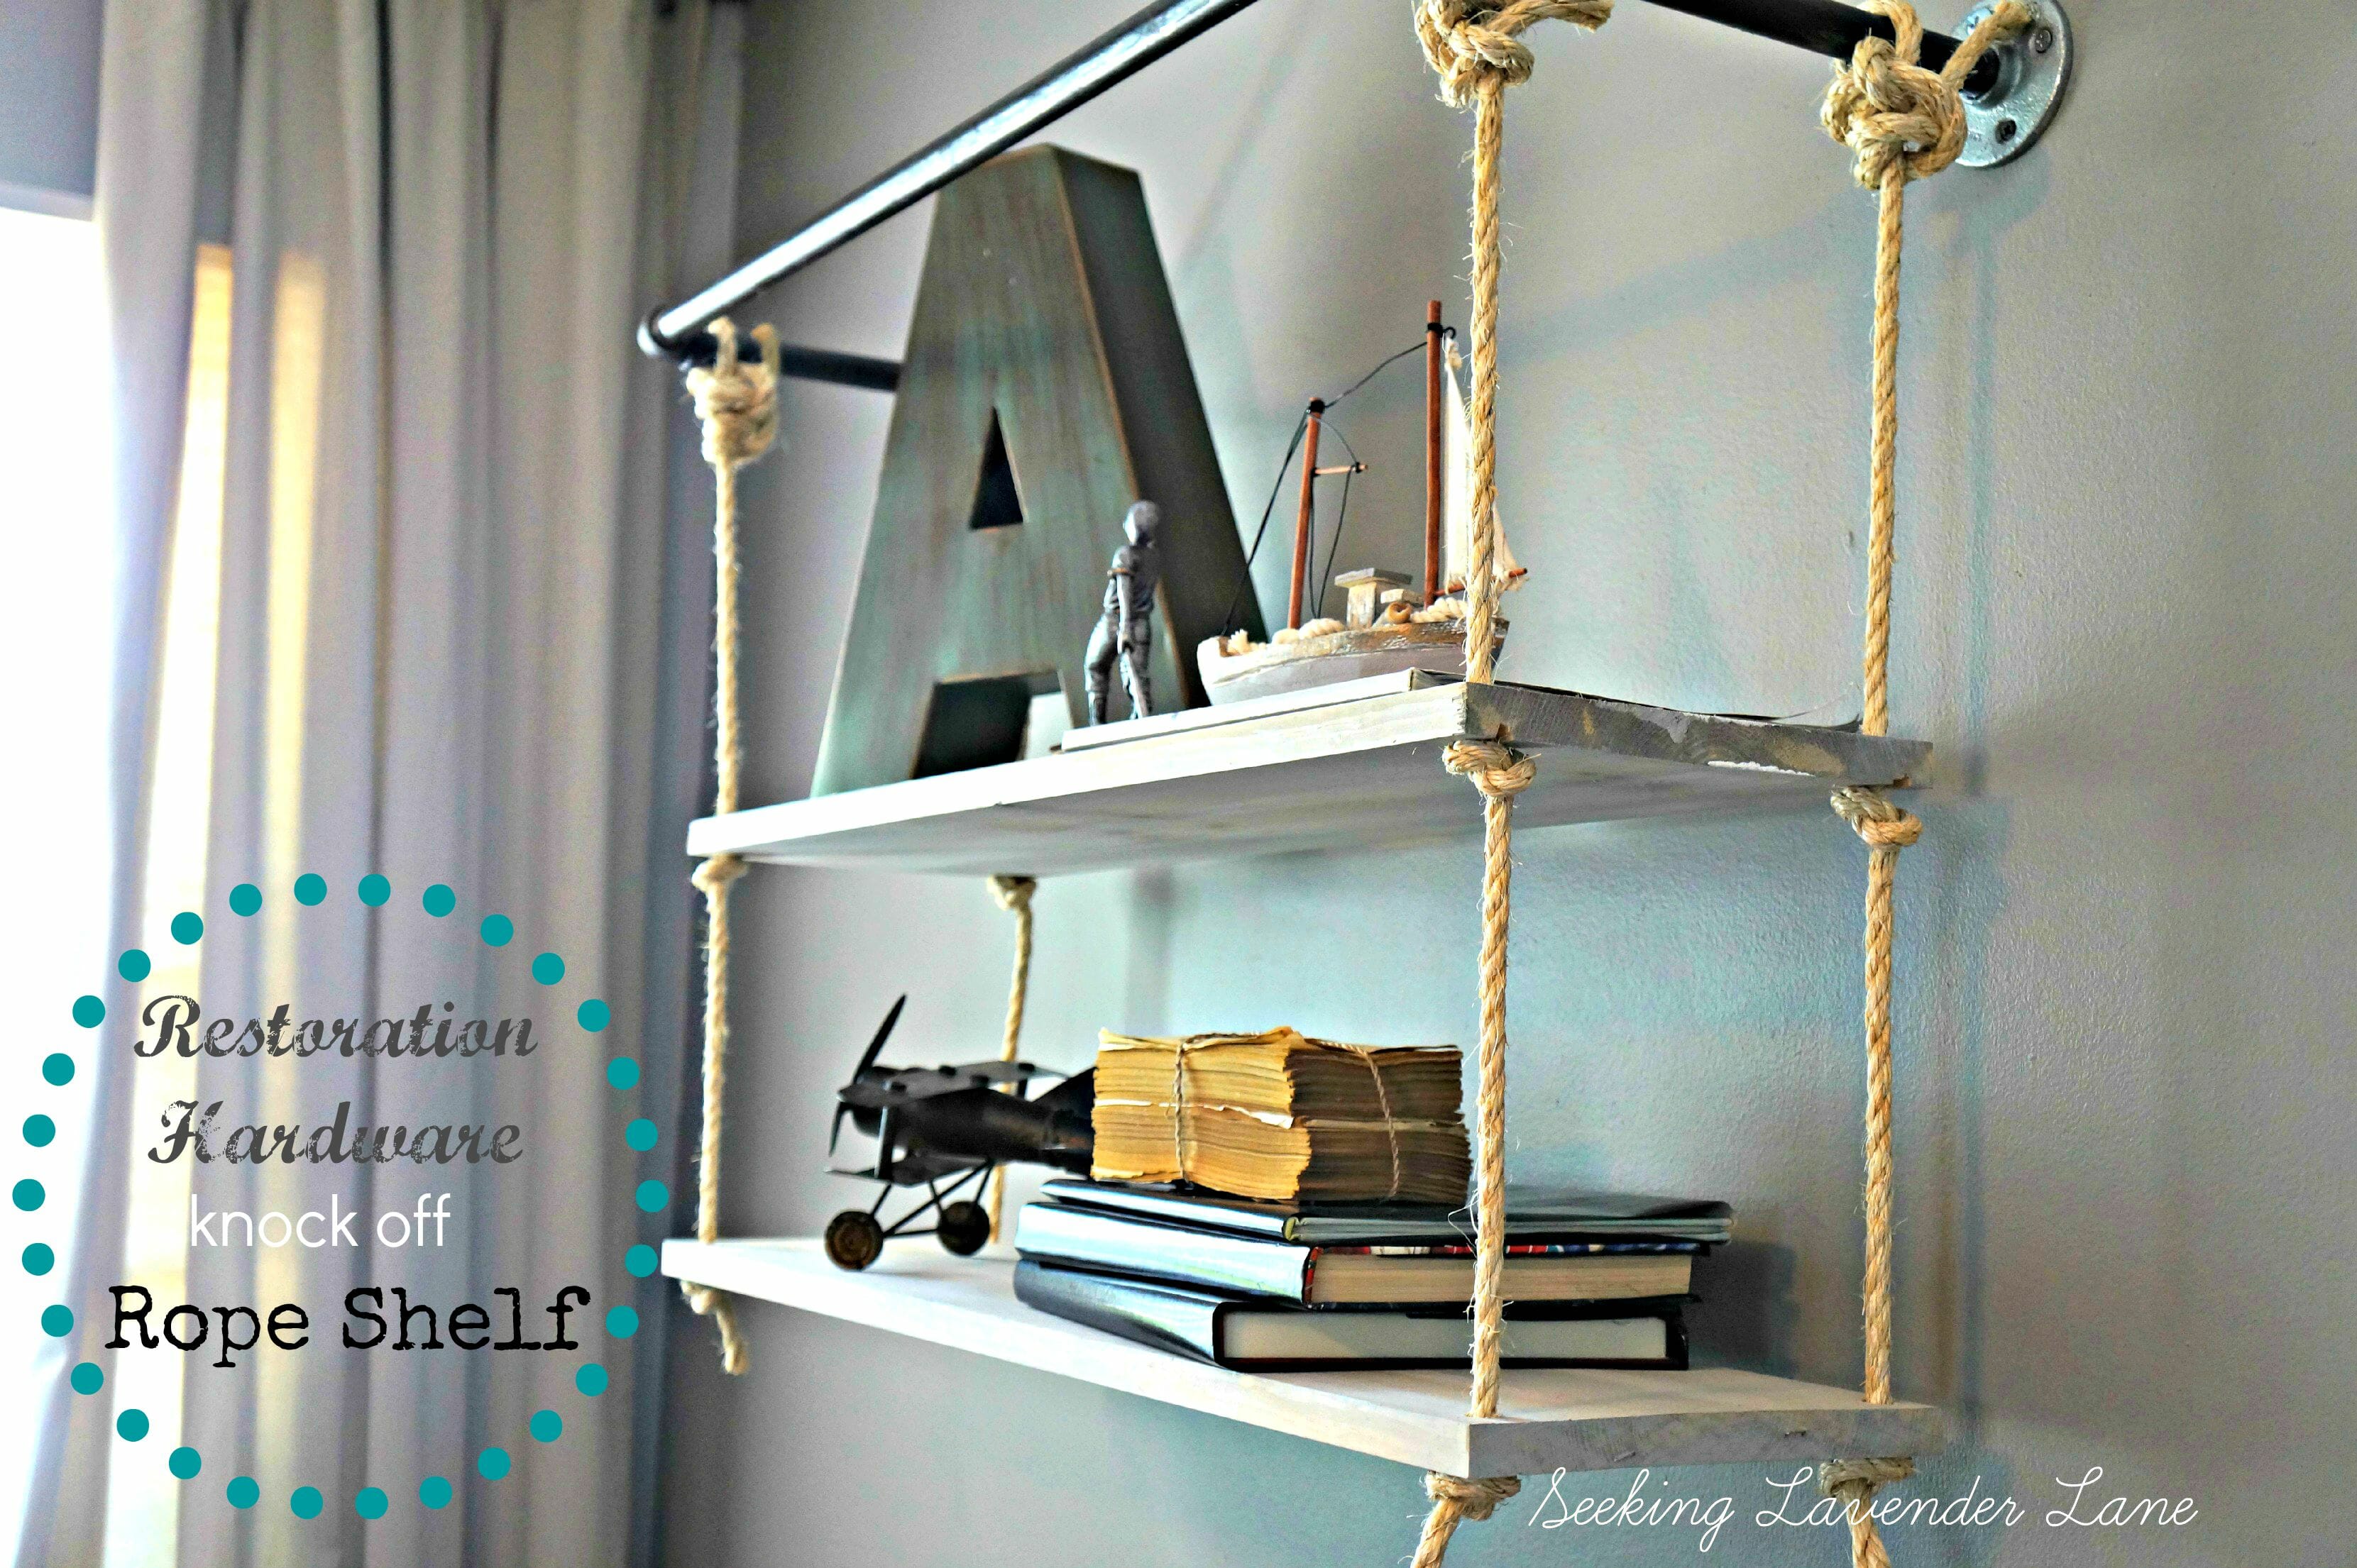
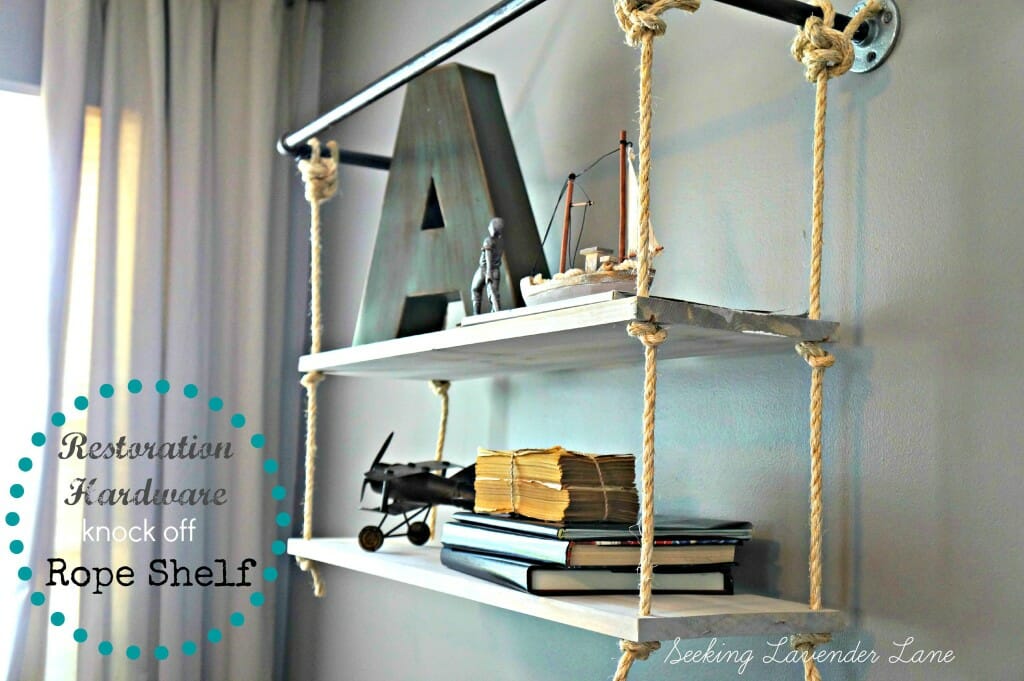
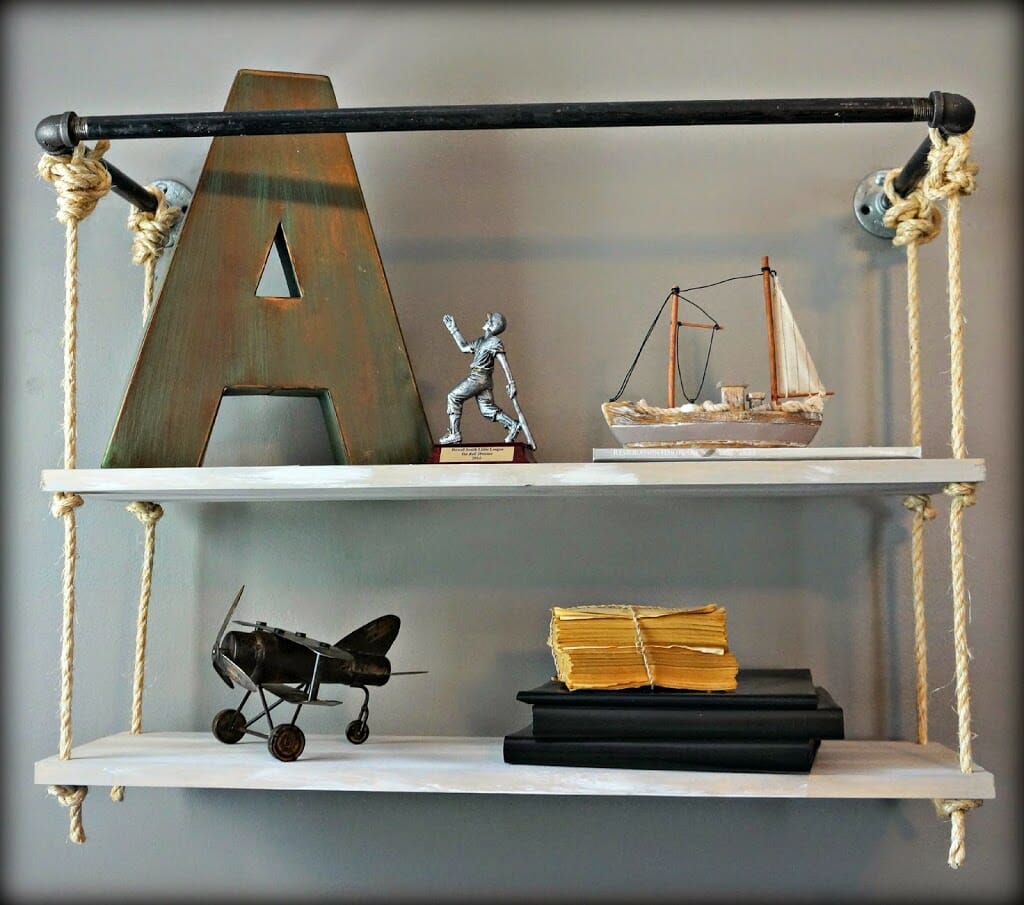
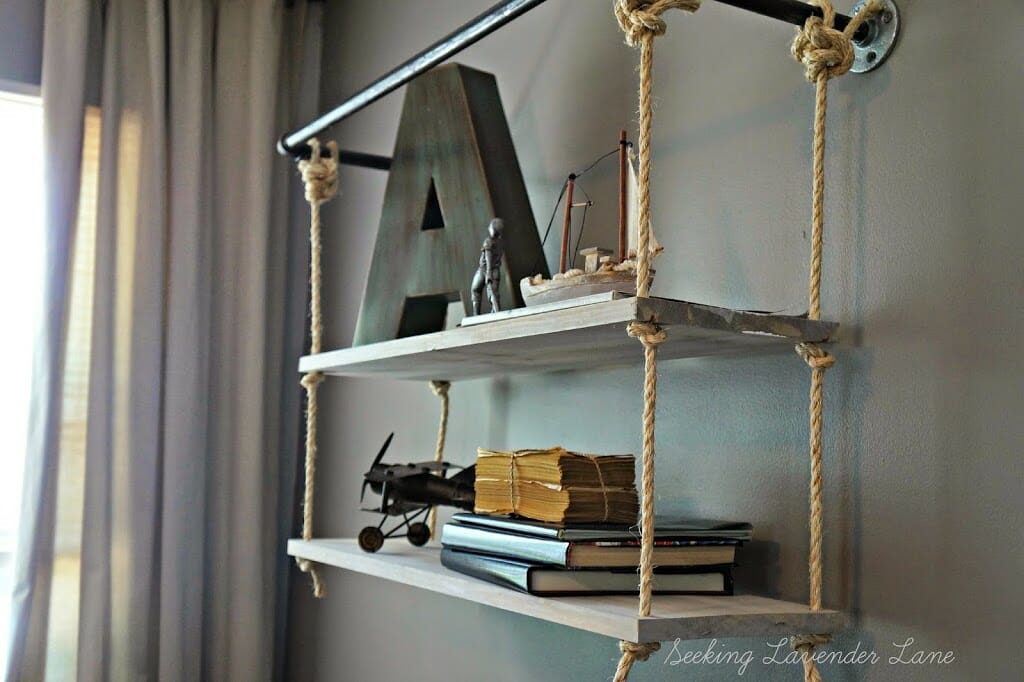
That’s how it’s done, I look forward to chatting with you all next time! Enjoy some photos of the shelves.
Yep! That’s my man…did I get the jello joke? nope! but that would be Dan’s sense of humor…complete randomness.
Thought I would mention that the wood we bought to create the shelves I grey washed with a mixture of half grey latex paint and half water. Then I dry brushed grey marks and dry brushed white marks to give the wood a distressed feel. You can do just about any finish on the wood. Stain it dark, paint it white, or blue…so many options to make it your own. The one thing I wish I had done before assembling is dip the rope in some stain just to give it a more aged look.
All together this project probably cost us around $45. We did already have the rope and paint or else it may have been closer to $60. Quite the steal considering the RHbaby shelf cost just about $300
Hope this inspires others to flip through RH catalogs, tap your hubby on the shoulder, bat those eyelashes, and create a pretty awesome piece just like this.
PLEASE STAY A WHILE






25 Responses
Deb, this is fantastic! Great job and way to save on the price tag! Thank you for sharing and thank you for the visit and sweet comment at The Dedicated House. It means the world. Feel free to share this post at my Make it Pretty Monday party which is still live. Here is the link if you want to check it out. http://www.thededicatedhouse.com/2014/07/make-it-pretty-monday-week-106.html Hope to see you at the bash! Toodles, Kathryn @TheDedicatedHouse
Thanks so much Kathryn! I def stopped by and shared this link!
This looks great, perfect for a little boys room 🙂
Thanks Michelle!
This is fantastic! Love the styling you did. The rope is fun – I never would have thought to hang shelves with it!
Thanks so much Erica! I have to say not my original idea…stole this from RH baby, but it definitely takes an ordinary shelf to the next level!
Lovely idea Deb!!
Thanks Michelle! : )
This is awesome, what a fun shelf idea! Thanks so much for sharing at The Makers! Pinned 🙂
Thanks Katie! Love sharing every week at The Makers. I appreciate the Pin!
I seriously love this! Now if I could just adapt it to the slanted walls in my craft room…
Thanks Jamie! Not sure how that will work, but if you do I would love to see how that turns out!
I love a good knock-off, and this one is amazing! Thank you for including such detailed instructions- this is going on my “to do” list!
So glad I inspired you to possibly try this one out Amy!
What a fun shelf! We are about to move and I can’t wait to go get settled and get making things like this!
yeayy! good luck on the move…hope you try this project out!
Very cute and I love that you used the pipes! Thanks for sharing on Worthwhile Wednesdays! I hope to see you again tomorrow!
~Allie http://thecraftiestallie.blogspot.com/
This is so beautiful. I love your style! I love how you do it on a budget but nothing looks cheap. Just really enjoy your home posts.
Thank you so much Leslie! You are just so sweet…love when you stop by!
I love industrial décor and I love this shelf! Pinning so I will remember for my next house (or next time I redo a room – but I need to stop before my husband kills me!)
Stacy
Thanks you Stacy! Yep…my husband wants to kill me almost every day lol
This is so amazing! I know it is a older post, but I saw it at the bottom of your letter post. I have done pipes, and shelving, but the rope is a great idea. I also love how you added the accessories! Now I am trying to think where I can put something like this in my house!
Emily, Our house now a home recently posted…HomeEdit Canvas Wall Art
Thanks again Emily! This has got to be one of my favorite projects that me and hubby did. It really adds a dramatic factor to my sons room. 3 shelves would be adorable too!
Thanks for sharing! I think we are going to attempt this for our nursery. How did you get the rustic look on the wood?
Hi Jessica, yay how exciting! I painted the boards in a light gray and then went over with a white dry brush technique, and finished with some dark wax.