


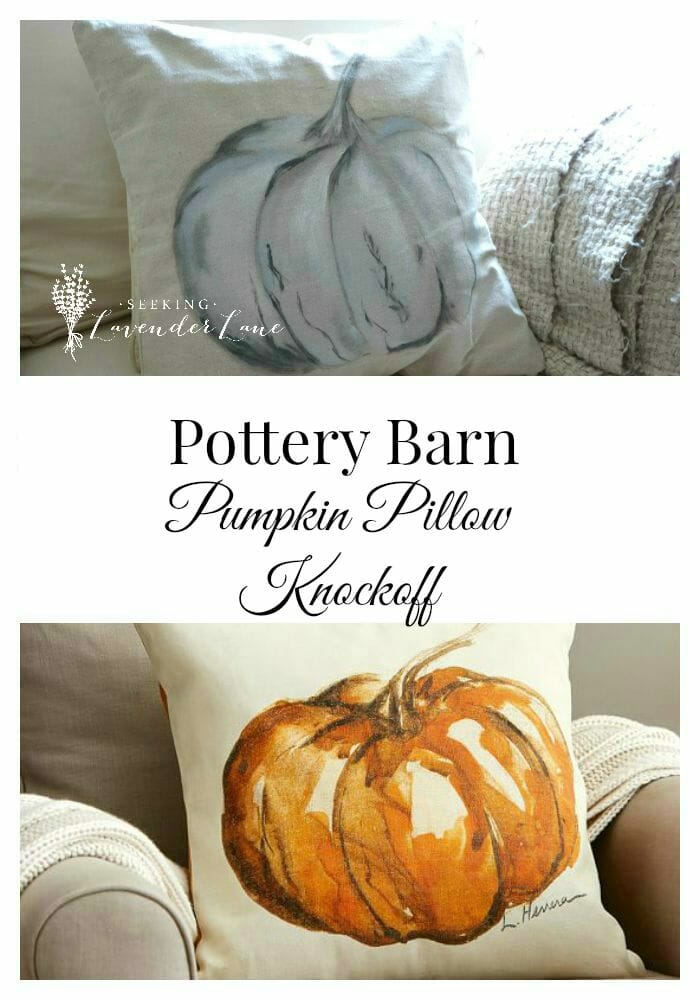
Painted Pumpkin Pillow: Pottery Barn Inspired
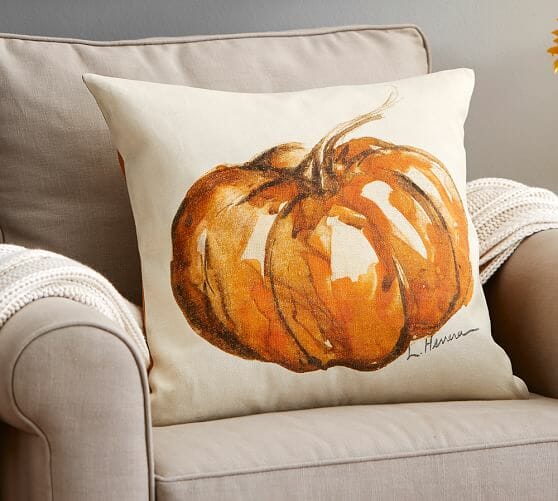
I am loving, getting my home ready for the Fall season. I am especially loving what some of the retail stores are selling for fall accessories. Did you check out my post from yesterday? I shared 10 Accessories to start your Fall Decorating. I shared one item in particular, this Pottery Barn pillow that just caught my attention about a month ago. It’s a beautiful Pumpkin hand painted pillow, that has such a homemade feel to it, but still so chic. I was inspired to paint my own Pottery Barn Pumpkin pillow, but in neutral colors.

Pottery Barn’s pillow
Well the brain started rolling on how I can possibly make one on my own. You know not spend between $30-$40 on a seasonal pillow that will only be sitting on my couch for two months or so. So I began to think if I can either make a pillow cover or find one for cheap to cover an existing pillow that I don’t use, I could probably try to hand paint the pumpkin.
Well the thought of sewing…was not happening! I am not one to have the patience to sew or really the passion to. So I decided that I could just easily find a pillow case somewhere and if I do than I would test out my painting skills. Well the fabric aisle in Hobby Lobby had exactly what I needed. A canvas pillow case for $4.99…was calling my name!
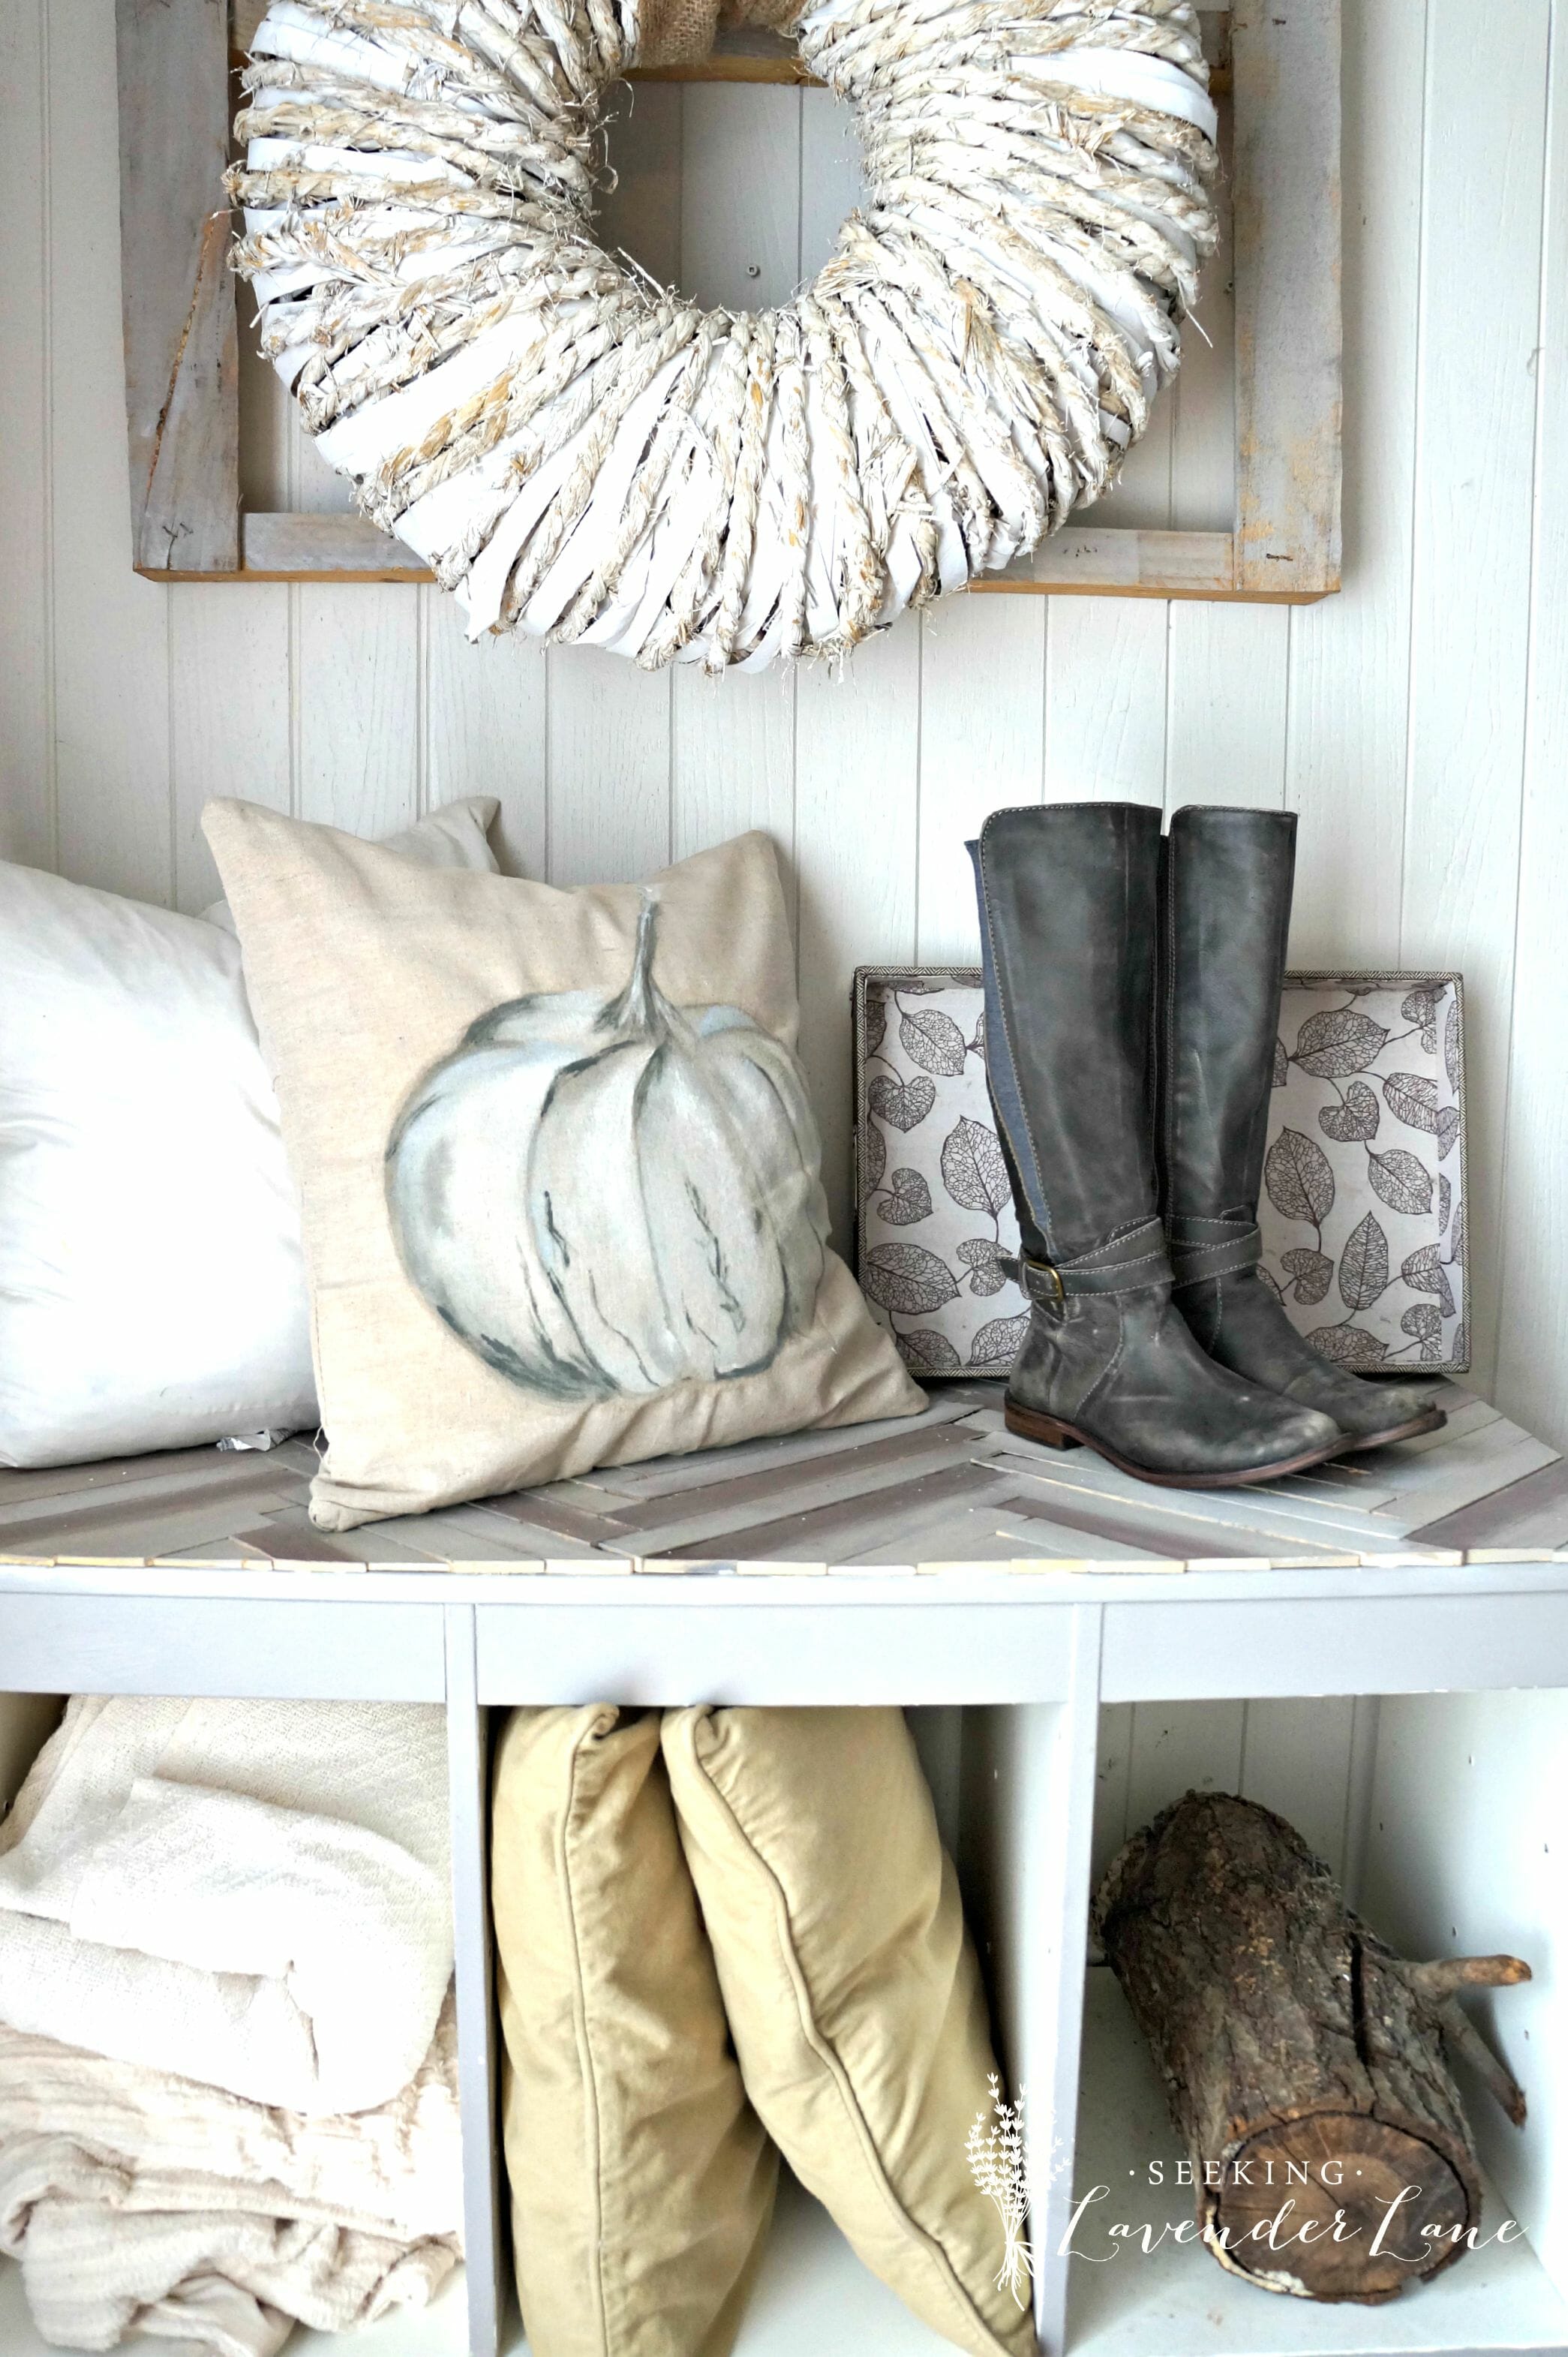
Into the cart…she came….and home I went to try this out. I mean $4.99 was a good price that even if I messed this up, I was not wasting too much money on this. I decided to use acrylic paint since that is what I had on hand. Now, I love the look of the Pottery Barn’s pillow with the orange and yellows, but for my house I prefer neutrals so I decided to try this out with white, light gray, and dark gray. I took a paper dish and applied the blobs of paint of my choice of colors. I grabbed a foam brush (because that’s all I had in my craft basket) and a cup of water to water down the paint. The water was really important to use because it helped gain control of the colors I was using. This way layering the colors and go darker as needed.
Supplies
Acrylic Paint

water
pencil
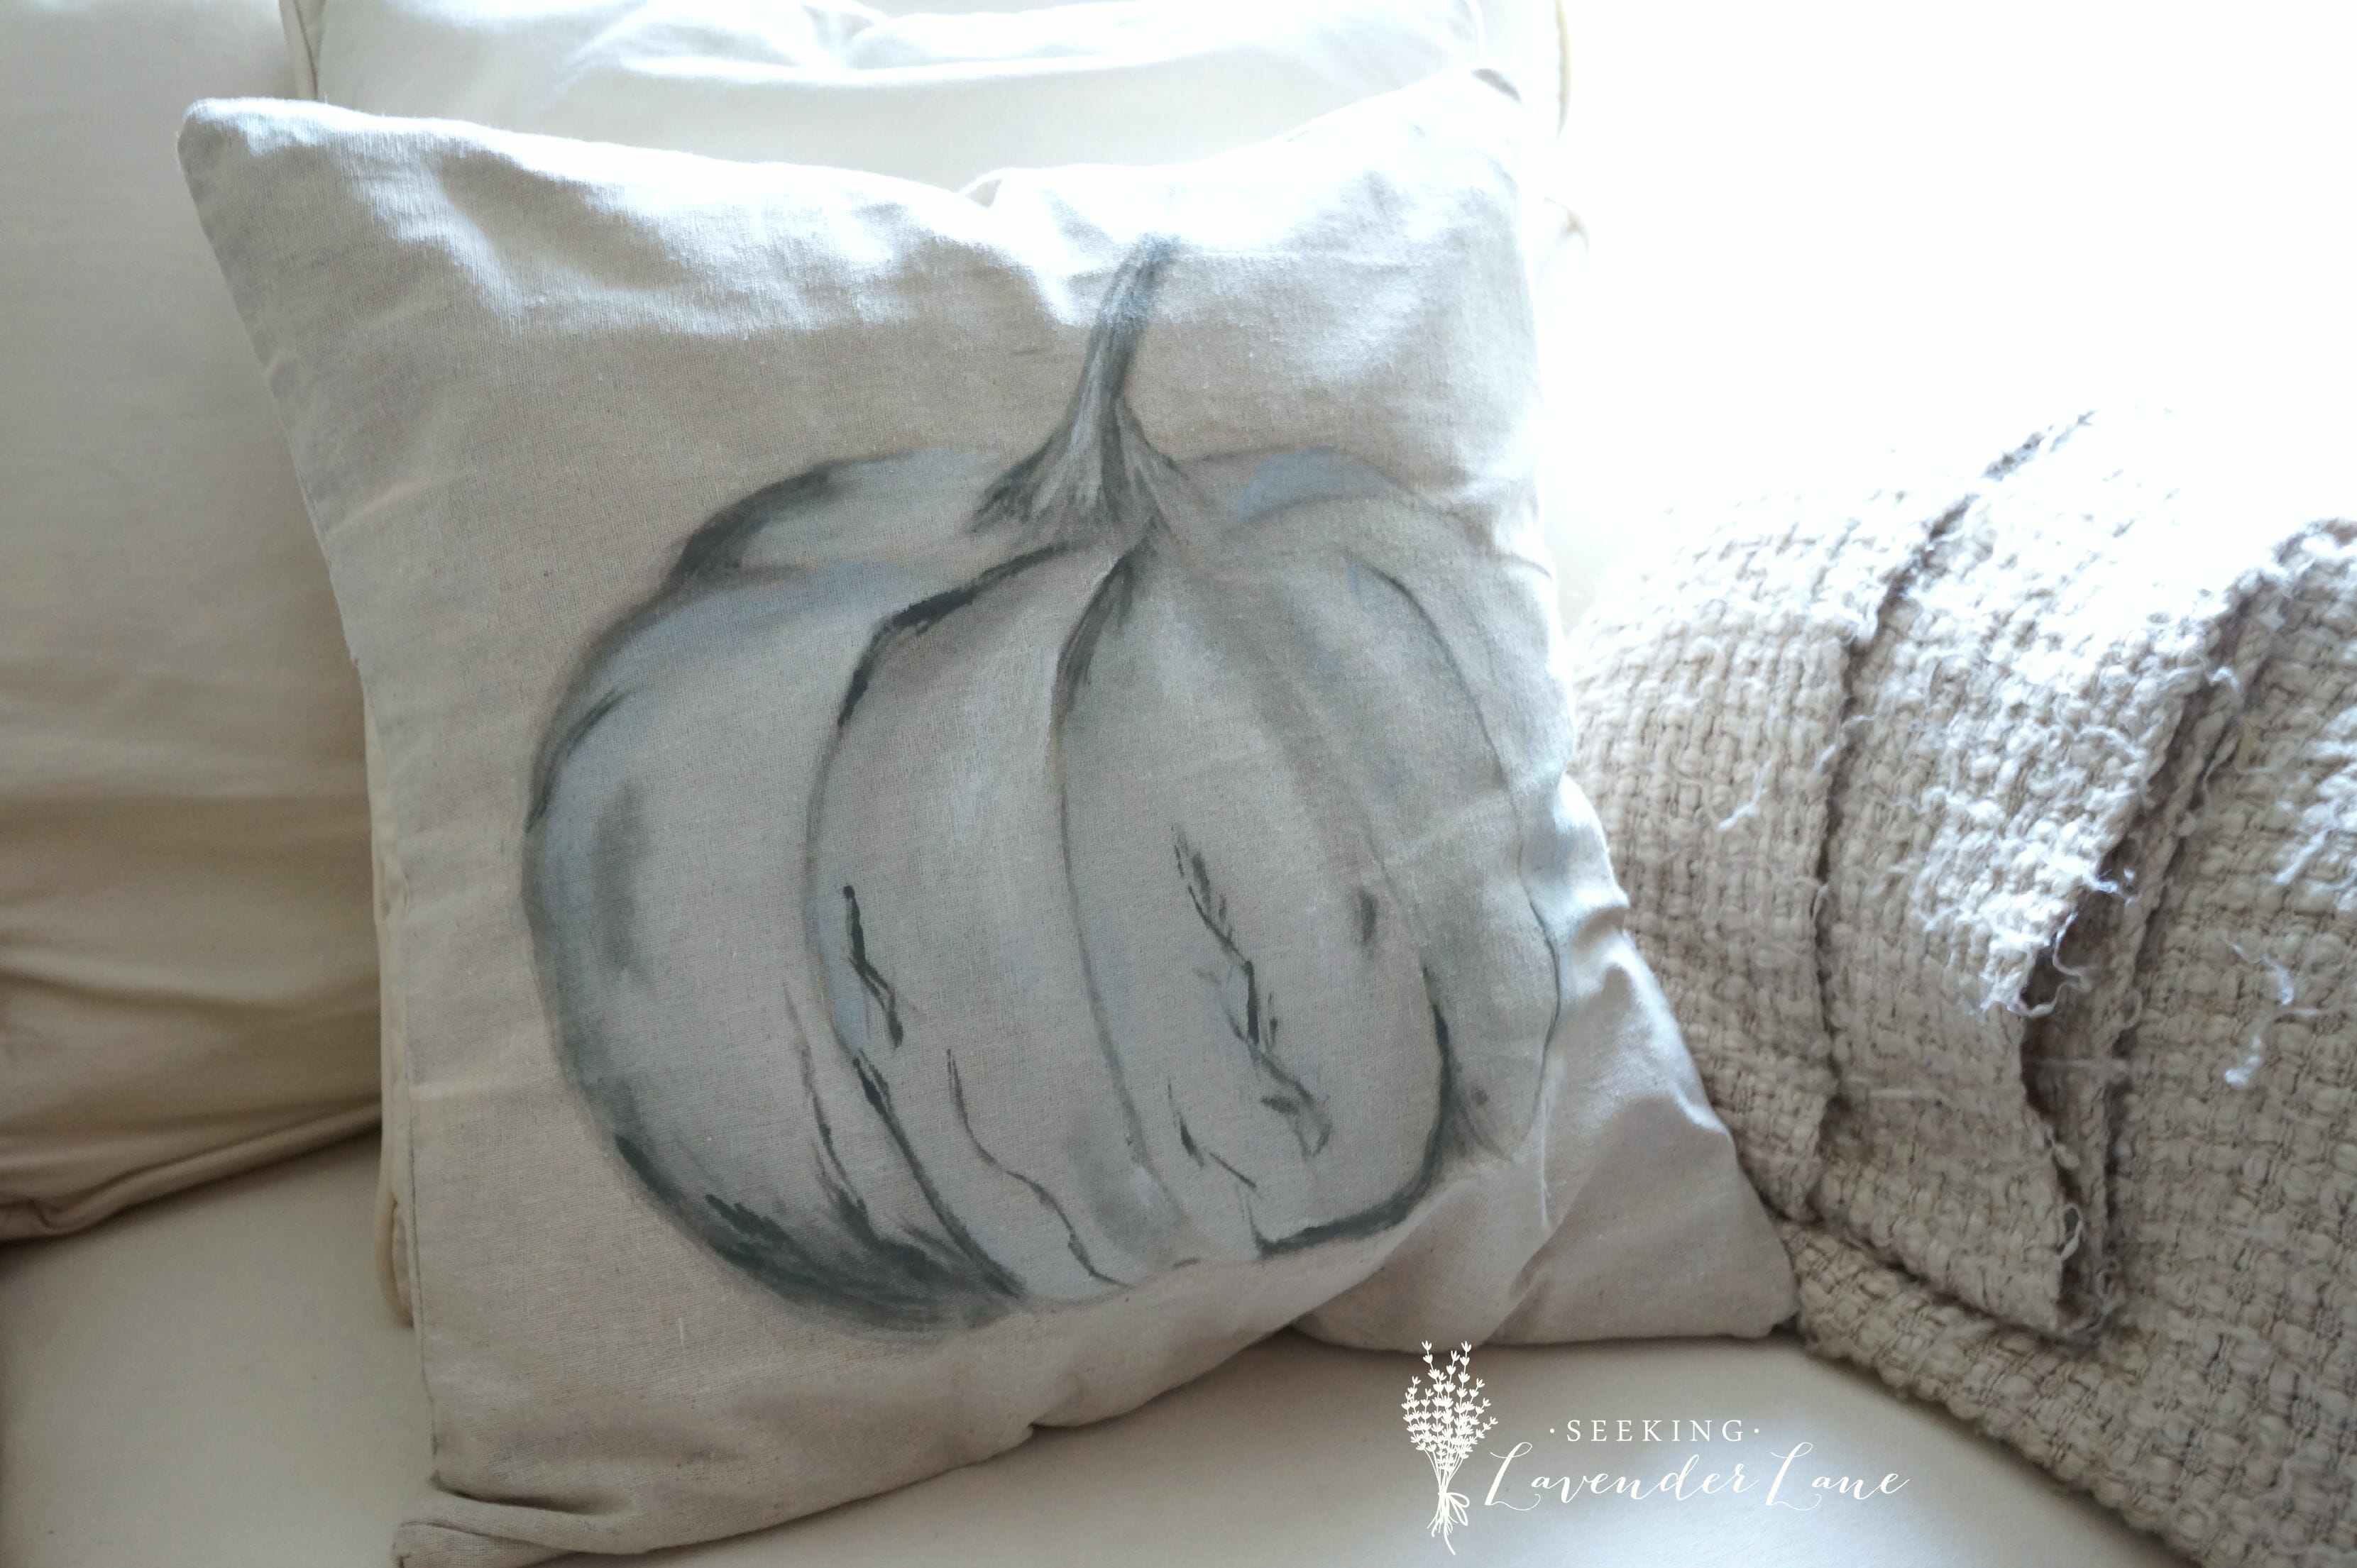
Before I painted the pumpkin I wanted to sketch it out first. I took another paper dish and marked out the edges of the pumpkin so I knew how large I could go…not going too close to the edge of the pillow (probably about 1.5″) Well once I did that I began to sketch out the pumpkin. I copied the PB image the best I could…if you are not great at hand drawing finding a stencil could help. I think what is important about the pumpkin here is that it has 3D shape to it so try your best at creating the 3D look. Once I finished sketching I darkened the areas of the pumpkin using the pencil (that were dark in the photo) So I knew right away where to start my contrast with the paint.
Adding shadow and contrast to the areas that the picture has and highlight (white) where the photo shows, using your acrylic paint. Once again having the water there helps to avoid too many mistakes since you can apply lightly and add as you go.
And that’s all! It was a fun project to do and I have not painted a “picture” in a long time so it was a really relaxing craft. No pressure is the best way to go about this. Knowing that the pillow cover was only $4.99 helped and if all else failed I would not have to do this post haha. I think if I can pull this off so can you….you know your artistic abilities and you don’t have to be a great artist to pull this one off. Having the “home made” look is what this pillow is about and could even be a great craft to have your kids do if you did not want to take this one seriously.
Update: Facebook Live Video on Painted Pumpkin Pillow

Linking with: http://savvysouthernstyle.net
PLEASE STAY A WHILE
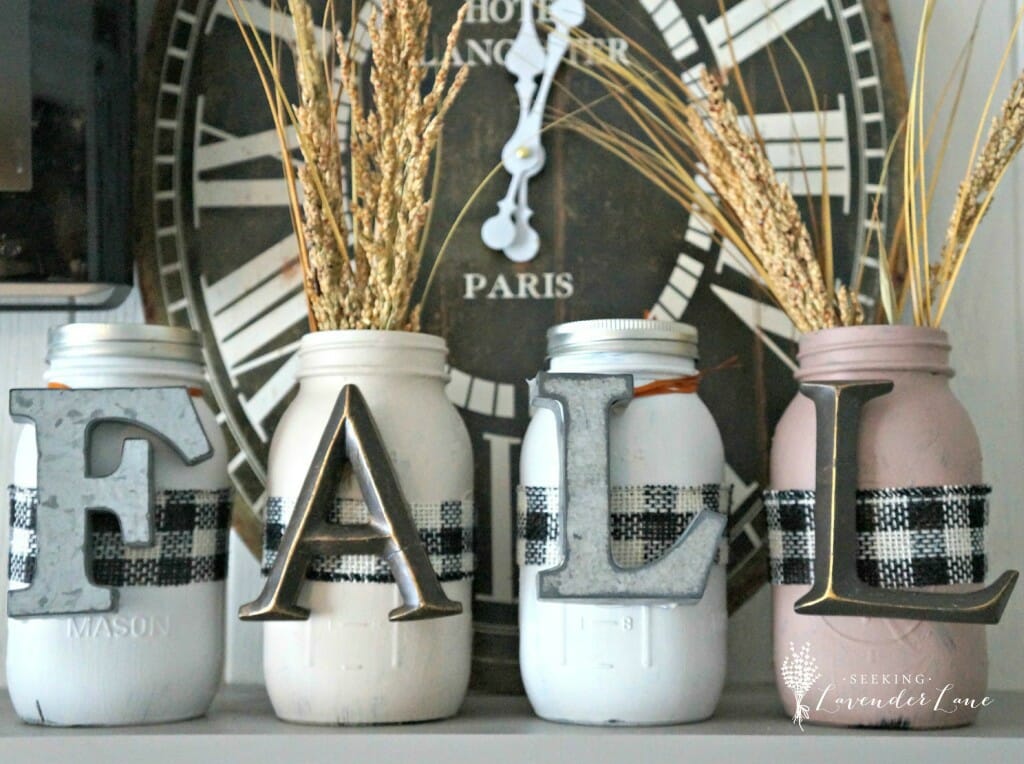
Fall Mason Jars Family Project


57 Responses
Perfect! It’s as good as the original and in your colors! Love it!
Lynda @ Gates of Crystal
Lynda Brandly recently posted…A Fall Centerpiece in the Dining Room
Oh Thank you so much Lynda! I feel like I should take up painting after doing this…it was so fun!
Wow! This is beautiful. Great job!
Karrah @ Mrs.DoItHerself recently posted…Create A Spook-tacular Halloween Tree
Thank you Karrah!
I love the pillow and the neutral colors! You did such a great job! Do you have a template of the pumpkin you could share?
Benita recently posted…To Be Completely Honest….
Hi Benita,
Thank you! I don’t, but maybe that’s something I can add to the post. Love that suggestion! I’ll send you a message if I can whip one together : )
I would love it if you could. Since I am “craft-challenged”, I need all the help I can get. I much prefer neutral colors also and this is perfect! 🙂
Benita recently posted…To Be Completely Honest….
Just for you girl! I’m going to figure out how to do that this evening : )
You are so awesome!!! Thank you so much!! 🙂
Benita recently posted…And So, It Has Begun….
Love this, I’ve been thinking about this one before I saw yours in the neutral colors. I did the same thing last year with the snowman from PB. https://www.facebook.com/kathy.miller.1806/posts/10201869677917892
Oh that’s awesome Kathy! Yea, the neutral colors just work better with my home…so even if I wanted to spend that extra money on their product I wish they had come up with a white and gray option. The snowman probably was adorable!
Hopefully, you can check the facebook post with pictures of “theirs” and “mine” versions. I included the link to the posthttps://www.facebook.com/kathy.miller.1806/posts/10201869677917892. Thanks.
Beautiful!! I love the colors in your pillow. I have been painting some seasonal words on pillows with acrylic paint. I did not use the textile medium in paint since I did not plan to wash the pillow. I also did not use acrylic fabric paint. Did you use the textile medium or fabric paint? I am asking because I didn’t know if the paint went on easier with the textile medium or fabric pattern. I have not painted enough fabric to know if it made a difference.
Hi Donna,
Thank you for asking! I just used basic acrylic paint from apple barrel that I purchased at Michaels. I watered down the paint so that really helped with keeping control of the paint and I did not have a problem with the color showing up even with the water mixed in. This is honestly the second pillow I’ve painted with this (decoration only) and I have no problem with it showing up. I probably would do more research on acrylic paints if I was going to sell the product. I hope that helps!
Thank you.
Say what?! LOVE this! Your painting skills are phenomenal! Oh and thanks for sharing where u found the pillow case! I am not a huge fan of sewing either. Pinning and sharing for sure! 🙂
Misty recently posted…Neutral Fall Mantel
Thank you so much Misty! : )
$4.99 at Hobby Lobby (so wish we had one here) was a no brainer for sure! Your knock off is just as pretty as the Pottery Barn version and I like yours better because it is neutral. Very pretty!
Marie@The Interior Frugalista recently posted…Scrabbling for Fall {DIY Banner for the Power Tool Challenge}
Thanks so much Marie : )
Wow, $4.99 for a pillow cover! Definitely a no brainer there. Your pumpkin looks great. I’ve come over from Your Turn To Shine.
Carol @ The Red Painted Cottage recently posted…Thursday’s Ramblin’ – A Little Show and Tell With Some Noosa
Thank you so much Carol so glad you stopped by : )
That is so beautiful! I’m partial to the softer tones of fall and the pillow is the perfect touch. Found your lovely blog from Your Inspired Design. All best!
Joanne @ Sea Glass Cottage recently posted…Master Bath – A Work in Progress
Hi Joanne! Thank you so much, so glad you stopped by! And thank you for your sweet comment…I agree Ilike the softer colors better.
So pretty! I actually like yours better with the soft colors.
Thank you for linking up to Your Inspired Design!
Thank you so much Gloria!
These pillows are my favorite fall decoration that I have seen this year! I love how you changed the color to a more neutral color.
Sherry@savvyapron recently posted…DIY Cloche From Thrift Store Items
Thank you so much Sherry!
Deb, I am loving your version so much more! I am just loving neutrals this fall season and your pumpkin is so calming and relaxed. I can’t wait to try the DIY. Thanks for sharing.
Michelle@DandelionPatina recently posted…Burlap and lace tablecloth wreath
Oh thank you Michelle! That means a lot!…I’m with you with the neutrals for fall : )
Oh my word. This is too cute! I have go to try this out!
Thank you so much Abigail…I hope you do!
Love the neutral twist you gave it! Beautiful vignette!
Cristina @ Remodelando la Casa recently posted…Signs from The Wizarding World of Harry Potter
Thank you so much Cristina! That means a lot!
Amaze-balls!!! I had no idea that HL had these inexpensive canvas pillow covers! I can’t wait to do something like this! Stopping by from Your Inspired Design!
Christine recently posted…Farmhouse Decor – My Mood Board Monday
Thanks Christine! Yea…I know insane right? I actually went back to get more today to do another diy pillow and they did not have anymore at my local store. I hope they get some more in asap. So glad you stopped by Christine.
You did a lovely job with this pumpkin pillow. I like the fact that you stayed with neutral colors because it will look terrific anywhere you place it. I saw your link at Courtney’s Feathered Nest Friday Party.
Hi Ann Marie thank you so much! Yes, I agree…color just does not work well with my home…and I am just so drawn to the neutral colors. I am so glad you stopped by!
I like yours better than the PB pillow. I wish I could draw. 🙂
Kim recently posted…Wow Us Wednesdays #240
Thank you Kim!
This is so pretty! I love that you saw what you liked and then made it your own. Great job and thanks for linking up to Your Inspired Design. I’m pinning this as well!
Holly McCall {McCall Manor} recently posted…To Buy New or To Slipcover? {that is the question}
Thank you Holly and thank you for sharing : )
LOVE this!! Great job painting it!
Julie @ Life of Bliss recently posted…The $100 Open Your Door Challenge (Are You Up to It?)
Thanks Julie…stepped outside of my comfort zone but had fun doing it.
I love those Pottery Barn pillows, and yours turned out great for a fraction of the price!
Julie recently posted…Hearth Room Dressed for Fall
I’m loving your take on the PB design even more than the original! Thanks for sharing at the Pretty Preppy Party – i’m featuring this tomorrow! xx, b
brett recently posted…Pretty Preppy Party Features
Thank you so much! and thank you for the feature!
I would have never guessed you painted that! Hobby Lobby to the rescue again!
Jennifer Juniper recently posted…Soul Sister Birthday Lunch!
Thank you Jennifer : )
Love those boots, where are they from??!
Thanks Beth, They are Lucky Brand (2 years ago I believe)
Beautiful! Love how it turned out!
Thanks Susan!
Thank for allowing us to tour your beautiful home. It’s so warm, welcoming, and gorgeous, that I felt as if I was there relaxing in the warmth of your home, while admiring the fruits of your hard labor. Thanks for the lovely invite.
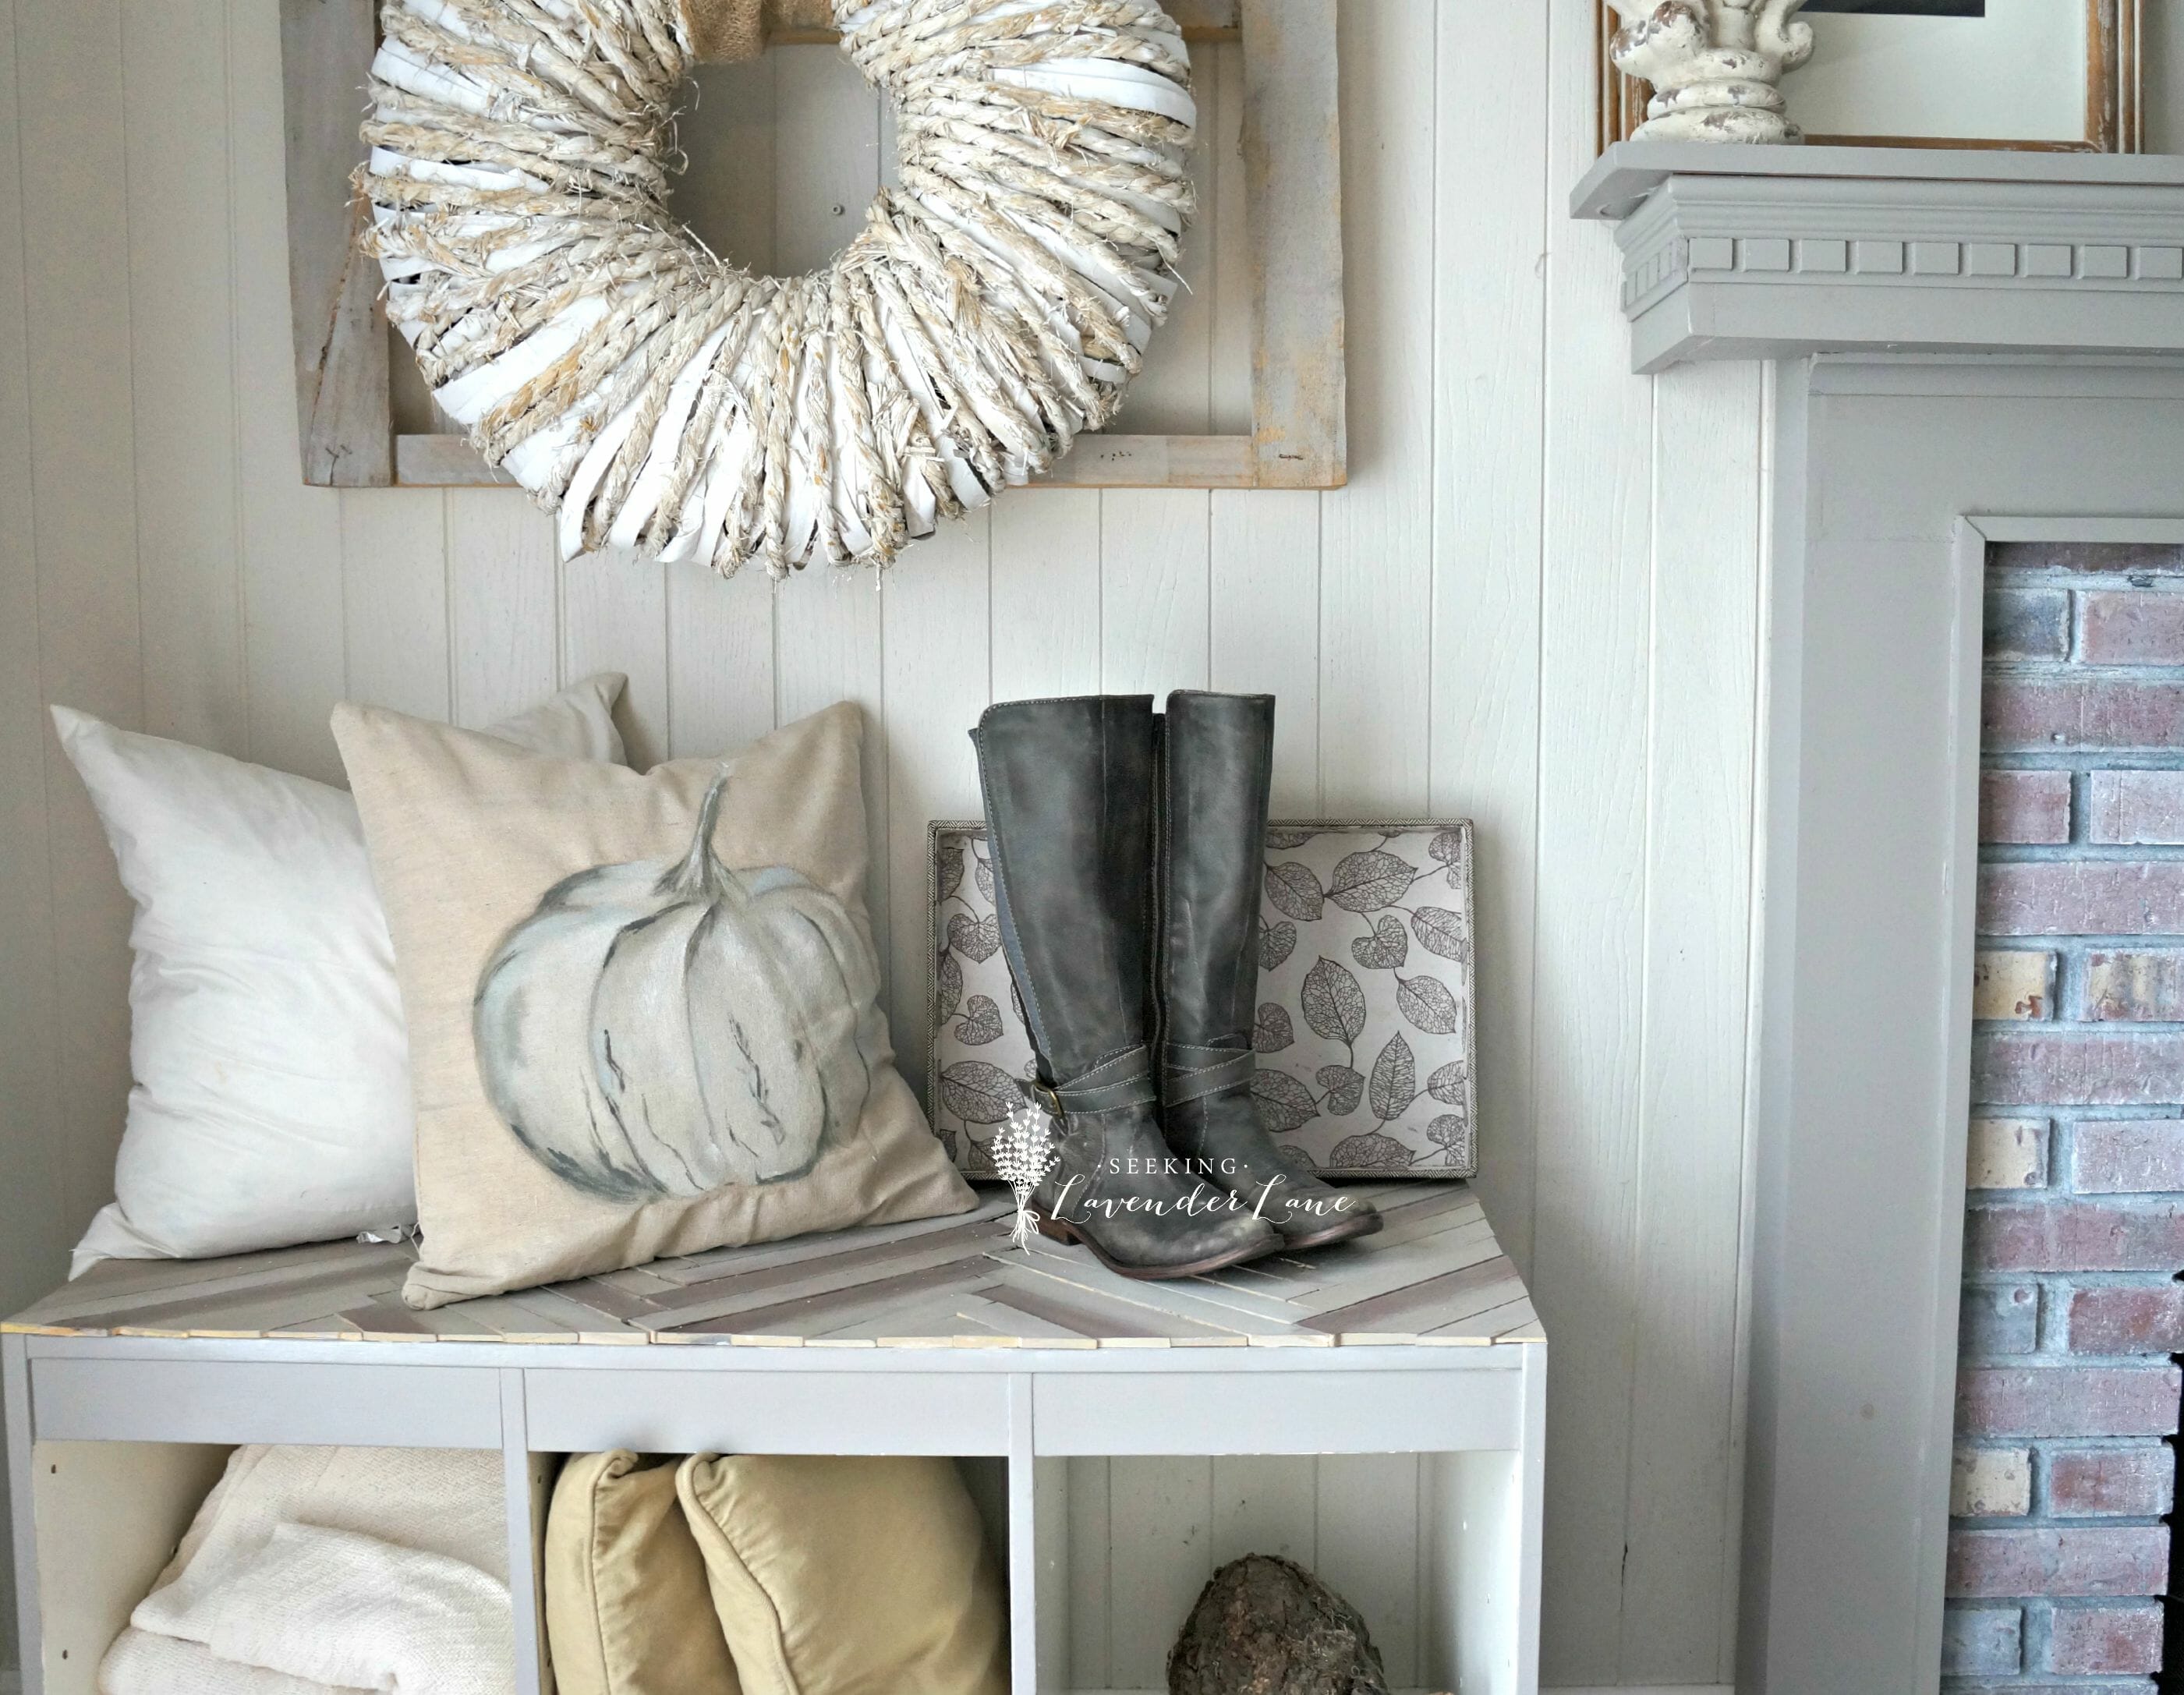
Hi! Love your blog! I was interested in the rope wreath that is in the picture of your beautiful pillow! Do you have instructions on how to make that? It is gorgeous!
Hi Beverly! Thank you so much, I’m so glad to hear it! The rope wreath is definitely a conversational piece in this house. I scored that awesome wreath from Homegoods almost 2 years ago. I have not seen it sold there since. I know there have been a few bloggers that have recreated it using rope, and fabric…so maybe something you want to give a try. I think one of these days I should just do a giveaway with it and send it to a lucky reader. Hope you’re having a great week! Deb
Such a great job!
Thanks Kim!