I am so thrilled to share this one with all of you!
A FREE project????!!!
Aren’t they the best!
Here is how I stay free with this project or some other “free” projects in the past, I shop my house! That simple…I use materials that I already have and try to see potential in them.
So what free items do you need to have lying around your house to complete this one?
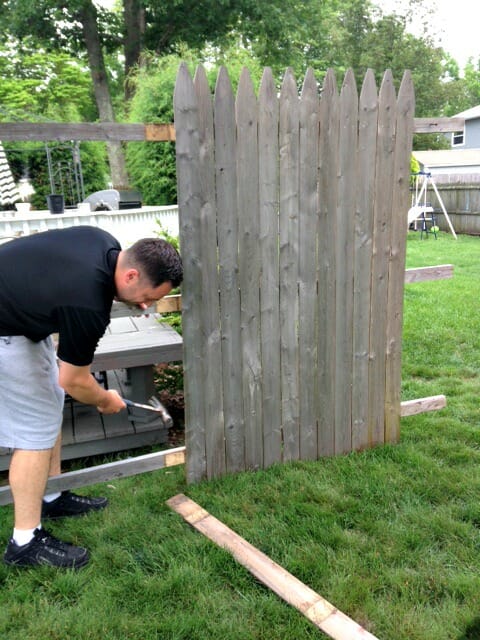
1. Extra wooden fence pieces
2. Some finishing nails,
Oh and a handsome guy that will help make the “easy” cuts and put it together for you! That’s all…and if you decide to put a finish on these shutters, then some left over stain or paint won’t hurt! Here I kept mine natural…I loved the beauty of the natural “worn-down” color.
Here the tutorial to this super easy project.
1. Detach wooden panels from frame by gently hammering out each piece.
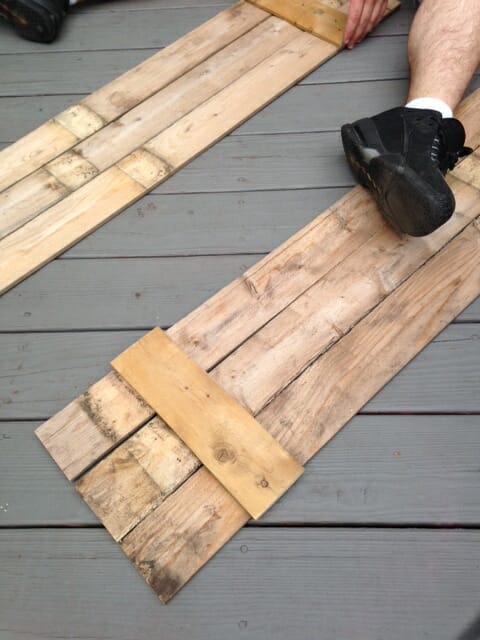
2. Measure Window and Cut each piece to size (choosing 3 pieces vertically)
3. Measure the width and cut two pieces to size to add to bottom and top of shutter
4. Nail together shutters using the horizontal top piece.
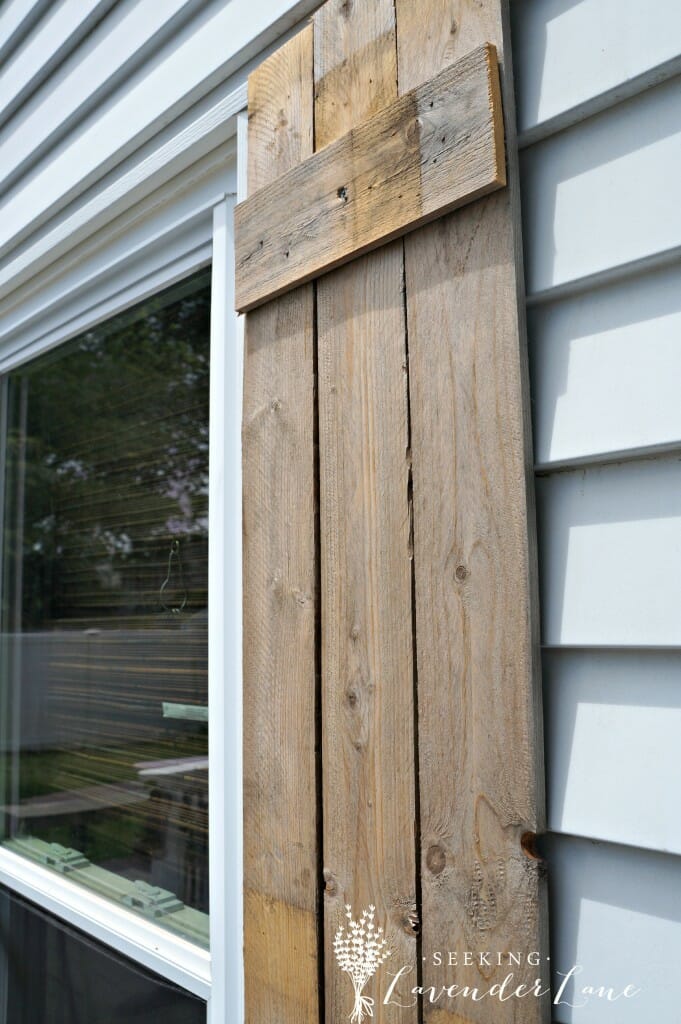
HINT: I used the reverse side of wood since I preferred the natural tone instead of the grayish side; see below image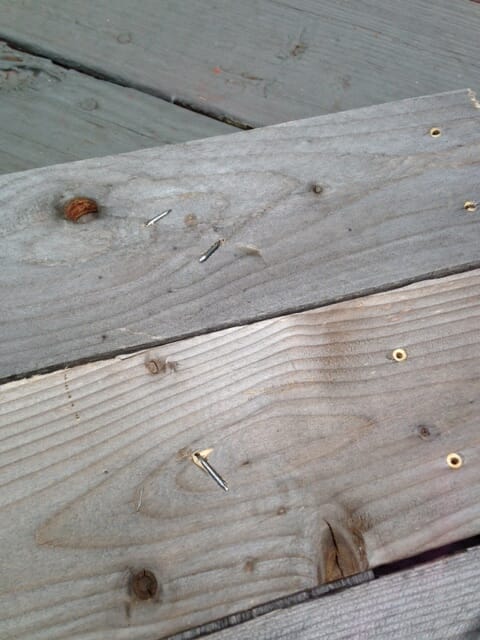
IMPORTANT: Also, as above photo make sure to bend finishing nails once assembled.
5. Sand down the shutter to make smooth
6. Lastly, screw shutters to house through the horizontal panel to avoid splitting the wood.
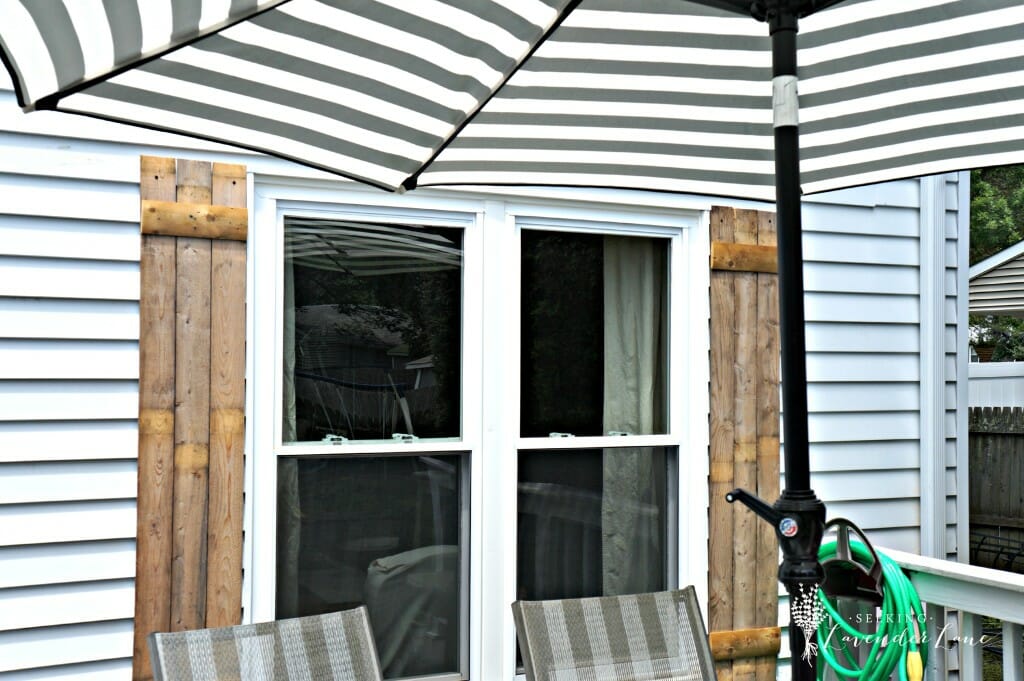
It doesn’t hurt to add a beautiful striped umbrella to pair nicely with the wood tones. I love this one that I found on Amazon.



Deb, I love these shuttters!! So pretty. I’ve been thinking of adding a faux window to a large blank outdoor space we have and these would be perfect. thanks for sharing!
April Rutherford recently posted…Gallery Wall #1
Thanks April! That sound fabulous…can’t wait to see!
Wow, those turned out great! Such a nice piece! Love it!
Thistle recently posted…Painted Porch Swing Project
Thank you so much : )
I love how much they made a difference to the back of my house and for free…can’t beat that!
I LOVE these Deb! What an impact they make on the back window! I think my power tool skills just might be good enough now that I could tackle this solo too! Thanks for sharing 🙂
Lindi recently posted…Coconut Scrambled Eggs
Hi Linidi,
Thank you! Ohhh you go girl haha…love to see them if you decide to make your own.
Oh I love these! I so wish those would fit the style of my house as we are getting ready to tear down and replace our back fence. Who doesn’t love a chic AND free project? Thank you for sharing at Merry Monday!
Amanda recently posted…Meal Plan Monday
Thank you Amanda! Oh think of all the projects you can do with that “rustic” wood : )
I actually just created another project last night using the remaining wood…so make sure you save yourself some.
Love free. And when you mentioned you shop your house… so do I. i love this idea of using the fencing. Thanks for sharing it.
Mary recently posted…DIY Chalk Paint
Hi Mary,
Nothing greater than finding something you already have lying around in your home…right? Thank you for stopping by!
Love how this turned out! WOW…and $0! My kind of deal. Hugs and blessings, Cindy
Love it, Deb! Fabulous “upcycling” of something you already have… The shutters look great!
Carol @ CAD INTERIORS recently posted…The “Other Side” {Main Bathroom Renovation}
Thanks so much Carol!
Love that these cost you nothing! Great Upcycle!
Gilly @ Colour Saturated Life recently posted…Earthenware Upcycle
Thank you Gilly!
I’ve always wanted these type of shutters! Great idea, they came out amazing!
Roxanne recently posted…DIY Lighting Fixtures
Thanks Roxanne! I love mixing some wood to add texture…thought it was worth the try and it worked!
Love free projects and love the shutters! They look amazing. Pinned this for when I come across some lumber!
Stephanie @ Casa Watkins recently posted…Sponge Holder from Upcycled Bagel Slicer
Awesome Thanks Stephanie! Yea you never know when you can find an old fence hanging out on the side of the road…I feel like that happens so often this time of year for when people are getting new fences and knocking the old ones down.
Now this is one awesome THRIFTY DIY project and I LOVE it!! Thank you for sharing these cute shutters at my Show and Share Party. You will be featured at my party on Monday.
Blessings,
Linda
Linda@Coastal Charm recently posted…Happy 4th of July
Hi Linda,
Thank you so much! So excited to be featured…thank you so much!
Nice, love free! Thanks for sharing at the #HomeMattersParty – we love partying with you! Hope to see you next Friday. 🙂
~Lorelai
Life With Lorelai
Lorelai @ Life With Lorelai recently posted…Meringue Topping – Desserts Crowning Glory
Thanks Lorelai, thank you for hosting as always!
These look great and super easy. I love seeing a repurposed wood project! Thanks for sharing. The shutters look awesome!
Thanks you Brian! Love that these were free and they add so much to the blah back side of the house.