


Progress on the RV Makeover
RV makeovers are a pure commitment, friends! They are a ton of work and time and they are not the easiest to makeover. There’s a lot of quirky thing about RV’s that you are not used to working with like in a house. For example, the carpets that are put in first before the furniture and you have to cut around them, I talked about this in our first post on our makeover here. Also, there are cabinets that are not all solid wood (I’m predicting some peeling), the walls are a bit crooked…and there are a ton of outlet covers that make putting up backsplash crazy difficult. So, though we are loving the progress we are making we have found a few good surprises and complications so far. We are just rolling with it all and not expecting perfection. After all, it is an RV but we do want it to be all pretty in the end. So, I am sharing today some RV makeover progress pictures with you. What we accomplished this week and what’s still left to do! Also, if you are on Instagram be sure to follow me there! I share all the behind the scene videos so you can see the RV coming to life in person. I have a highlight button so if you are catching up you can see the videos from the beginning.
This post contains affiliate links for your convenience!
Week 3 Renovation
Adding Ardex Feather Finish Concrete Countertops
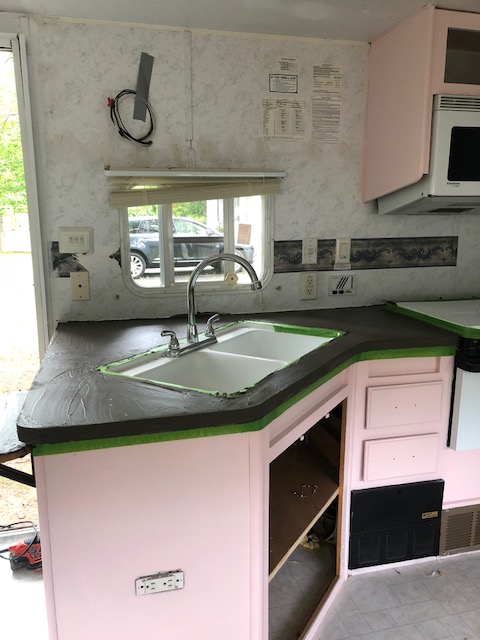
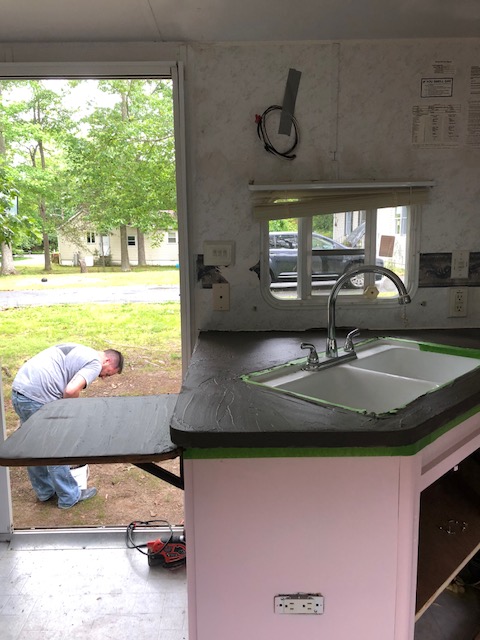
The Countertops Install
So, first, we installed our countertops with some Ardex Feather finish again. If you’ve been here for a while, then you know it is our go-to countertop choice for DIYing. It’s decently easy to do and it looks great! I love concrete to begin with and I’ve contemplated adding concrete floors and countertops in our next house…but I don’t think we are going for it. Maybe if we lived in a warmer climate I would have! So, anyway, Ardex is easy there are a few steps to install.
- Scuff up the countertops with a sander and we use a wallpaper scorer to scuff up counters so concrete can stick.
- Then you apply in batches trying to cover as much surface area as possible.
- Sand
- Seal
You can read more about the process of Ardex Feather Finish here, and here!
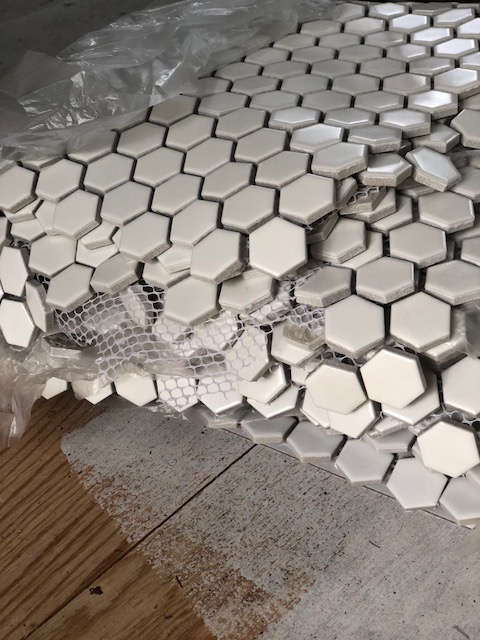
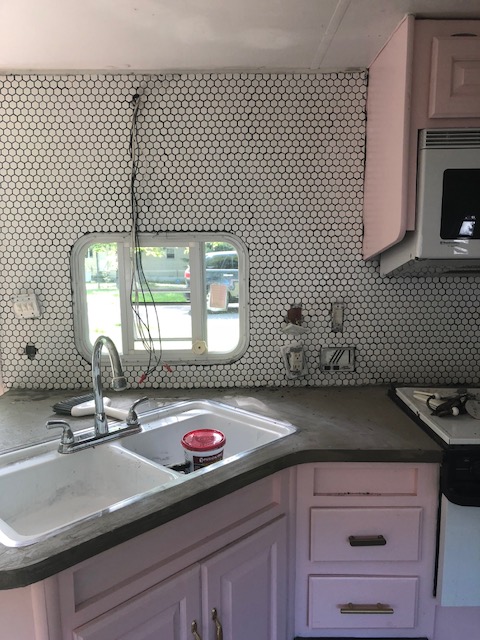
Then when these were dry we started our next process installing our hexagon backsplash. I really LOVE this tile it adds a classic vintage look mixed with a contemporary modern all at the same time. I think after we installed this it truly made the RV’s style come to life!
Materials for Tile Backsplash
Handheld Tile Cutter (couldn’t find on Home Depot’s webiste)
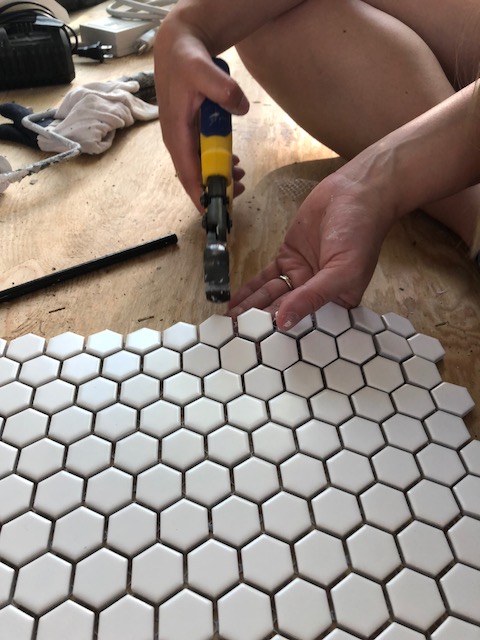
The Backsplash Install
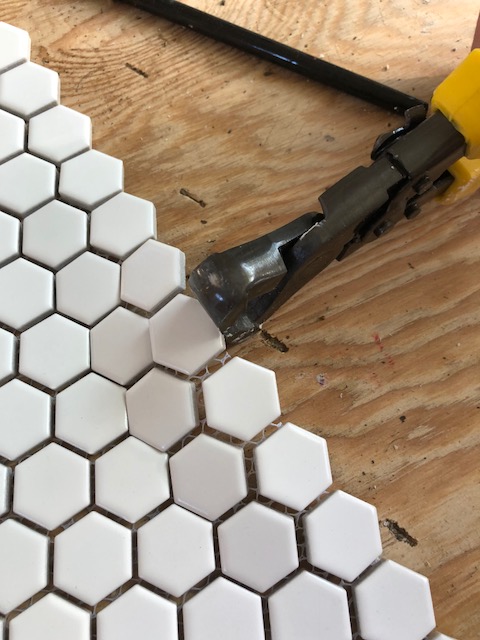
We used this tool, which allows easy cutting of the tile for those pieces that you need to cut in half or remove the point.
Using a batch of the tile adhesive you lay down a thin layer on the wall. We chose to tile all the way to the top of the wall since we had removed our cabinet above the sink. We felt the weight should still be fine since the cabinet had come down. If we were working with a larger tile I may have opted not to tile to the ceiling.
Cut your tiles as you go and start from the most visible wall. This way if there are any mistakes you are not seeing it right away. (Being prepared for mistakes when you’re not an expert DIYer is important…that’s how we always work).
What I liked about working with these mosaic tiles versus a subway tile there is room for error. So if you do need to make one or two tiles work you just have to remove and snip and then you can re-apply. Also, we had a big Oops moment! when working around the window and trying to make our tiles connect we ran into the tile pattern being off by 1/4″. That made me nervous I had a freak out moment, but than I talked with my friend and neighbor Dana (who just started her own blog and is a DIYer herself) and she gave me some advice to cut in sections and space a little apart and together that should make up the difference for the gap for it all to work together…and it did!
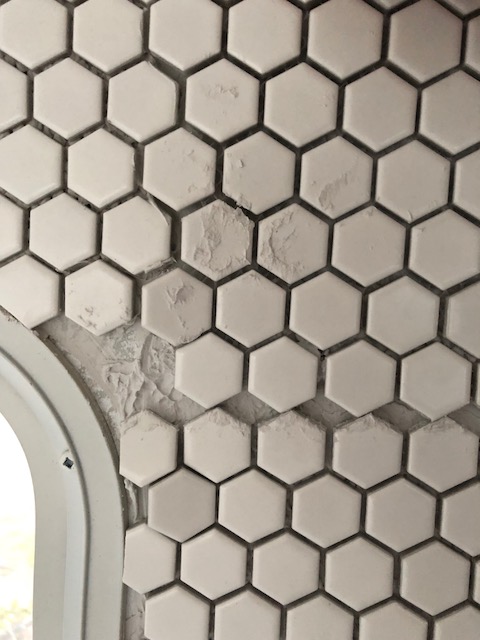
Above photo is of our Oops moment! See how they were not lining up, with cutting the tiles in sections and spacing them apart a bit we were able to make up the difference and line these tiles up again-phew!
So, yesterday we did the final step with the backsplash by grouting with a charcoal grout. The charcoal grout really allows the wall pop and create that high contrast look. Though I think a white or light gray would have been pretty too. That was a tough decision but I figured I would go bold or go home.
Apply in batches since the grout dries fast. I worked in small sections and allowed 1-4 mins of dry time before I sponged down the tile. Since we are in the RV and still have no water we were using bottled water that I was pouring into the sink and soaking the sponge that way. Not the most ideal but it worked until I finally ran out of the water and asked a neighbor for a large bucket of hose water. It was one of those things where I didn’t want to bother anyone until we just got beyond frustrated and caved in.
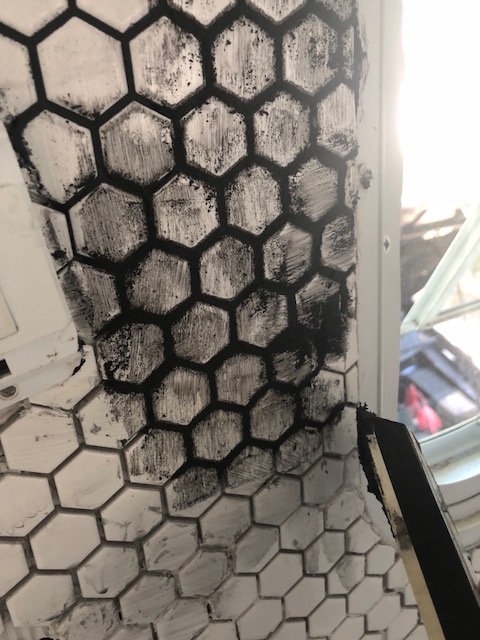
applying in sections and be sure to go on an angle to get grout in-between the grout line.
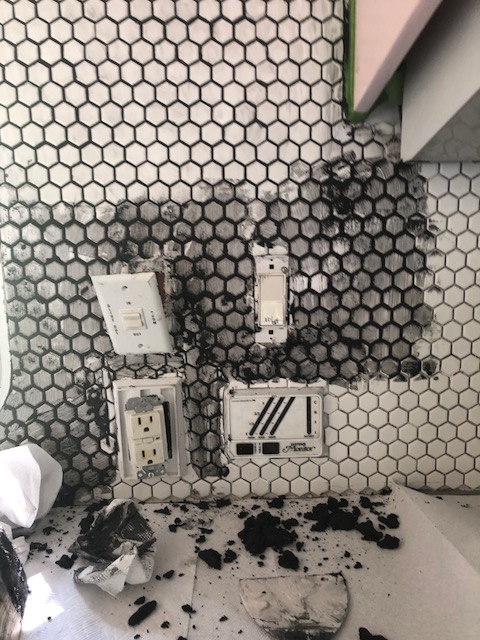
This part got a little messy as I had to work around all the outlets!
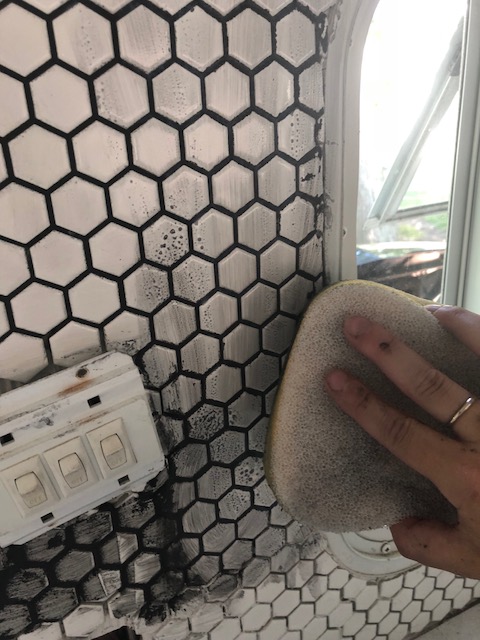
Sponge off every 1-4 mins
Here’s how it looked right before we left yesterday. It needs some caulk and maybe another round of cleaning…but so far so good! I have to say this was the first time I’ve worked with dark grout and it’s wayyy messier than white or light gray grout. My hands are even stained from the dark color…hoping I can get it out tomorrow.
I can’t wait to share more with you all, especially as I start decorating. I’m hoping to maybe put the Hammock Seat up this week as well. Tomorrow we are going to install the flooring which I can’t wait to share with you all. We found some really beautiful flooring and it’s going to work perfectly in this space. Also, the thickness of the flooring we may be able to score with a utility knife and snap so that’s going to make a HUGE difference in the timing of getting these floors down. Can’t Wait…in one week this RV will really start looking like a home. Oh and less than 2 weeks until we are all moved in!


6 Responses
WoW!!
It is really starting to come together! 🙂 I can’t wait to see the floors.
Regarding the concrete countertops: can you get different colors? In your photos the counters look quite dark and even after drying thoroughly have a grey cast. I would want a more off-white color. Is that possible to get or would I have to paint them?
P.S. I love the hexagonal tile on the kitchen walls of the RV! Wow!
You can probably stain the countertops. That may be a good option if you want a light countertop.
Looks Great!! I’d love to get an RV someday and this has given me a lot of ideas!
P.S. I would prefer to see the advertisements on the side though, at almost every other picture, it was a bit distracting for me.
Thanks Alicia! I know, they make me a little crazy too, but it’s a way I make an income from my blog by providing free information.