

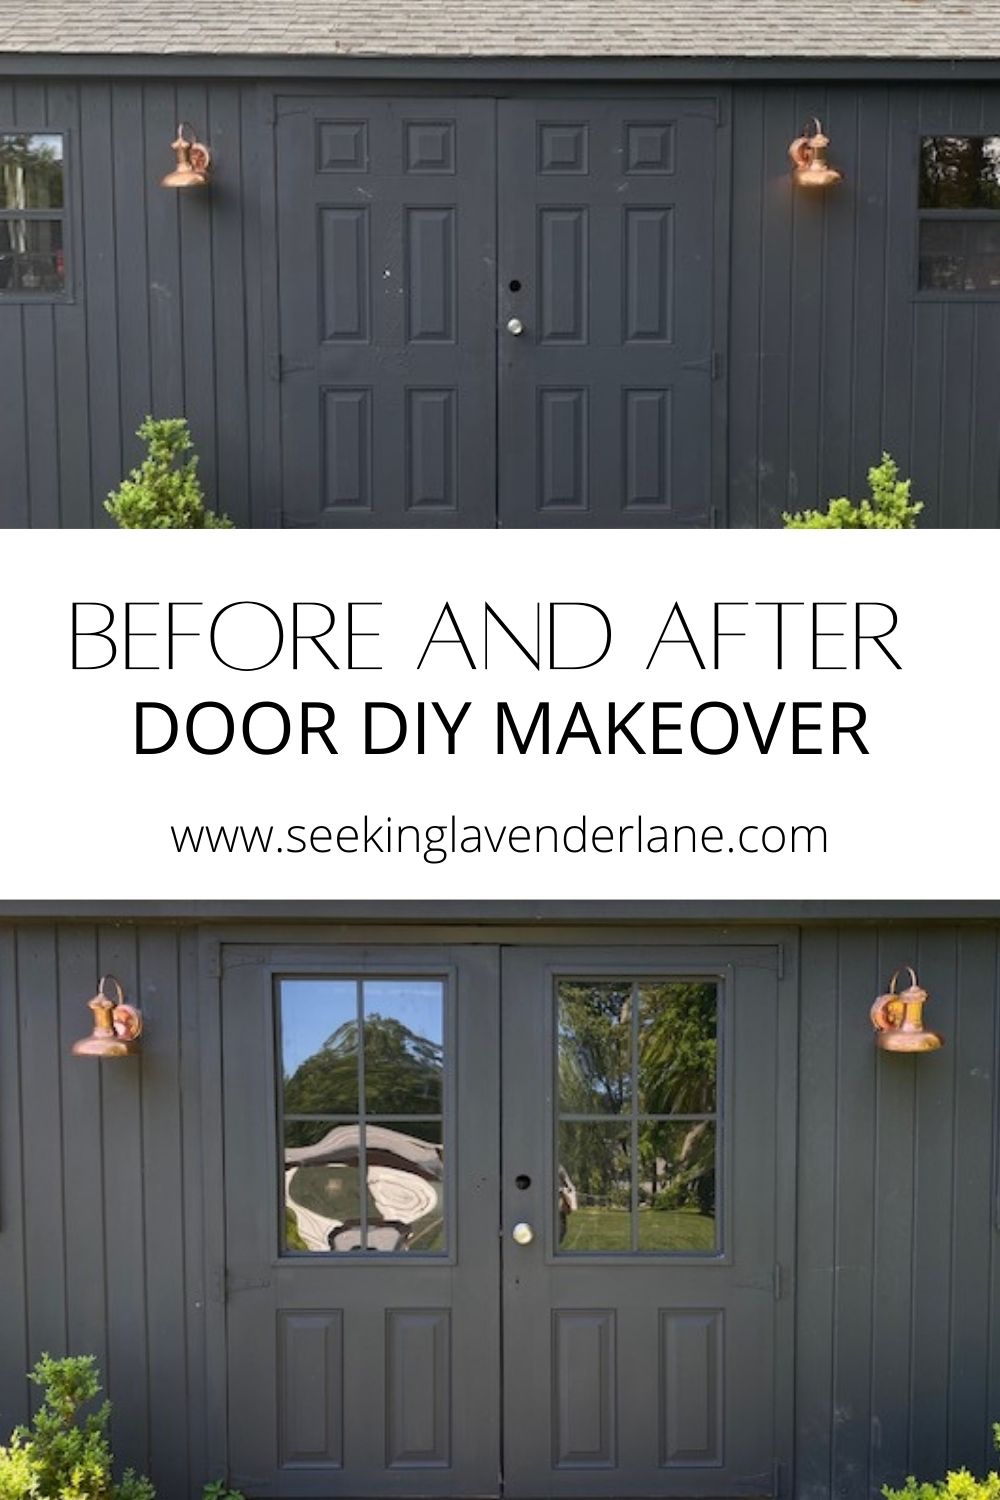

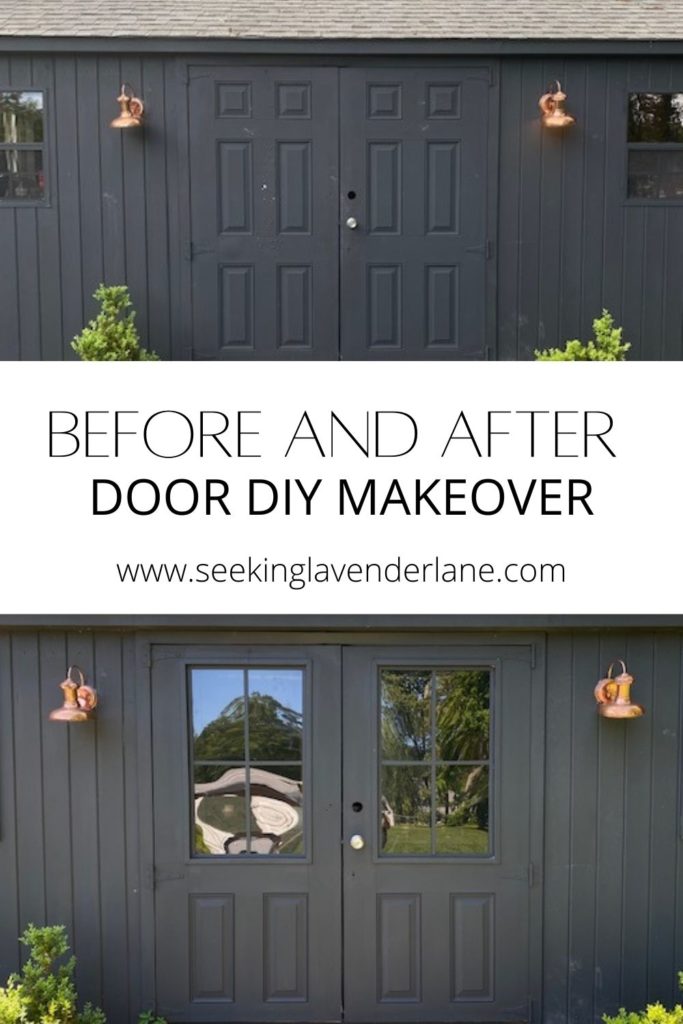
The spring has been a busy one! We have been working hard on our new business adventure with Vintage Keepers, and trying to get our backyard in tip-top shape! There is a laundry list of what I want to do and have been wanting to do with our backyard and we accomplished a lot this year and are finishing a few more tasks before the season is too hot. I am already at the stage of DIYing where I am so ready for a break and just want to enjoy it all. What’s good is that I have a few more updates and DIYs to share with you all here. This one in particular is a clever way to get a “custom look” for cheap! Have you ever wanted to update a solid door to have a window? I love a glass door to let in more light and our shed door was in much major need of repair. It was chipping and with our new moody European she-shed the lack of light inside made it a little too moody. So, rather then buying a new custom size door we decided to try to tackle this one ourselves with removing the top of the solid door and adding a glass insert.
Disclosure: We used plexiglass on this project since it’s a backyard shed and our kids broke the windows a few seasons ago with a frisbee so we did not want another broken window. If you are doing this for a front door or don’t have to worry about kids and frisbees you could definitely pull this off with glass.
Products needed for this project:
- Saw
- plexiglass cut to size
- Caulk
- L shaped molding for each side of the door (this is where you will wedge your glass between)
- molding to create mulliens (we used a flat exterior vinyl moldings)
BEFORE
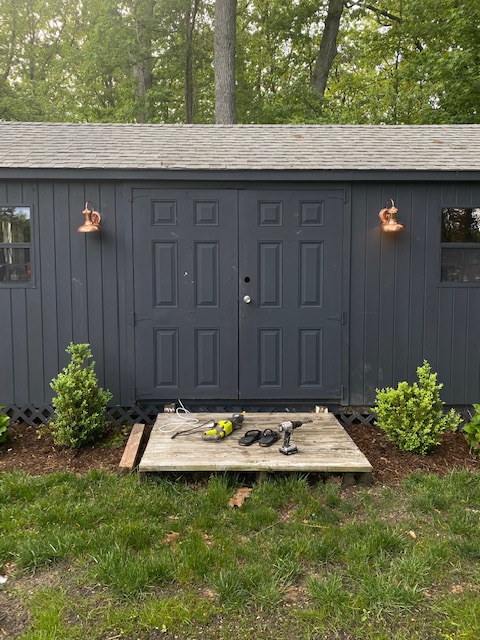
You can see here our doors were blah and lacked character. We needed some natural light inside and a little detail to the exterior.
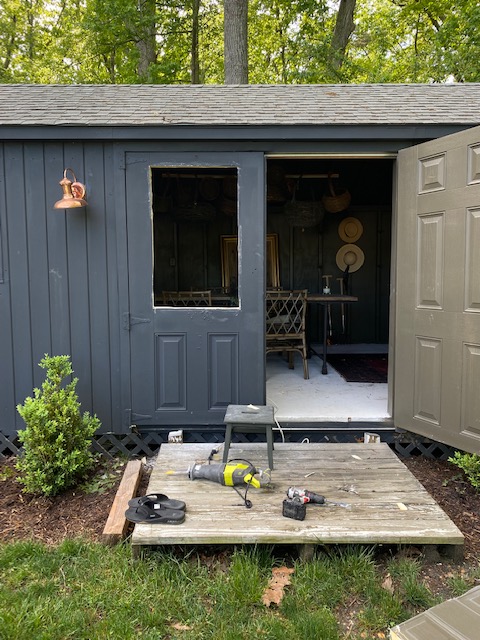
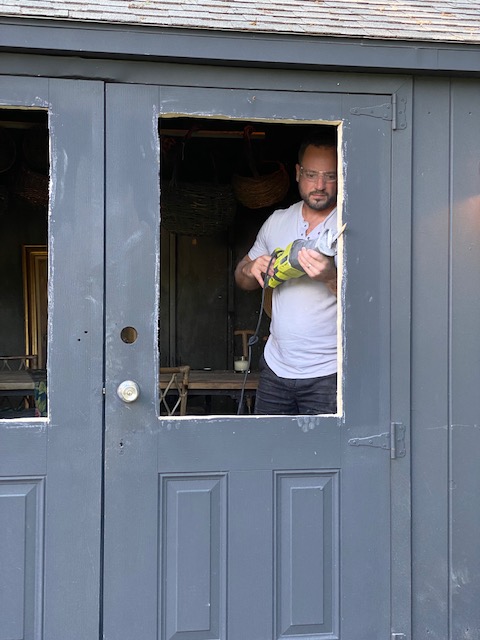
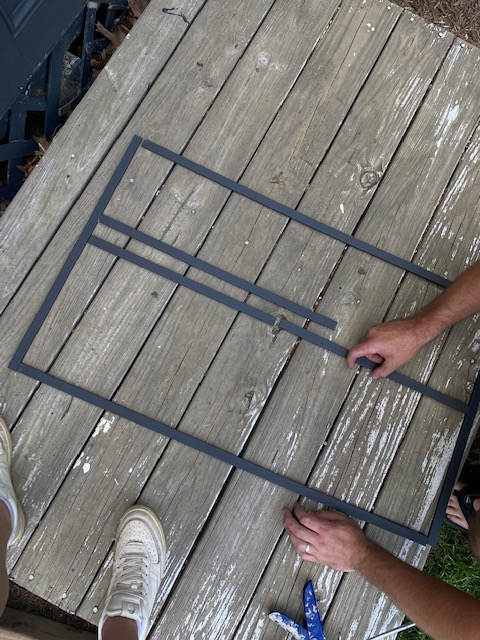
We used the saw to cut a hole out of the perimeter of the door details to create a perfect rectangle for our glass. This part does not need to be “perfect” because you will cover it with the molding, but it should be the right size to have a snug fit on your glass.
Door # 2
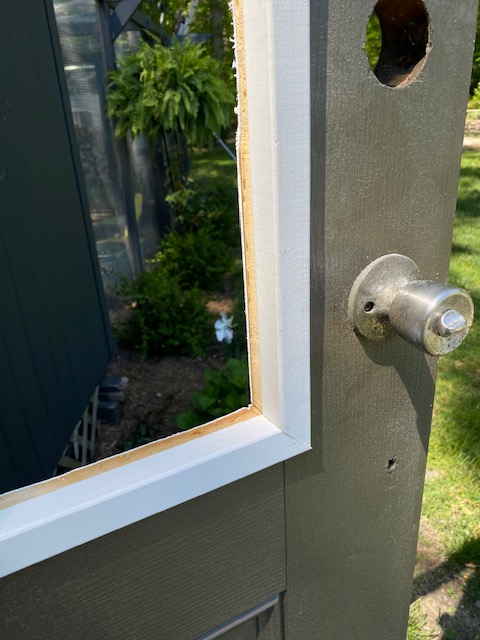
Next step is to apply the cut to size molding inside to create a picture frame angle. The edge should be cut at a 45 degree angle, but the inside should be a straight cut. Continue this process all around the 4 edgse and again in the inside of the door.
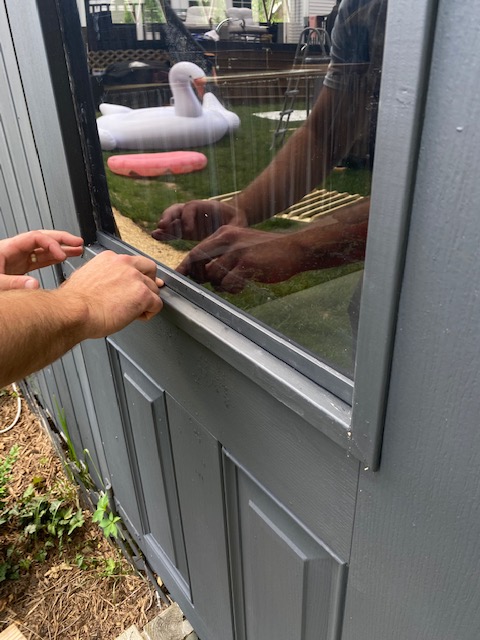
Add your plexiglass inside between both moldings and apply a caulk line to keep glass in place.
Here’s where we went wrong:
Of course every project comes with its struggles, and I wanted to give you all a heads up about where I wish we went different. We decided to just try to tape around the edge and caulk and paint. If I did this project again I would have painted the molding first and then caulked without tape. Our caulk became a bit sloppy and peels away as we tried scraping the paint off the window. Unfortunately, plexiglass can scratch easily and smudge…so lesson learned here!
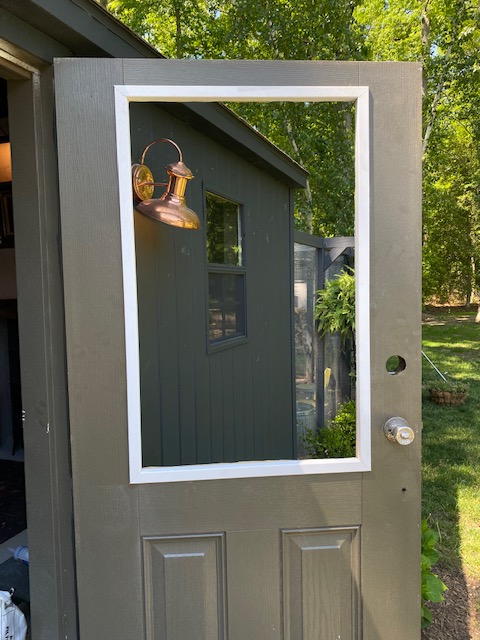
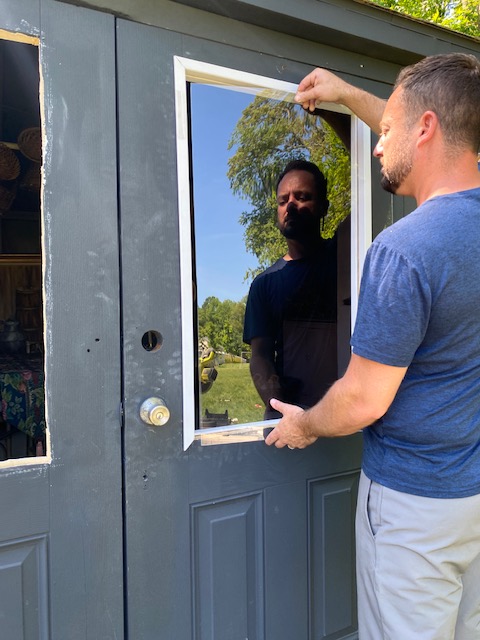
We decided to cover some of the sloppy caulk lines with some molding that we pre-painted this time and applied with an exterior glue to hold in place. Adding the frame around the outside of the glass and apply the cross inside, carefully applying so its straight and centered.
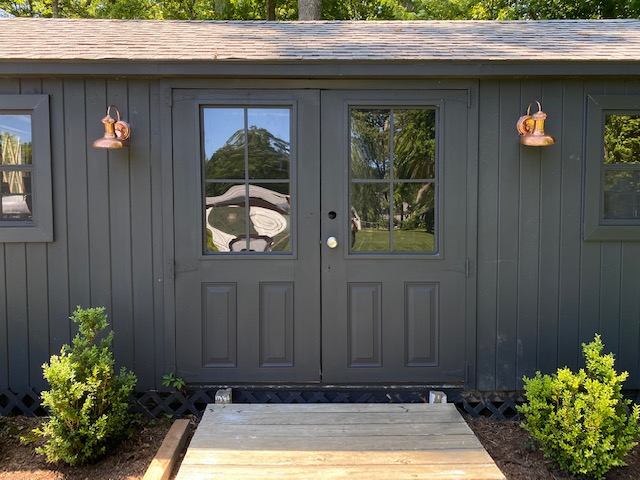
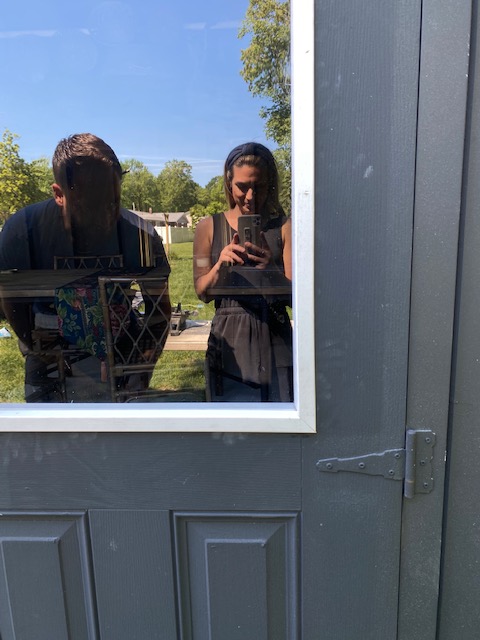
and the finished look! Now, we did not add the mulleins inside the door (which would be better) We just decided it being a shed that it was fine with just the exterior detail.
Next up to finish the deck here which we have had to do for a while now (this is part of a playset we pulled down and put here temporarily which lasted a few summers now).
To see some previous renovations we have done on this FB marketplace shed that we found a few years ago, check out below!
PLEASE PIN


4 Responses
Everything is coming along!! Loos great and your hard work is paying off!! Congratulations ❤️❤️????
Great job by your husband…love how it turned out! I’ve always thought it’s those little details that make things all the more special!
Your door look fantastic! The opening should let in light. Love the copper lights, are you
planning to paint the hinges copper? Copper is my favorite outdoor color. You and husband did a great job!
Excellent article thanks for sharing with usss Lubly !
Duvet Cover recently posted…Best Washing Soda for Laundry