


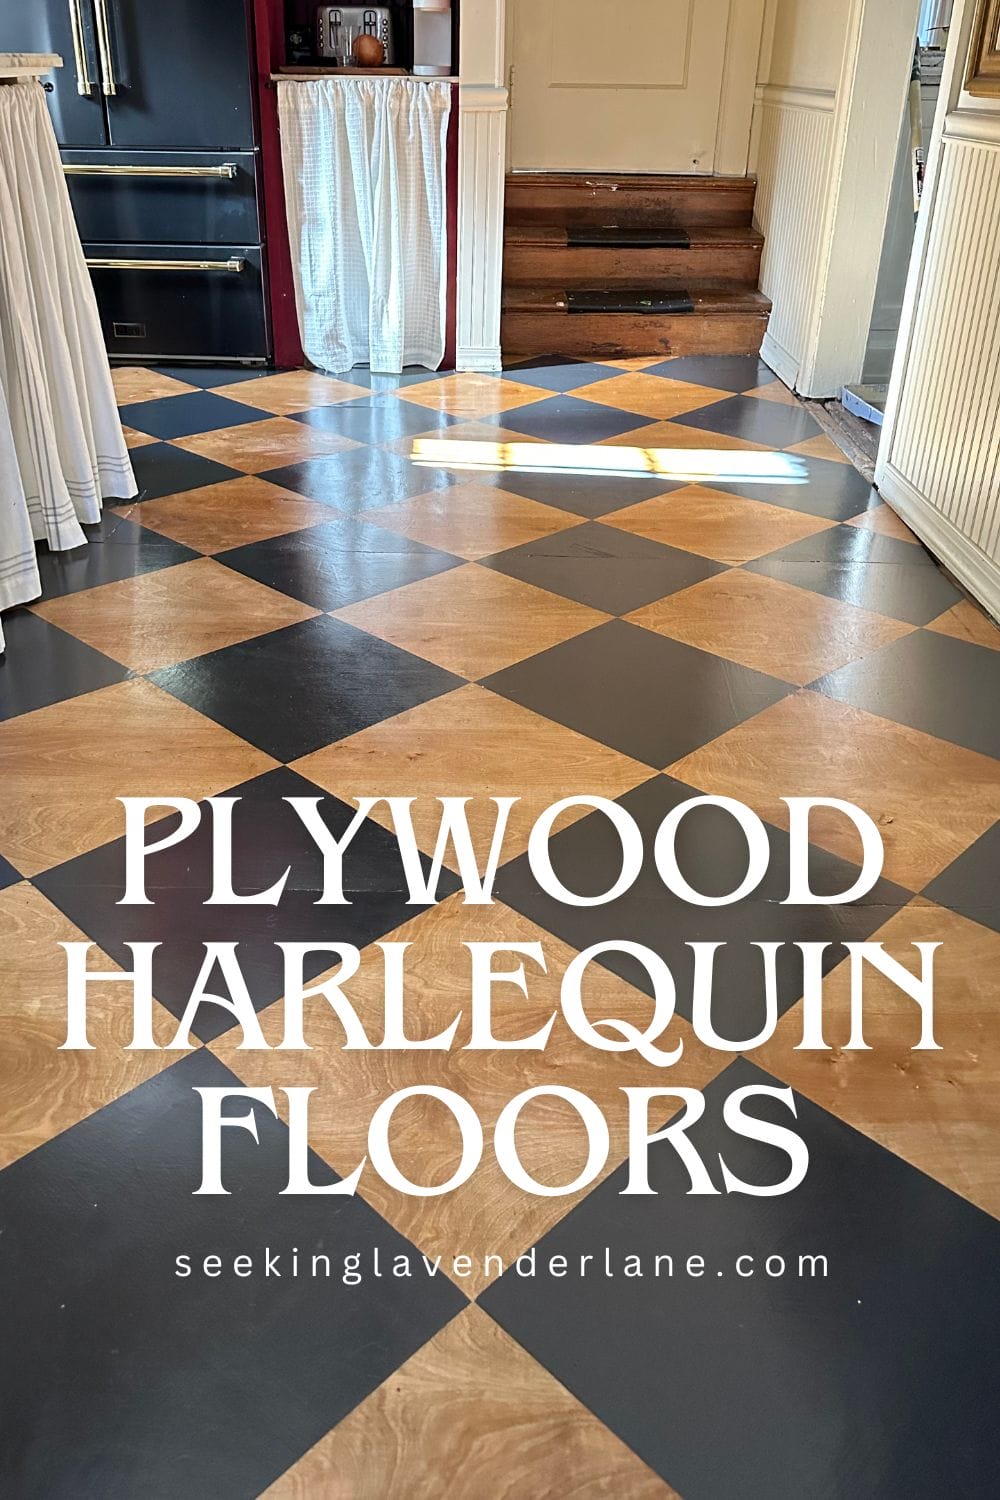
Grab some icy-hot and Advil…you guys its worth it!
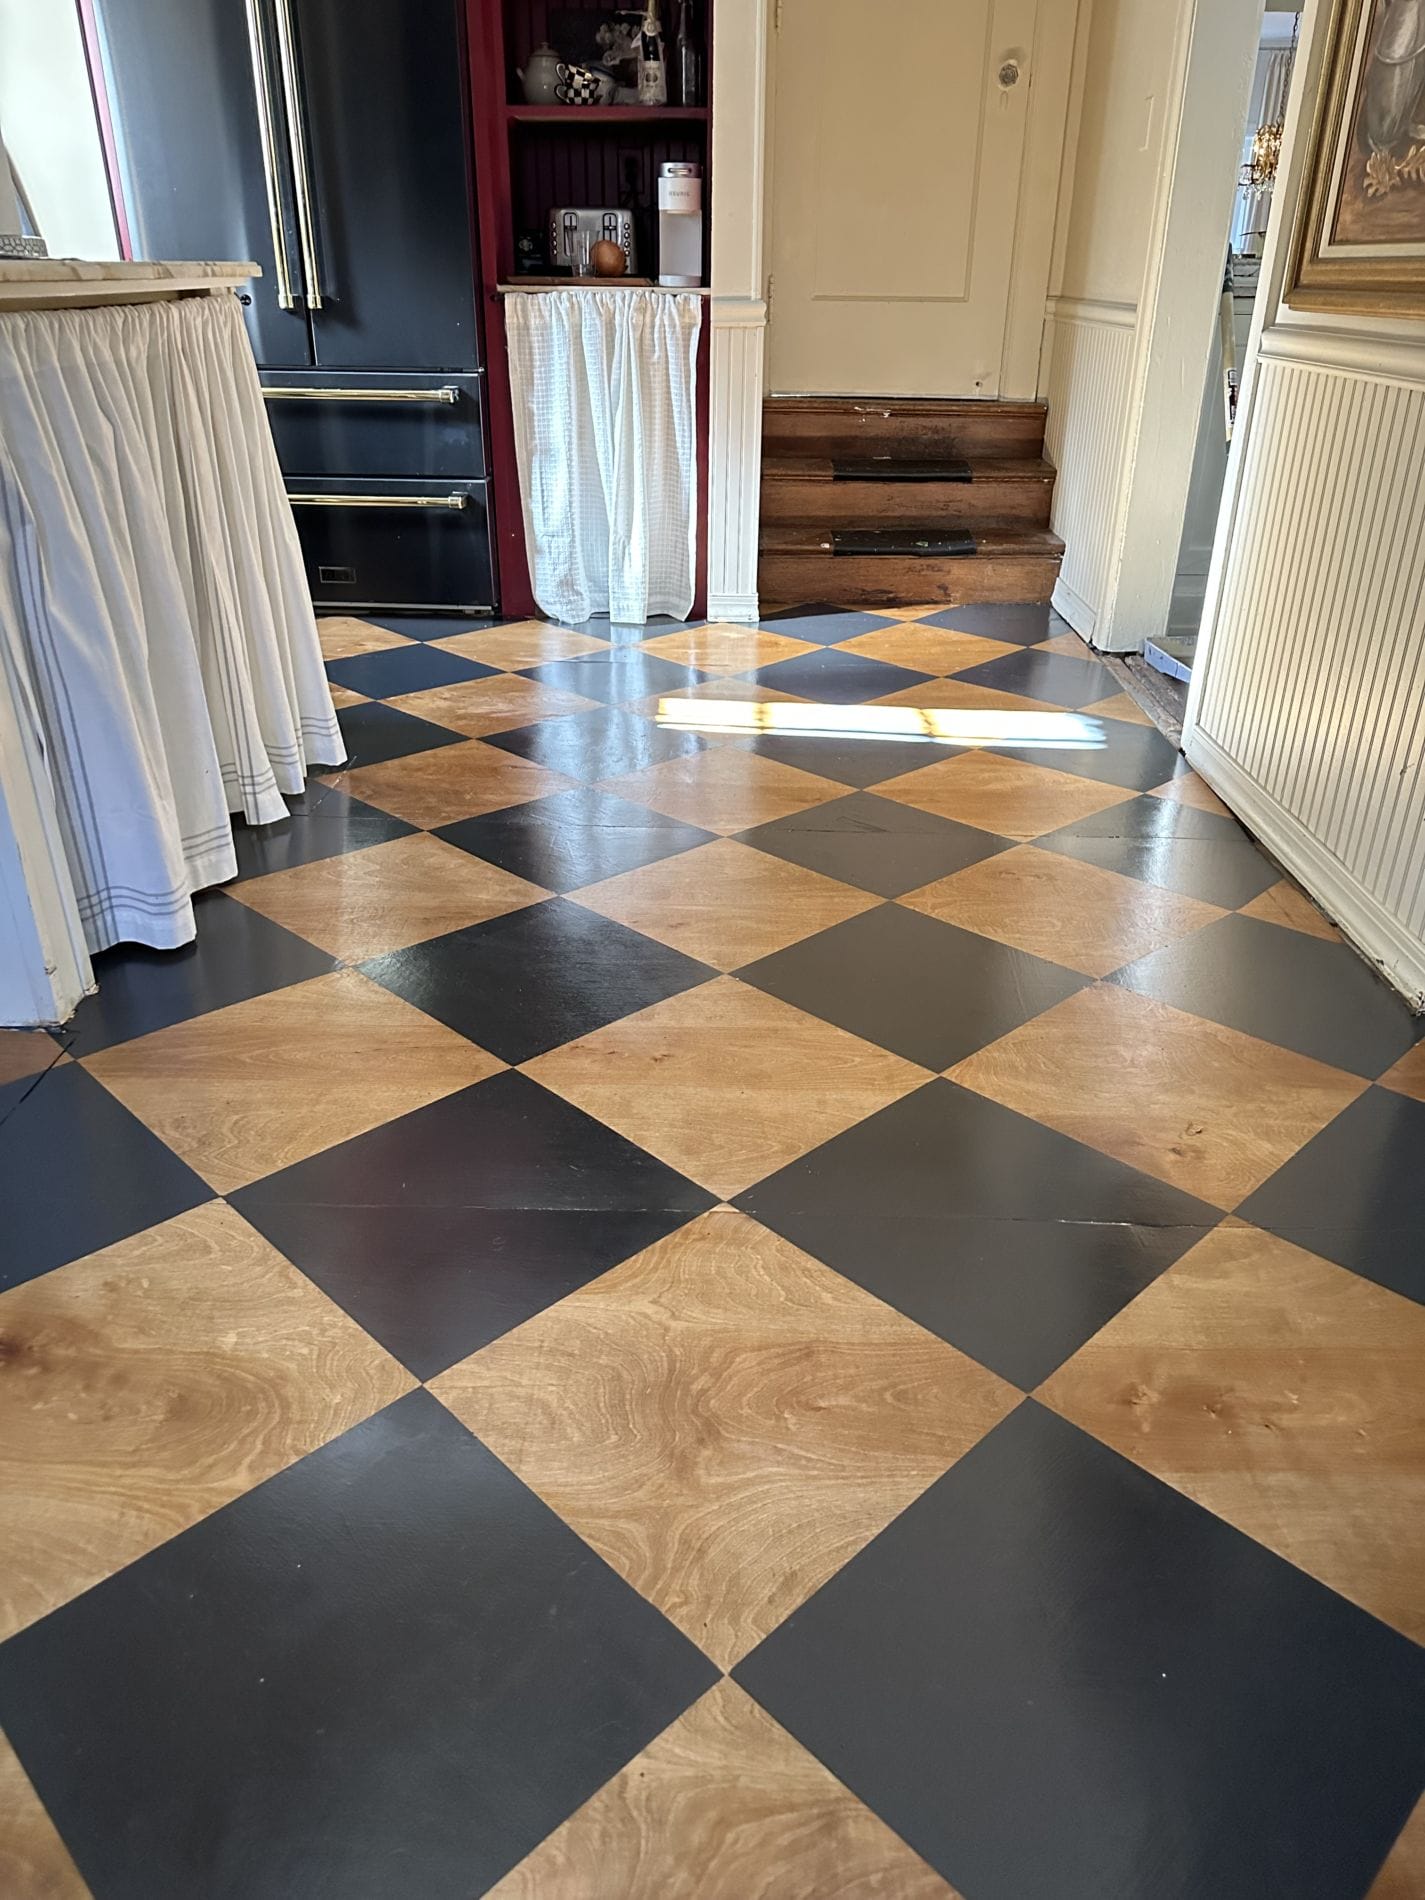
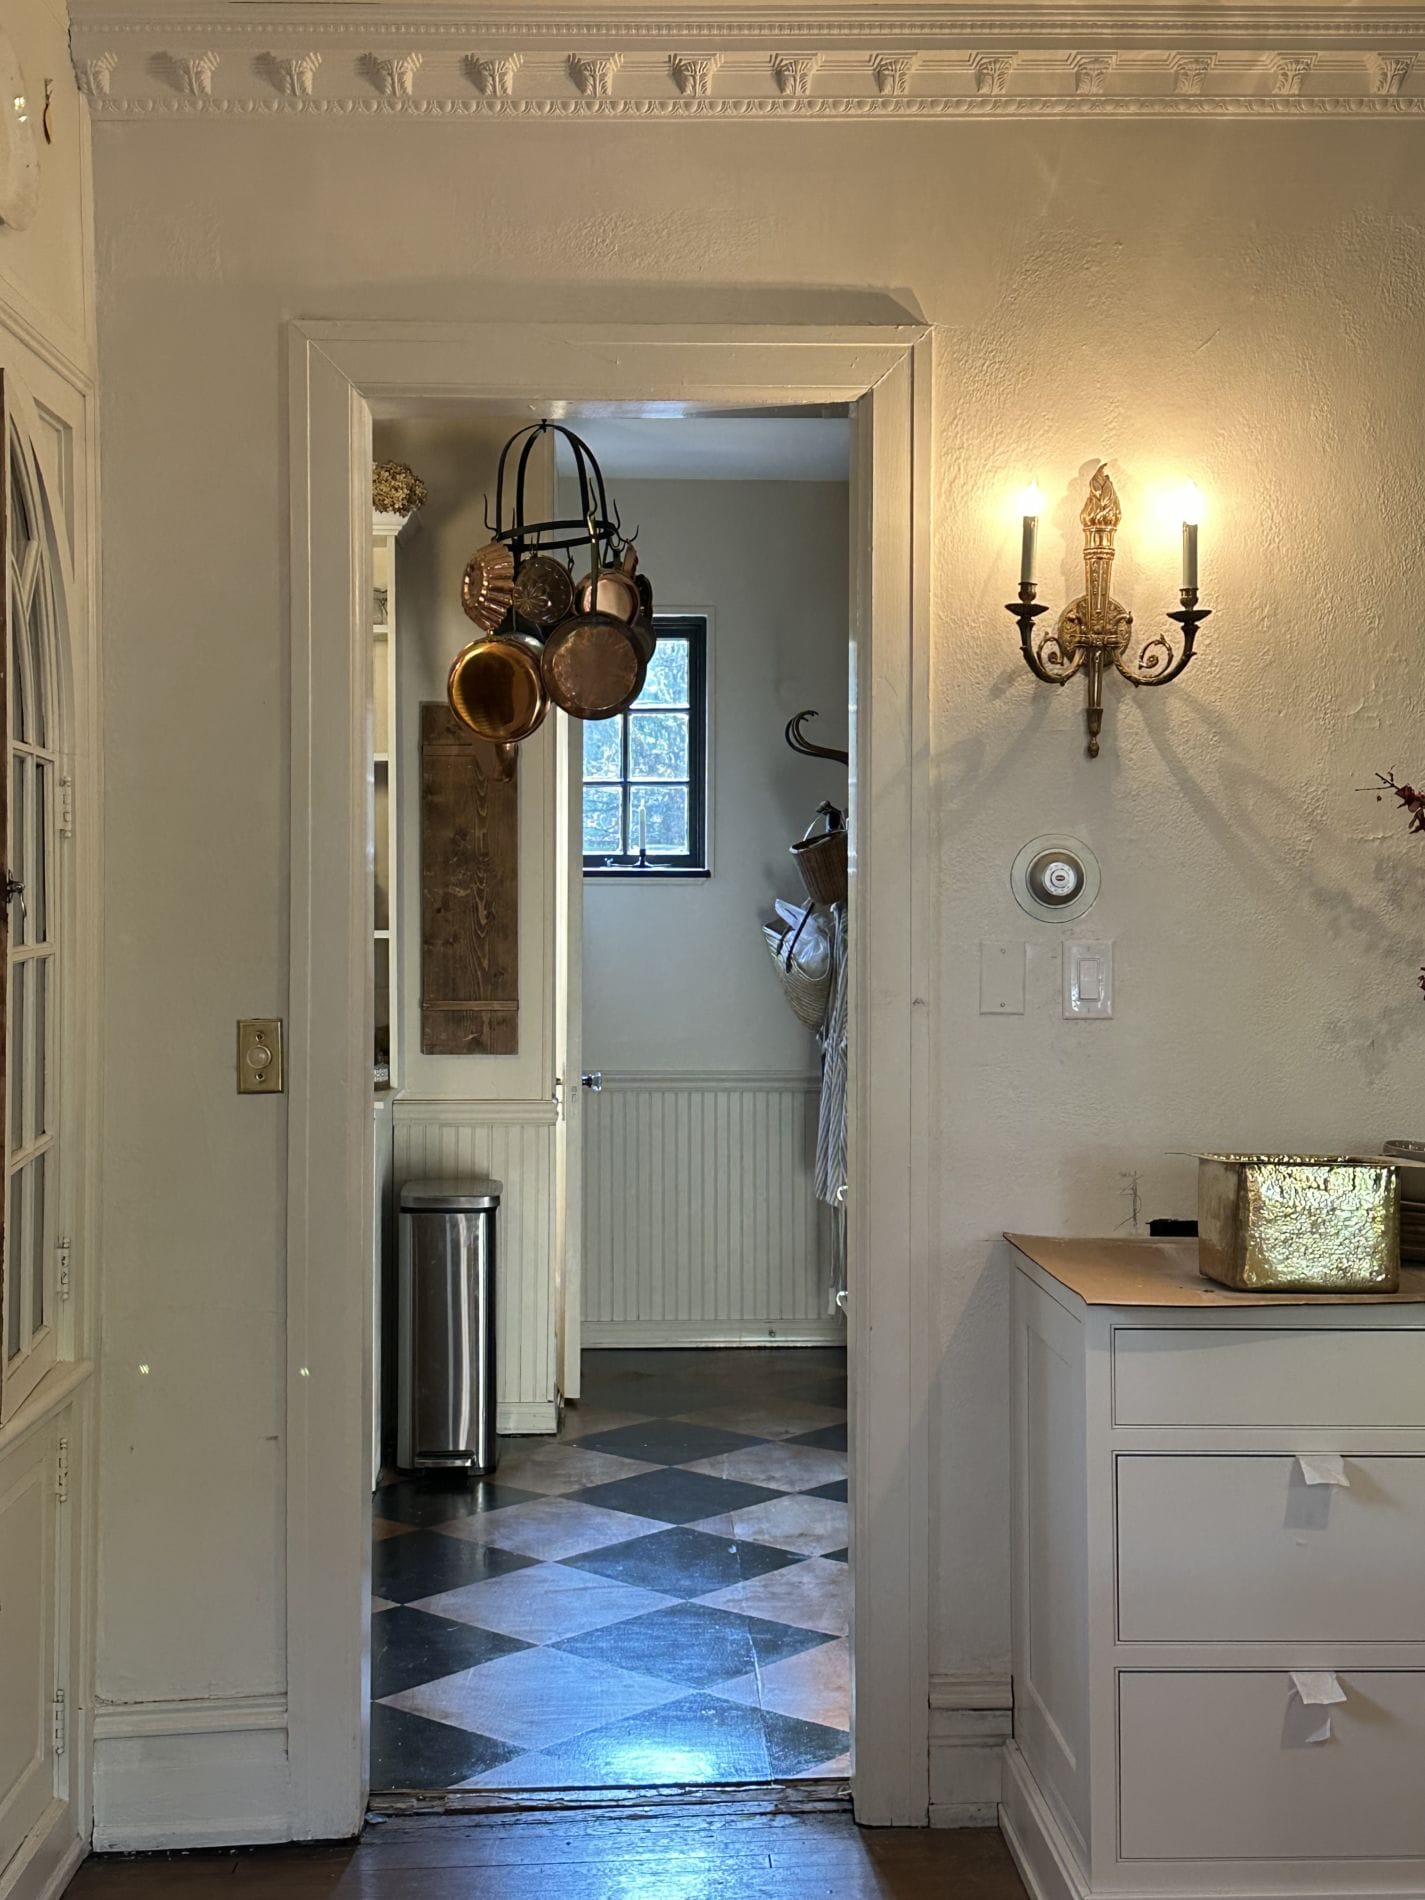
I’m not going to lie I have a bad back and neck issues and this triggered all of that, but worth every second of the hard work to pull off these plywood harlequin floors. We still cannot believe we were able to do it and how much they don’t look like plywood. We chose this option after needing to cut some costs on our current renovation. As renovations go and old home renovations go…everything is more expensive and more timely. We needed these floors done in our pantry/mudroom (a shared combo room which was once the kitchen) and we were walking on leveling cement for 3 months. It was time and we needed to do something about it.
Materials:
- 1/8″ plywood sheets (invest in the better quality ones since these will be your floors)
- Nail Gun
- Glue
- A table saw (for making cuts)
- sander (for rough edge or unevenness)
- poster board template
- FROG TAPE (this is not sponsored but I promise you, get the green one for this)
- stain (we used special walnut)
- porch paint (color of choice we went with BM graphite)
- laser level
- credit card
- poly
The first step to achieving these floors is making the cuts that will hide the seems the best way. No matter what, plywood is a standard size and you can’t prevent the seams, so choose where its best to have them and to avoid as many small cuts as possible. I decided that since our floors were “vintage” it would achieve more of that vintage feel with having some seems. They won’t be perfect its plywood so give yourself some grace during this process. I gave tons to my husband ; )
BEFORE of our floors, I couldn’t take one more day of it….
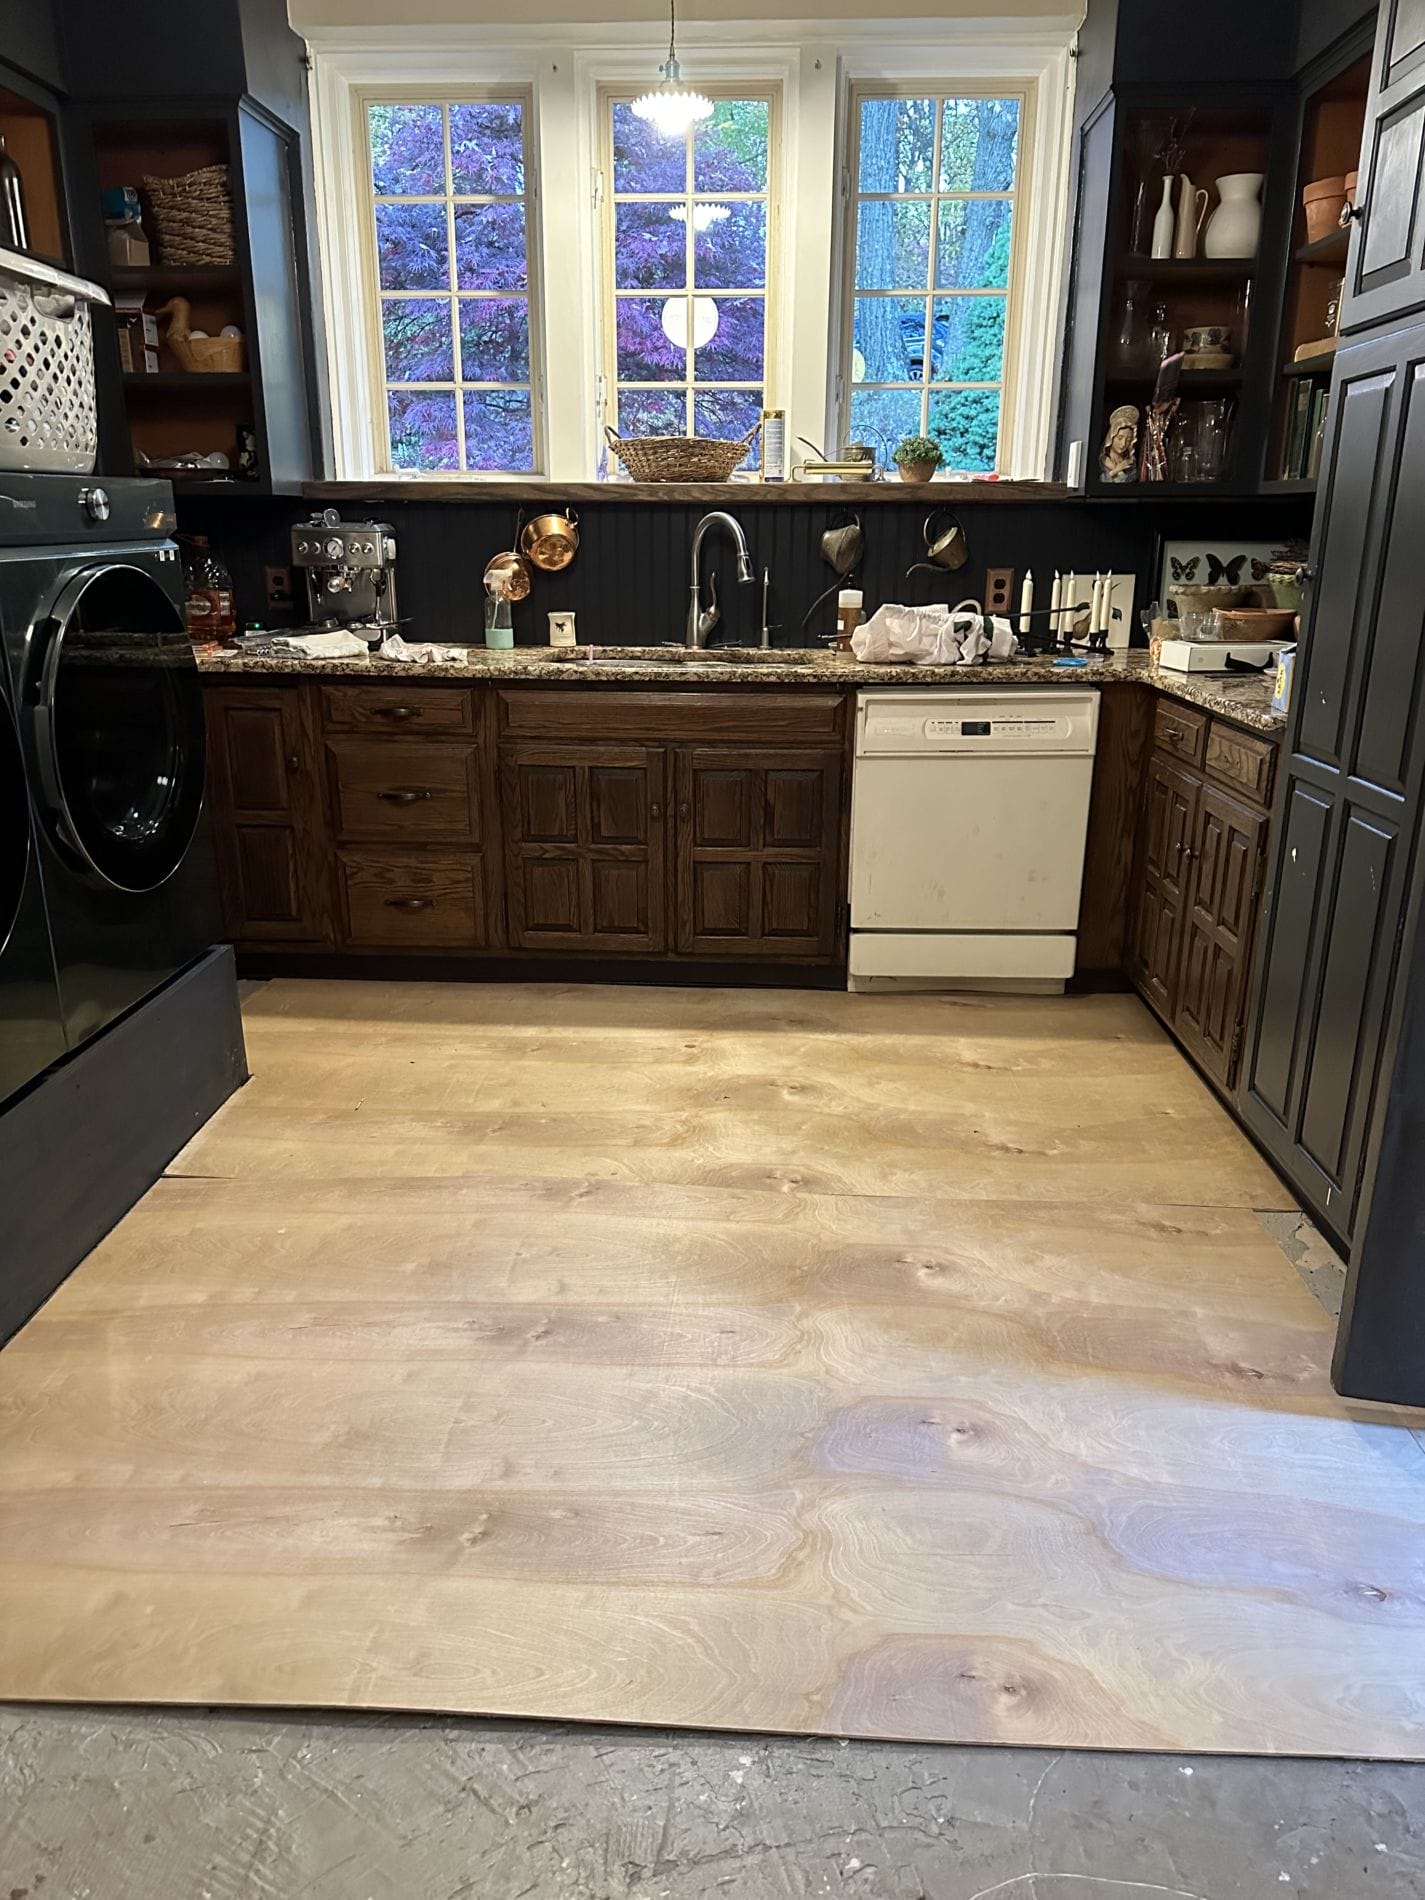
First few pieces of plywood we tried to keep the seems as visible as we could and in less traffic areas. Also consider how little cuts to make.
To apply we had leveling cement underneath but if you have subfloors it may be even easier. Apply glue and and Nail down using a nail gun. Screws will be visible unless you have a very stubborn floor. Hubby added a ton of nails in because of the unevenness of the floors we wanted to really secure them from popping up.
Once this step is done next its time to sweep!
Sweep, vacuum, make sure all the debris is up!
We stained the floors with special walnut using a rag and its amazing how well the floor took to the stain. We DID NOT sand!
Once dry (we waited until the next day) We started to make our template and tape.
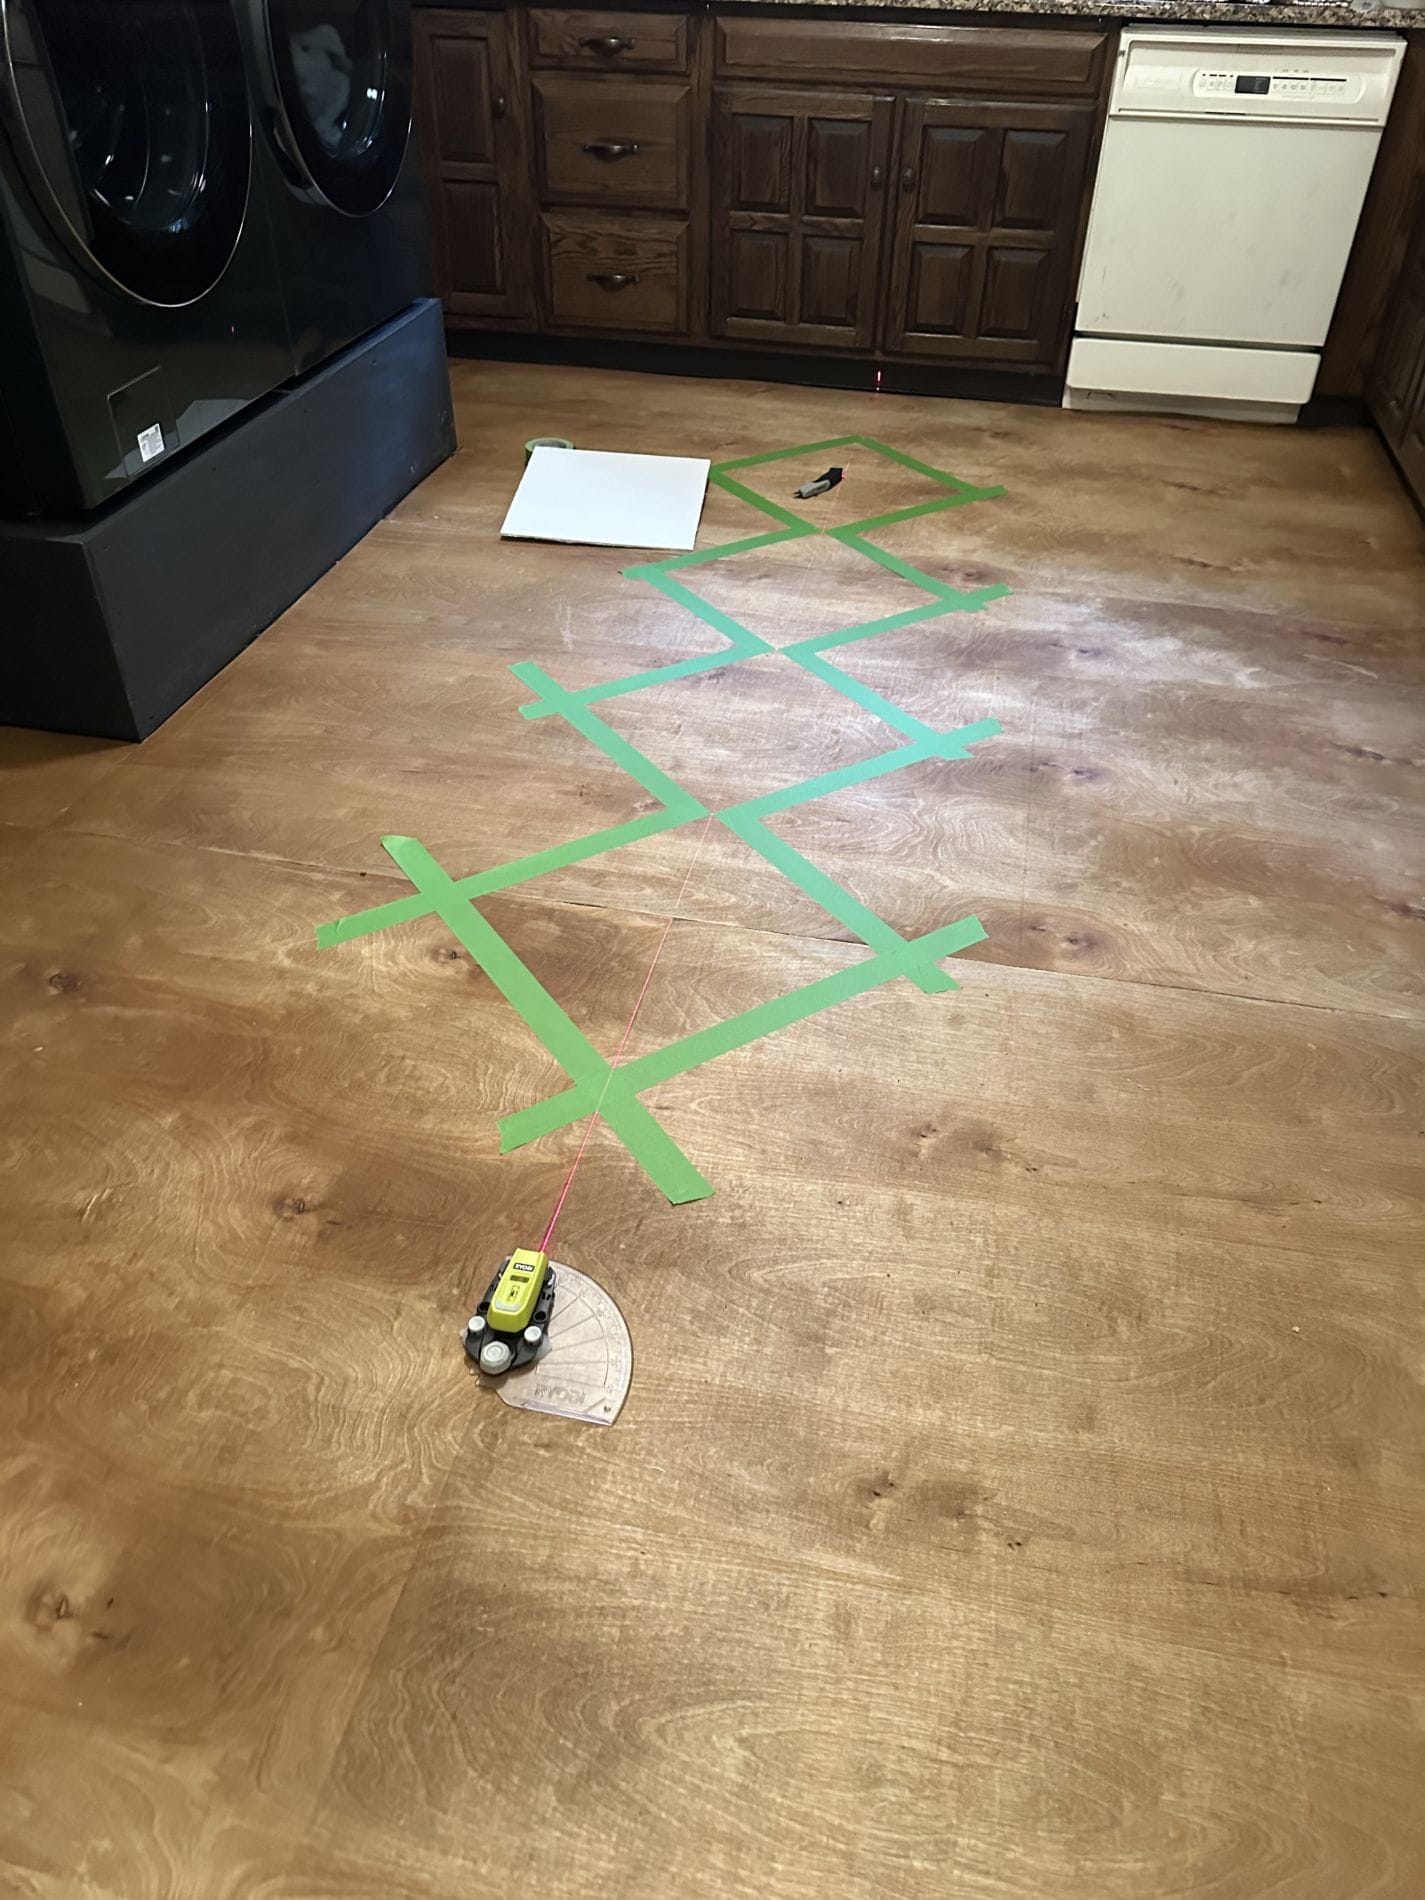
I chose to use a poster board to make my squares and decided on a 16×16 size. Measure and use level to make for an accurate template.
I chose to start in the middle of the room because I knew that’s where my pattern would be most seen and noticeable. Start with a line don’t move too fast be sure each line and row is accurate and you want to rely on your laser for this.
Once you get to your edges you are going to realize your template is not going to work here. I chose to “wing” the side squares by continuing them off the pattern and level for guidance. I made two mistakes but they are barely noticeable.
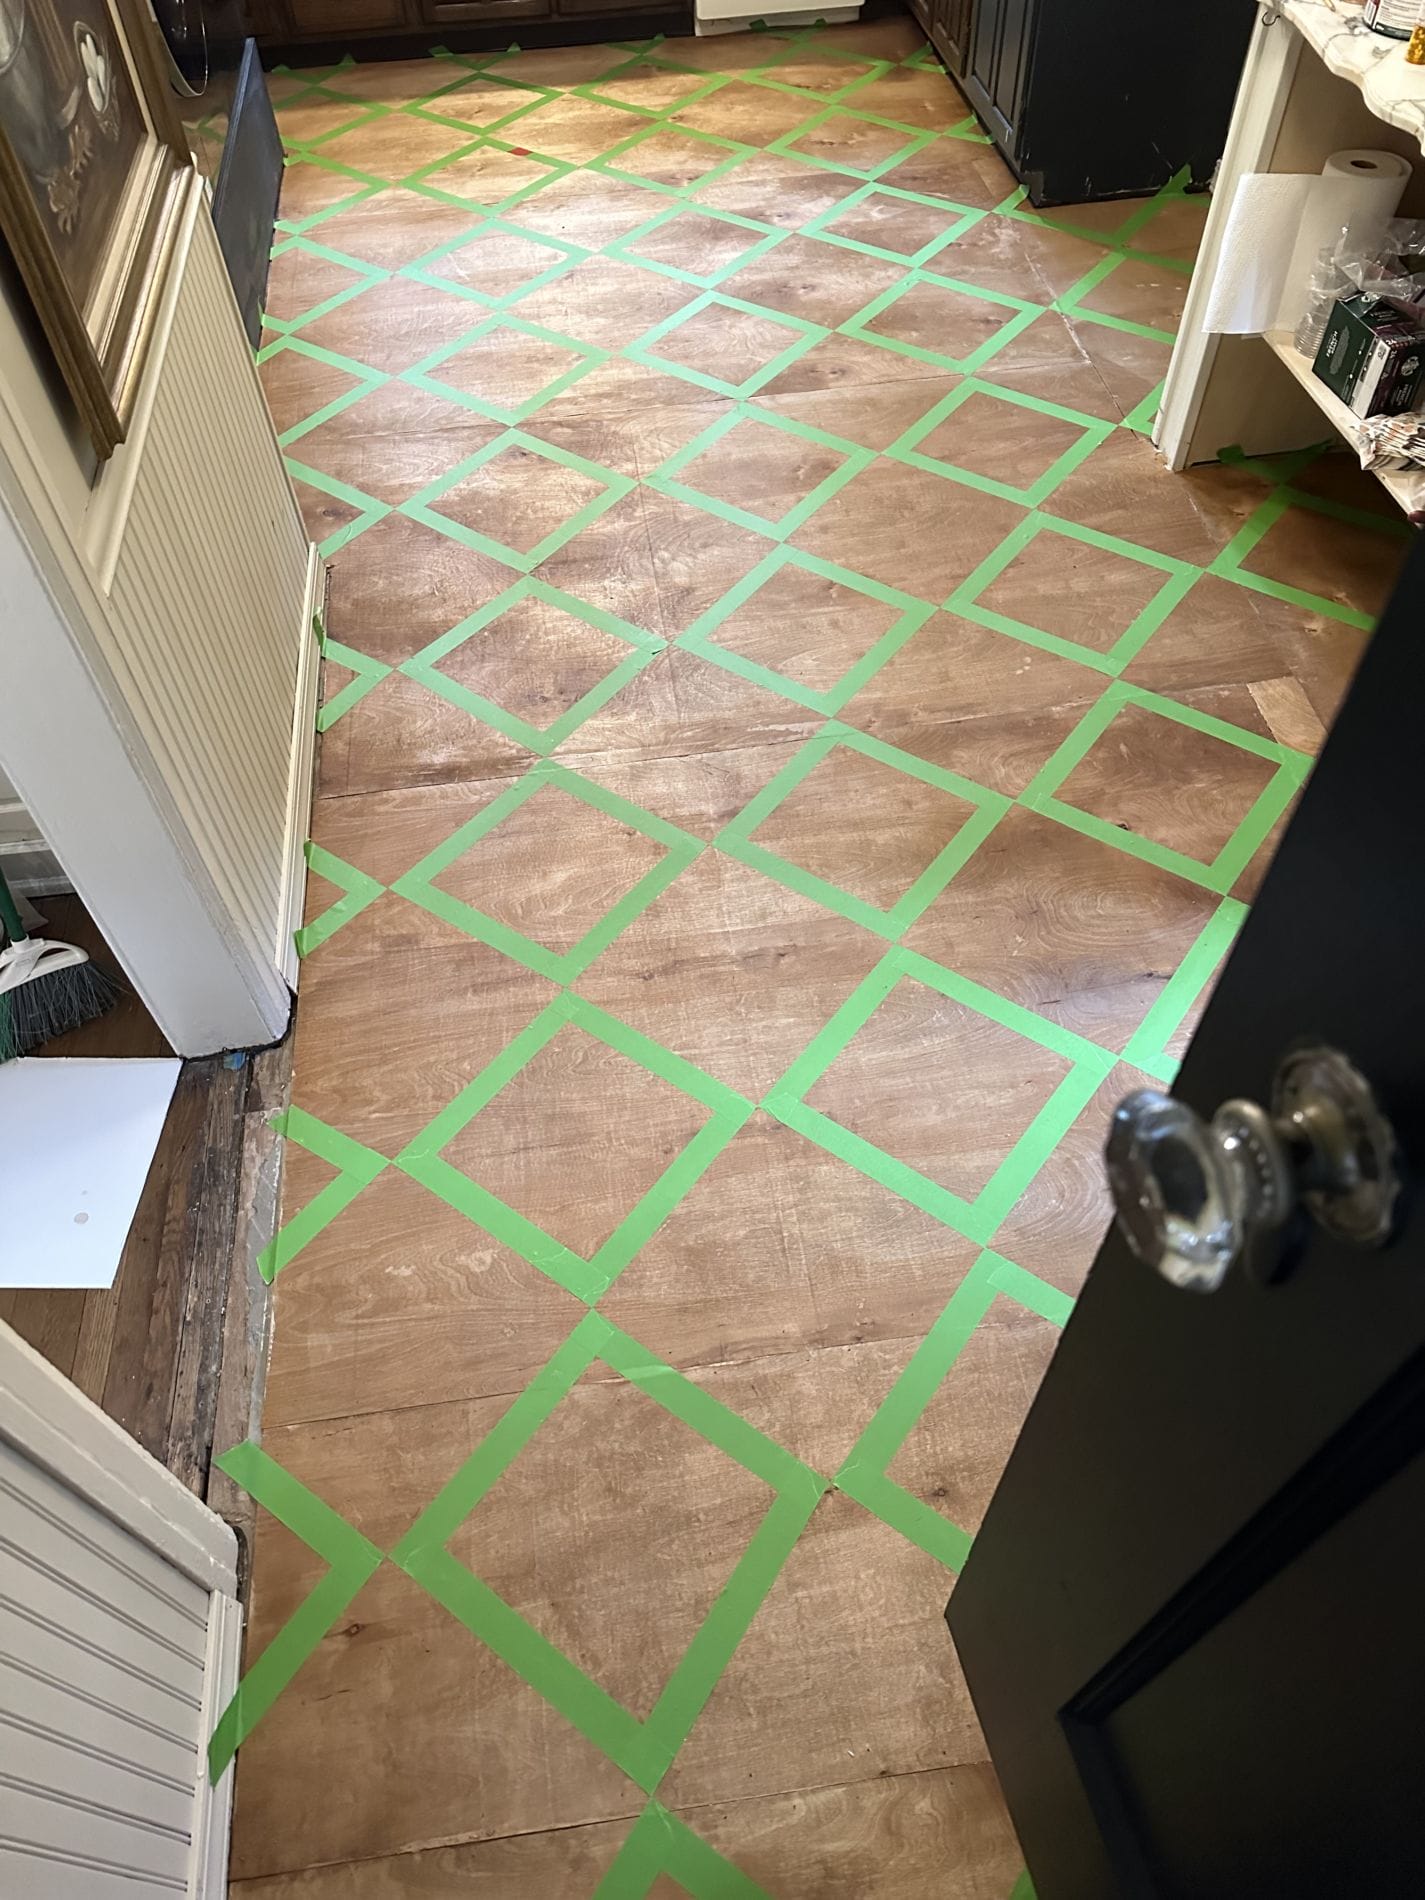
*TIP When taping keep in mind that your painted square will be bigger and your non-painted square will be smaller. Be sure to stop and check yourself every few to make sure you are not messing up this pattern. I also included putting a piece of tape in the squares I was NOT painting to not mess up.
Once all your tape is down you want to go back over with a credit card to smooth out tape to make sure that the edges are sharp.
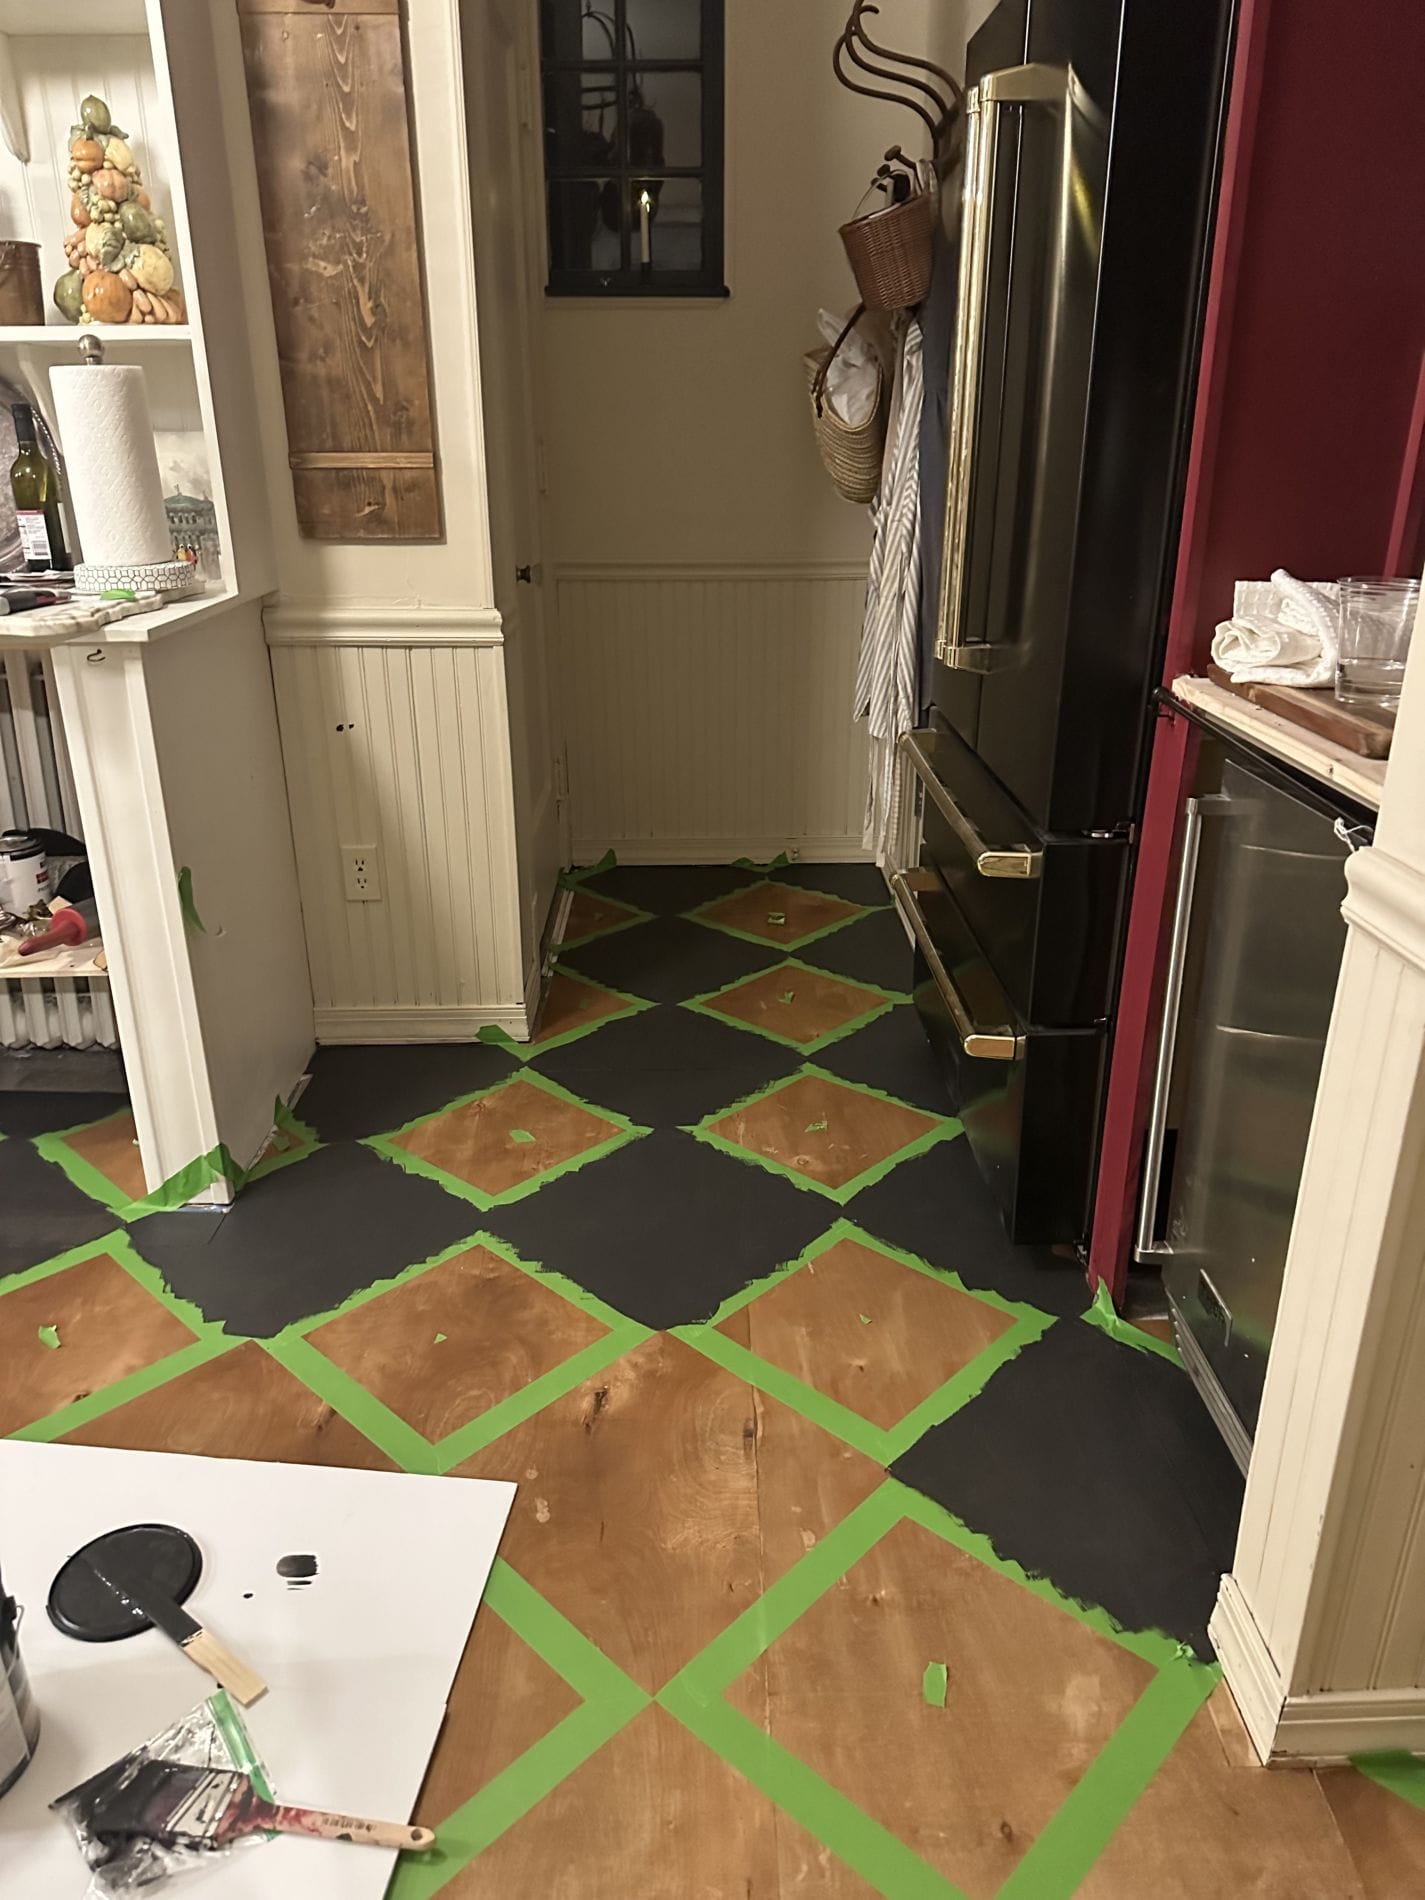
Paint the “larger” squares your color of choice, you can use a roller or a paint brush I chose paint brush so I had more control of bleeding.(2 coats)
Once done let dry but not entirely, I left for about 3 hours before ripping off tape.
After tape, before the poly
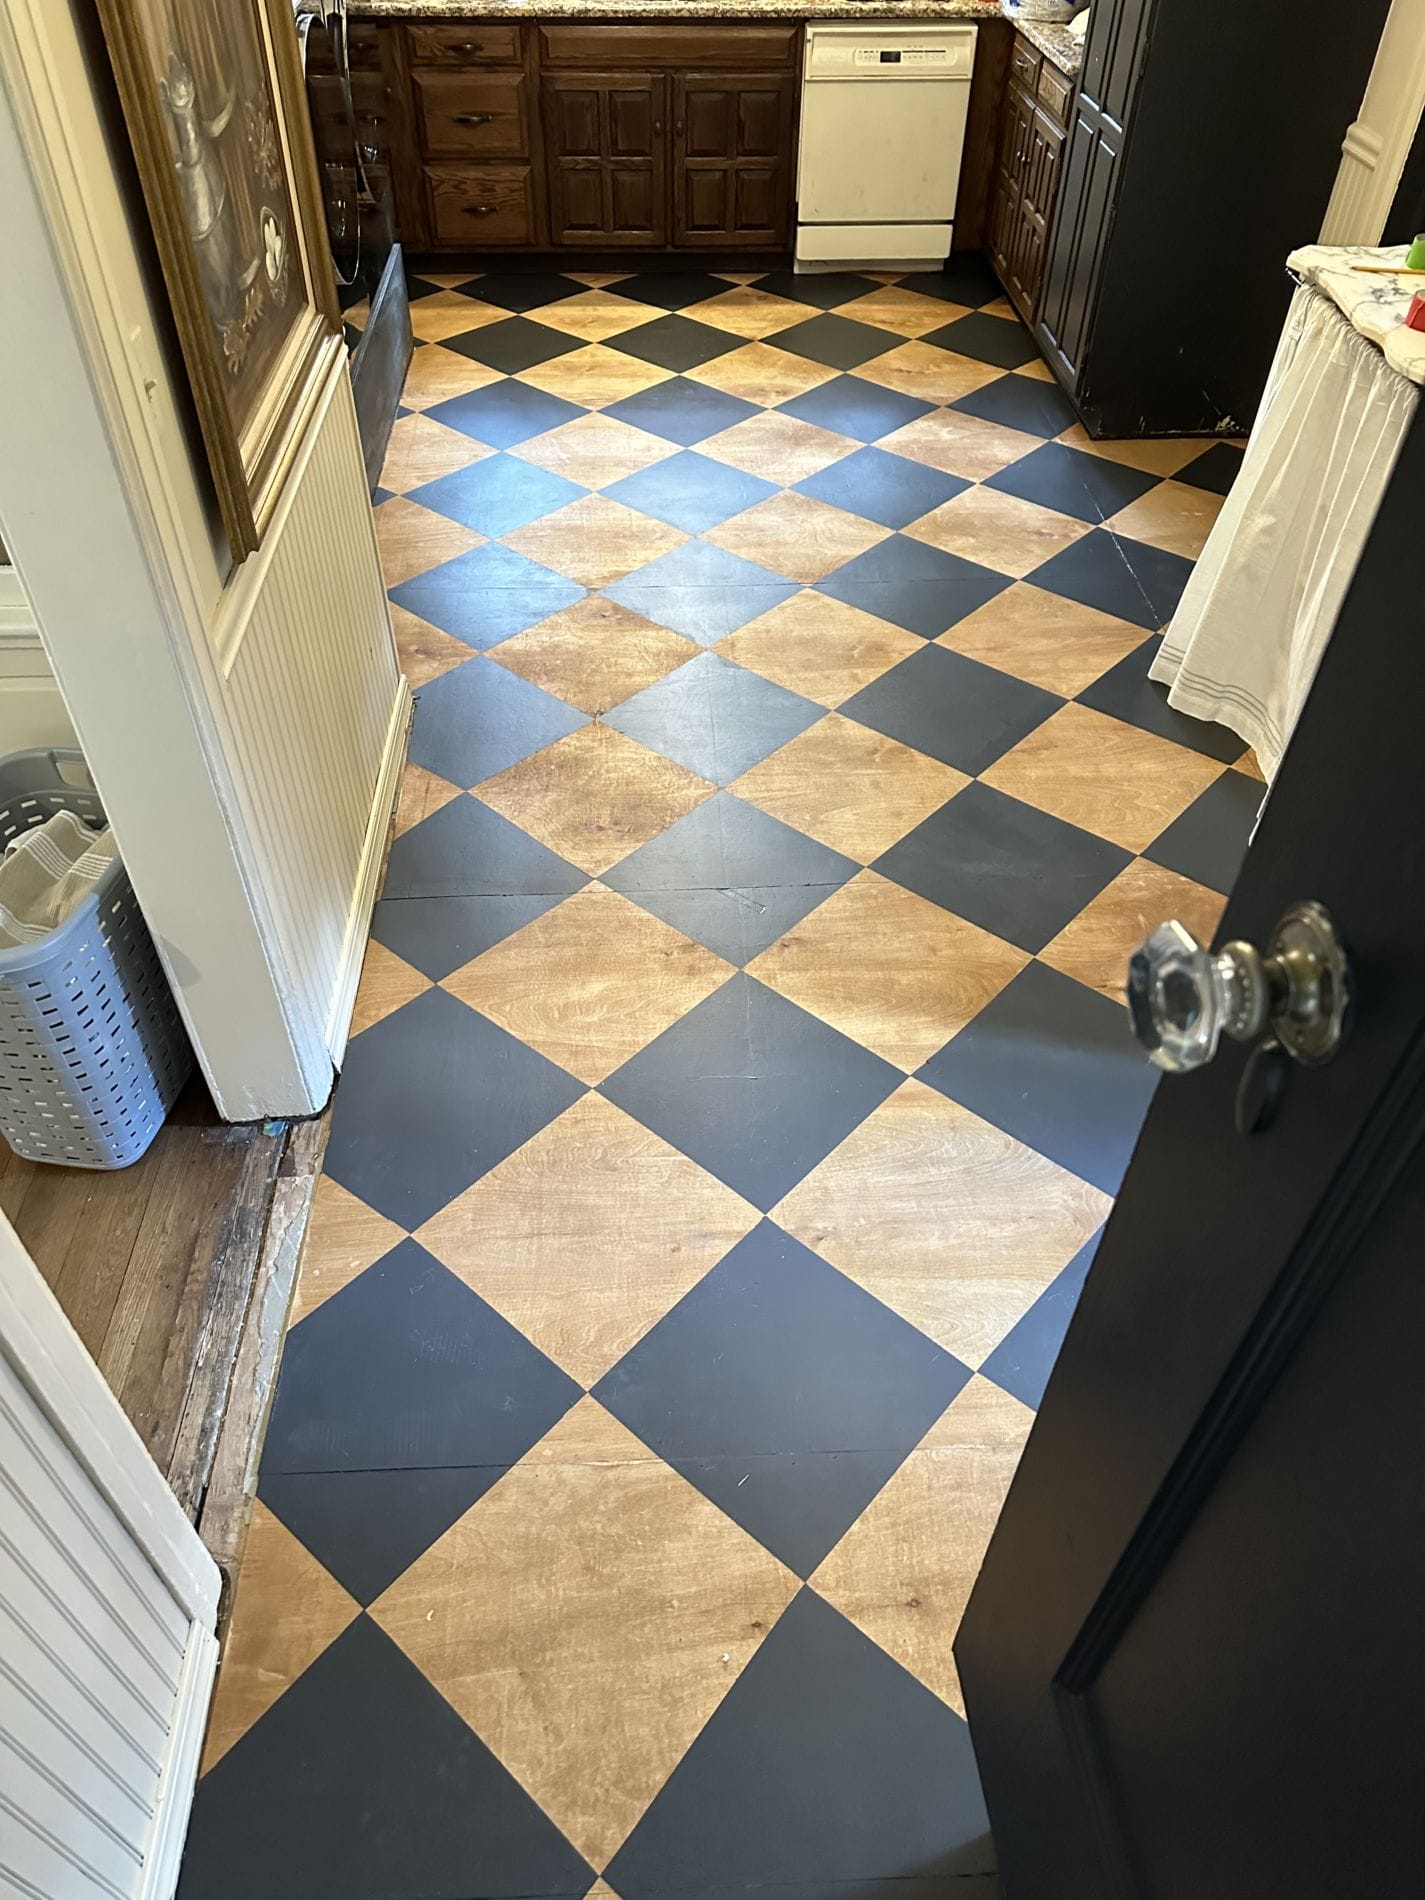
Next day be sure to vacuum or sweep again and then use a poly sponge and stick to apply a coat of poly to seal and protect. This also allows the color and wood grain to pop beautifully. I chose a satin poly. You can do multiple layers of poly if you feel you need the extra protection. I just did the one and its been holding up so nice. I figured we could always add more poly down the road if we need to.
Let dry for 12 hours and walk with socks only first day.
ENJOY! All that hard work paid off and now time to enjoy your beautiful floors. price will vary depending on room size but the cost really is in the wood, paint, and frog tape (I used two rolls).


11 Responses
Such a beautiful job!!! It goes so well with the style of your home too…..😍👏👏👏. Well done!!!
Looks so fabulous! Did you use oil based or water based polyurethane? I’m considering painting my upstairs hallway.
I think water based it was for wood flooring
I LOVE IT!!!!! I am ENJOYING SO MUCH seeing all the progress you are making on turning your “new” house into your true “dream home.” I REALLY am looking forward to seeing how you decorate it for Christmas!!!!
Amazing. The wood grain is gorgeous.
Absolutely gorgeous floors. What a genius of an idea. They look better than tile!! Very vintage looking. You and Dan did an awesome job 💗.
I love everything you’ve done so far in the house. I can’t wait to see the kitchen completed.
Thank you so much Maureen
I am beyond impressed with this project! Thank you for sharing the details!
Absolutely love this, but so confused about attaching to cement floor. You said you glued and nail gunned into the cement?
How??? Please share!
It wasn’t cement its a cement overlay on top of sub flooring so we glued and nailed into that.
WOW JUST WOW!!!!! It is absolutely GORGEOUS!! I did my dining room floor to look like tile MANY years ago and it came out GREAT!! I used marine varnish which is used on boats and we never had to do anything else!! It works beautifully in case you ever want to try something different but we have lived here 47 yrs and no issues at all!! Love love love this floor my friend!! Great job!!