Concrete Countertops with Ardex Feather Finish DIY product.
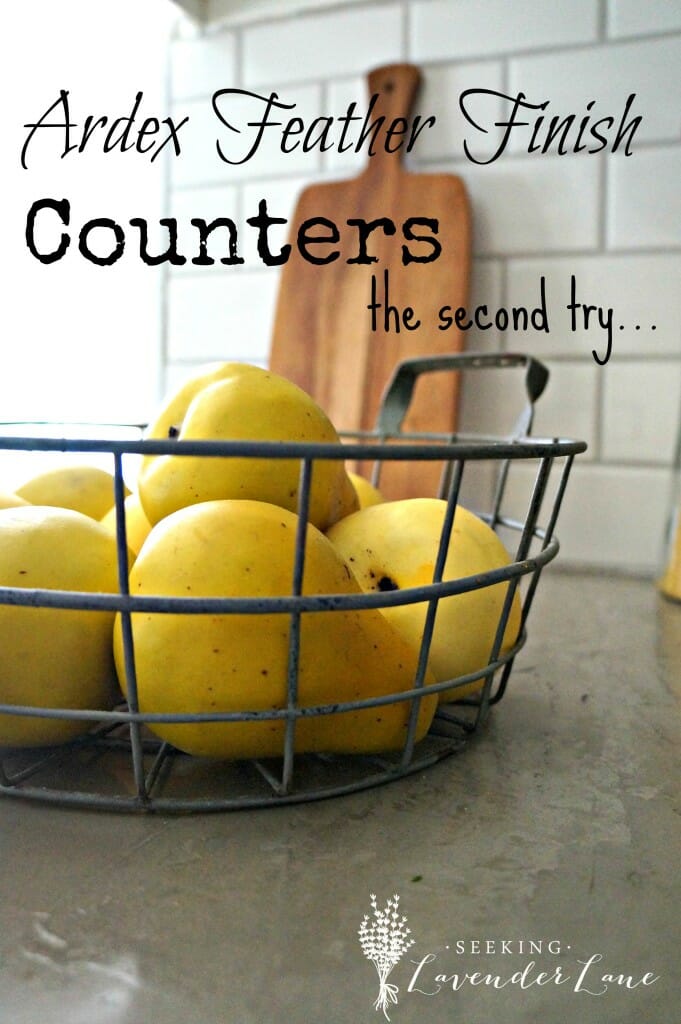
ARDEX Feather Finish Countertops the second try…
Let’s make this clear….the second try is all because I misread a blog post two years ago!
Yes…us DIYers do make mistakes and this one I was completely to blame. Though my countertops held up really well the last two years, the past couple of months the counters started to peel.
Peel?
Yes, because I painted over the counters instead of staining…which the blog post clearly said “STAIN”. I knew when painting them, something was not right. I looked at the tutorial once again and caught my mistake. I was completely bummed…but had to make it work!
I still sealed the counters and like I said they held up pretty well…but after wear and tear the paint started to lift and peel away. I pretty much had no option from here but live with them…or fix them.
I really love the look of the counters and I figured if we did the new layer the right way we would be much happier with them.
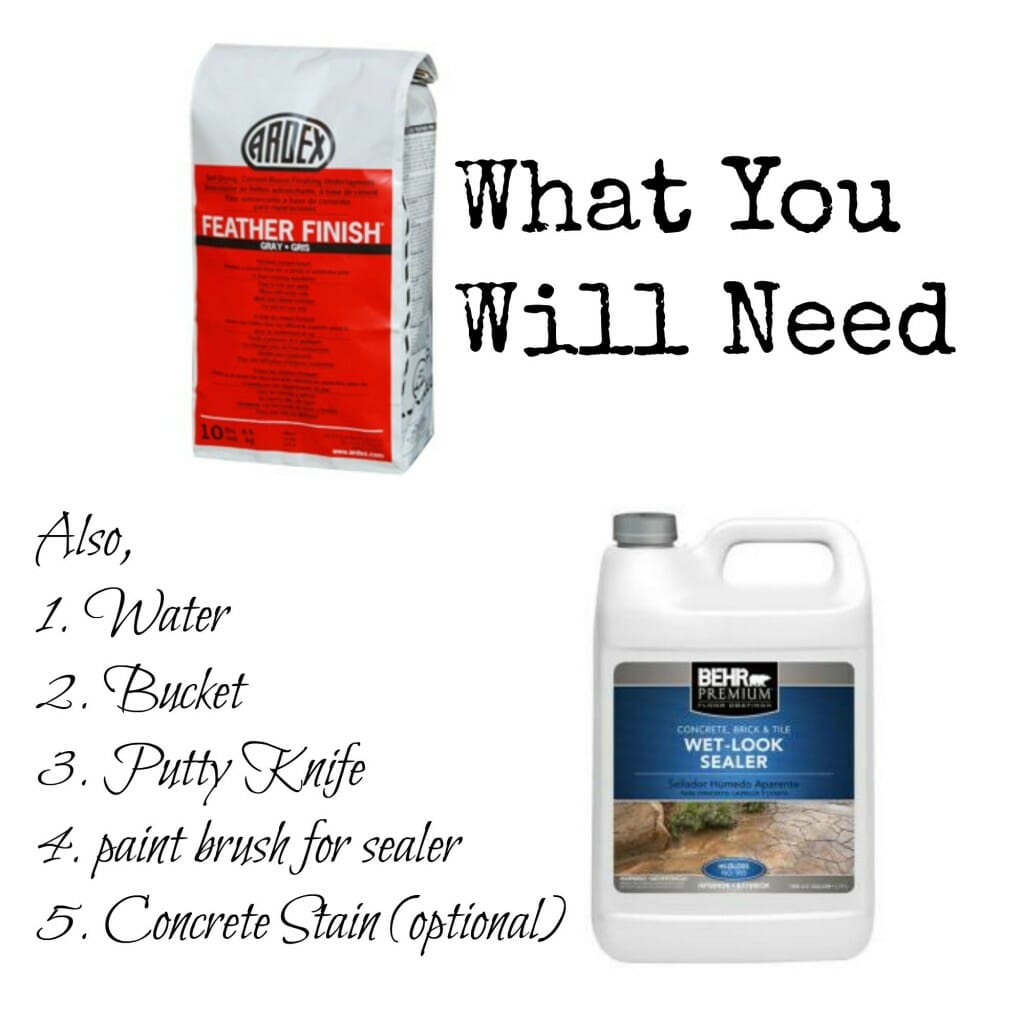
With the new go ’round on the counters, I had to order another bag of Ardex Feather Finish. The price of the Ardex increased since the first time I had bought it, I guess due to the popularity of this product…but still very affordable. Fortunately, I still had more Sealer…which saved me some money.
We had to start by sanding down the counters to create a roughed up surface so that the concrete would stick well to it.
This time we knew exactly how to apply and figured out a better method. I mixed small batches while the hubby applied the concrete directly to the counters. It’s really important to work with small batches since the concrete dries very quickly. It’s funny how this time we protected less of the kitchen and kind of jumped right in. The first time we had taped off the cabinets and had garbage bags to cover everything. Maybe we’re just pros like that now ; )
After applying the new layer as smooth as possible, we let the concrete dry overnight. Keep in mind the concrete dries much lighter than when wet. 8-12 hours should be enough time before adding the sealer. If you choose to add a stain this would be the time to do so. If this is your first time applying the concrete to your counters you will probably add about two layers…we just needed a top coat.
I applied 3 layers of the Wet Look sealer, to protect the counters and to create a glossy look.
Let dry for 72 hours before placing anything on counters. I had to put everything back after 12 hours since I had a BBQ I was hosting the next day. Of course, that is how I usually work…my impulsive decision to choose the day before the BBQ to finish the counters. Fortunately, nothing happened to the counters and we were fine after the 12 hours. I would still definitely recommend the 72 hours to play it safe, and not host a BBQ the next day!
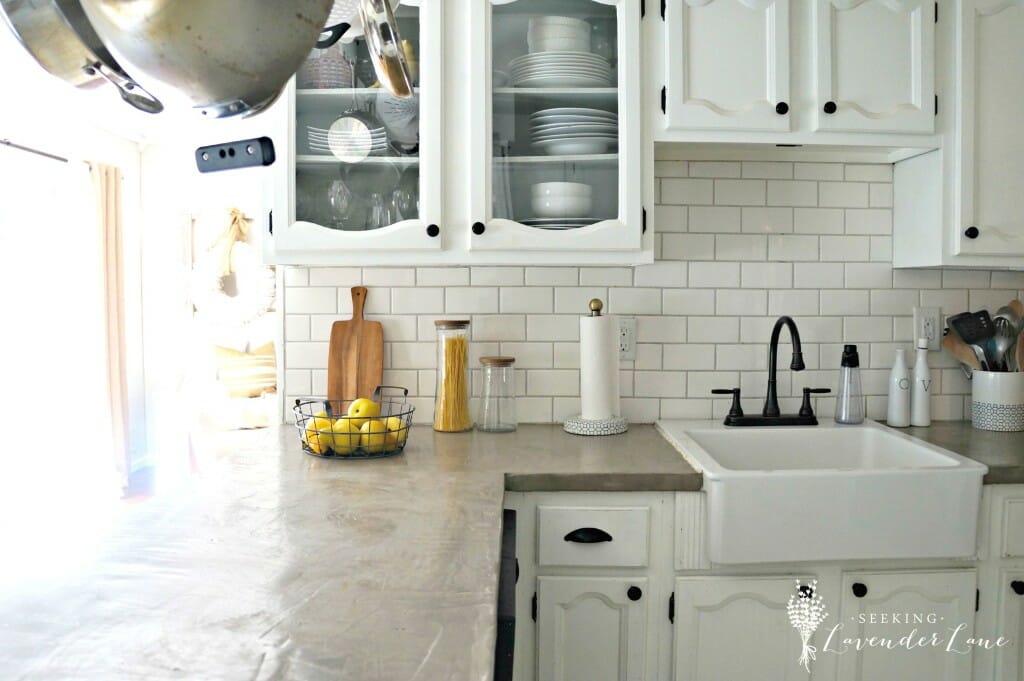
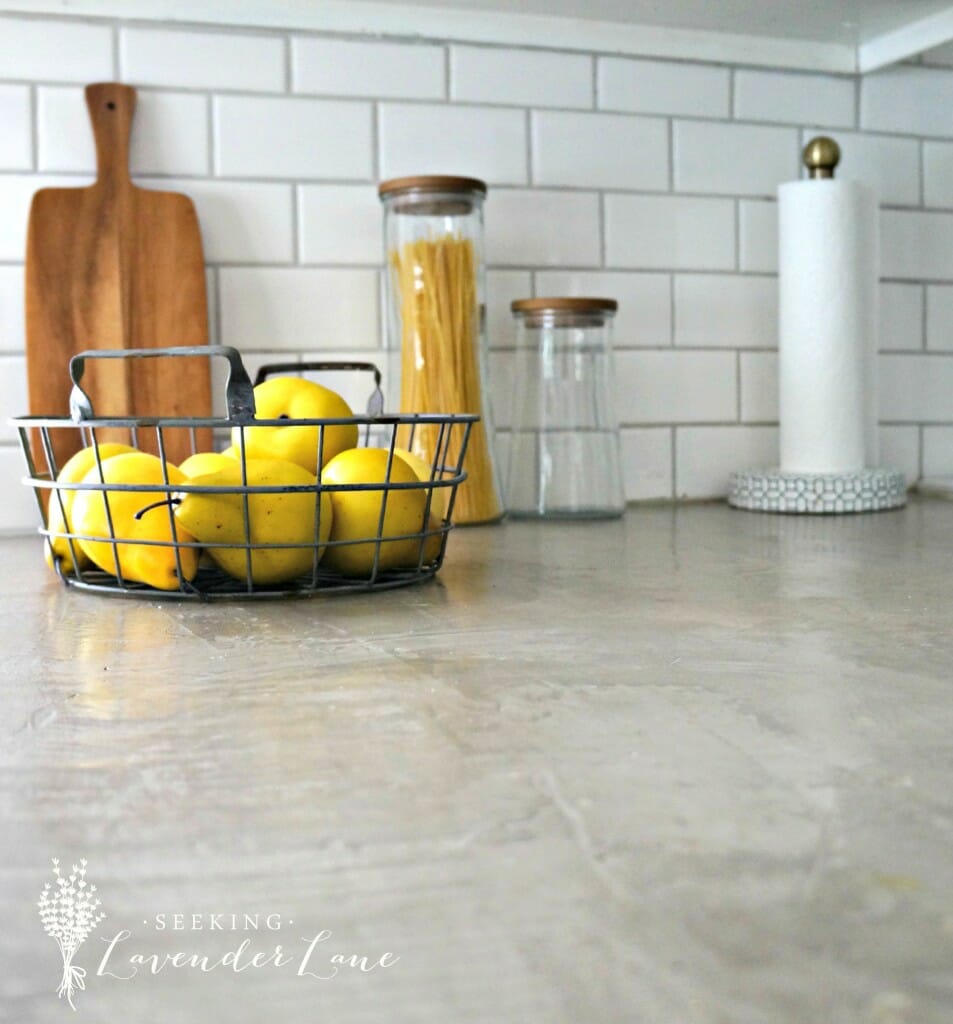
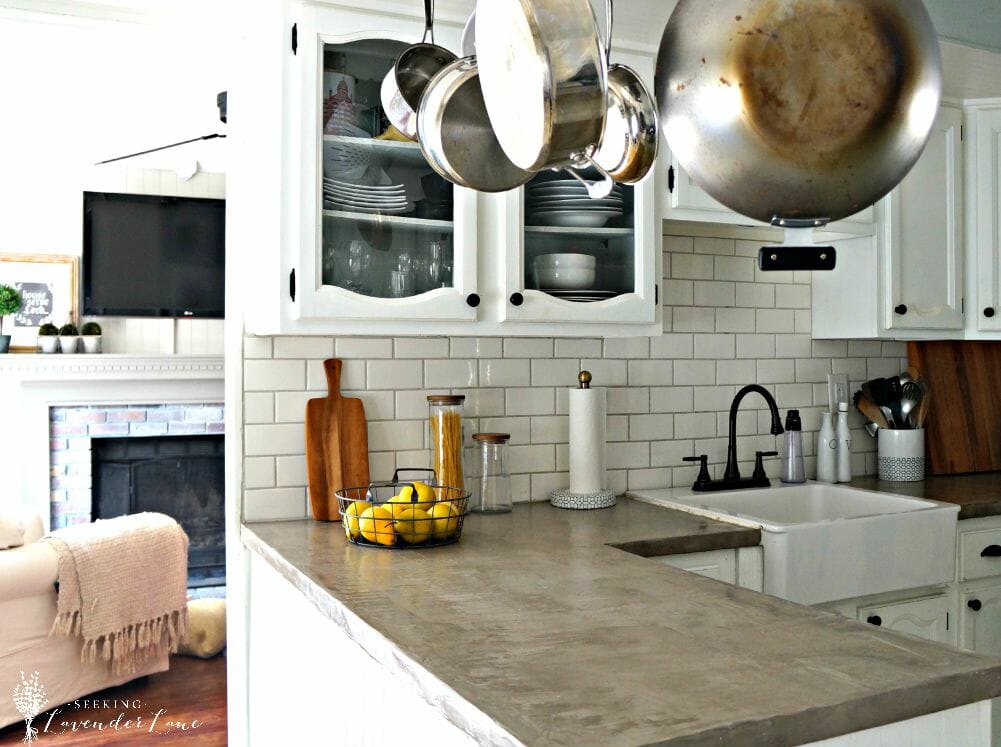
This time around the counters feel more authentic and came out much smoother. They are not perfect…but I love the imperfect look of them, makes them more rustic (that’s what the hubby and I say every time something turns out scratched, scuffed, nicked or has extra holes) Thank goodness for rustic design.
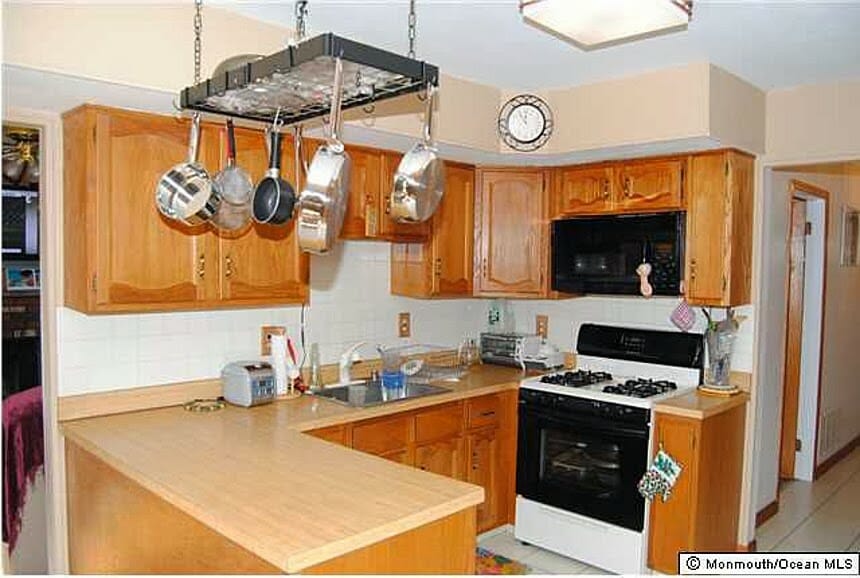
Just thought I would flash a photo of the before kitchen again…if this is your first time stopping by.
You can see the counters were laminate and we used the concrete right on top of them.
And the new once more…
So glad we went for the Ardex Feather finish countertops the second time. Made me proud of my kitchen again after hiding the peeling counters the last few months.
More on Concrete Countertops and DIY Kitchen Makeover
All you Need to Know About Ardex Feather Finish Countertops
The Easy Way to Painting Kitchen Cabinets




Beautiful! Questions…do you feel that it’s uneven when you put a plate down etc? And could I do this over tile?
Tara recently posted…How to Save Money On Home Projects
Hi Tara,
it is not complete flat..but not totally uneven that the plate would be lop-sided. I am almost 100% sure you can use this on tile…you just have to scuff up the surface really well.
Deb, these came out great! I have had a box of that feather finish for a year, but I’ve been too afraid to do it. My kitchen is a major before! Hopefully your photos will inspire my husband as much as they just inspired me, lol!
Roxanne recently posted…Outdoor Entertaining
Thanks Roxanne! OH I know what you mean…it’s always about convincing the hubby right. I have to say it was one or the easier projects…not so bad. Maybe test it out on a table first. I have some left over eager to do another project with it.
Your counters look amazing! I absolutely love this look and it seems so doable. I’ve always loved the way concrete counter tops look. I’m really tempted to do this on our laminate counter tops now!
Ooooh Thanks Amanda! You should…I love it! Only if you hate your counters though lol. It was an easy and affordable fix since we can’t re-do our entire Kitchen. Poured Concrete counters are great, but this at least can show you whether you like the look or not before you go through the trouble and expense of it all.
Your kitchen is fantastic and your counters are now great!
As a DIYer I also happen to make some mistakes while decorating my house.
But the best lesson is when we learn from our mistakes:-)
Greetings from Poland:-)
Hi Anita,
Wow Poland, love it!
Thank you…yes learning from our DIY mistakes and making them better is the fun in all this : )
Wow! This turned out stunning! I found you from the Shabby Nest Link party and I’m glad I did. Wish I had done this to our counters in our old house. They turned out great. Thanks for sharing!
thisgratefulmama recently posted…DIY Glass Photo Pendant Beaded Necklaces
Oh thank you so much! Such a cool product. You can for sure do this on anything though..if you wanted to build an outdoor bar or something it would be great on that too!
Your whole kitchen is beautiful. I had no idea you could do this to counters! Love the bright look and rustic counters now. Fantastic job!
Sarah recently posted…Back to School Mason Jar Gift
Thank you Sarah! It makes a drastic change for such a small price!
I LOVE THIS! This was perfect timing for you to write this! I’ve been reading up on this and you just gave me the extra nudge to do it! I want to do it for our main bathroom upstairs. Yours turned out great and really completes your gorgeous kitchen!
Ruthie recently posted…Adding Color to Your Space
Oh really…I would love to use this in a bathroom too…except I have those ugly 1980’s shell sinks lol I would have to replace the entire top no hiding that. Can’t wait to see how yours turn out…I really do love this product!
In my research on this product I read a tutorial by someone who did do this with built in sinks. They just applied the concrete in the sinks. Took a little extra smoothing but they did it. I think I found the original post through Hometalk.
I just recently did this concrete technique on my master bathroom counter top. I love it! I am glad to hear that yours have held (minus the paint) for two years. I figure a kitchen counter takes more of a beating than a bathroom counter. I appreciate your information. Your kitchen is simply lovely!
Thanks kathrine! I would love to add this to a bathroom counter…I love that look. Yes, they held up really well. As long as you’re not expecting perfection you will be happy with this product.
As they say, second time is a charm! They look fabulous Deb! I can totally see myself misreading something… lol! Your kitchen has come a long way and looks amazing! Thanks SO much for sharing at Your Turn To Shine 🙂 xo
Thank you Kendra : )
Looks AWESOME, Deb! I’m dying to try this one day in our kitchen too. I love love love your house! …But you probably already know that. 😉
Lauren recently posted…The Beginner’s Guide to Painting Cabinets
Thanks Lauren! I love this product so much…It really is a perfect product to achieve that rustic look for a great price.
Your countertops turned out SO good, Deb! Your entire kitchen is gorgeous.
Amy | Canary Street Crafts recently posted…Duck Egg Blue Table
Thank you Amy! : )
Love your kitchen! My husband and I plan on building in 5 years and I want a white kitchen! Just wanted you to know it is lovely!
Adeline Mills recently posted…The Bedroom
Thank you so much Adeline! I swear a white kitchen never gets old. That is going to be so fun when you build your home…Oh I would love to start one from scratch!
Can the Ardex Feather Finish be used over Tile counters (that I absolutely HATE)?
Lynn, Absolutely! Just be sure to really rough up your tile so that the Ardex will stick to it. Also, be sure to not have any cracked tiles, that could be a problem. I hope this helps!
Love, love, love your counters, Deb! I am thinking of doing mine like this and seeing yours is pushing me a little bit further off the fence, LOL. Your kitchen is so gorgeous!
Sarah @ Little Red Brick House recently posted…Guest Posting at Lovely Etc.
Thank you so much Sarah! that’s so exciting, you should or sure go for it!
Looks gorgeous!
I ask Behr if the sealer was food safe FYI
@BehrPaint
Jan 20
@SusanHamrick Hi, we don’t recommend using this product on a surface that may come in contact with food … (1/2)
Hi Susan, thanks so much! Fortunately, we don’t cut any food on our countertop. I know Behr did not make the product to be used for countertops, but I was 100% fine with using it on mine. Thanks for your comment.
How did you Finnish the edges od the counters?
Thank you, love the post.
Sharon
Hi Sharon,
We smoothed them out, and taped off from the cabinet. It’s like icing a cake ; )
Hi there,
Beautiful job on your kitchen. I am looking to do the feather finish on my laminate counters, but also want to install Ikea’s farmhouse sink. I noticed your farmhouse sink. Did you install your sink prior to doing the concrete overlay or after? Did you have to cut into your pre-existing laminate counters prior to installation, if so, any tips? Did you use a specific caulk when sealing the space between the sink and the concrete overlay?
Thanks!!
Hi Lizzy,
Thank you so much! Unfortunately, I never documented our ikea sink on the blog. As for the installing it, we did have to cut into the cabinets and counter. The concrete was installed after the sink was in. Caulk the sink to protect the counters and from leakage. I hope this is helpful!.
Hi there! I was wondering if you would mind if I use a picture from this post on my blog, Biscuits & Burlap. I am currently writing a post about my plans for my bathroom renovations and wanted to use your picture to illustrate the possibilities regarding the counters. If you don’t mind me using it, I will link back to your article in my post. Please let me know!
Hi Sara, no problem! thanks so much for asking : )
I’m wondering about how durable the edges are? Have you had to baby the countertops much? I saw on a different website that they had problems with heavy objects leaving dents in the material. Do you have any comments on how durable?
I actually have no problem with the edges of the counters, as well as getting dents. The only problem I have had is with oil stains. I think the one great thing about the product is that it’s easy to sand them down and do a new layer on top. Ardex are def not a permanent solution to counters. If you are planning to go with more of a permanent concrete then definitely poured concrete is a better solution. Ardex is a great “getting by” solution and is affordable and easy to do.
Hi, nicely done….im wondering if you stained or added any color to mix prior. Ive seen other countertops done with this product and they seen differet shade. I love the shade of yours. Again, beautiful kithen and great job.
Thanks,
Considering this project
Hi Hilda,
You’re not the first person to say that! Hmm..nothing different here. I’m wondering if it’s just that my kitchen has a lot of light. So the counters just seem lighter. I would say they are a true concrete gray color.
Hi there! Love your countertops! Did you notice if the Wet Sealer darkened the concrete at all? I’m using white and grey concrete and mixing them to get a lighter shade. The sealer I was testing out darkened it quite a bit and I don’t like the look of it. I just came upon your blog and love the way yours look once sealed.
Hi Brandy, That sounds amazing!!! Mine darked slightly, but they do have a very natural color to them. I of course loved how they looked best before I sealed them, but of course that would have never worked. I have a post coming up soon about a new product I’m using on the counters…stop on back and check that out. I’m thinking probably early May.
Love your countertops! Will you please tell me what you did with the lip part of the laminate countertops before adding concrete? I see that the flat surface now runs right up to the wall. Thank you in advance.
Yes, so we removed the lip. Then we filled it in with the ardex and then went over the entire surface. I hope this helps!