


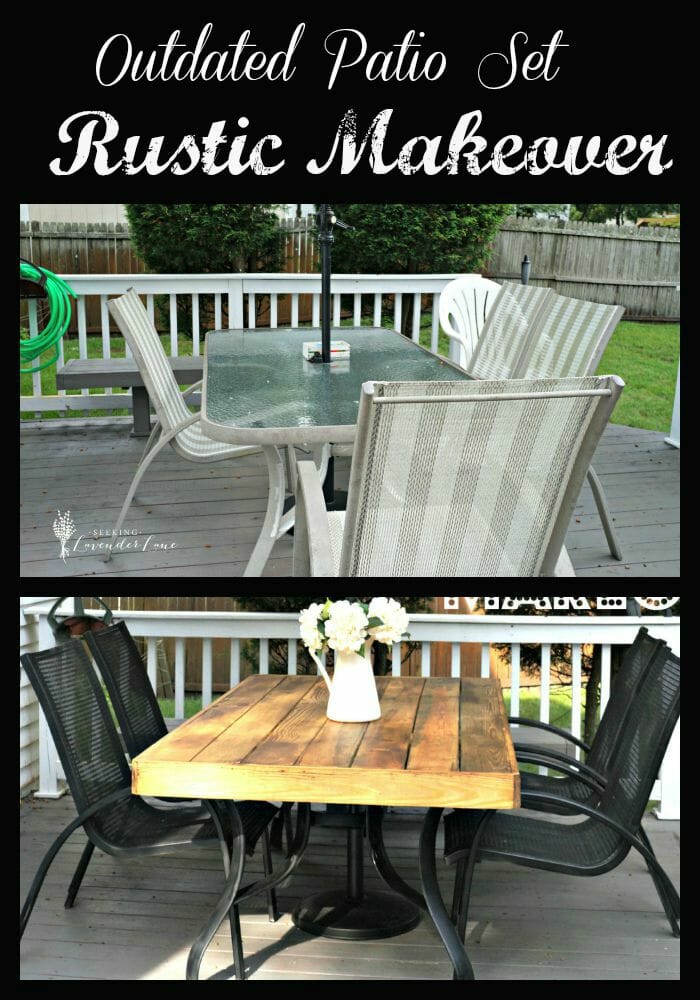
Cheap home decor: how to update an outdated outdoor furniture to create a French rustic cafe setting in the backyard using old outdoor furniture.
That time I went to Paris for a week in college and the one afternoon we had some free time to enjoy a small outdoor French cafe where we had cocktails and I had the most delicious crepe with roasted duck inside. I have never felt so relaxed and poised at the same time. It’s a moment I’ll never forget (probably my favorite of the entire trip) and yet I long to have that feeling back again. What about having that every summer night in the backyard? The problem is…I have an outdated patio set…that needed a rustic makeover!
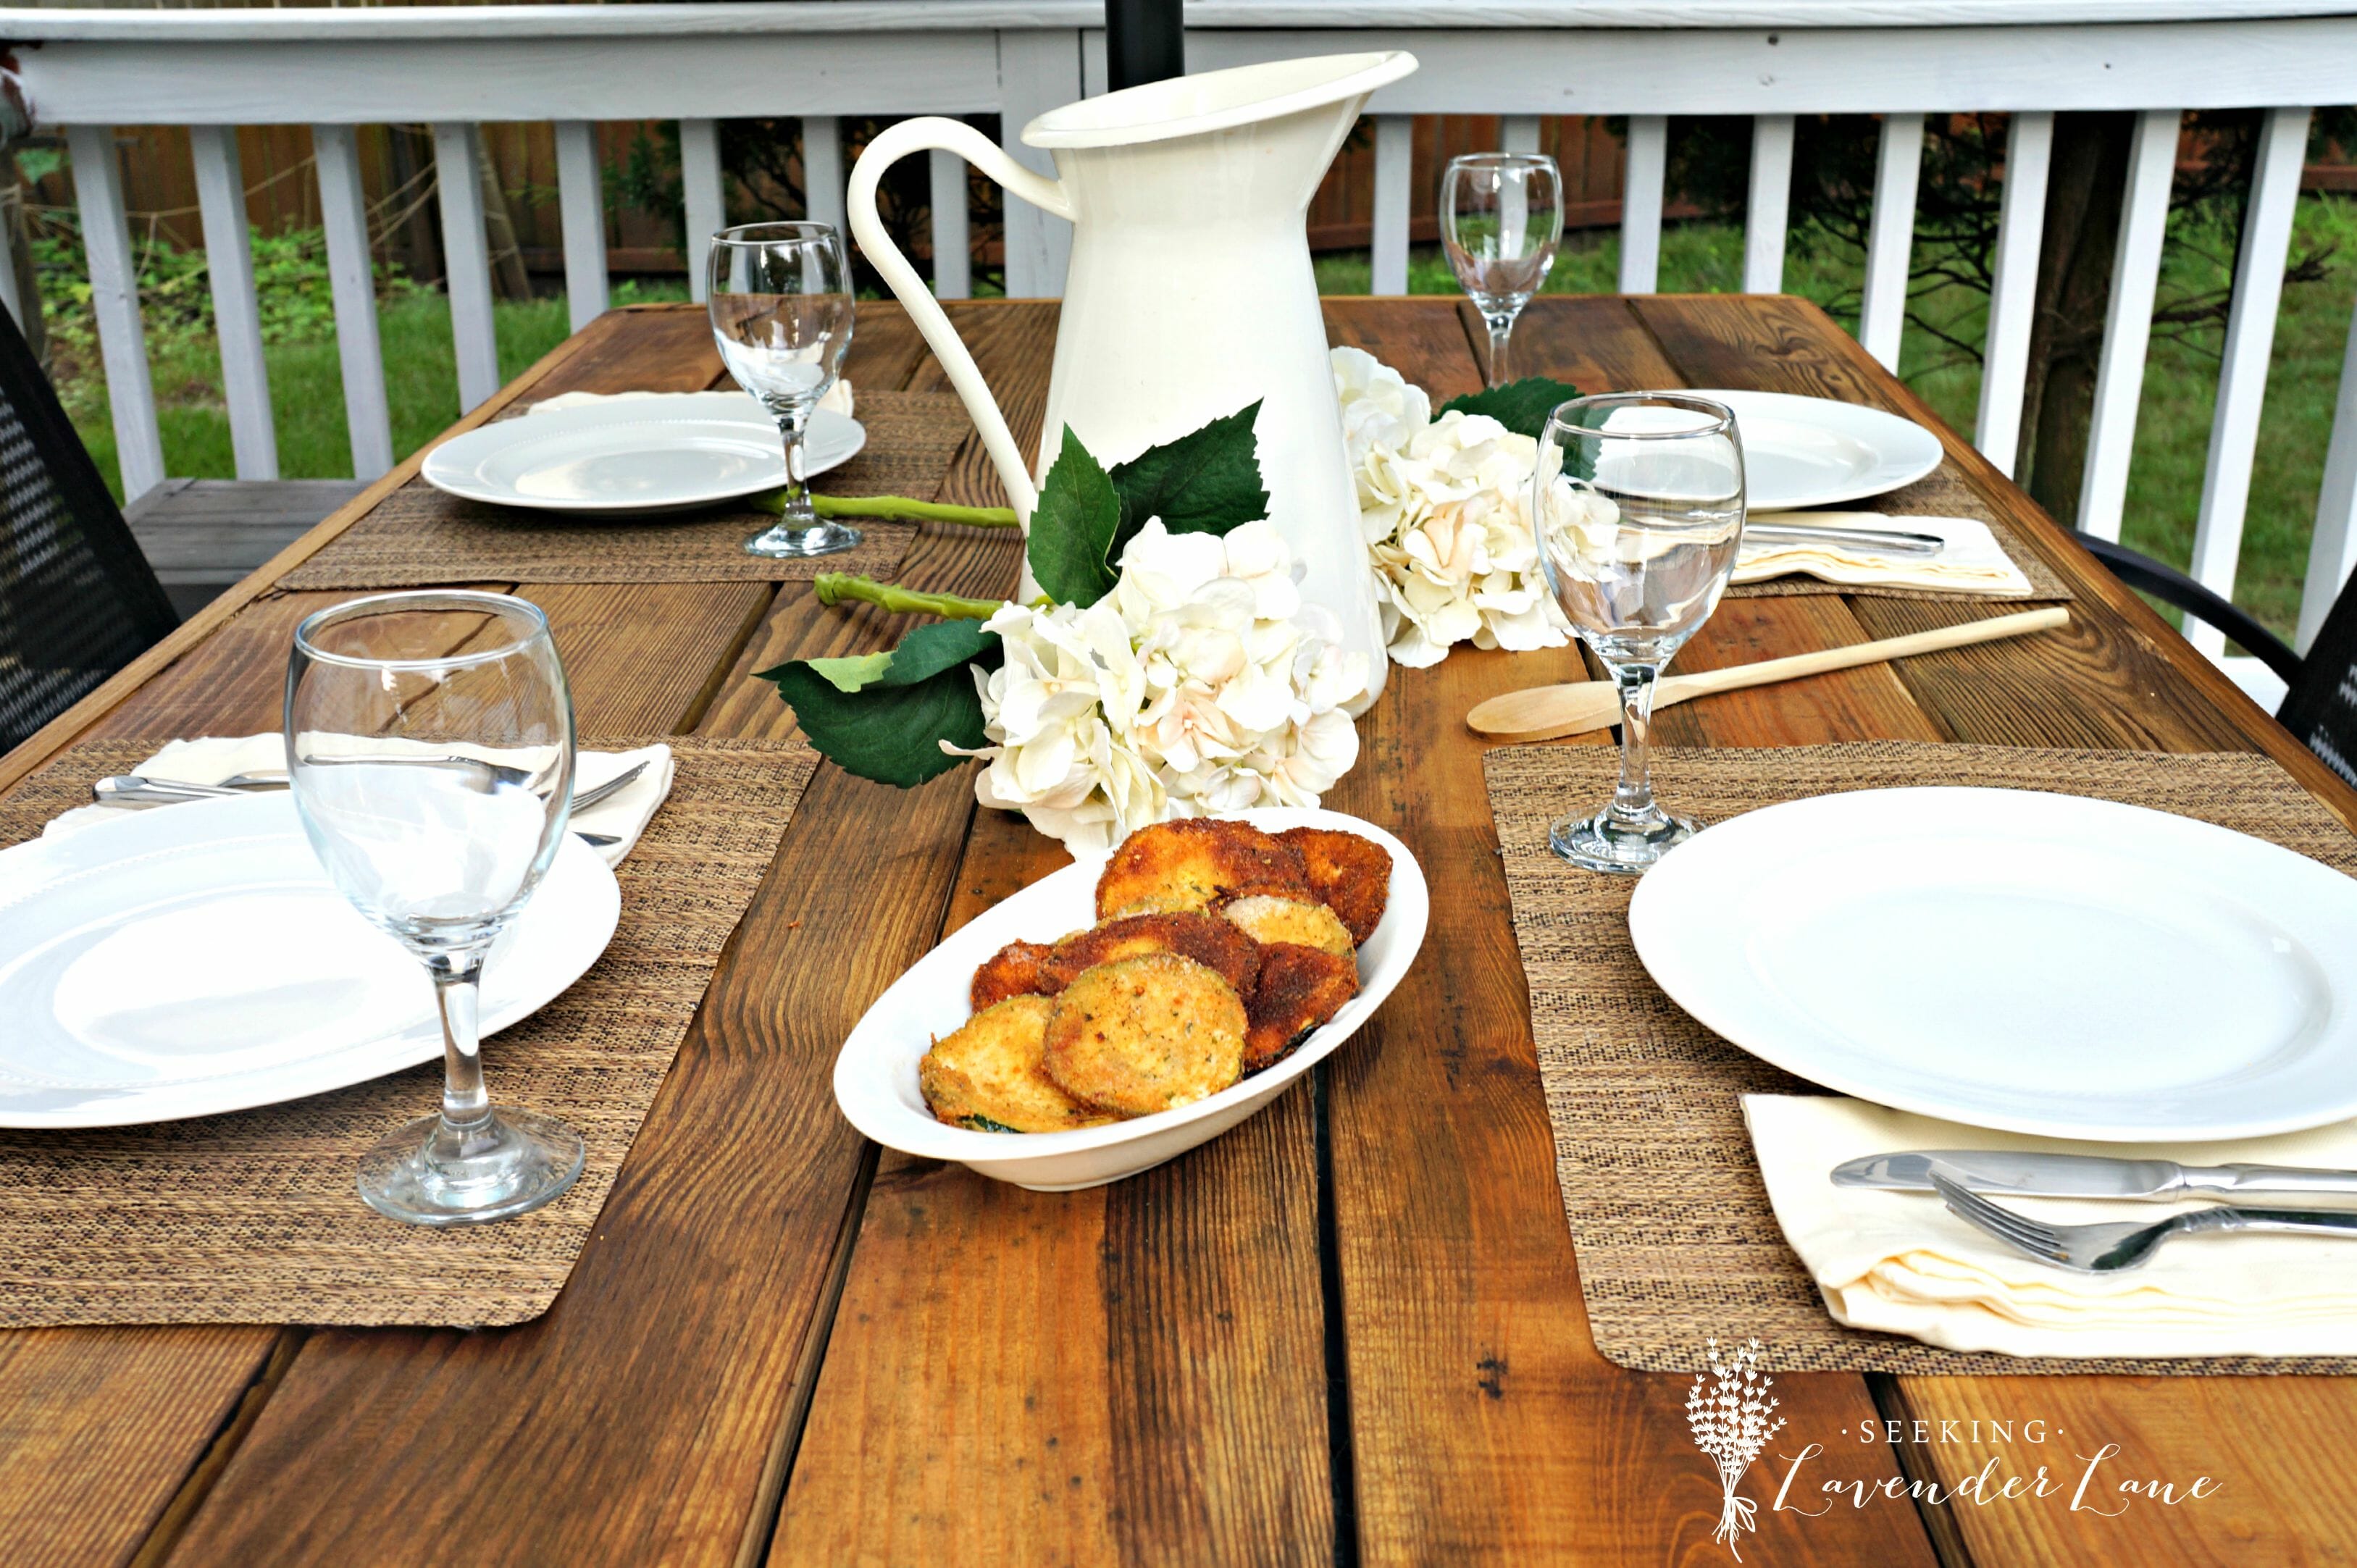
I decided to create a French rustic cafe setting in the backyard using the outdoor furniture I already have for a cheap home decor make-over. A spot that makes you feel as if you are on a vacation that won’t end. A spot to enjoy coffee every weekend morning, afternoon seltzer and magazine reading breaks, and where every summer night should end with a glass of wine and good music. I started with my outdated patio set and gave it a rustic makeover.
This post contains affiliate links that I make a small commission from with no added cost to your purchase.
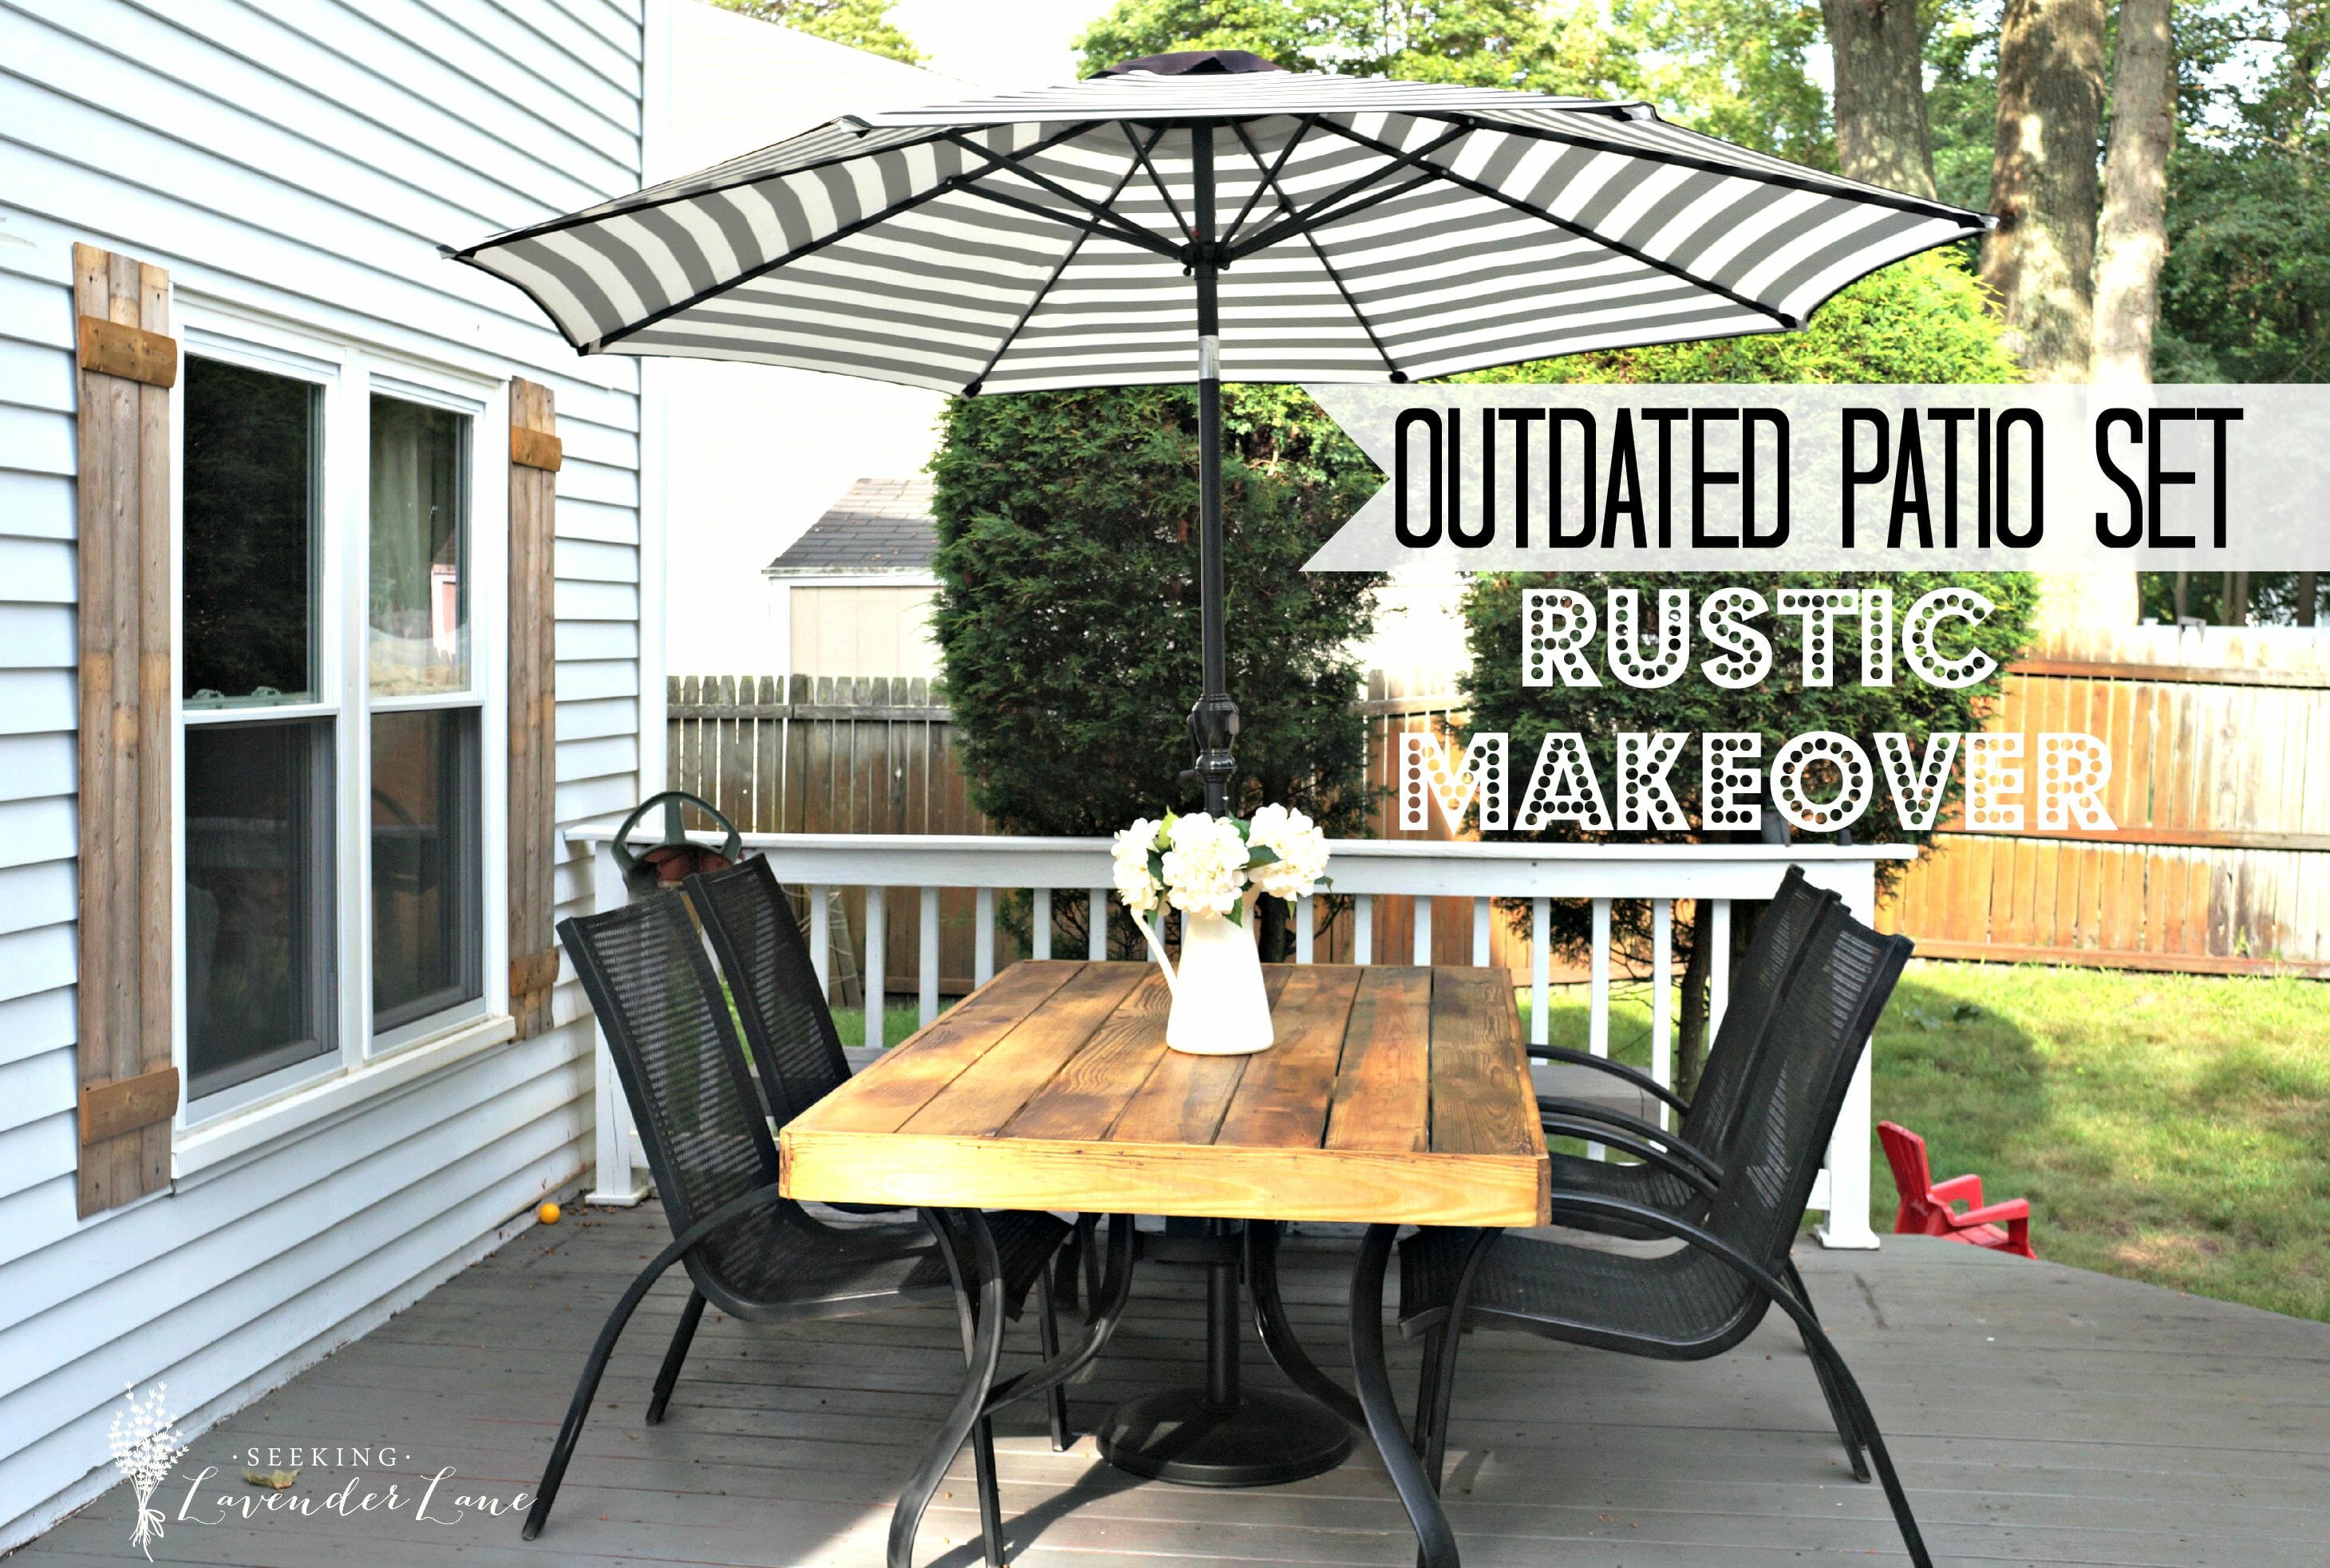
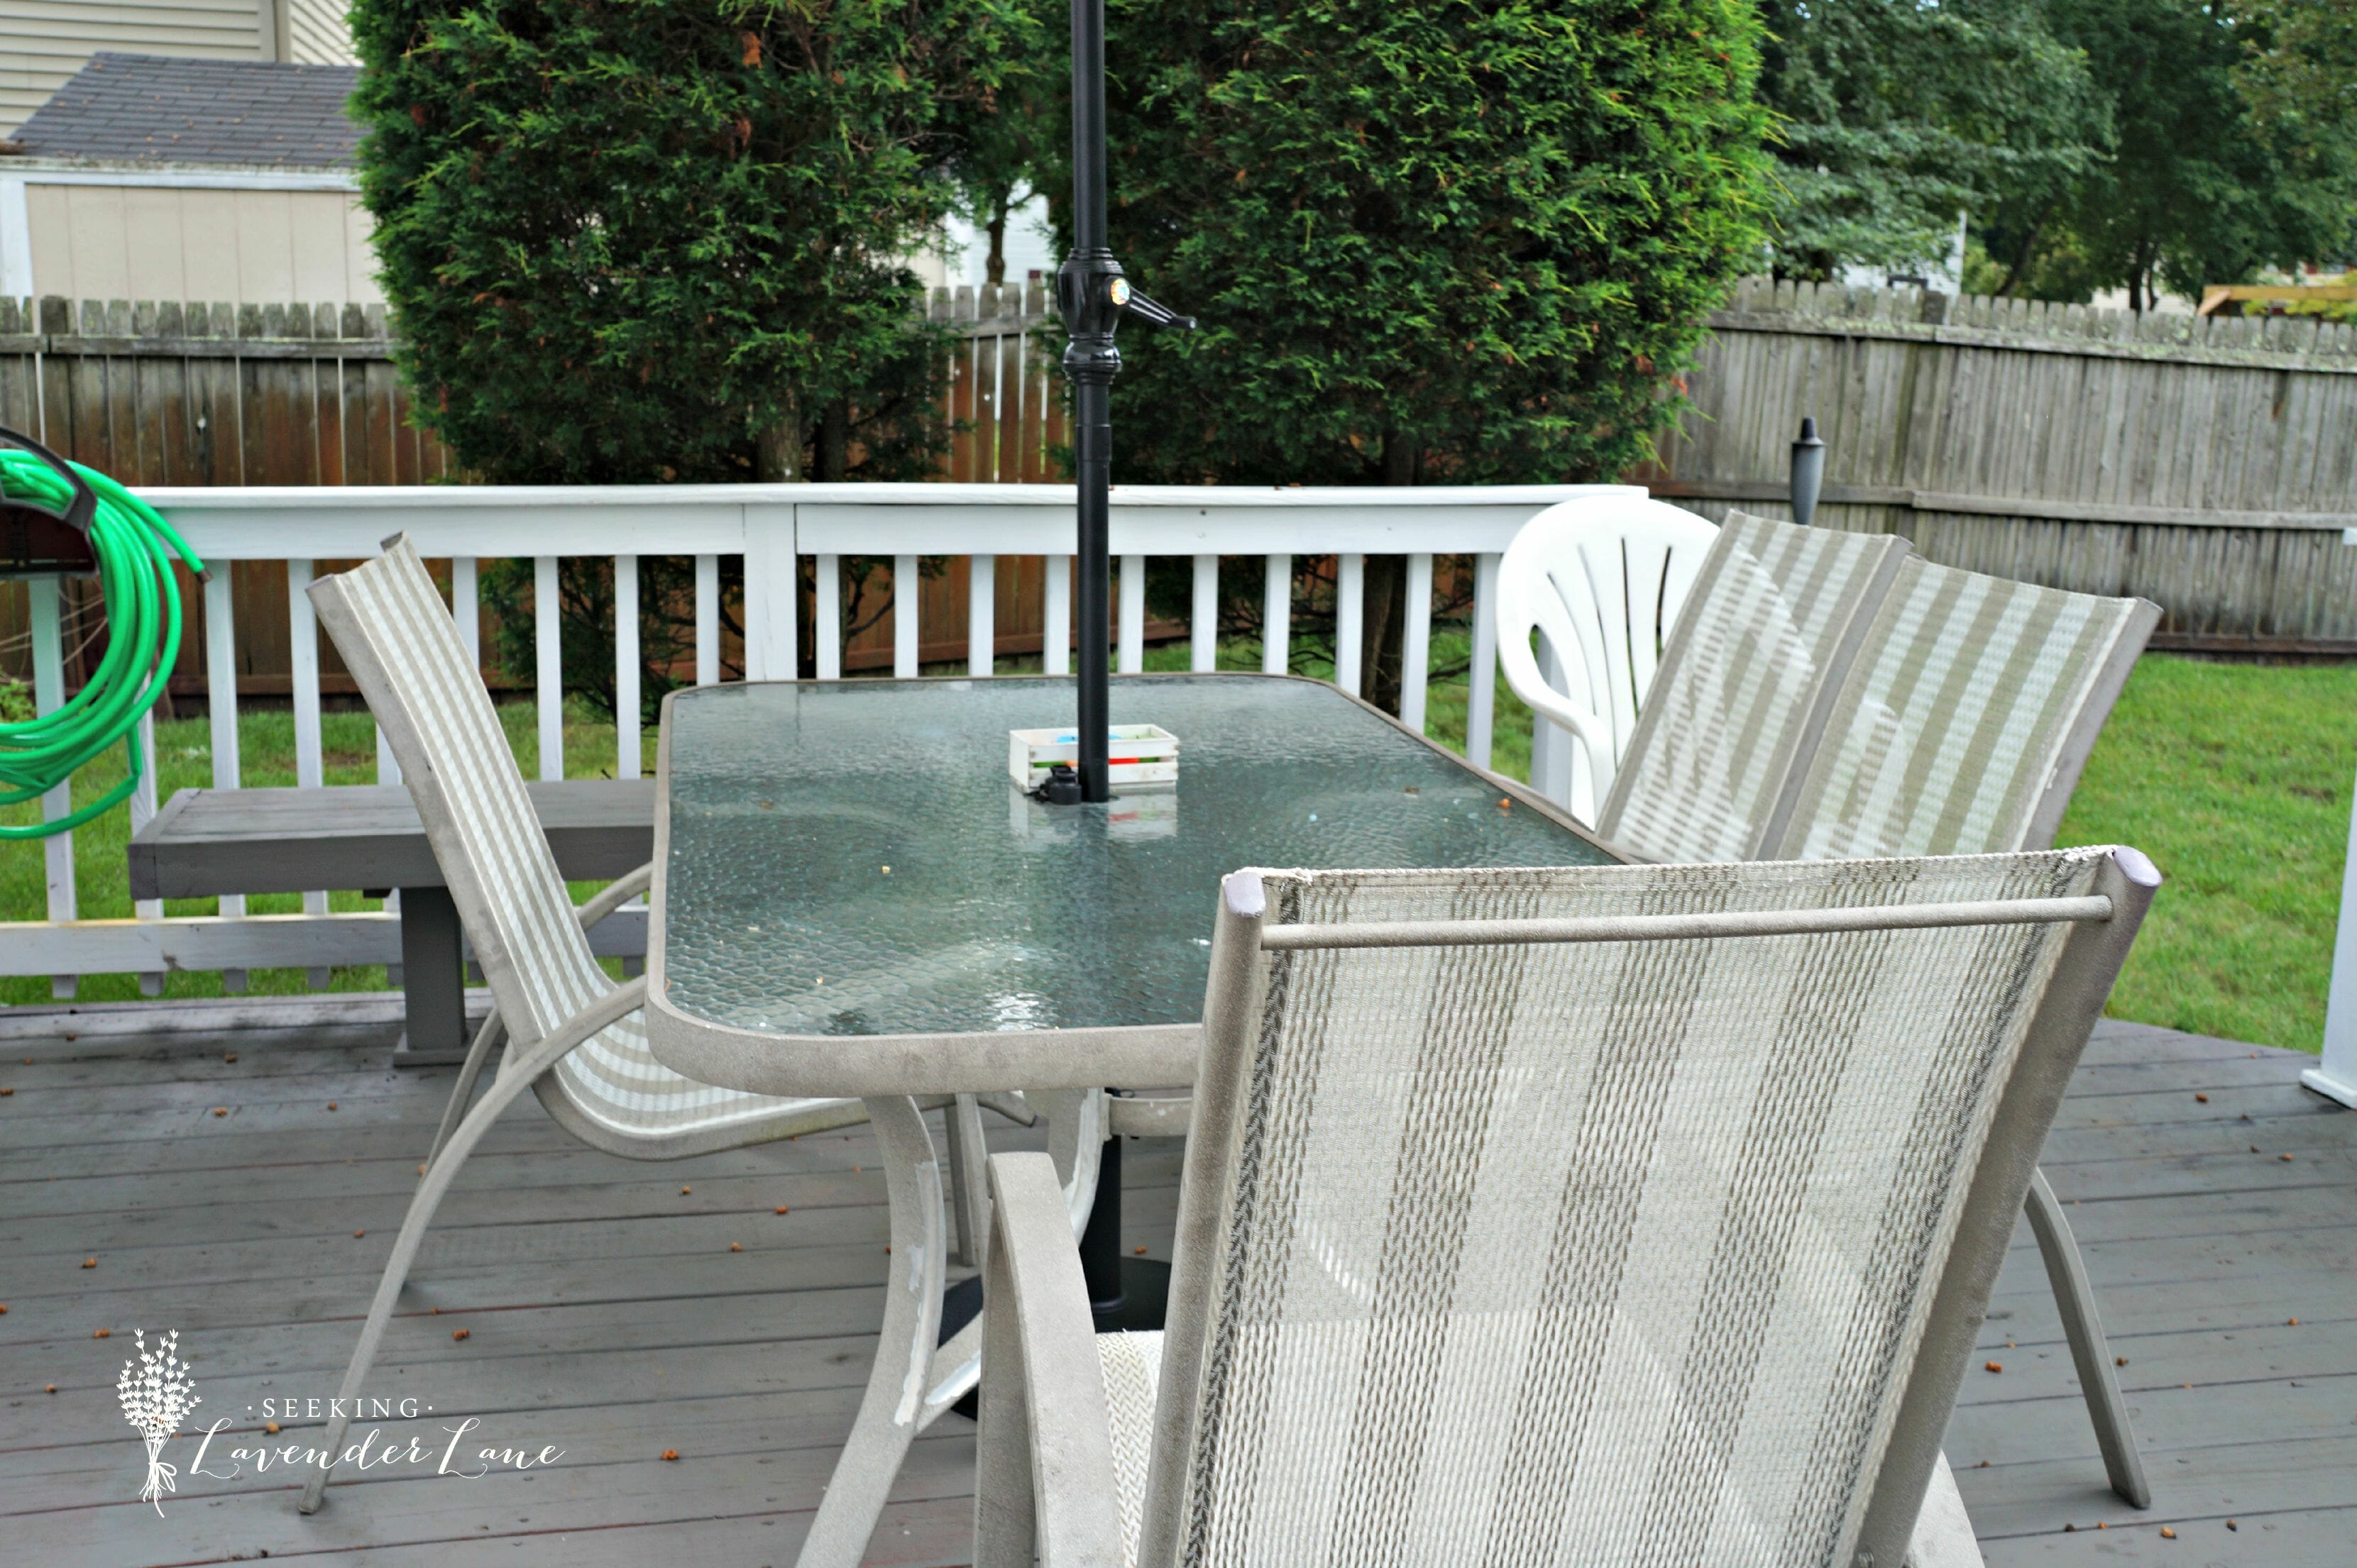
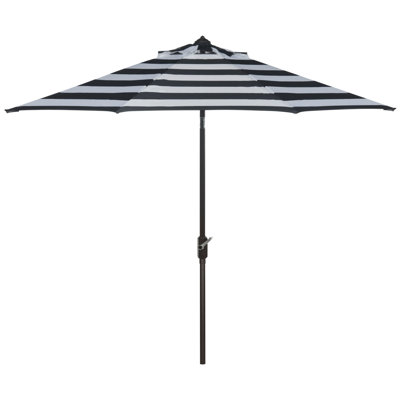
Our rustic gathering all began with 2 sets of $0 wood shutters that we created from some old fence wood. The wood just helped warm up the white siding and created a dramatic look to our very boring windows. That was just a start for this girl who loves rustic design I had an entire plan to update our very outdated outdoor furniture patio table that was a hand-me-down that was definitely not speaking to my style. The one good thing it was gray, but then I decided I had to have a black and white striped umbrella (which no longer worked with the gray and white striped chairs) so that had set the entire tone to the outside space.
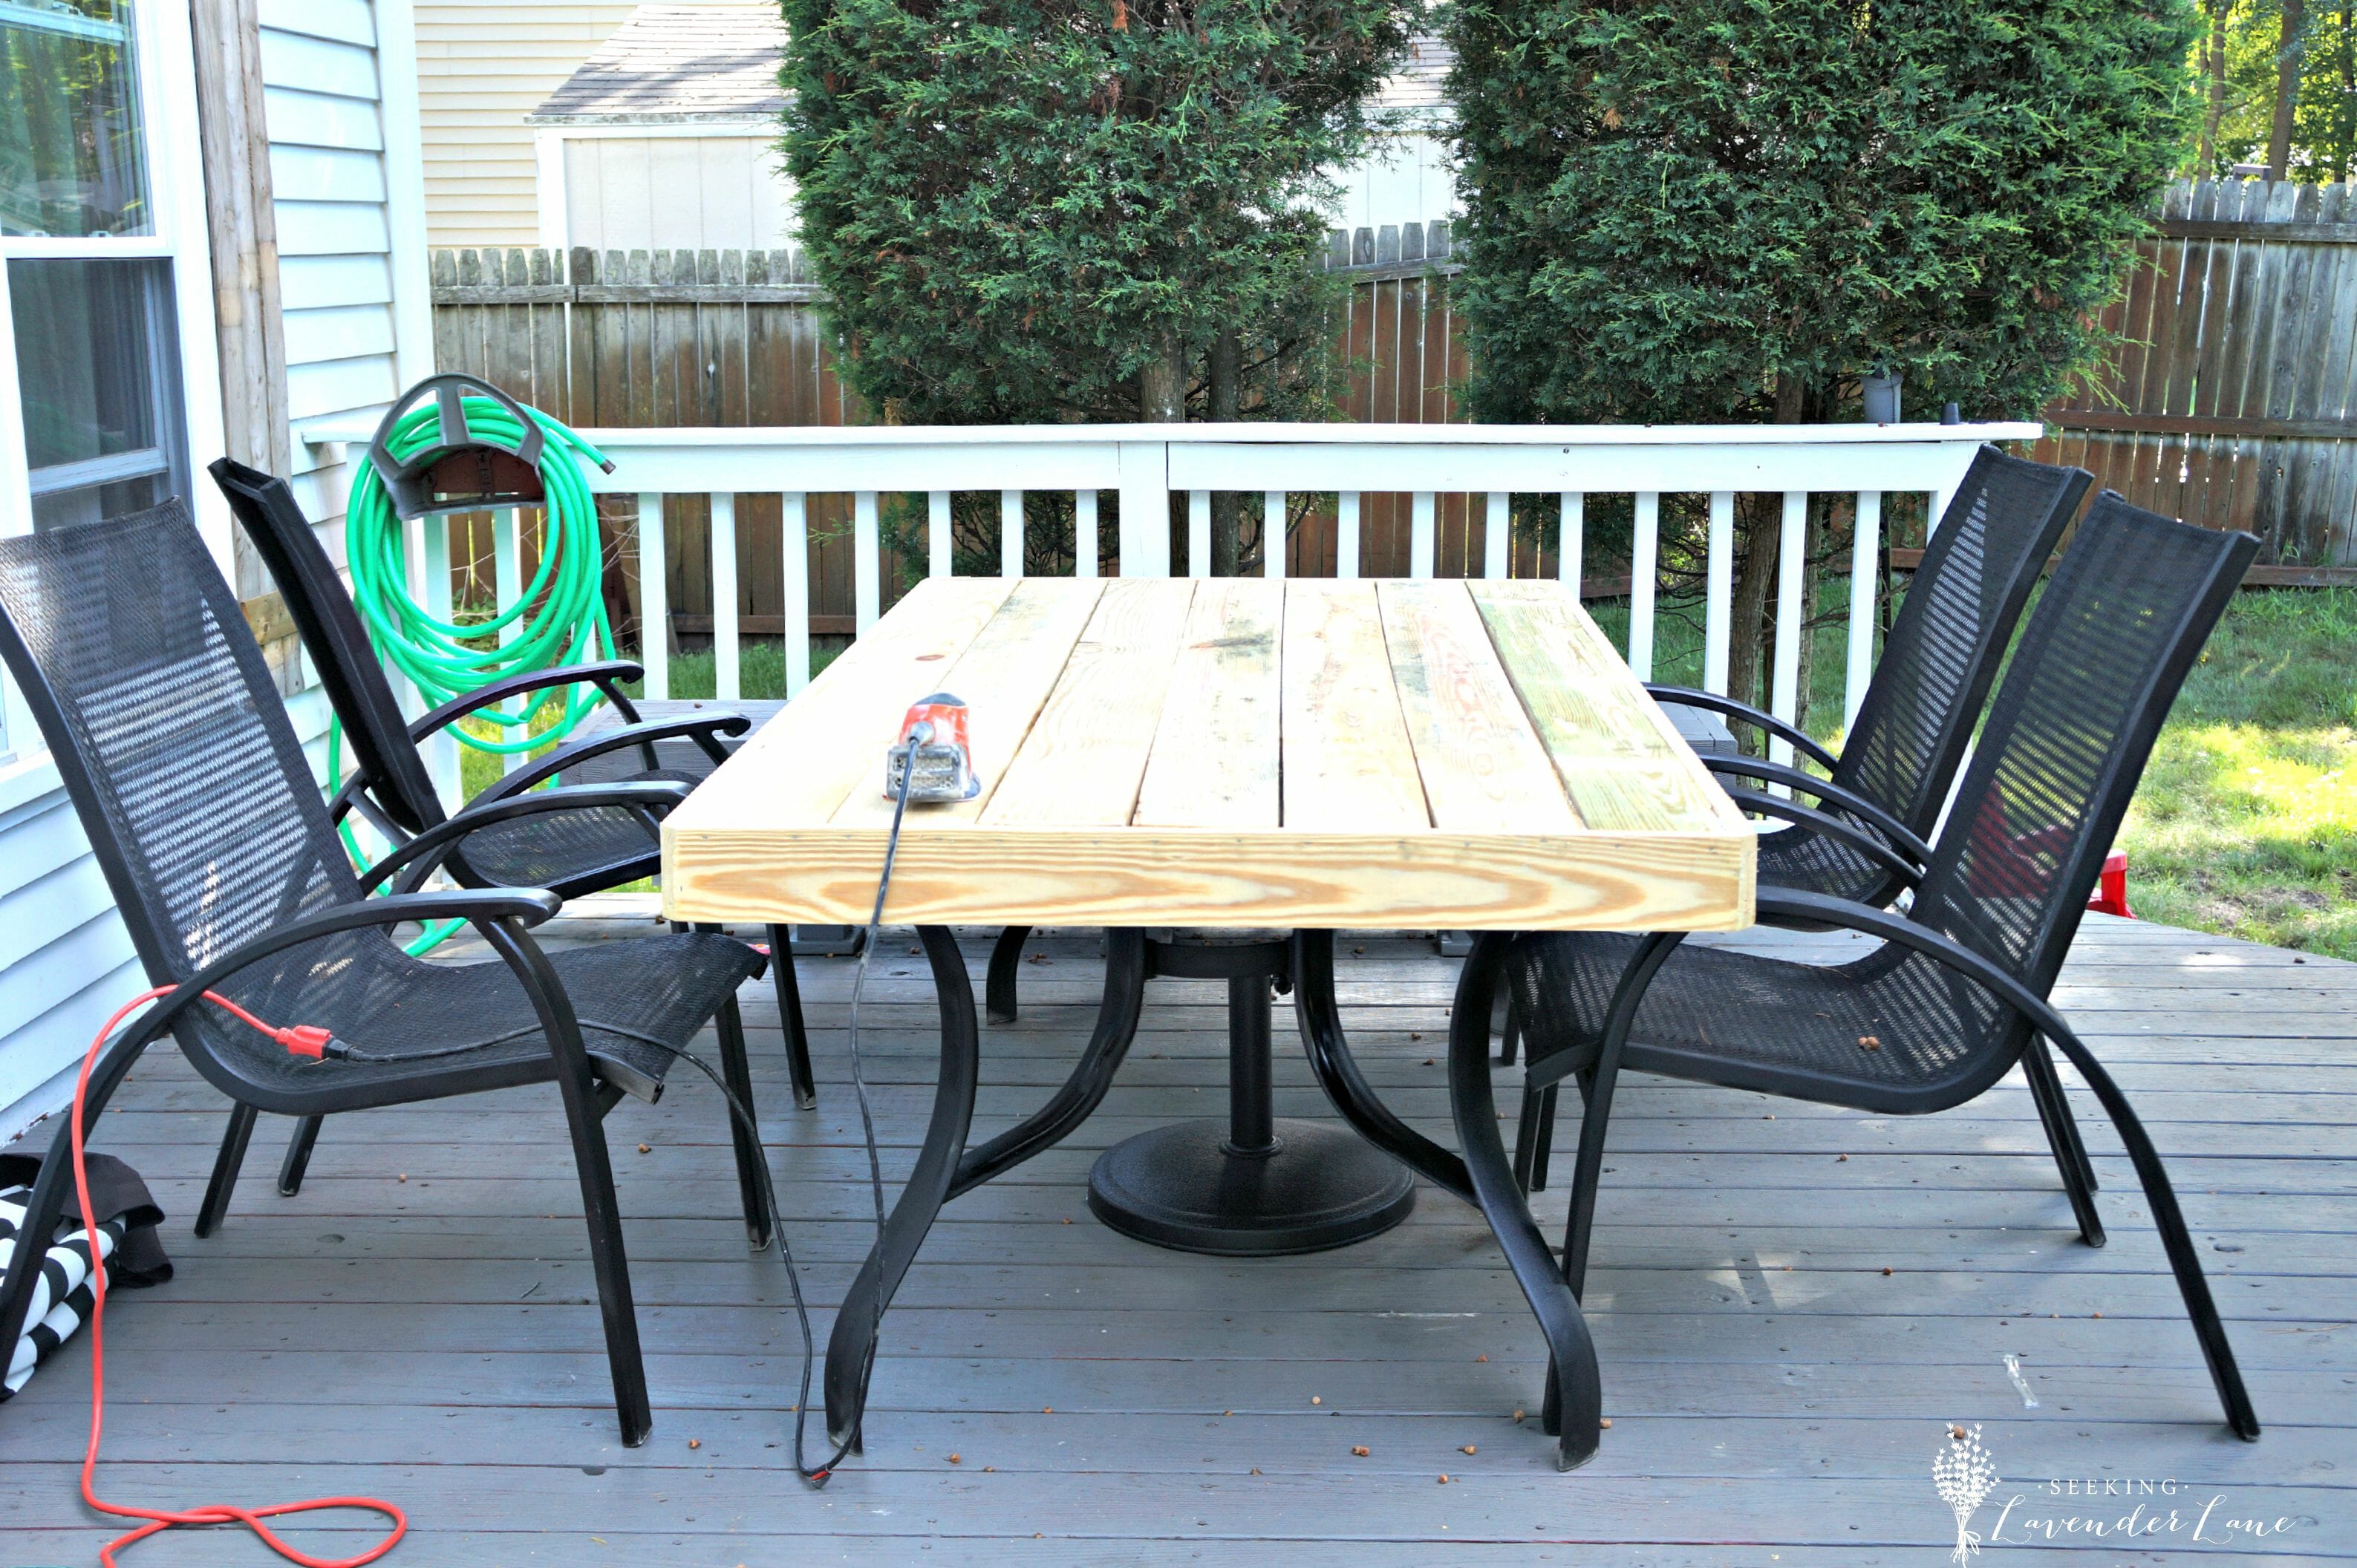
BEFORE
Well, the process began when I decided to spray paint the entire outdoor furniture set including the table black, helping the table match better with the umbrella. I used Rust-oleum Flat Black Spray paint (6 cans to update the furniture. The metal frame instantly popped better especially against the white siding and the gray deck. I have to say if it was not for the Rust-oleum Comfort Grip  this would have been a much more complicated process. I have spray painted many pieces in the past and usually prefer a brush since my hand cramps quickly, but this made such a difference in doing all four chairs and table.
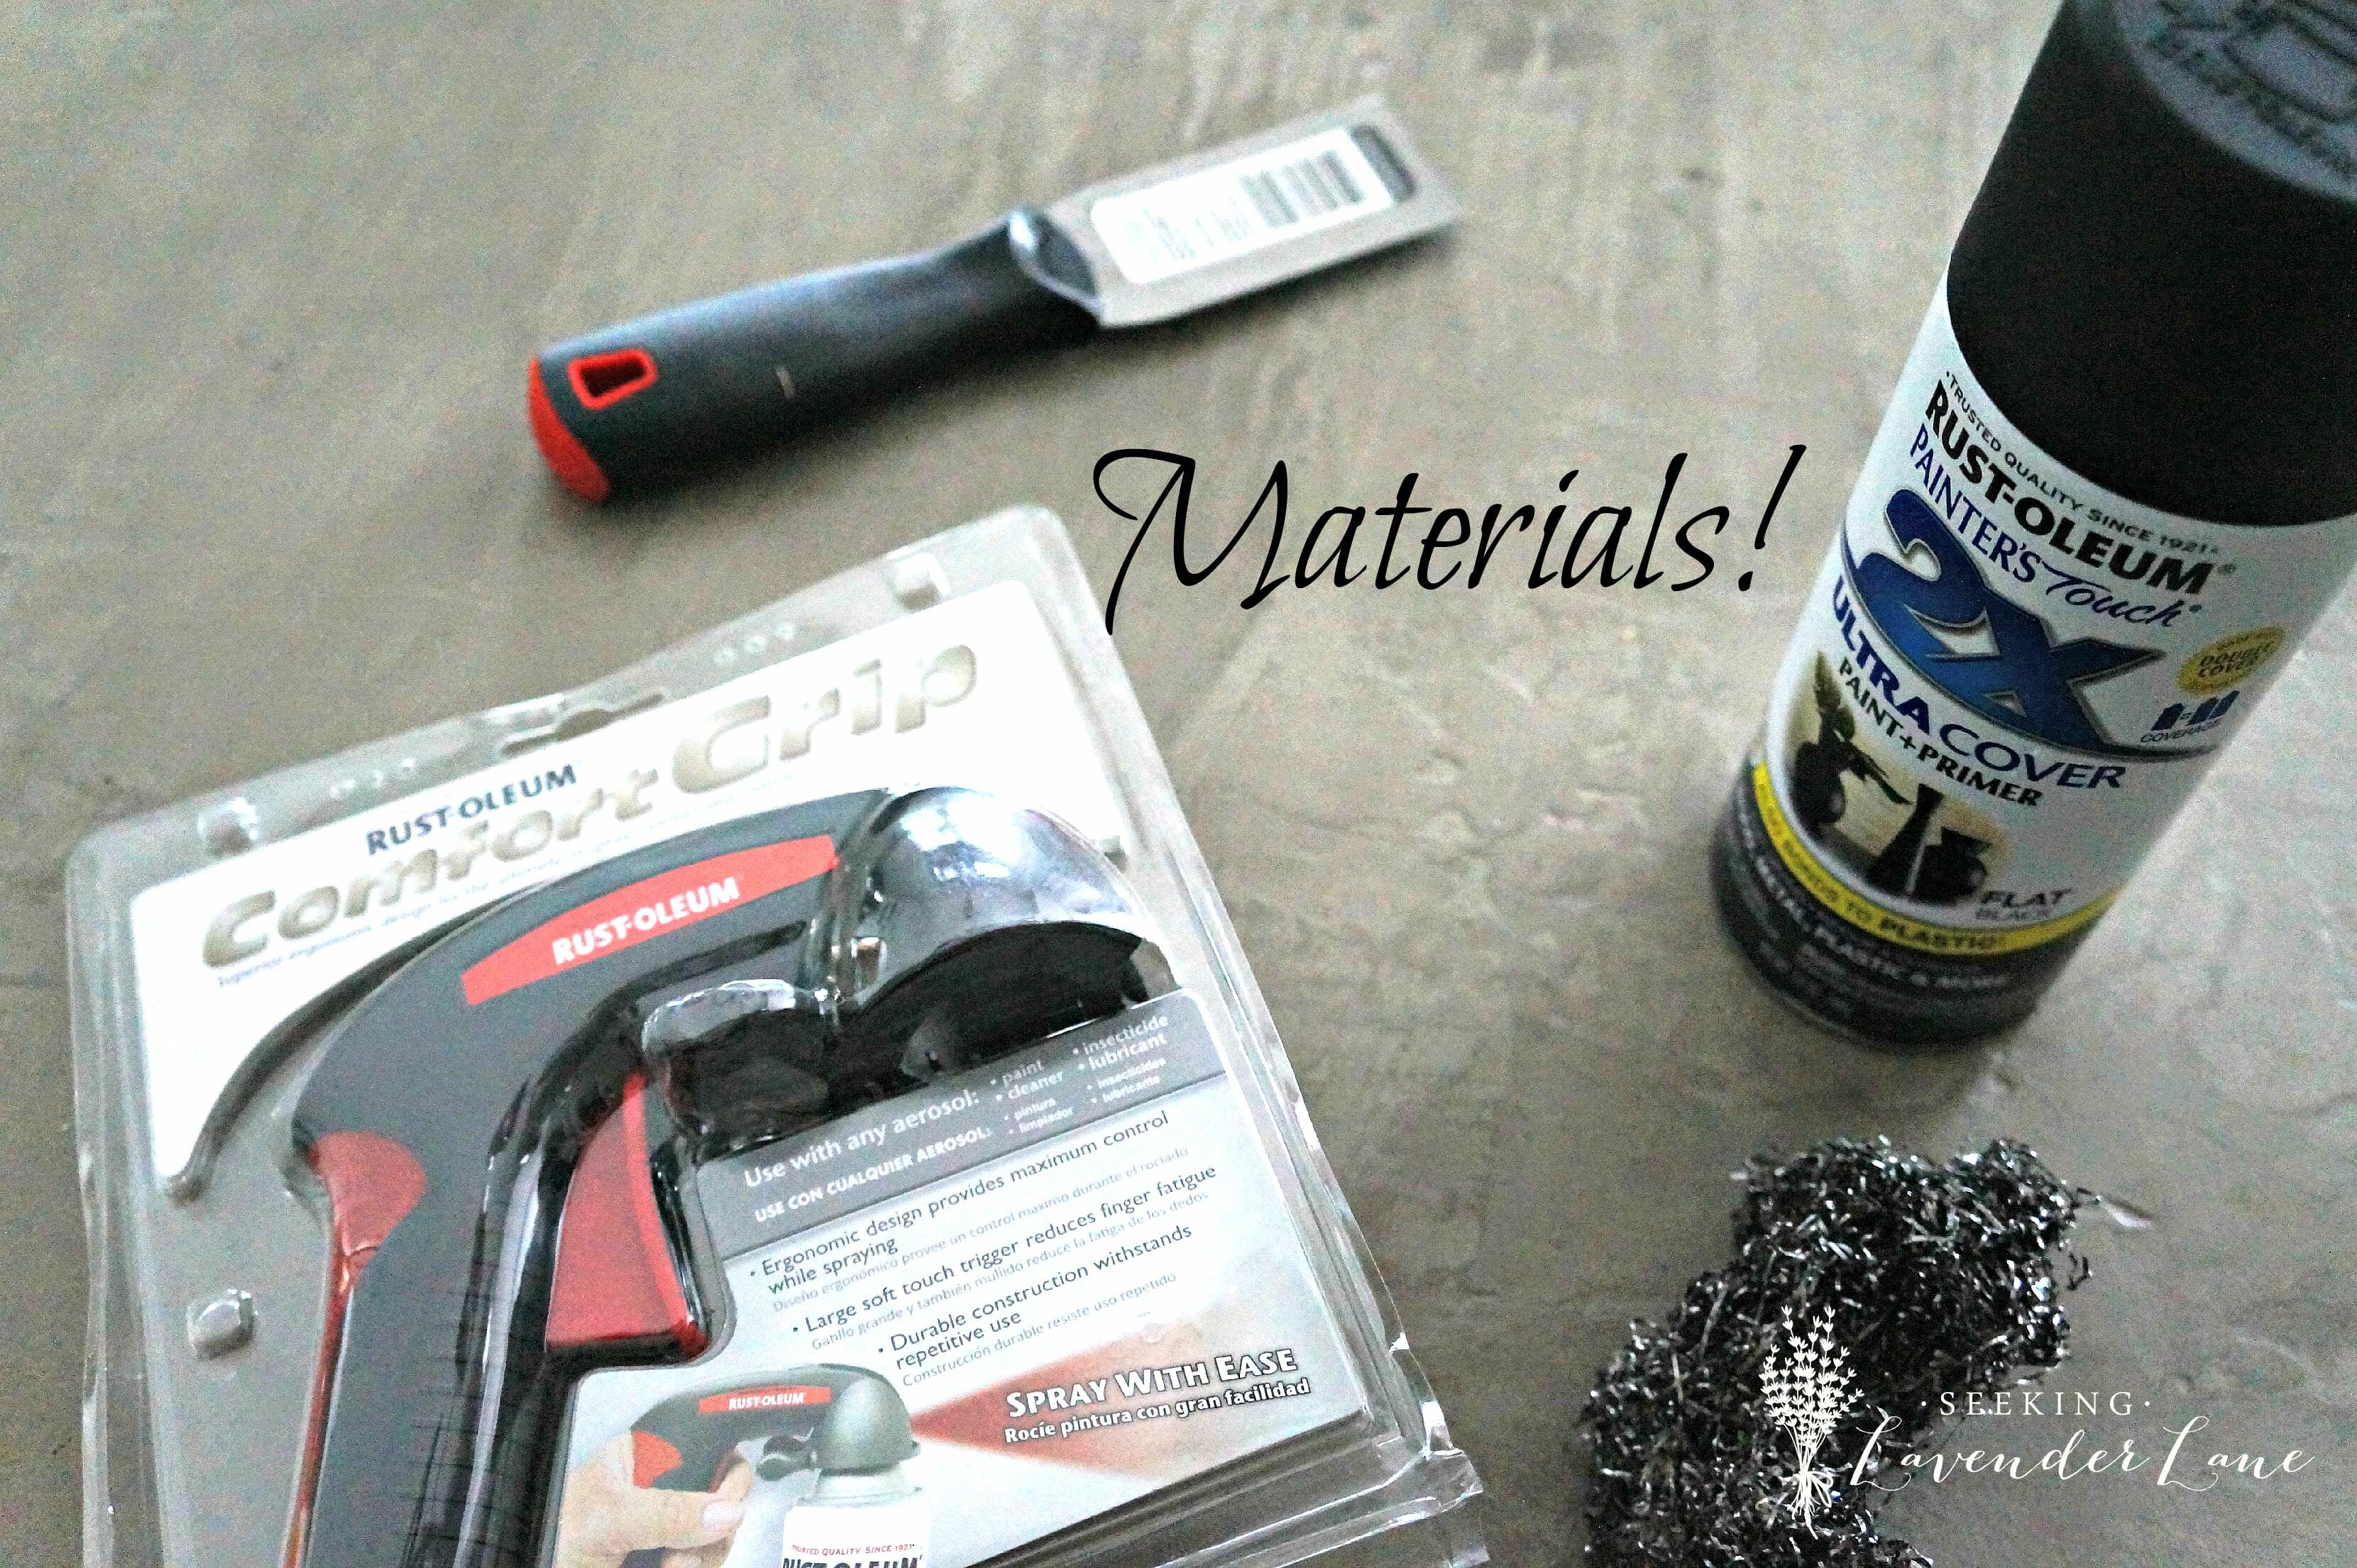
MATERIALS FOR SPRAY PAINTING OUTDOOR FURNITURE
Before you tackle spray painting your outdoor furniture, be sure to chip away any peeling paint and clean up the surface. I had a ton of chipping on the table frame and I had to pick and choose which areas to pick off and the rest I just went over lightly with a brillo pad. I can not be sure that the paint will not peel off, but since the surface area was in pretty bad condition I could not take off the paint from the entire table. Fortunately, the chairs were in better condition and I did not have to chip away too much. I used the spackle knife to help lift some of the chipping paint away easily.
Materials:
Black Rustoleum Flat Spray Paint

Brillo Pad
Spackle Knife
I did take a before and after photo of the spray paint, but somehow it never stored in my memory card, so I have no photos to share the comparison of the before and after with the paint.
The spray painting was completed within a few hours and then I started to plan out how I would create the top of the table. I knew that I wanted to build the table top where it would slide on top of the current table without breaking the glass that is currently there. This way if the table gets damaged we would be able to simply take the top off.
We chose pressure treated wood since we would be using the table outside. Once we got home with the wood that’s where all the problems began. From crooked wood to wrong measurements, too stubborn nails, and a not so happy hubby…this project was on a downward spiral fast. I really thought at one point that we were not going to be able to complete this project and that maybe it was best to just return the wood that we had not used yet and just wait til next summer to just purchase a new table. Fortunately, even when the hubby is frustrated with my crazy projects he does love to make me happy and so we kept on going (but waiting 24 hours until he cooled down and when we could get some new nails…since we forget that one small/very important item to buy)
The initial plan was to make picture frame cuts to have a seamless look. Though I wanted the table to be rustic, I still wanted the ends to be smooth without rough edges. I felt this would look best when paired with the metal base. Well…that turned into a disaster, one wrong cut and onto compromising the design to save money.
I have to say one of my biggest piece of advice for anyone who wants to get into DIYing and trying new projects at home…be ready for mistakes and have backup plans. We always make mistakes in our designs and I have to say sometimes they end up better than we had imagined when things go wrong.
Either way pre-plan B or how the table turned out we decided to cut 45-degree angles for the two (short) side pieces of the frame.
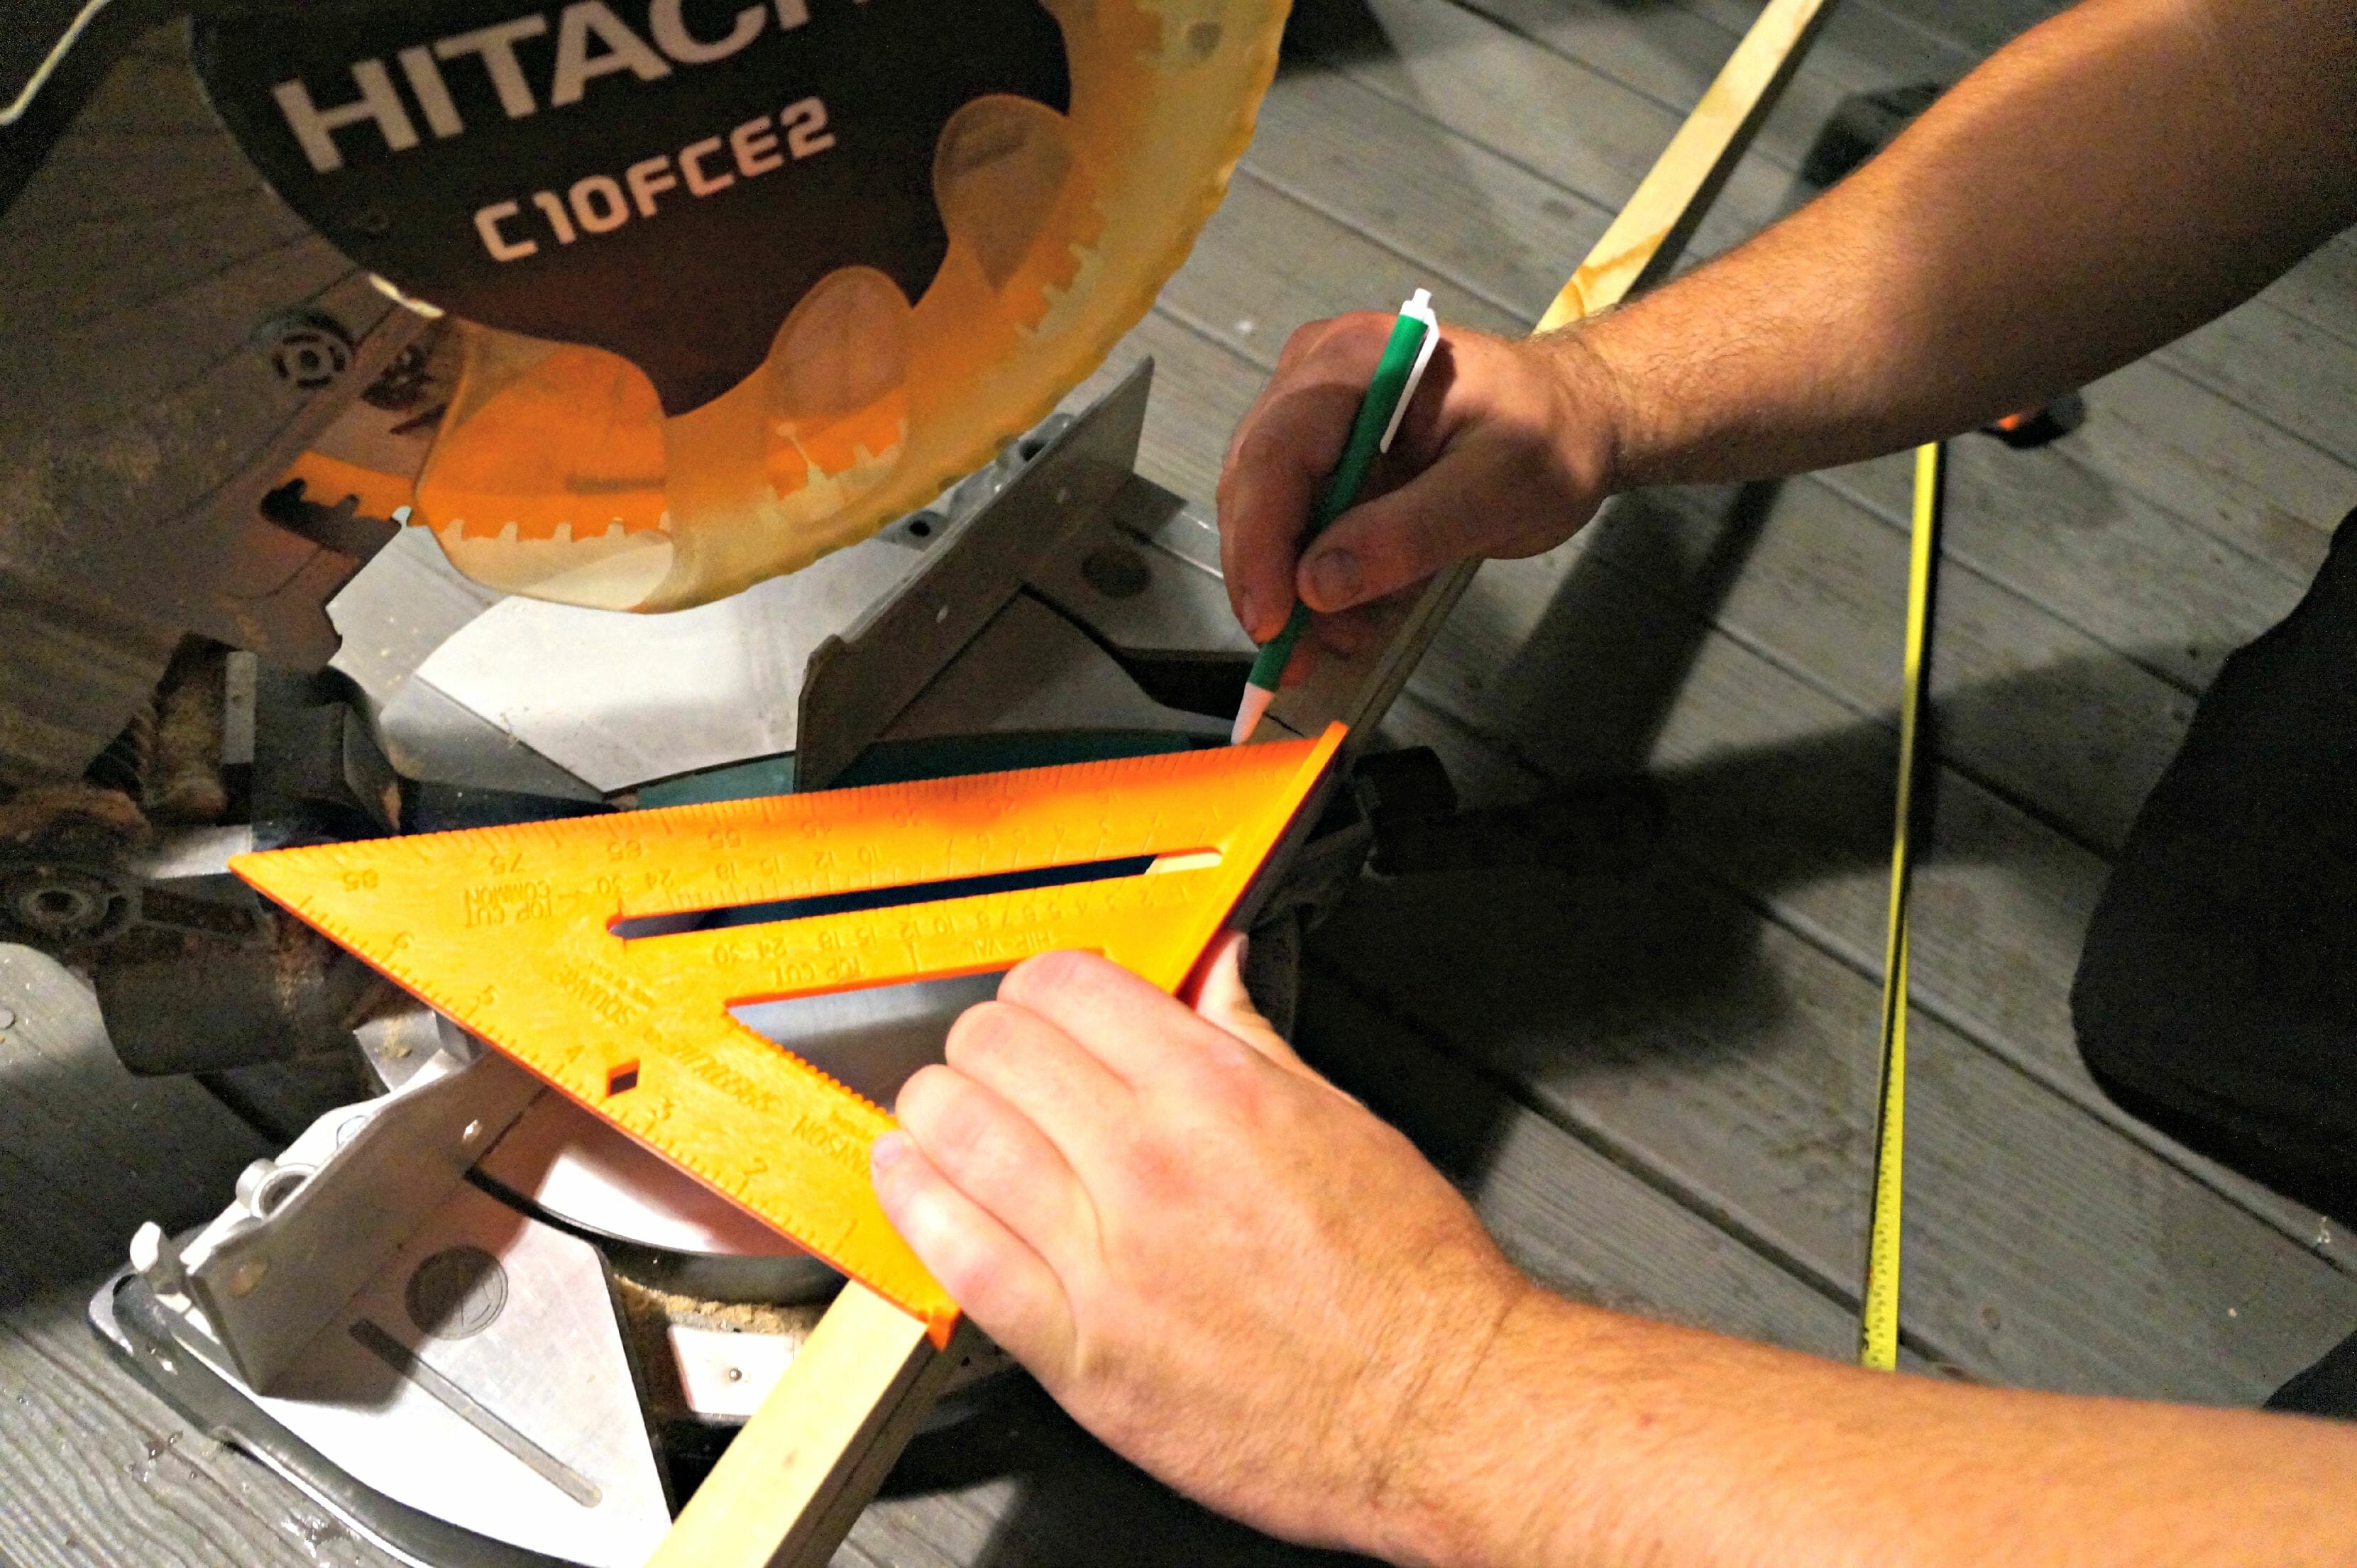
Once the angle cuts are made to the width of the table it time to cut the length of the table frame. We happened to buy the wood for the frame the same length of our table (6ft)
Once frame pieces are cut to size it is time to assemble!
Start with adding liquid nails to the sideboard and nailing them together. Since we had messed up a measurement our side pieces have no 45-degree angle cuts..you will see in a second how our Plan B turns out.

Add clamps to keep wood in place. (our little nosey girl was coming to check out what we were doing).
And onto another mistake! Lol, it just kept happening honestly this was a black cloud of a project.
Yea that turned into an argument…let’s just say we misunderstood the measurement cut. And so a little sliver of wood made it all better : )
Please keep reading…I promise after all this bad luck…it does turn out beautiful!
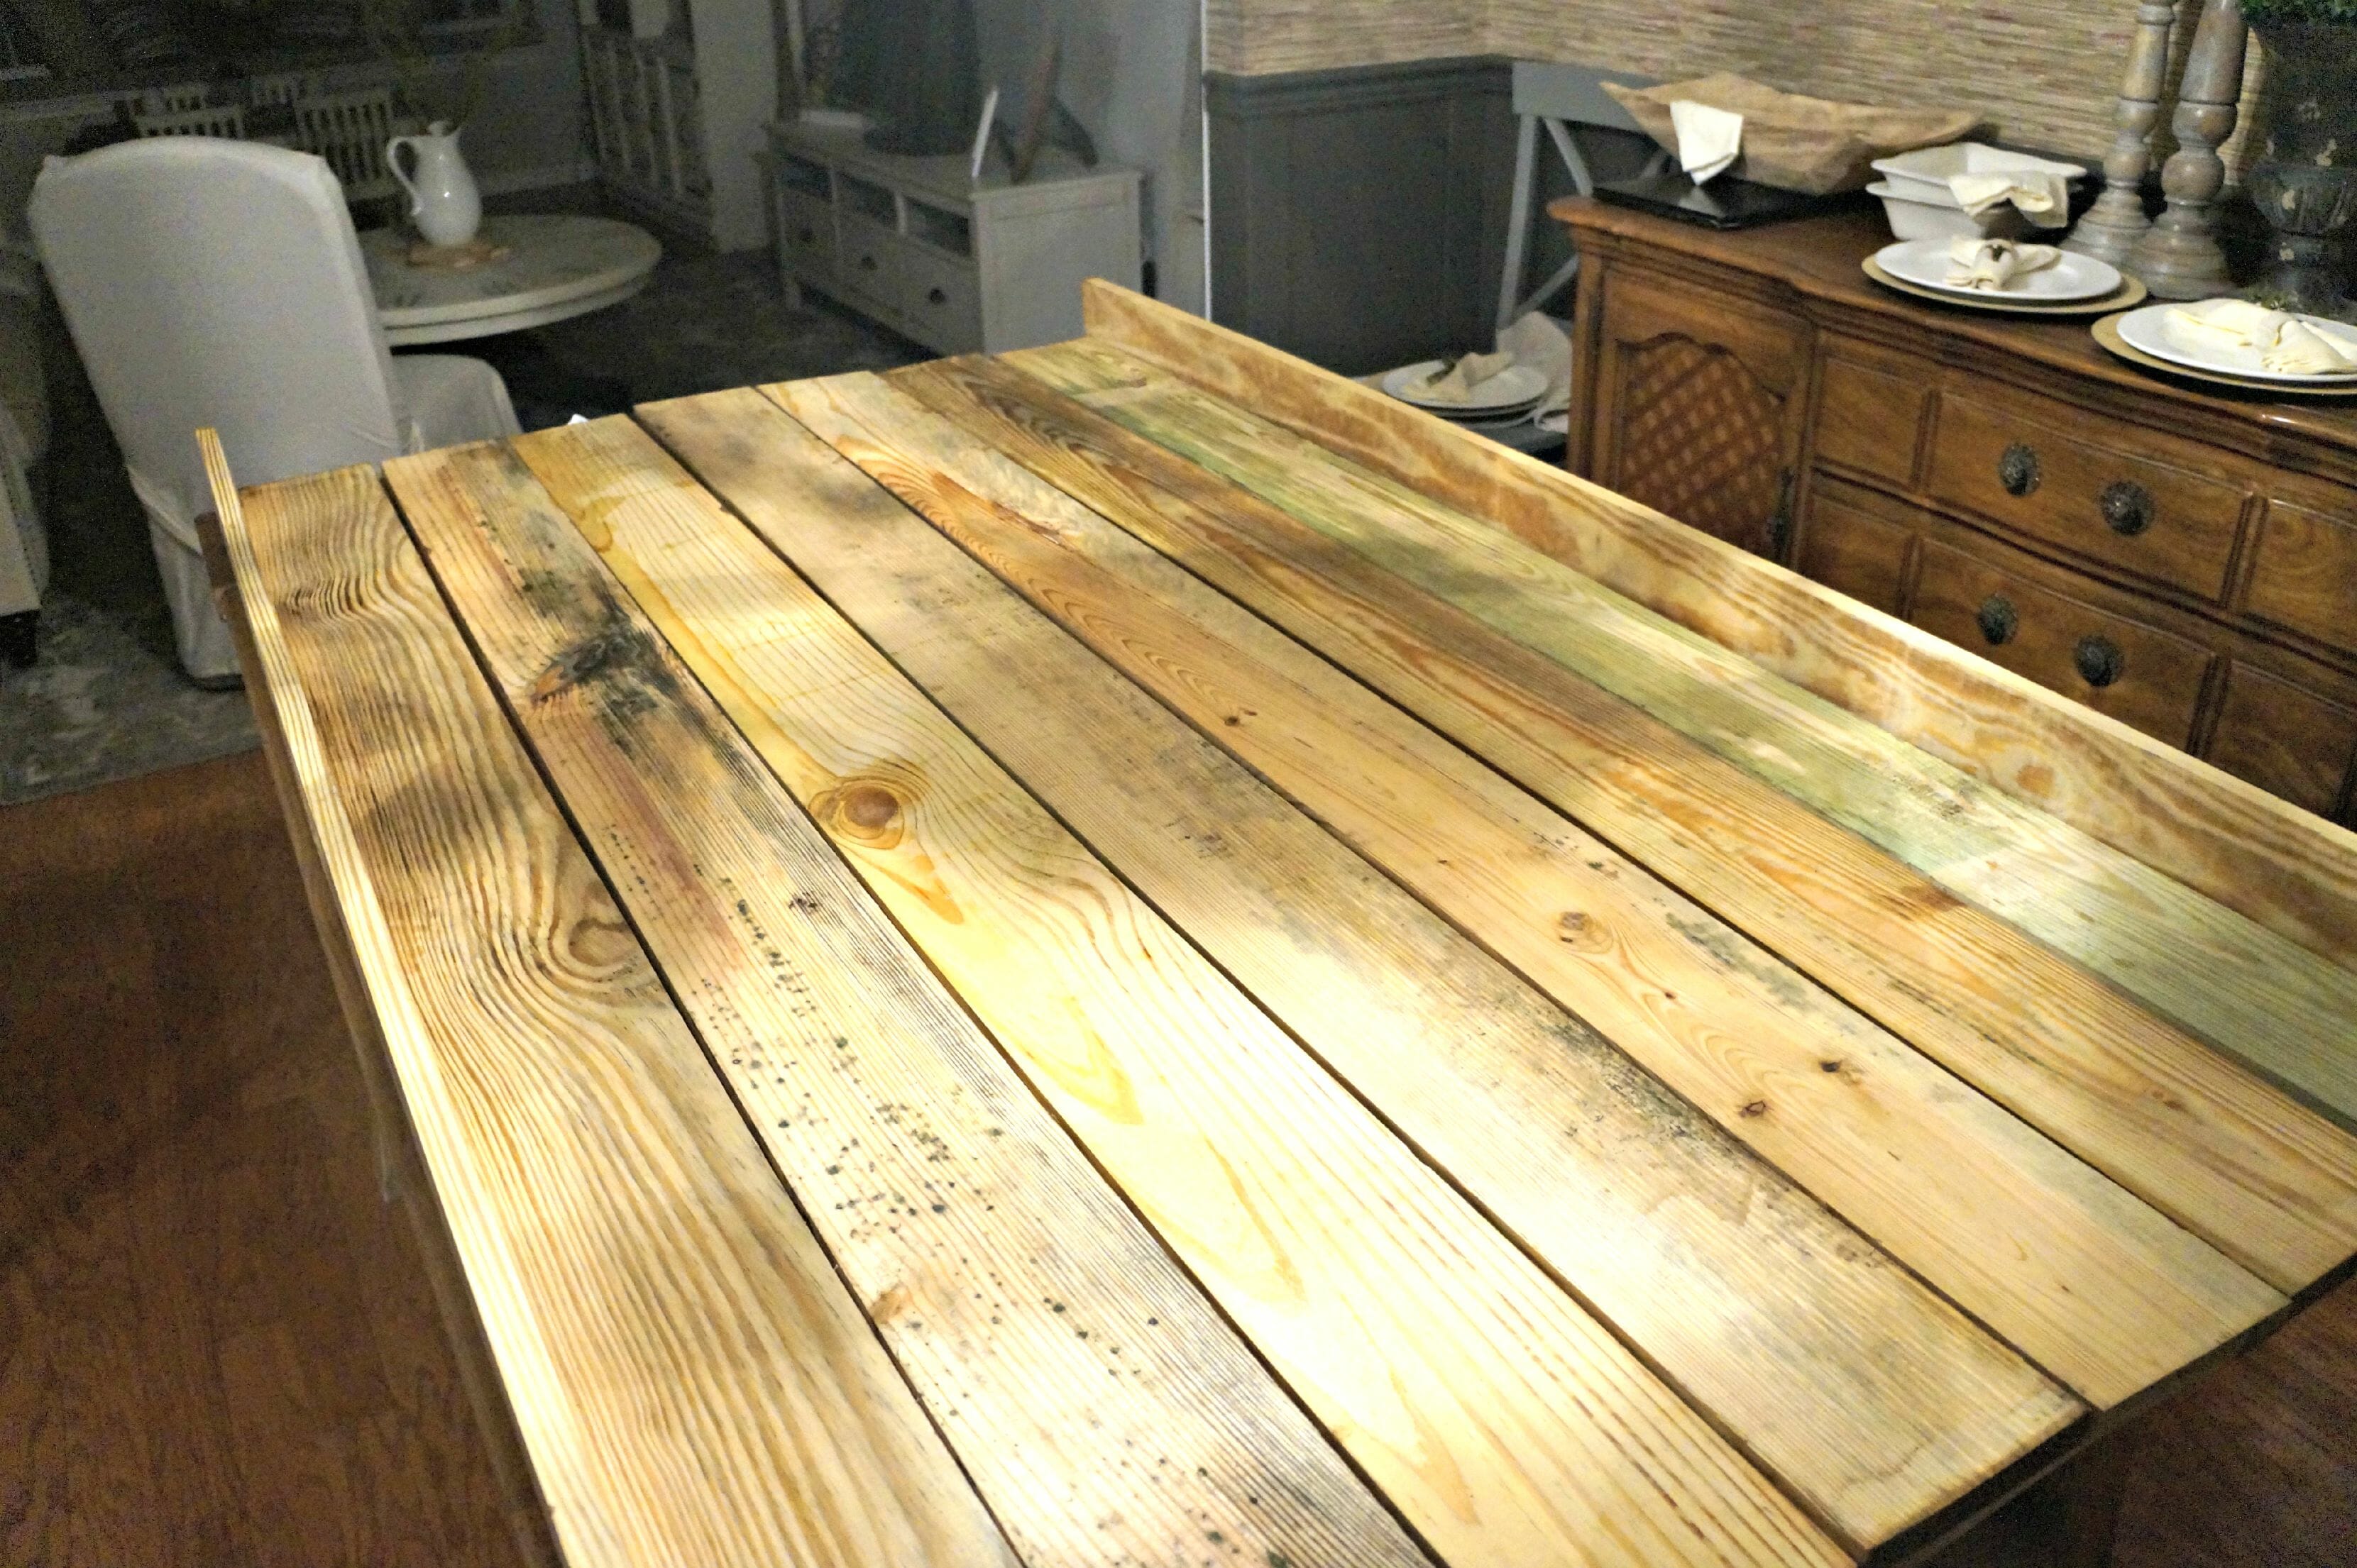
Once the two sides are put together, spread out the wood planks evenly and nail the rest of the frame together to the wood planks.
Notice: the 45-degree angles on the outside…makes for an interesting shape and detail.
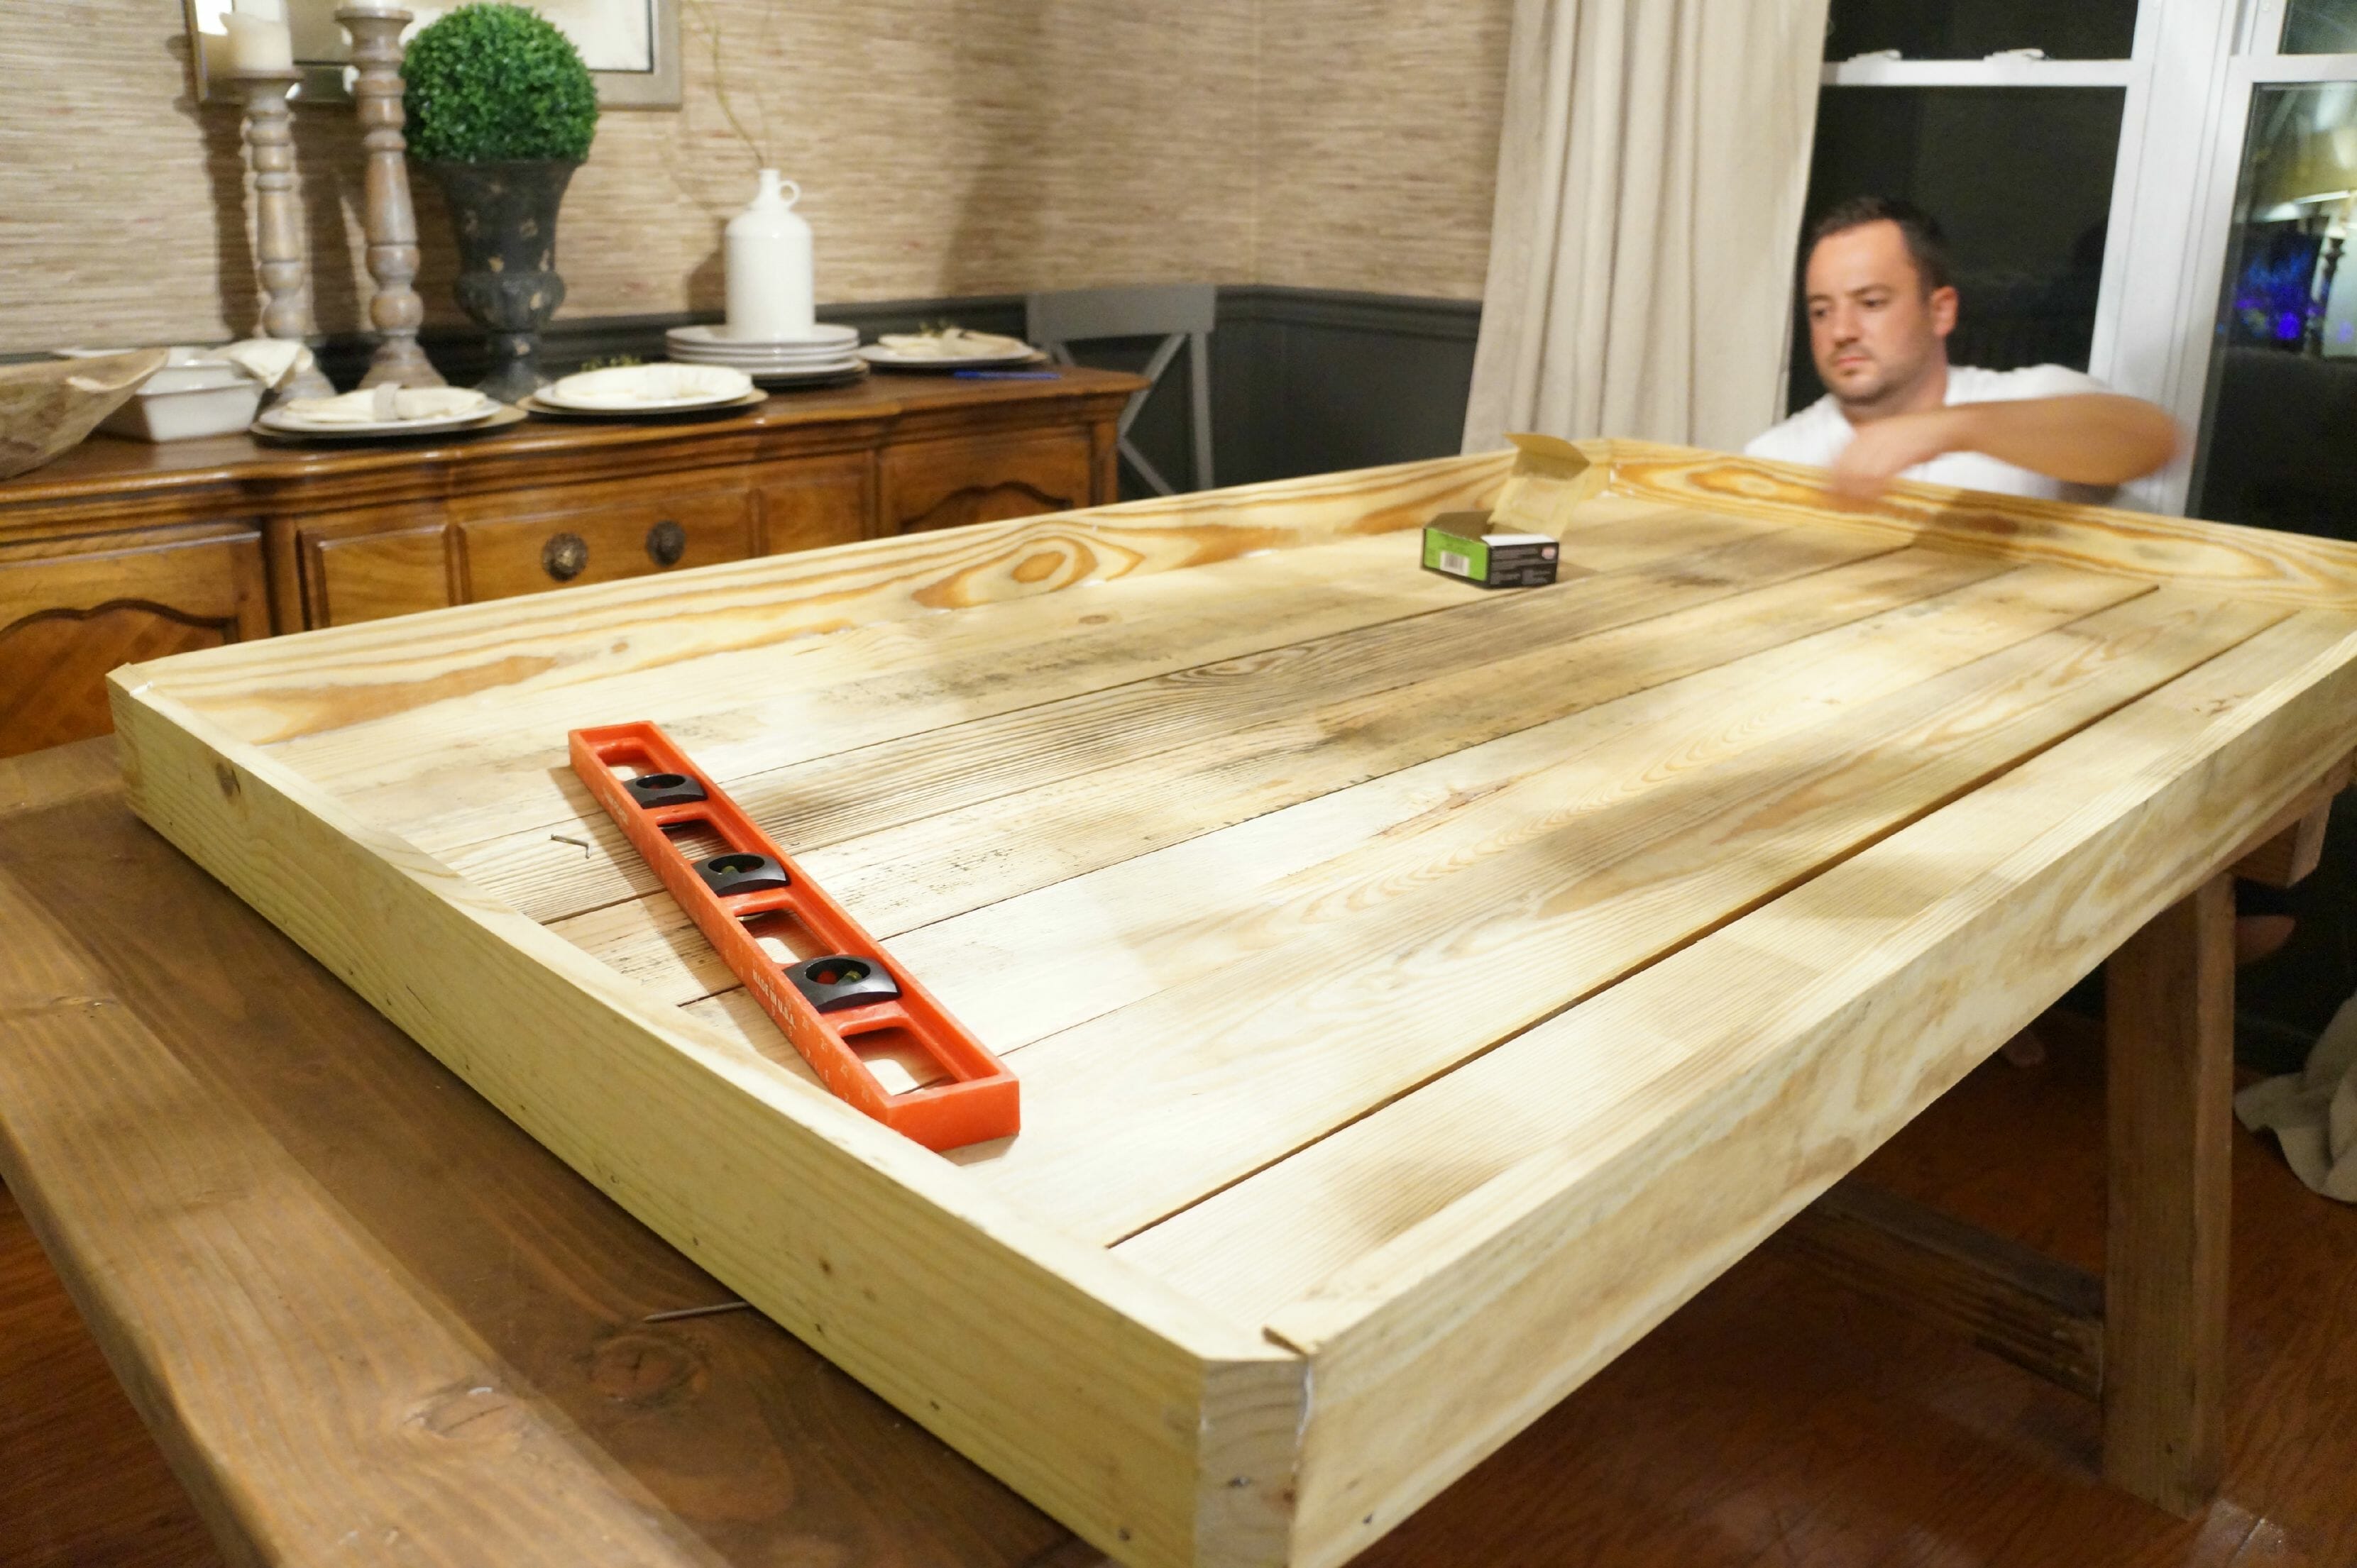
Once the table is complete…it was time for the moment to slide it onto the table. Pretty nerve-wracking since the rest of the project was frustrating and working completely against us.
The moment of truth!
Wooo-hoo it actually worked!
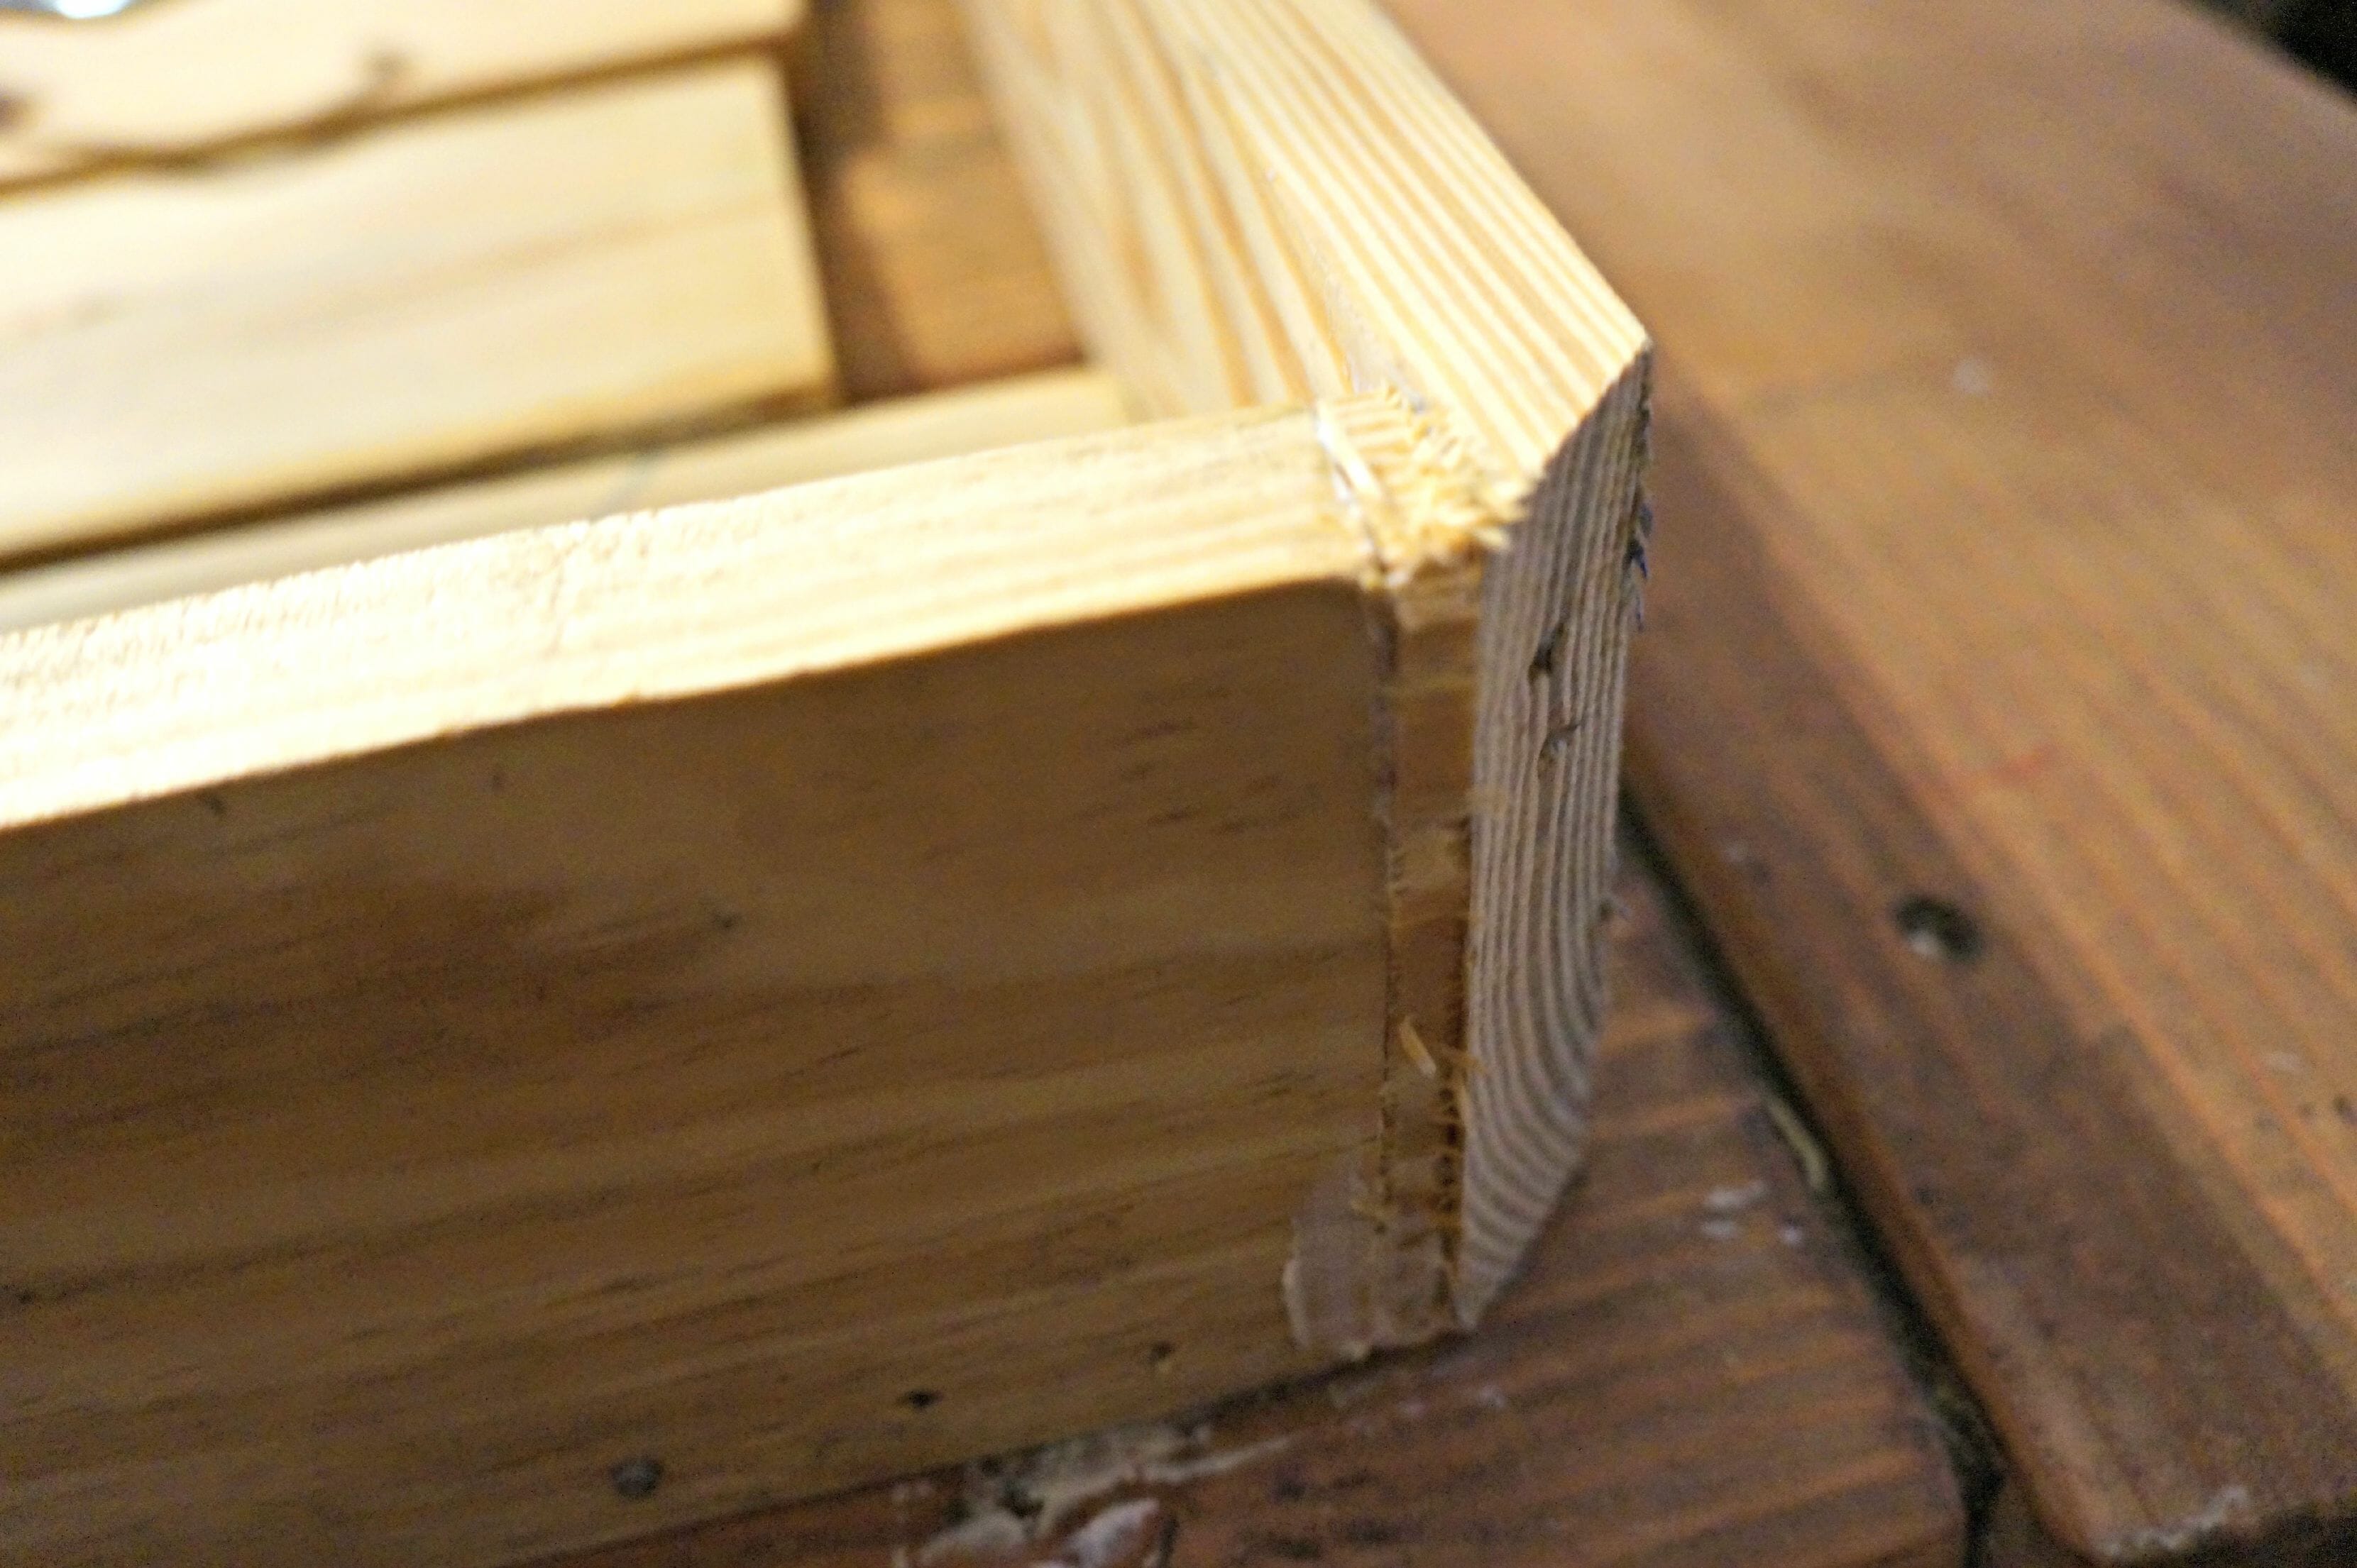
So then the next day I began to sand the entire table smooth including that not so pretty corner that I happened to snap that ugly picture of on Instagram.
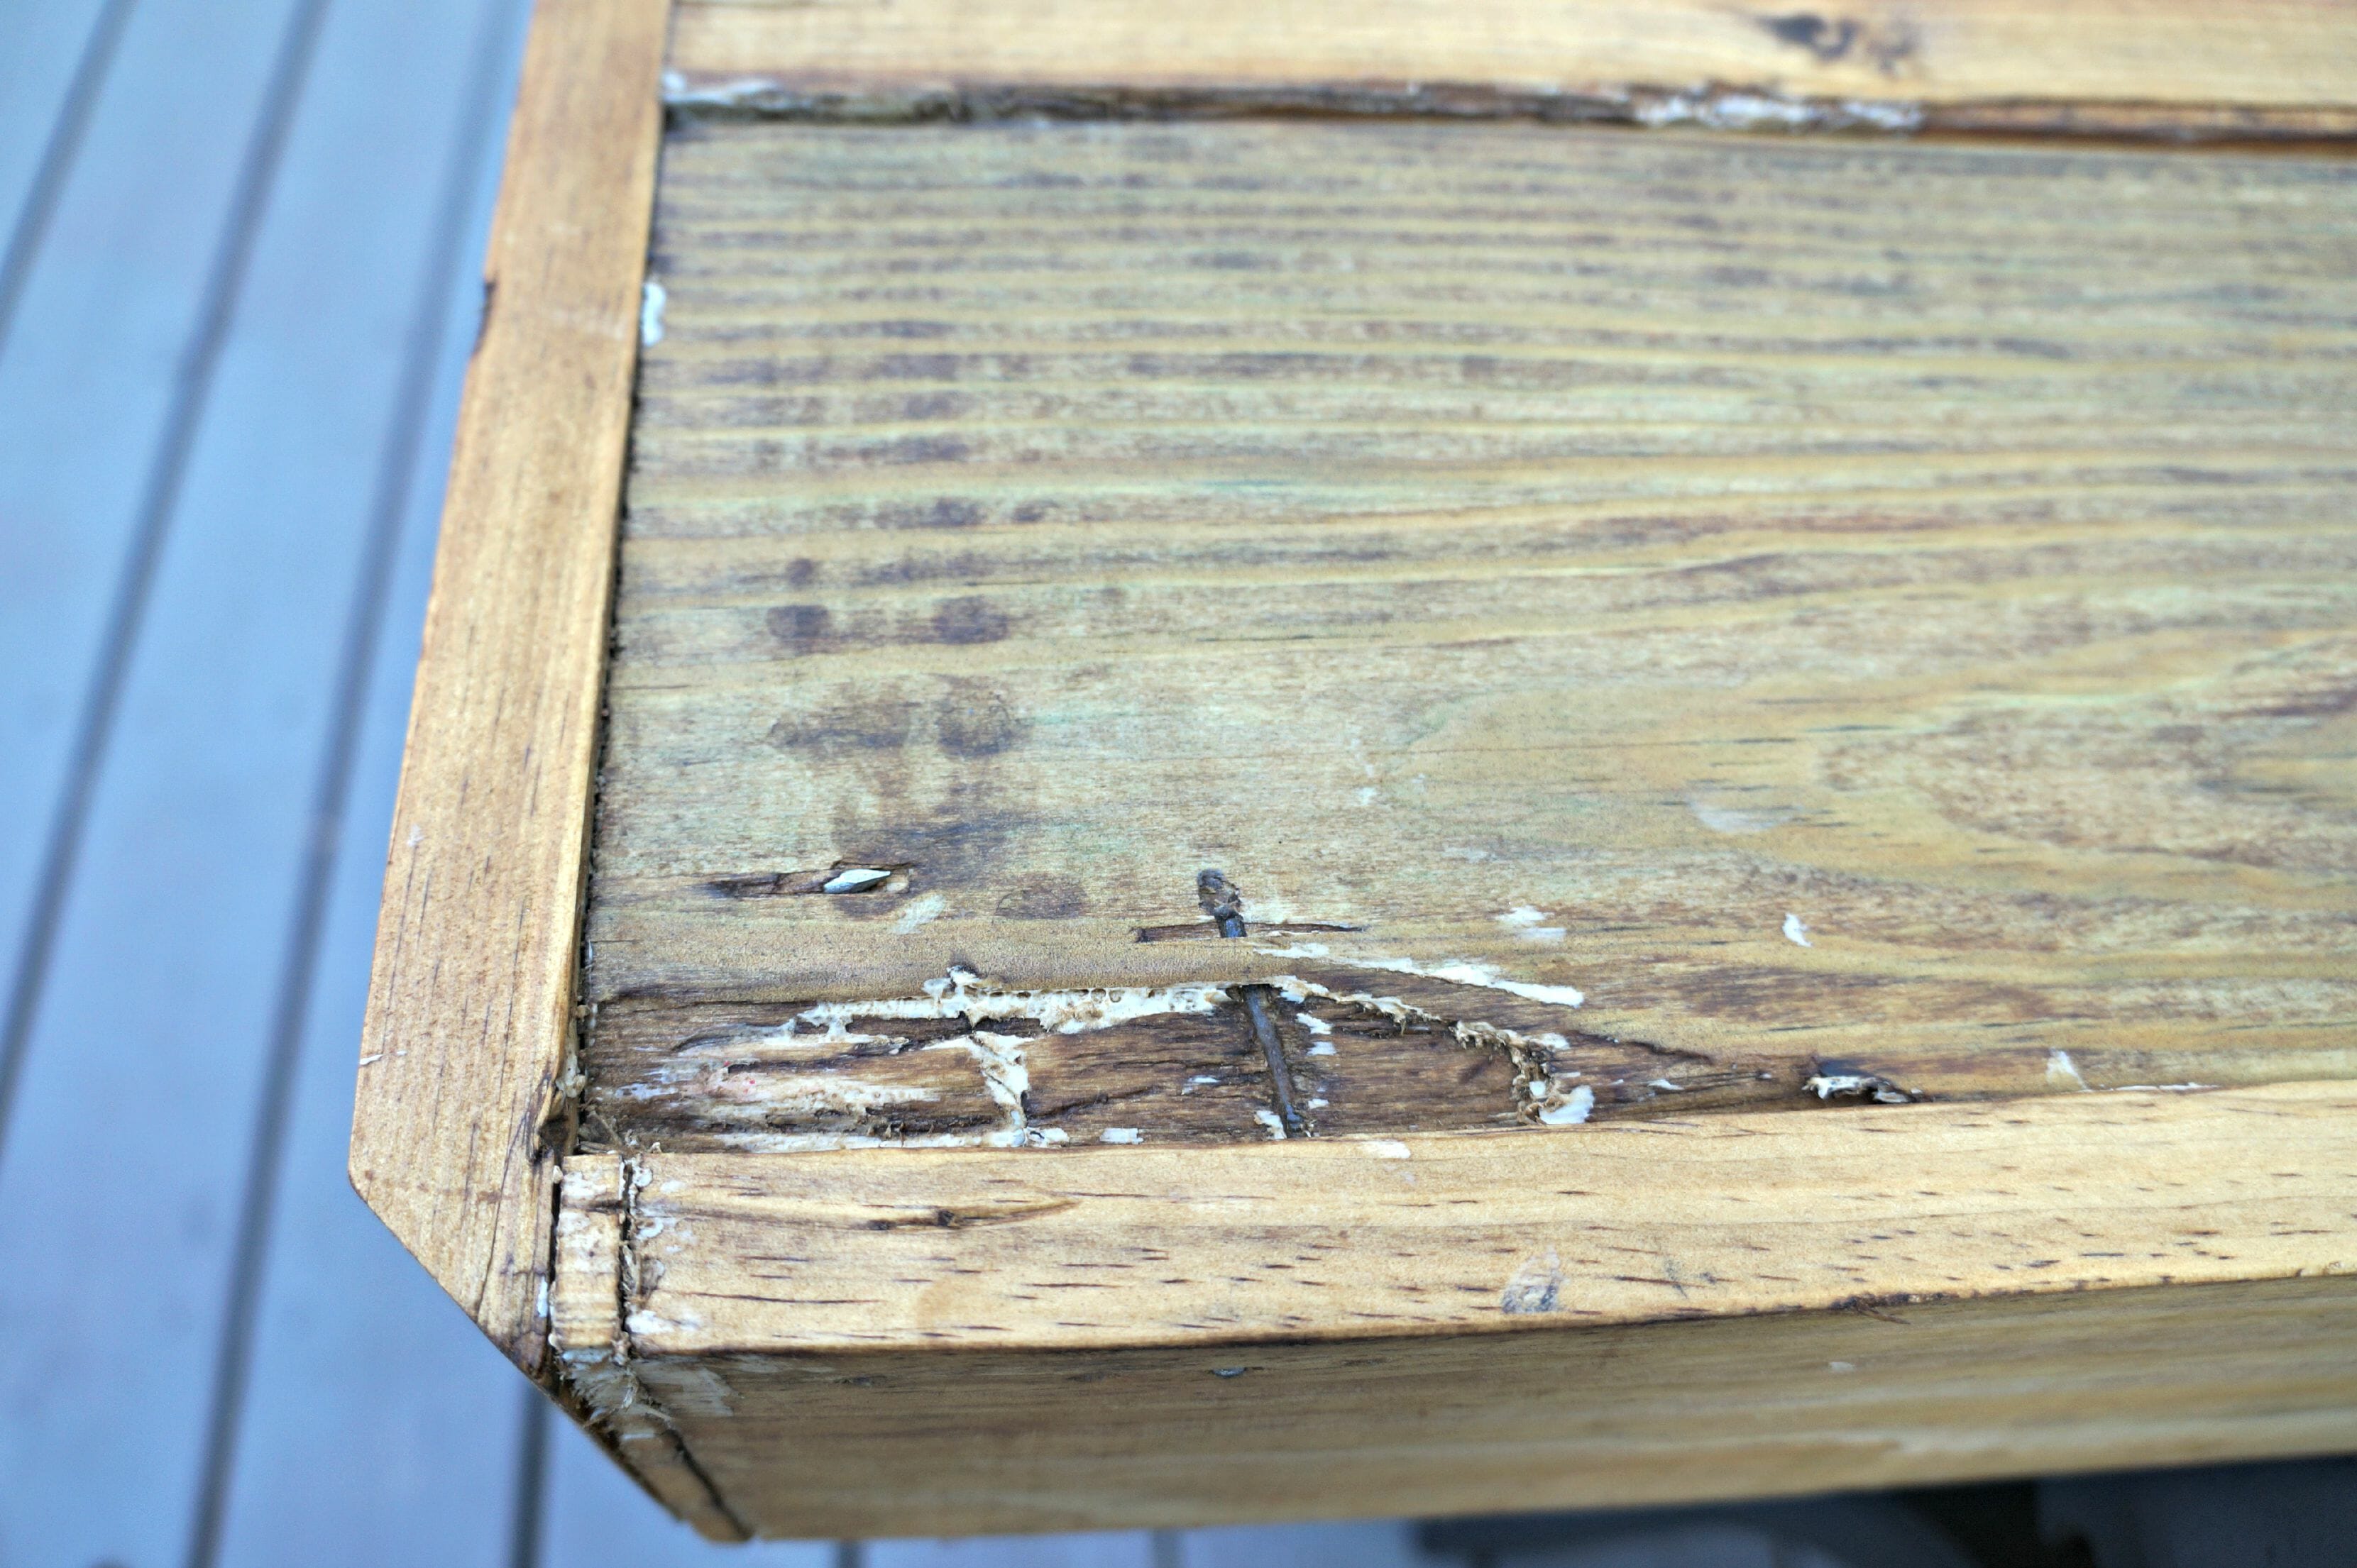
It is an unfortunate mistake that takes away a bit from the table, but looking at it as a whole it really is not that noticeable. Just to prove not everything ends up so perfect, but it still looks great!
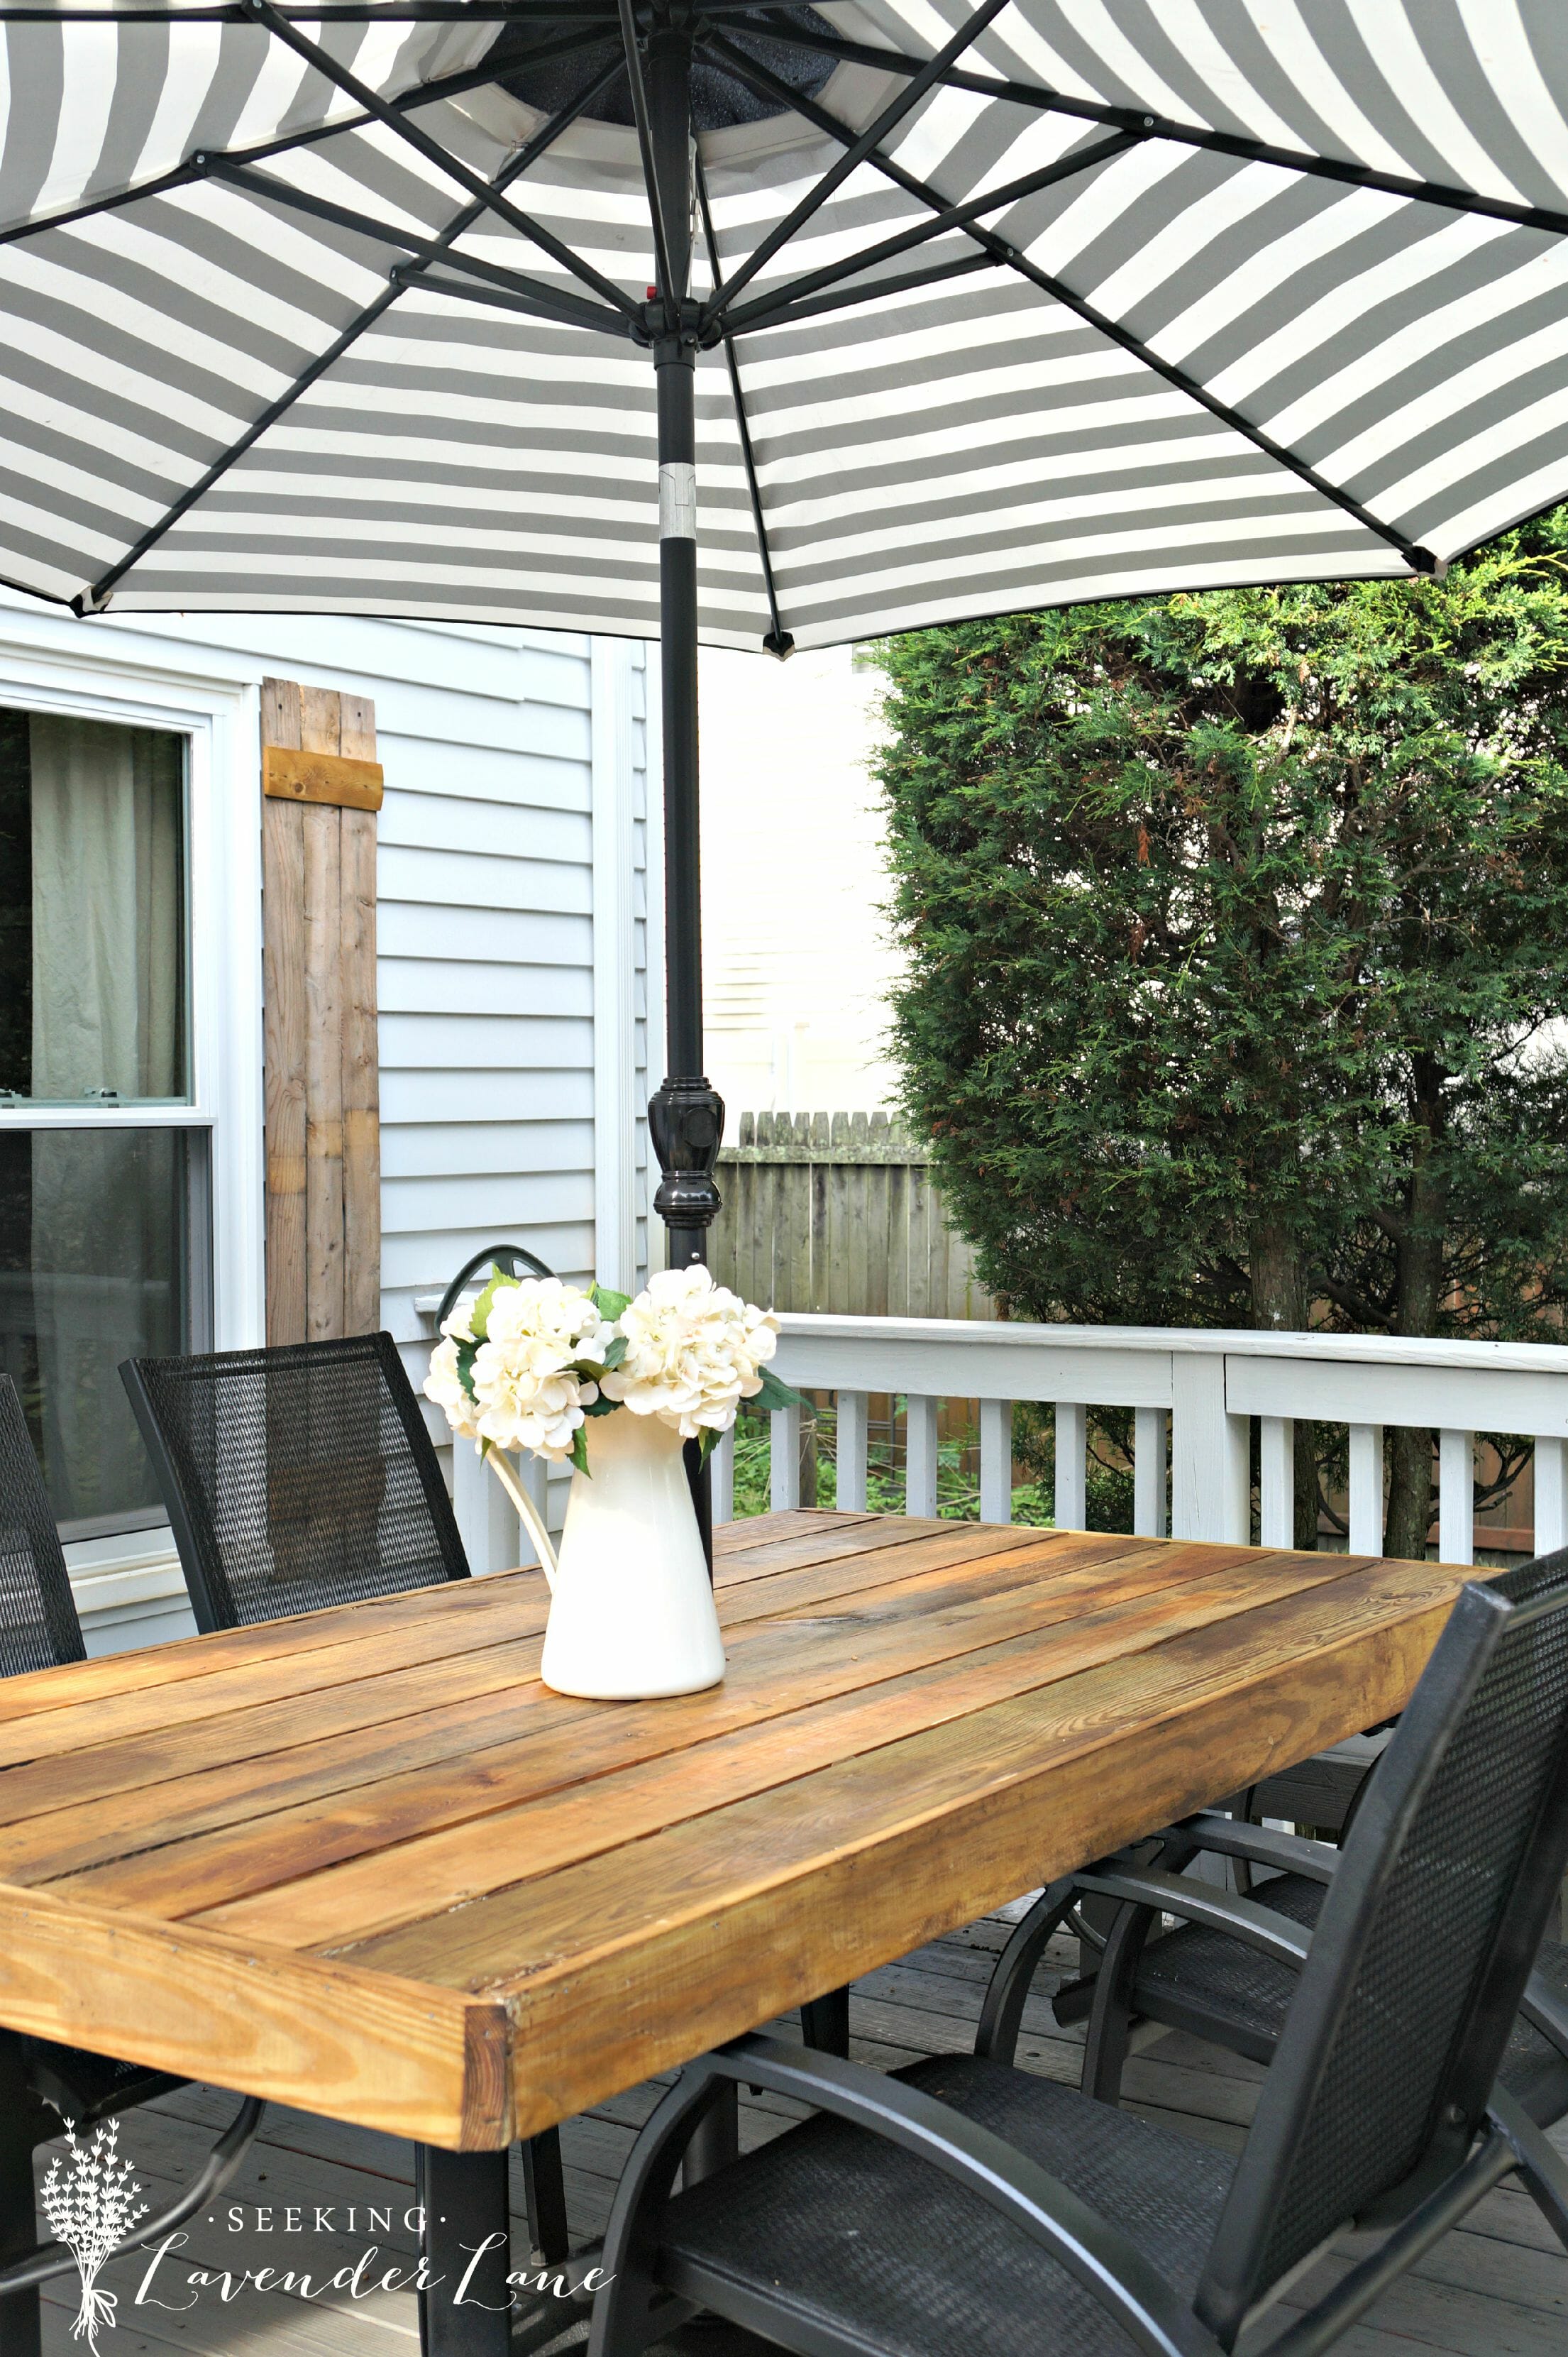
I stained the wood with Minwax Golden Oak and added dark wax to add attention to the grain of the wood and the roughed up details.
Next, cut a hole in center of table for umbrella using a 2″ Lenox Hole Saw
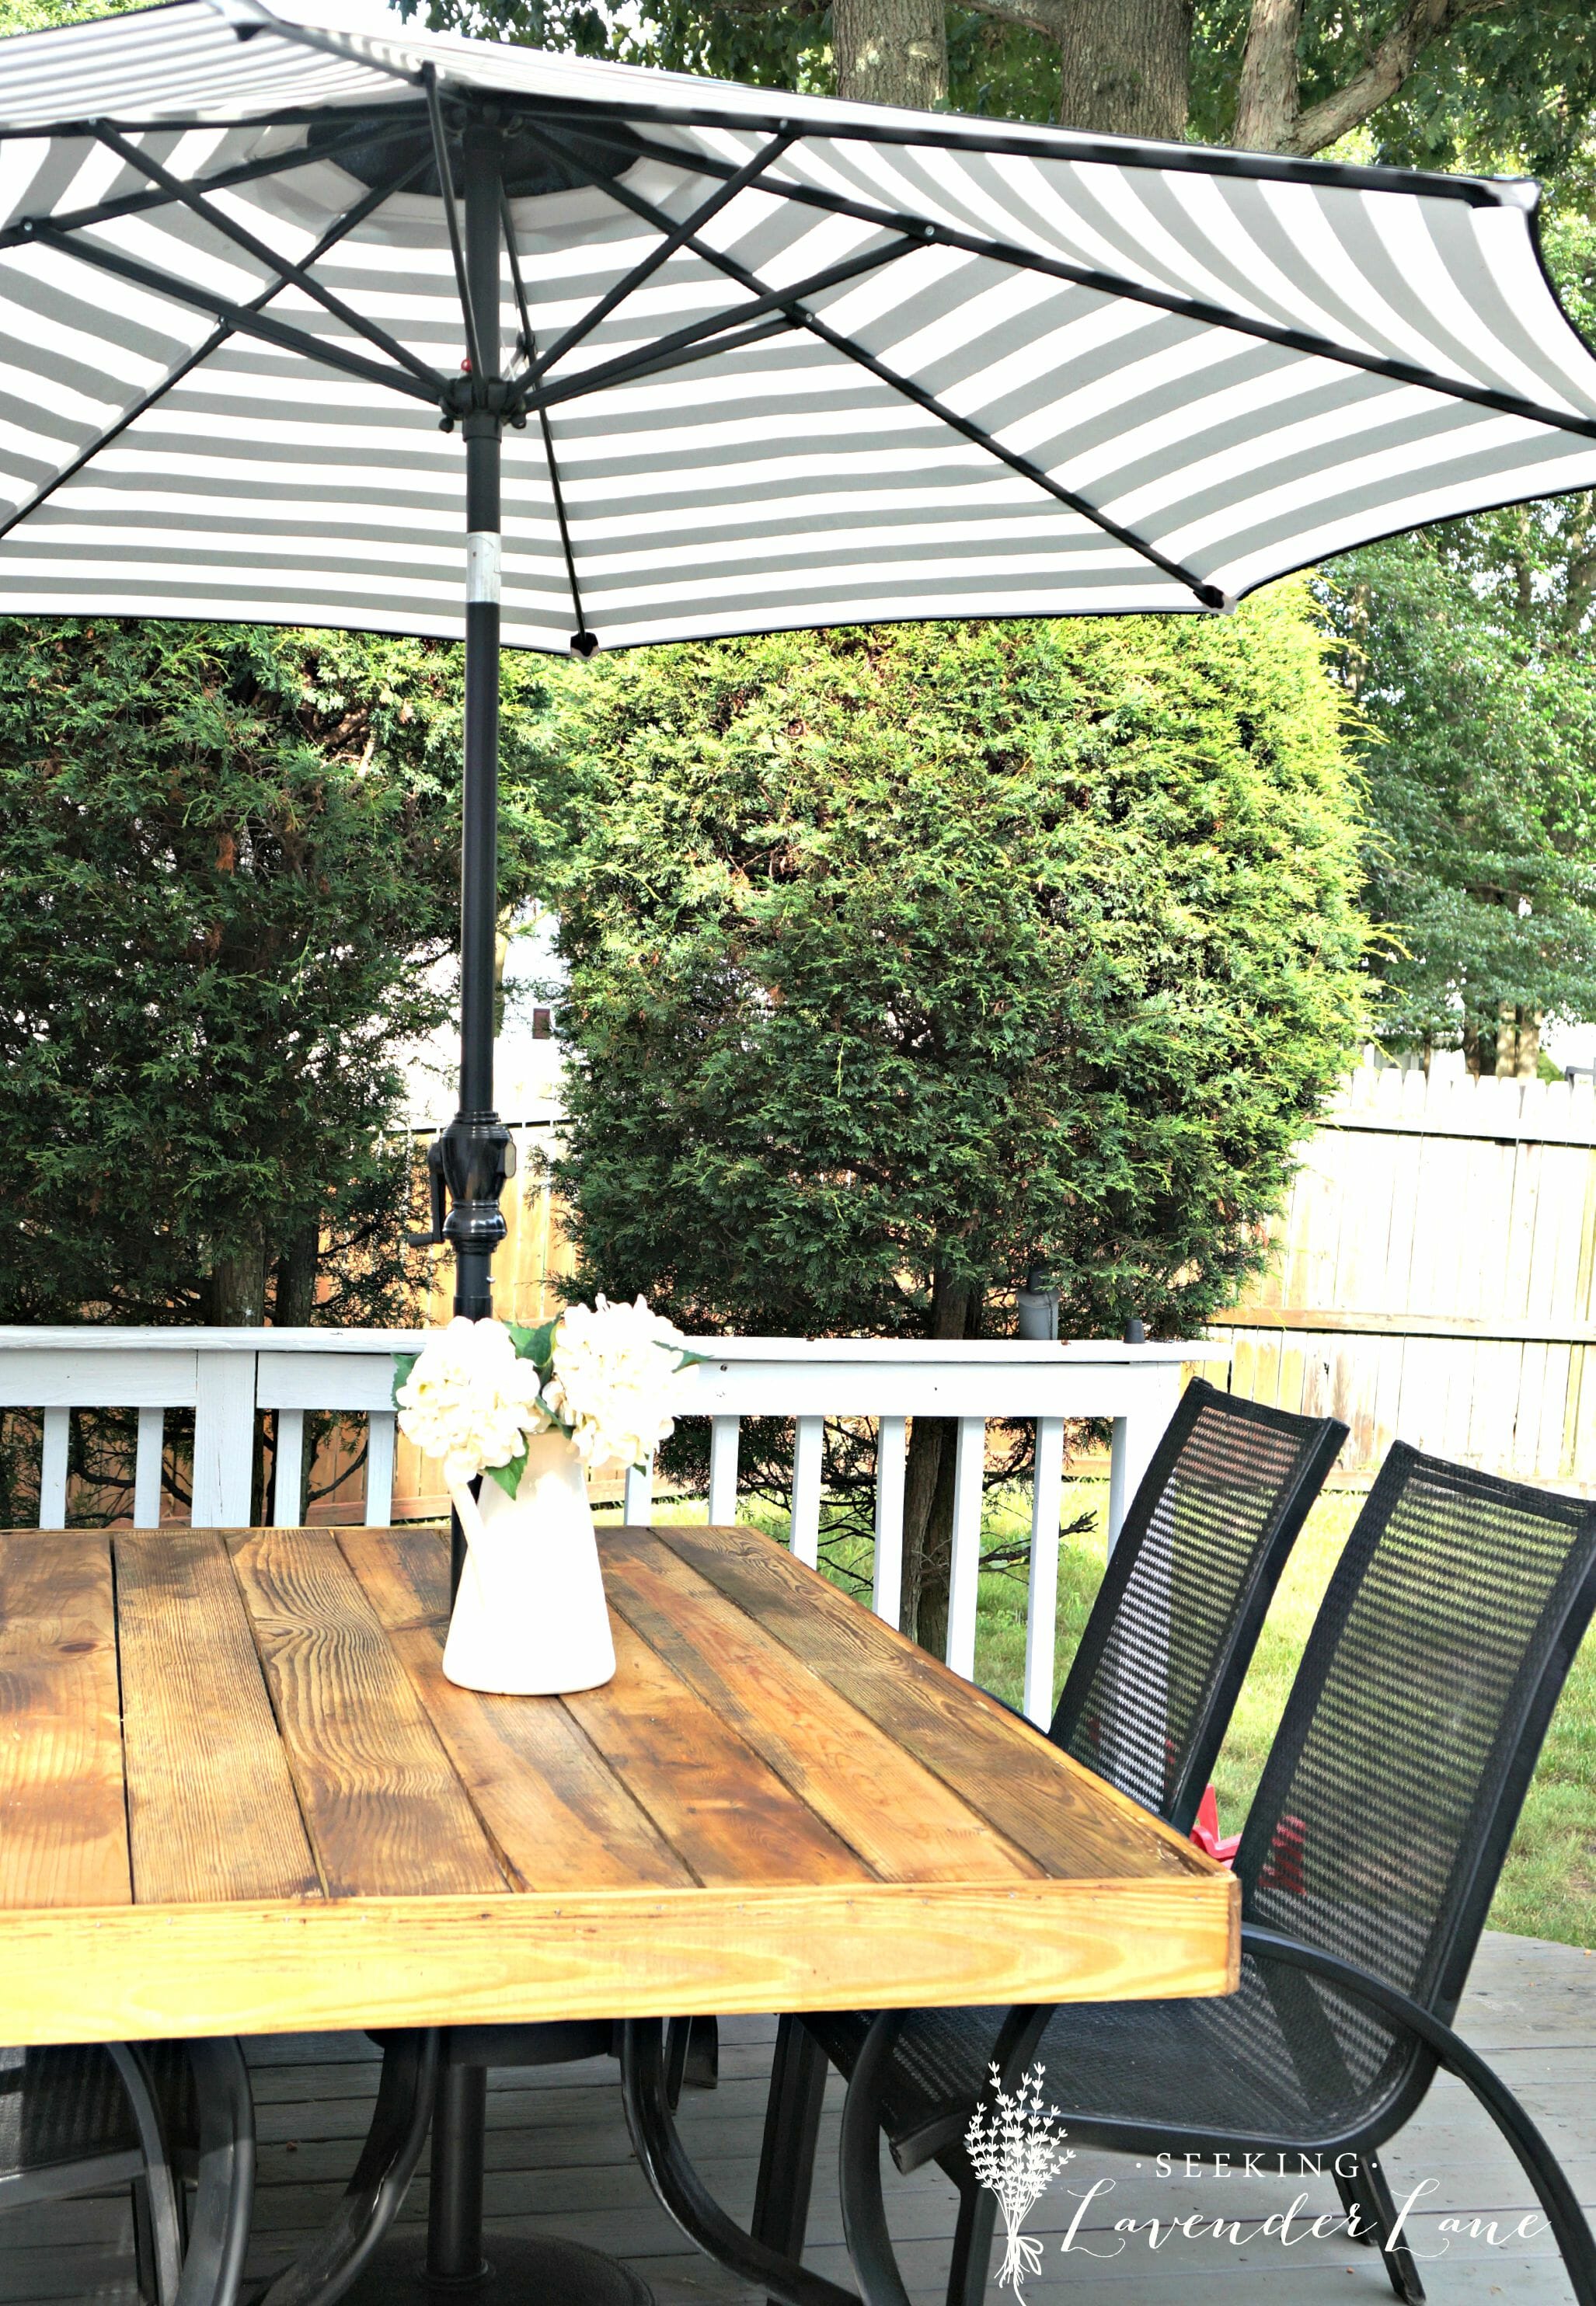
And now I have a fabulous patio table that feels more like my style and looks beautiful even after our very black cloud of a project.
If only I could get myself a roasted duck crepe and a French waiter…and call it a day!


This is a sponsored post featuring Rust-oleum products. All opinions are 100% mine to help create an easier DIY life for all of you.
Get the LOOK: click images below!
PLEASE STAY A WHILE: More Outdoor Decor Ideas

DIY Mason Jar Garden Chandelier
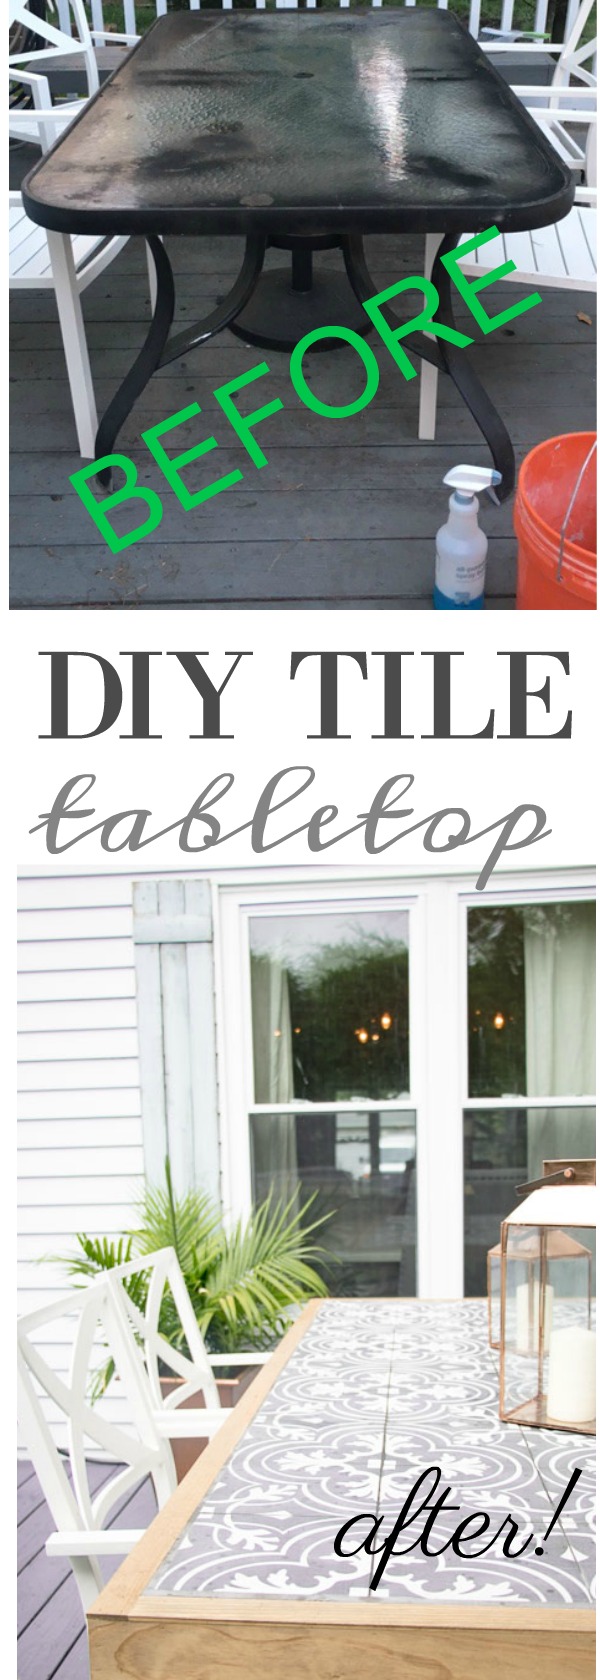
DIY Tile Tabletop: Patio Table Makeover


97 Responses
Deb,
This is fabulous. I love this re love of your table. It will hold up so much better to the outside elements too.
Beautiful job.
Kris
Kris @ Junk Chic Cottage recently posted…Side Road Cabinet Re Loved
Thank you Kris! I really hope so!
Hi, I see that it has been awhile since you have completed this project. It looks great. I was wondering how the chairs have held up to being painted? I am wanting to do the same thing with my patio set. Thanks!
Hi Jennifer, so I did this project last summer. We live in New Jersey, so they sat out during the winter wonths without any use. They still look pretty great, but I am sure they will fade over time. Nothing that a little more spray paint can’t fix though. I hope this helps!
Did any of the paint chip off from the fabric parts?
Hi Kelley,
This year I am noticing some fading, but no chipping. I’ll probably hit it up with some more spray paint soon.
Hi Deb, omg I can not believe that is the same set…..what a project!!!! I love the table, so awesome!!!! Thanks so much also for leaving me a sweet comment on my blog Little Brags. I tried to reply directly to your comment but you come up as a non reply blogger. Then I tried to leave you a message on GOOGLE PLUS but there is no message on your page only a hang-out . Google made some changes recently and it’s making me nuts….LOL…..
xoxoxo Christine
Christine recently posted…My Cozy Outdoor Spaces
Thank you so much Christine! That’s crazy, that it is doing that : (
So glad you stopped by!
I just love how this turned out! I’ve had similar struggles when I was adding wood planks to an IKEA coffee table. I had little slivers of wood to fill in gaps too! Unfortunately mine ending up falling apart and I just re-did it with straight cuts haha.
Angela @ Simply Beautiful By Angela recently posted…DIY Word Art
Thanks Angela! I am so glad I am not the only one lol…doesn’t always work out the way we have planned, embrace the imperfections : )
Your patio set looks great! We are needing a new table. I never thought to build over the old one, but I am thinking ours is just too old to make that work. But, I might just have to build a brand new table instead! Thanks for the inspiration!
Laura recently posted…Heidi Swapp Marquee Love Letters
Thank you Laura! I had thought originally we would build an entire table, but since we had the existing one that was in decent condition still I thought it would help to save money.
Wow! What a great makeover. Love the idea of covering the table with the wood. What a difference! Now you have me wanting to redo ours!!
Thanks Sara! Oh you should it makes the entire space feel so new and updated.
Wow! Just wow ! Amazing, I would have never bought in to that! What vision you have
Paige recently posted…Sea Glass
Thank you so much Paige!
This is AMAZING! I love it, and I didn’t even know I needed to update my patio set…until now! Thanks Deb!!
April R – Uncookie Cutter recently posted…Dart Board Upcycle
What a great idea! I have a similar set that I was thinking of replacing. Now I’m thinking this may work for me too. I didn’t see any mention of the chairs. Did you spray paint them as well? How is it holding up?
Hi Diane…yes I spray painted everything. So far so good…I feel at least the chairs I can always go over every summer with more spray paint if they fade. Or buy some new ones in the future…for now they are good.
Very cool project! I have the same kind of chairs (with the mesh backing on a metal frame) and didn’t know what kind of paint to use. I specifically wanted to know if you’re noticing any flaking off the mesh – we are having guests soon, I am thinking of painting our chairs a bit more colorfully for our new patio, and yet don’t want to send guests home with wild paint flecks on their clothing! So you’ve truly seen no problems with the paint used on the chairs?
Hi Teri,
no flaking of the paint so far…the only thing that happens is our chairs get wet every morning from our sprinklers and the chairs do tend to bleed onto light colored pants early in the day. That has only happened twice though…other than that all is good with them!
I came across this post on Wednesdays Moonlight and Mason jars linkup. Love the photo of your new patio set. It looks so stylish and unique. I don’t think I’ve seen the Rustoleum comfort grip sold in England. I’m going to have to hunt it down as it looks really good especially for bid paint projects. I’m thinking about spraying some cupboards. Thanks for sharing
Hi Birdy thank you so much! Yes you have to get the comfort grip it makes such a difference!
What a transformation! I have an old table I’ve been wanting to update and you’ve given me some great inspiration! Gorgeous!
Jennifer recently posted…Budget Home Improvements
That’s awesome Jen so happy that inspired you!
Looks really great. But did you cut a hole in center for umbrella? And if yes it appears that was done after too was assembled? Again beautiful table!
Hi Marcia, you’re right..I totally forgot to mention that. Thank you, I’ll have to add that step in. It was really simple to add in.
Love it! I have those chairs in green/tan & have wondered about painting them. Mine are so comfortable, but not my colors. Any advice specifically on the chairs?
The spray painting was pretty easy, just be sure to spray both sides of the fabric. It may fade a bit, but it still is a quick and easy change and something you can update each summer with a little more spray paint.
Love the look of the table with the wood – Thanks for linking up to Pin Worthy Wednesday, I have pinned your post to the Pin Worthy Wednesday Pinterest Board.
Amberjane recently posted…Easy and Cheap Plum Galette
Thanks so much Amberjane
This looks amazing! Seeing the before and after is such a huge transformation! I’d love to invite you to share some of your posts at my Inspiration Thursday link up this week. I hope to see you there!
Thank you so much! Love to link up there…thanks for sharing!
That looks amazing! I need to find the nerve to try to tackle a project like this. It looks so great. (I have the same glass top table and I’m not exactly a fan of it, either.)
Jamie @ Medium Sized Family recently posted…4 Tips for Packing School Lunches + Free Printable
Thanks Jamie! It’s one of the those projects that you know is not necessary, but if you do it…totally worth it! We are really loving having our table with the new look.
Great look. Glad you didn’t give up. Changes the whole vibe of the patio.
Thank you so much!
This is a fantastic makeover! It looks gorgeous now, you really did an incredible job!
Amy | Canary Street Crafts recently posted…IKEA Rast Hack
WOW!!! This is one outstanding makeover…luv that tabletop. Thank you for sharing it at my Show and Share Party (please don’t forget to add my party name with a link that you are partying with us…thanks).
Blessings,
Linda
Linda@Coastal Charm recently posted…The Market on Chapel Hill…The former Chapel Market
i love this. I can’t hardly believe that the end product started out as a boring store bought table!!
Thank you so much Stephanie!
Deb this looks amazing! I would have had no idea it was the same table. You guys did such a great job, genius!
Thank you so much Amanda!
Where did you find black and white striped umbrella? I have been looking for one for some time. Thank you in advance.
Hi Linda, I found mine through Amazon here is the link Black and White Umbrella just love it…I searched for a while too!
This is such a fabulous makeover! Thanks for sharing at Inspiration Monday!
Christy @ Our Southern Home recently posted…French Country Stool Makeover
Thank you Christy! for the feature today…what a great surprise!
I love your makeover, I can’t believe you spray painted the chairs, they look so good! And just putting a wooden table top on top of the old table is great. I love your beat up corner, I have many project that have that extra “character”. It makes them more homemade, but no one ever notices them but me. I’m inspired to get after my deck area for a makeover, but mine involves building the deck first and I need more motivation for that!
Kati recently posted…Build a Rustic Picture Frame in 20 Minutes
Oh no Kati! That’s a whole lot of work…but so worth it when it is done. I know my deck needs to be repainted already and that is enough work in it’s own…there is always next year! lol
Remember, measure three times and cut once.
Lol thanks William…in my case measure 6 times and cut once! I almost do better when I eye ball something hah
This is absolutely stunning. I love the new rustic look. You mentioned that you added wax over the stain. Just wondering how wax holds up to the outside elements?
Hi Mary this has only been done for a few weeks now…so hard to tell over time what it would be like, but so far so good! I am not a fan of poly and I am okay with a rustic feel to the wood so I prefer it this way. I also like that it has a flat surface no sheen here!
Hi Deb! This is an awesome idea – I have the same exact table but different chairs. The cushions are also thicker and are put on separately. Can you spray paint a cushion like that? Also, did you remove the glass or did you just keep it on under the wood? Thanks!
Hi Erich, not sure about the cushion…are they attached? maybe you can remove them and cover them with new fabric. and the class is still there, we did not remove it.
Did you take out the glass top and just put the new wooden top over the frame?
I love the mitered corner. I always bruise myself on the points.
Hi Jennifer! Thank you! We did not take the glass out at all…we just covered right over it.
What a great makeover! I own the EXACT same table. The glass top on my mine was shattered after a wind storm blew the table and umbrella over a few years ago. We were hosting a party a couple days later and needed the table, so my husband bolted a piece of cheap plywood to the frame and we covered it with a tablecloth. After the party, we bought a new table for the patio and moved the old one out to my husband’s workshop…. Now I’m thinking we should make a nice planked top like you did for the old table and bring it back out of hiding!
That’s so great Lisa! I hope you do…it can become such a great piece for cheap! and it also becomes a conversation piece : )
I have been keeping an old table base for some reason ,and after seeing your makeover I now know why …so clever and love the mix of materials ….I am a new follower and your ideas are very impressive ….kiddos to your husband as well…good combination …
Thank you so much Melanie! That’s so great…I hope this works out for you : ) So glad to have you following along!
Fantastic ideas for this makeover……looks awesome !!!!! LOVE the black and white strips…. But I have a dumb question….where do you spray paint such items like the chairs? I have such a difficult time trying to find a spot to do such a thing…I do not want to have over spray on my neighbours house, car or anything of my own for that matter….my backyard is all pool and cement…. I do not have a garage…. Hmmmmm I am at a loss where to do it.. Just a curious question….teehee… And I had one more about another post…it was about your daughters dresser, you used olive oil…in to wax..why was that and how did you know that would work? Can that be used for other things? And if so…what other things? Stain? Paint? Would other ‘oils’ work? Thanks in advance for any information and / or advice you can give me… I value your opinion and advice. Hope you are having a great weekend.
Thanks Laura for you sweet comments. The sray paint I did over garbage bags in my back yard (which is all grass) For you, I would probably just get a drop cloth and paint over that. As for my daughters dresser I did that will Annie Sloan Dark Wax. I used Olive oil and brown acrylic paint on my Ikea TV stand. I was the only time I tested it out and it worked pretty well. I’m not sure about sealing it, but as for just giving the piece a nice vintage and layered work…it did the job! Fortunately it’s not a piece I really needed to seal since everything remains in the same spot and it’s an item that we don’t use often. So glad you stopped by Laura!
It is amazing what you were able to do with this set, it looks beautiful. The umbrella looks perfect with it too. Thank you for sharing!
Thanks so much Laurie!
hello!! We are so excited to give this a try with our old patio table… Maybe a dumb question, but how did you hold the pieces of wood planks together for the table top? I read in a previous comment/question from a reader that they are not glued down to the existing glass table top. So are the wood planks just nailed at the ends to the frame all the way around on the outside perimeter? Thank you for clarifying. I appreciate it!
Jenny
Hi Jenny, thanks so much for your question. I am so excited that you are taking this project on. So we nailed the planks into the wood frame. We then did a horizontal piece across too to help support the wood planks. I hope this helps. Love to see how your table turns out…please send me a photo to my email.
This is exactly what I’ve been wanting to do with our table on the deck. How has yours held up? I’m in Texas so it has to hold up through our fierce summer heat. And don’t worry about the one mistake. You’re probably the only one who ever sees it. Also, I like your 45 degree corners!
Thank you so much Debbie! It has held up great. We haven’t used it since summer, but it withheld during our 3 foot snow storm, and I think that was my biggest worry. So if that worked, I am sure your table will be fine in Texas.
I really like the finish you put on that table. It really brought out the color, which really matches being outside on your patio. Hopefully your table will last you for a while before having to tend to it.
Thanks so much Sarah!
Hello Deb, Your patio turned out very nice! My husband and I did this a few years ago to a free table I snagged off Craigslist (it was missing the glass top, so it was perfect). We are having trouble keeping ours “new looking” though. I like the shiny wax look; but also want to leave the table out all year. How is yours holding up, do you have any suggestions or product recommendations. Thank you again for sharing your talent!
Hi Michelle, how neat! I really wanted my table to not have too shiny of a finish. I decided just to wax mine last year. My table after this winter has faded some. I plan on giving it a new stain and I may try poly this year in a satin finish. It is just as your wooden deck will need to be re-finished every few years so will your tabletop. Probably the best way to keep from re-doing would be to paint the wood. Other than that a little maintenance is the way to go.
I love what you did with your patio furniture! We have basically the same set. Our glass top just shattered over the winter and your post inspired me to do a wood top (or, more less inspired me to have my husband make a wood top..haha). He finished the new wood top this weekend using stained pallet boards left over for our pallet wall project. I really want to paint the chairs black as well and was curious if you’ve had any issues with painting the fabric. I’m ok with yearly touch ups if that’s the case but was wondering if throughout the summer the paint chipped off the fabric or not.
Thanks so much for sharing your beautiful patio furniture face lift project!
Hi Dayna, we really did not have many issues painting the chairs. In the beginning they did happen to get on light colored clothing but after a while it was fine. The fabric part has faded a small bit which I wil probably touch up with some more spray paint. As for chipping…no chipping, and these chairs are really old too.
The table looks fantastic. I’ve been wanting to do a wooden table top. Was the lumber on the table top attached to something on the bottom or did the sides of the table provide enough pressure along with the screws to hold the top together? I’m wondering if there is plywood or narrow pieces of support wood under the top.
Thank you for sharing.
Hi Jean, we just built the frame and it slips right over the top of the existing glass table.
Hi Deb! I just emailed you about being featured on Remodelaholic, but my emails are swallowed up in the email vortex far too regularly, so I wanted to leave you a comment as well, for insurance 🙂 Drop me a line at hello@remodelaholic.com please!
Hi Lorene,
Thanks so much! Will be in touch! : )
Beautiful pictures! Thanks for sharing, everything looks beautiful, and you give wonderful ideas!
OMG! I LOVE this idea! I have almost the exact same patio set in almost the exact same condition as your “before” pics! I also have 4 matching bar stools, so to replace all of it would cost me a small fortune that I don’t have right now. I am so going to do this to our set. Can you tell me how the paint has held up, especially on the fabric part of the chairs? I had to laugh reading through this article cuz anytime I get an idea like this, i too enlist the help of my hubby, who is usually grumbling along the whole way cuz I want it just right. We usually have to do the whole “24 hour cooling down period” too! Please let me know how the paint has held up. Thanks!
P.S. Love your style and blog!
Lol oh thank God I’m not alone with begging the hubs to help in a project! so the paint seems fine, it did fade a bit…but just a little extra spray paint shouldn’t be so bad. Love to see a pic on how this turns out, send it to my email!
hey, We are about to copy a lot of what you have done. My wife loves the white and grey umbrella you have. Do you know where you got it from? Thanks!
Hi Kevin, Awesome to hear you are working on the outdoor patio set makeover! The umbrella is actually black and white, not sure if that matters. I found the umbrella on Amazon, I believe there is a link on the blog post. hope this helps.
I loved the remake of your table so much that I showed it to the hubs and asked him if he’d work on making a new top like yours for the existing legs of our table. He actually got all excited about it and immediately got started. Sometimes I forget that he’s an engineer, is very creative and doesn’t think like I do. LOL I should’ve known that he couldn’t make it an easy project. It has taken three months to make the new top but he finally put it on the legs yesterday. It’s actually more of a piece of artwork but I love it. Of course, now we need new cushions for the seating and need to put sealer on the deck (He power washed it in the spring but started work on the table top and hasn’t gotten around to the sealer plus we’re in Texas and it’s just too hot to do much on the deck. It’ll be a while before we can even use the new table top.). The top is made of cedar and has at least 3 coats of outdoor sealer on it. I wish you could see it. Thank you so much for your inspiration! :0)
Yay! How awesome debbie! send me a photo to my email I’d love to see how it turned out : )
I tried sending a photo to https://seekinglavenderlane.com/contact/ but it wouldn’t let me attach one.
my email is dfoglia413@gmail.com
Love what you did with the table. I’m not a fan of glass tabletops at all. Huuuuuge improvement if you ask me. 🙂
Jimmy recently posted…Best Teak Patio Set Under $2000 – Bayview Patio 9-Piece Outdoor Dining Set Review
How did you join the boards in the middle? Did you use a biscuit joiner or just nail each boards edge to the frame?
We nailed them down to boards underneath to keep in place.
Hi Deb,
I absolutely love the updated table. The before and after is amazing. Thank you so much for sharing this transformation with me.
Jenny Valance recently posted…Complete Guide to Mow Strips
Thank you Jenny, I am so glad you like it!
what are the dimensions of the wood that you used. I love this idea! Are they 2x4x6?
Thanks Kiley, the wood should be probably 1×6
I have the same problem with my patio space – grass is growing up through the cracks. What did you do to solve that problem?
Really? Growing up the cracks of your table? My table is on my deck so I haven’t had that problem. Unless you’re talking about between your pavers. I would say maybe weed killer…or embrace the shabby chic look : )