


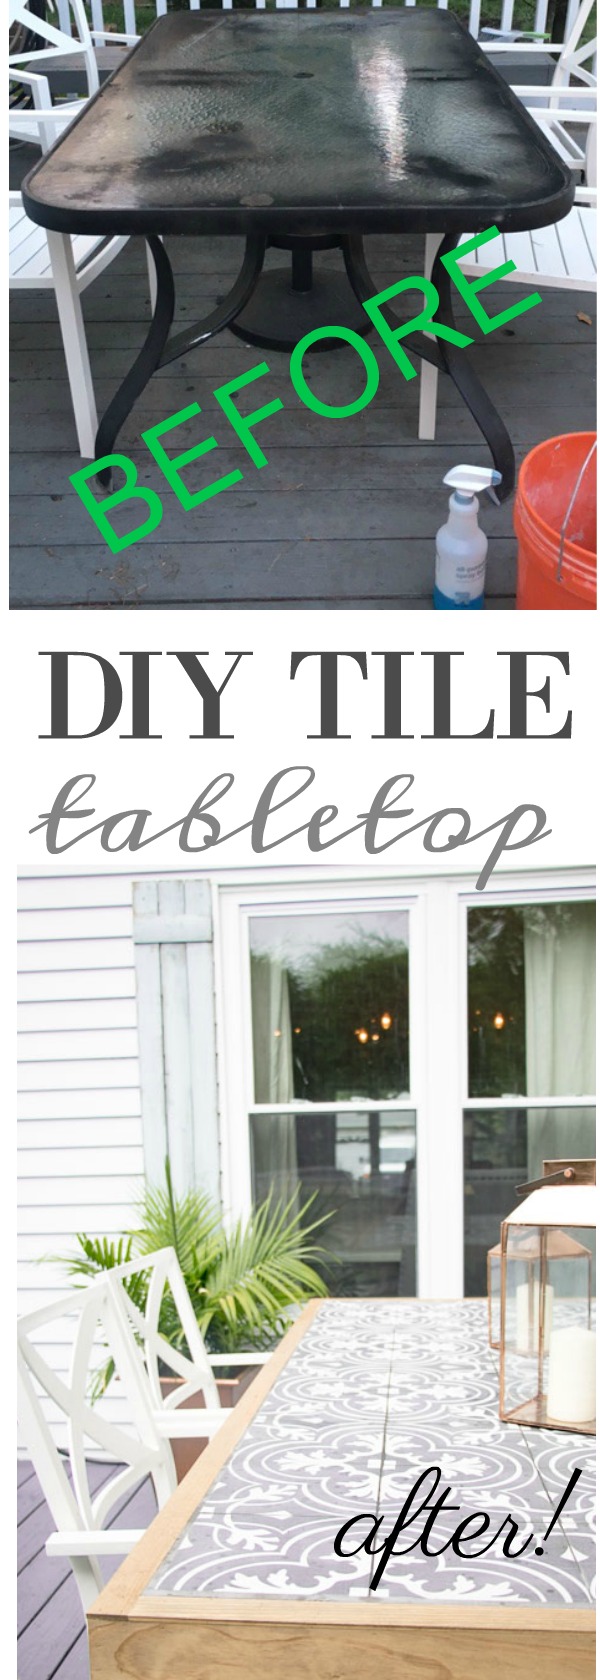
DIY Tile Tabletop: Using Merola Tiles
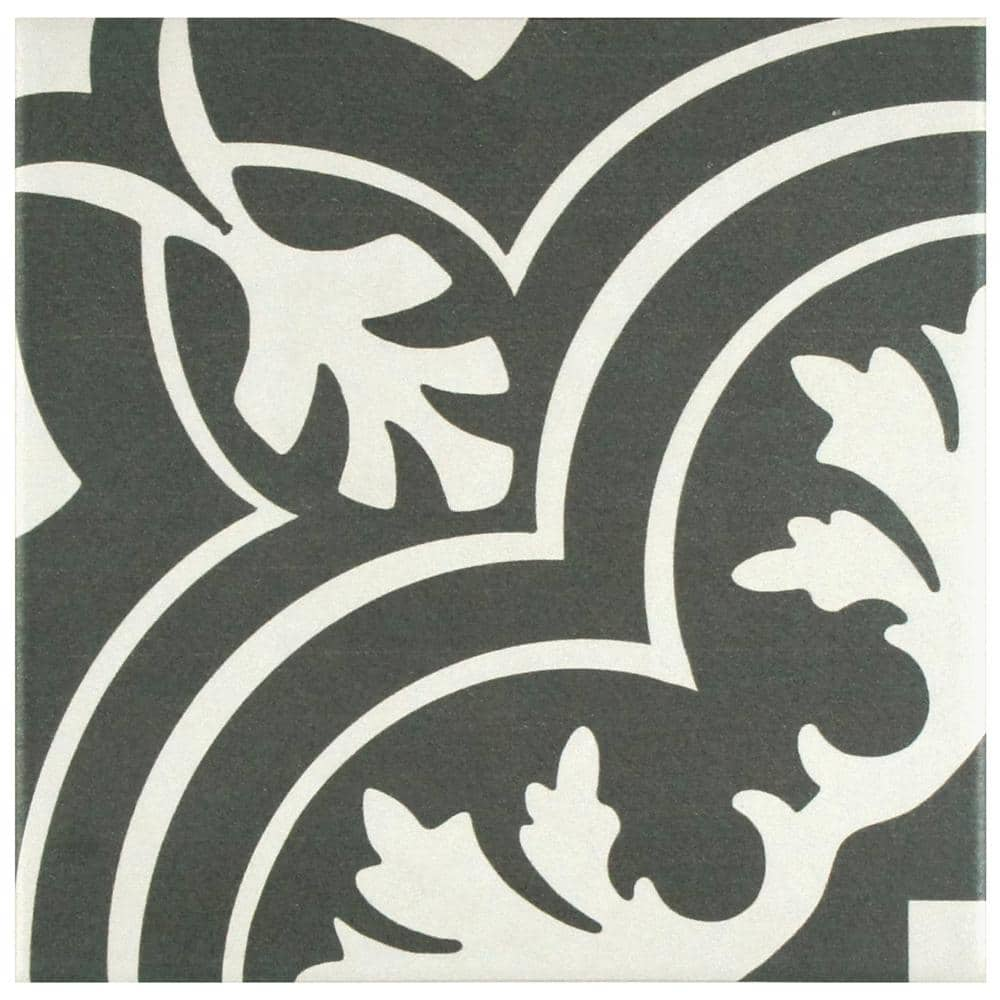
Let’s first talk about the dreamy black and white (link to tile here) Merola tiles. Who else has been oohing-ahhing at these for the last year or so?
This post contains affiliate links that I make a small commission from, with no added cost to your purchase.
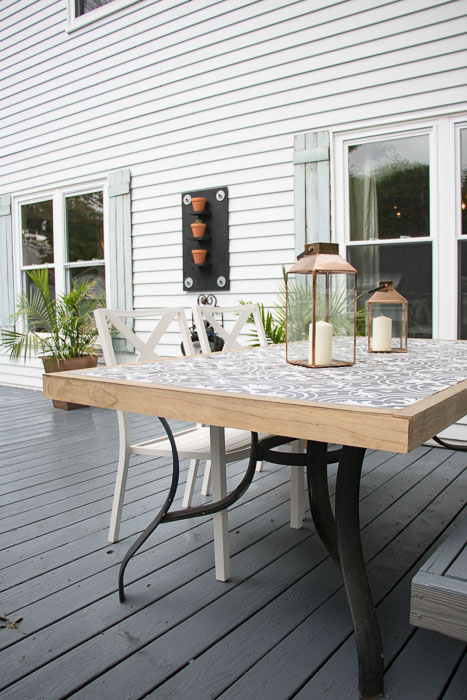
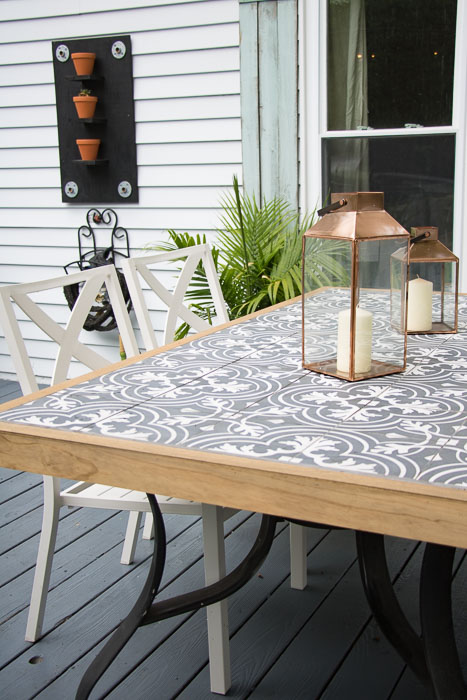
They are such a trend in home decor right now since they are an affordable option to cement tiles and their bold black and white pattern is adding interest to every kitchen and bathroom around! Well, you know I would love to have a bathroom or kitchen or something filled with these gorgeous tiles, but for this girl who’s working on a small budget always and a small home, I’m running out of money and space for these kind of projects. That just made me think outside the box even more so, how I could have these bold beautiful tiles in my home. That’s when the Spring and Summer projects came in mind. Our Outdated Patio Set updated surface, was not doing so well two years later. We needed a new solution to the patio table and though I really just wanted to buy something new…$300-$500 just wasn’t in the budget. I thought about just re-doing the top again as we had in the past, but then a tile top popped in my head. This seemed like it would be a much easier option too…since the hubby and I have a problem with our “carpentry” projects not always turning out so perfect. I figured tile would be easy and all we would have to do is build a frame around the edge. A DIY Tile Tabletop would be the perfect solution!
Materials
2 boxes Merolo Tiles (click here)
Plywood
1 x 2.5″ (3 pieces)
Molding for top trim same thickness as tile.
Mortar
BEFORE
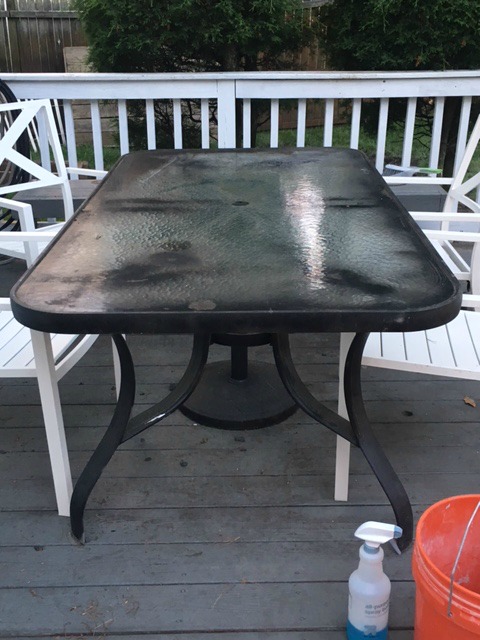
Our original makeover on this table I spray painted the table with black spray paint. Considering the piece was slightly chippy from it being so old, the spray paint held up well these past two summers. I also always recommend their comfort grip for large spray paint projects like this!
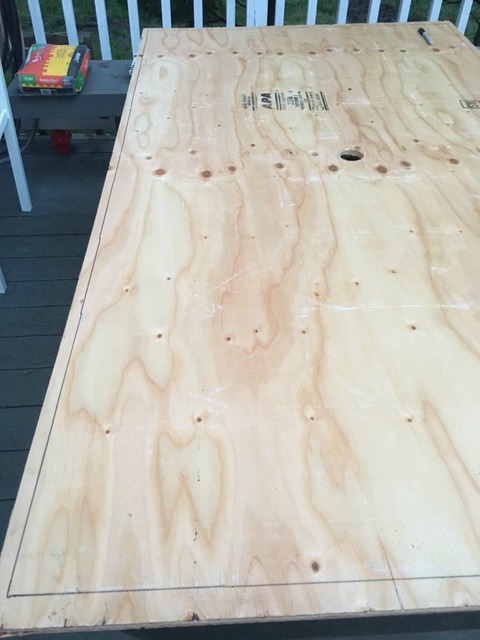
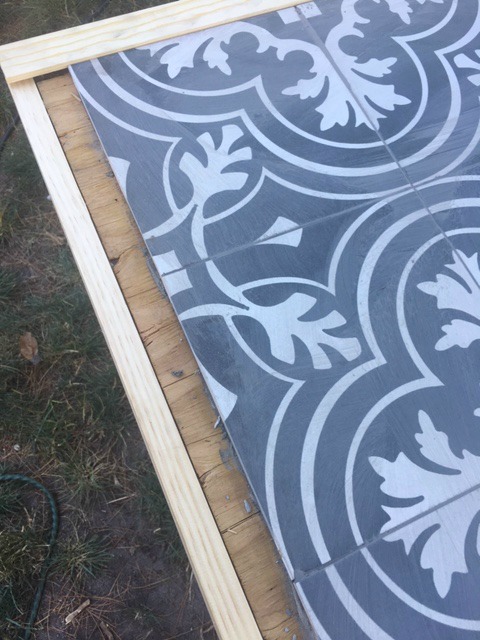
First, we added a thin piece of plywood cut to size of the table, directly on top. Try not to get too thick or heavy of a piece of wood, since the tile will make it heavy and you don’t want to add too much weight to the raggedy outdated patio table.
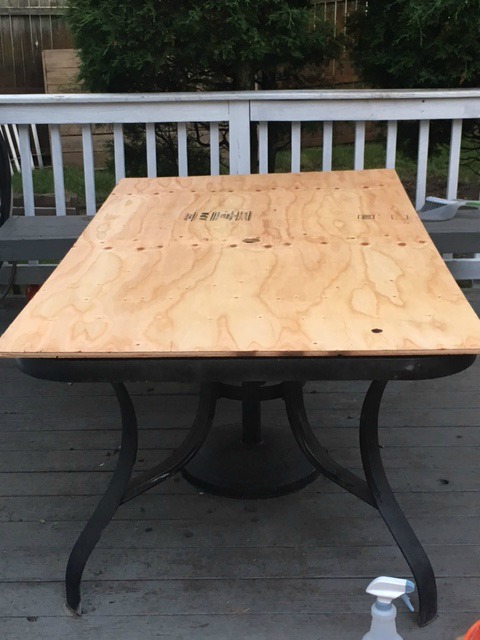
Next, place the tiles on top of wood trying to keep the rim of the wood the same all the way around.
Trace tiles while they are on top of the wood.
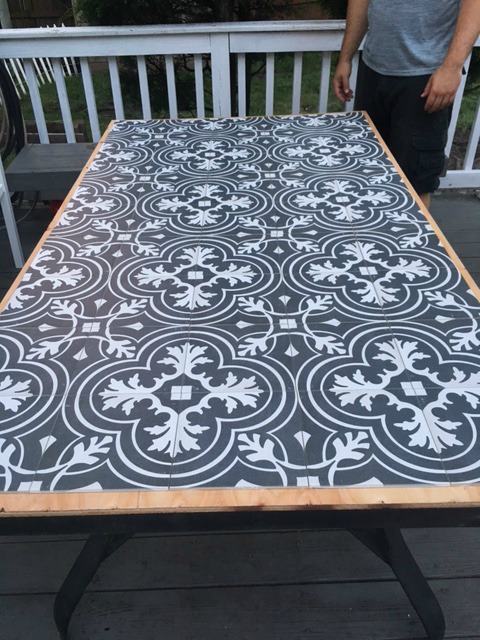
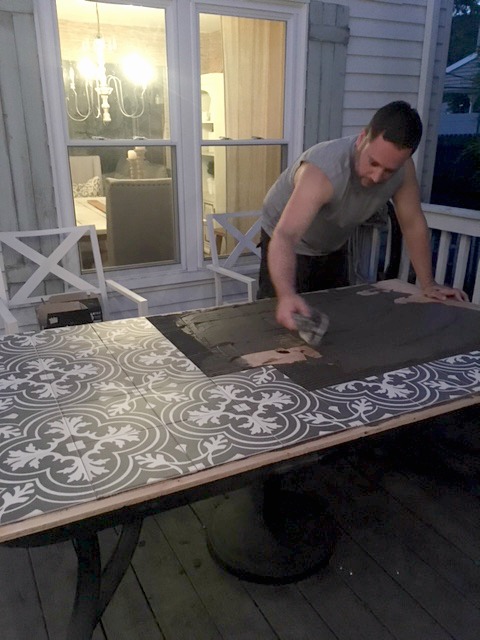
By having the outline this will help when placing the tile back on top. Begin to Mix mortar and apply starting in one corner and working your way down. This tile is like working with a puzzle piece so be sure to not jump all over but work in one section to the next.
Once Tile is all in place let dry overnight. Be sure to choose a non-rainy day or week to do this project.
apologize for the lighting this project we started after the kids went to bed.
*Tip be sure to not get too much mortar around the edge of the table. You are going to be placing your frame here so be as neat as possible. Any excess you can always scrape off.
Okay, an honest story here! If you follow along on Instagram then you have seen my frustrating insta stories…where I grouted the tile the next day and then a big rain storm came through! Yep, you can only imagine. The tiles ended popping up in some areas and we had to scrape and re-do the tiling on some of the table. The project I promise is very easy, but for some reason, we had a black cloud over our heads when doing this project (no pun intended). I think overall even after all the hurdles we had, it still came out pretty amazing..oh and I didn’t mention I bought wood and had it cut at the store and came home to realize my cuts were all wrong. A waste of money and time. So yes, black cloud status here..but as always we have a plan B and it all turns out alright at the end.
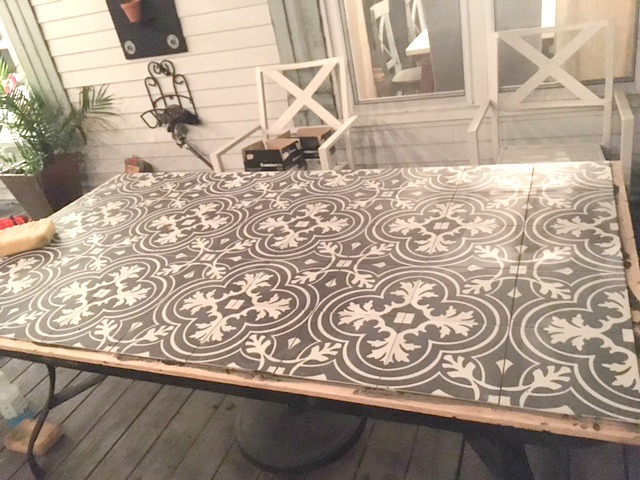
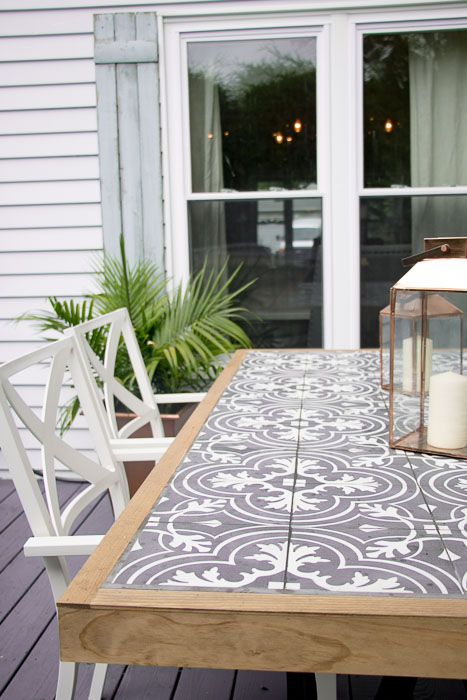
On to the framing of the project. Be sure to buy wood trim that is close in thickness to the tile. This will allow the table to be flush and flat. Also, if you have chairs that have an arm be sure to measure for that as well because you are going to want to push your chairs under the table when sitting.
Here we built the frame using our nail gun and nailing the trim right into the wood frame. We chose not to do angle cuts since this would be the easiest to assemble. If you’re a pro craftsman do all the fancy angle cuts of choice. We’re still not there 4 years into DIYing.
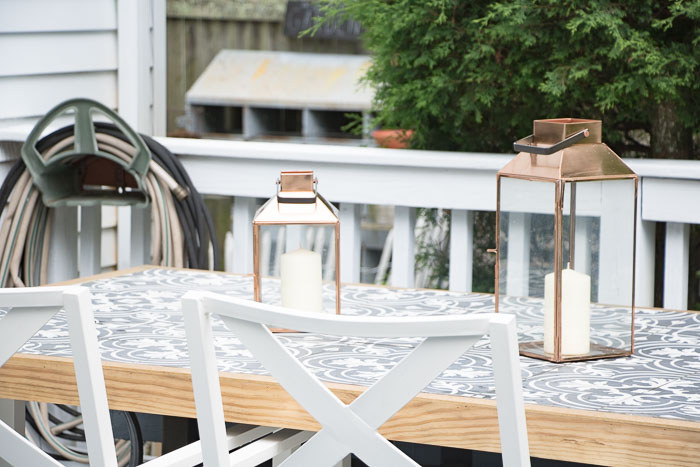
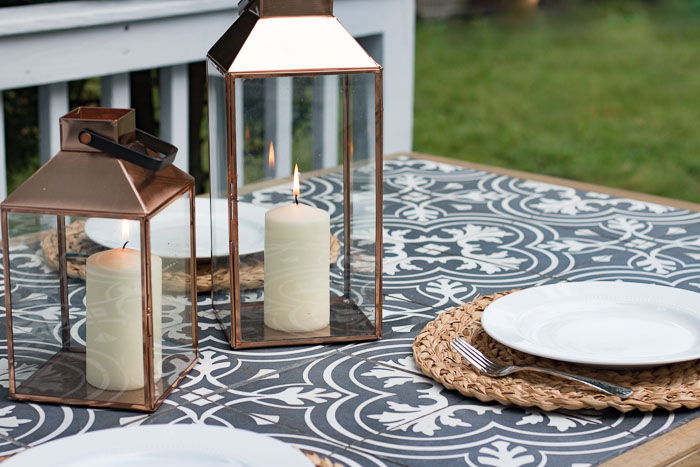
This is a close-up shot of the table ready for its top frame. As I mentioned we chose a thickness close to the tile thickness. We assembled to the edge of a table and then grouted inside the line.
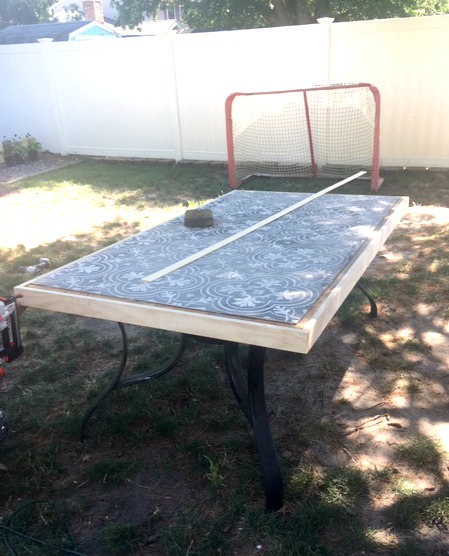
That’s it! Super easy if it doesn’t rain on ya!
Funny thing…it was raining when I took these photos too, fortunately, everything is dry and complete. We thought about maybe sealing the grout with a clear epoxy just to make it even better for the outdoor weather.
UPDATE: We have since sold our house and moved since we moved we did not take our table with us due to it’s weight and inconvenience. I believe with sealing the table, covering it or moving to a shed during winter, and correctly building, this table can last you a few years. I get many questions on that and unfortunately we moved so I don’t have a true update on how it held up.
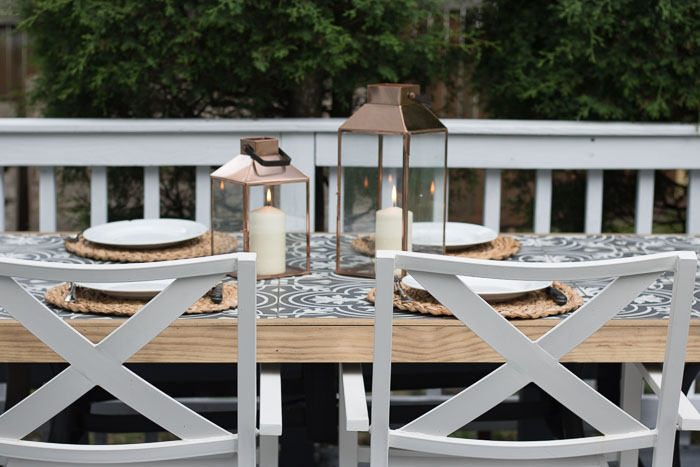
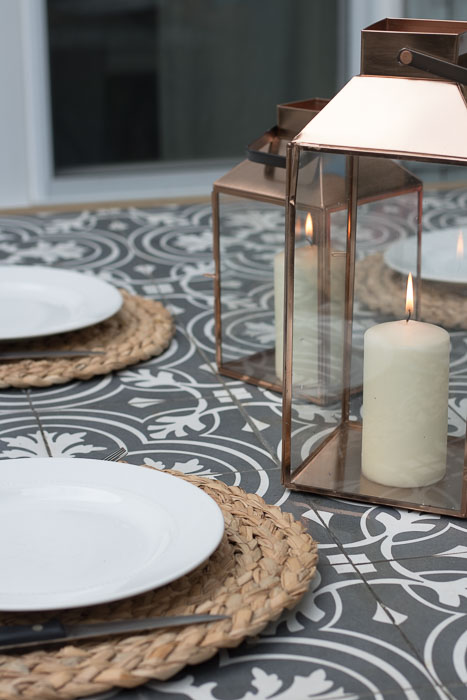
AFTER
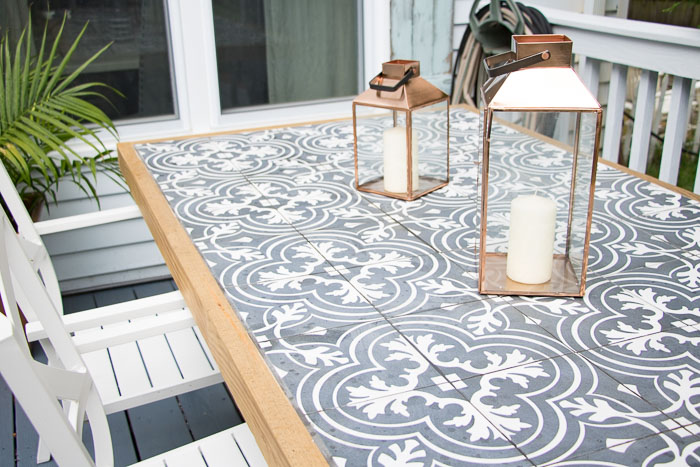
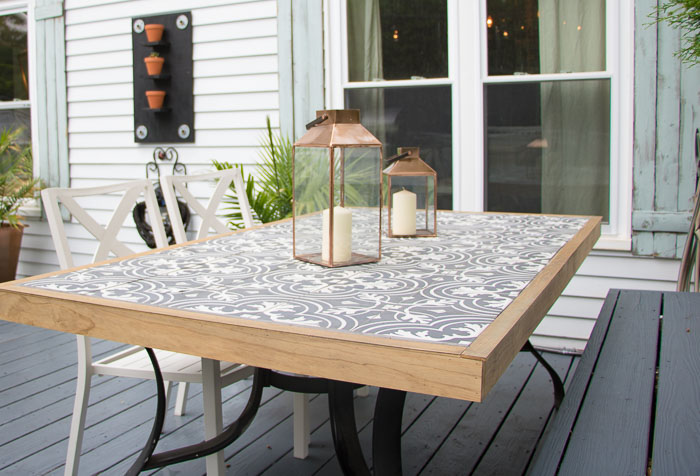
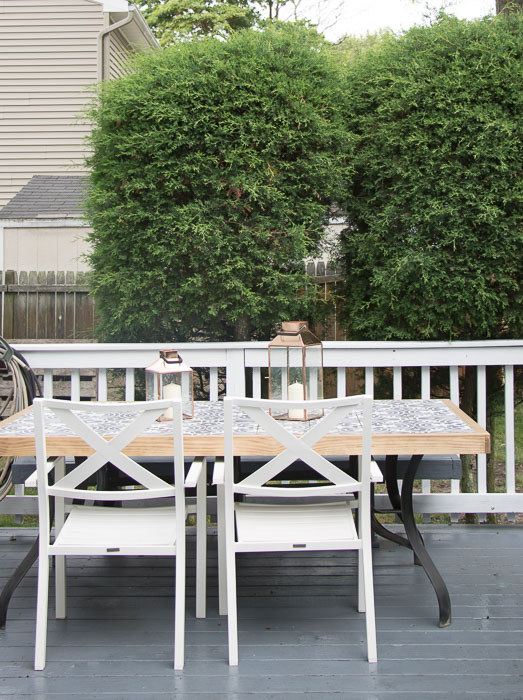
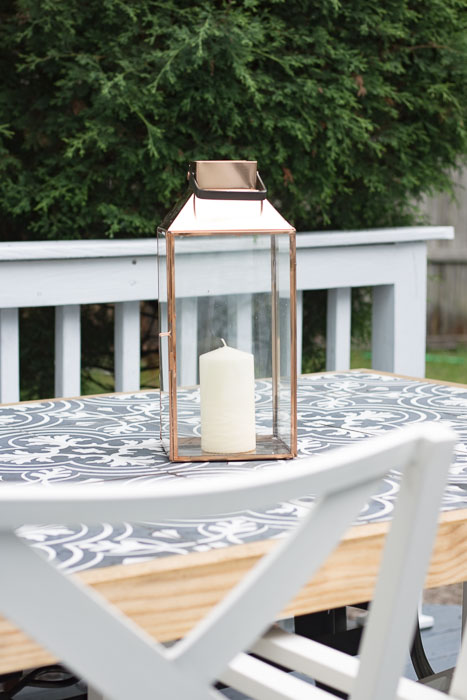
and the table all set…
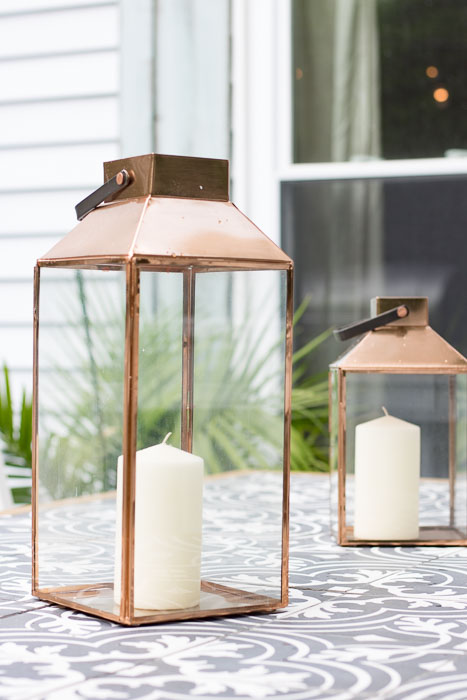
Shop the Post

LOVE for you to PIN
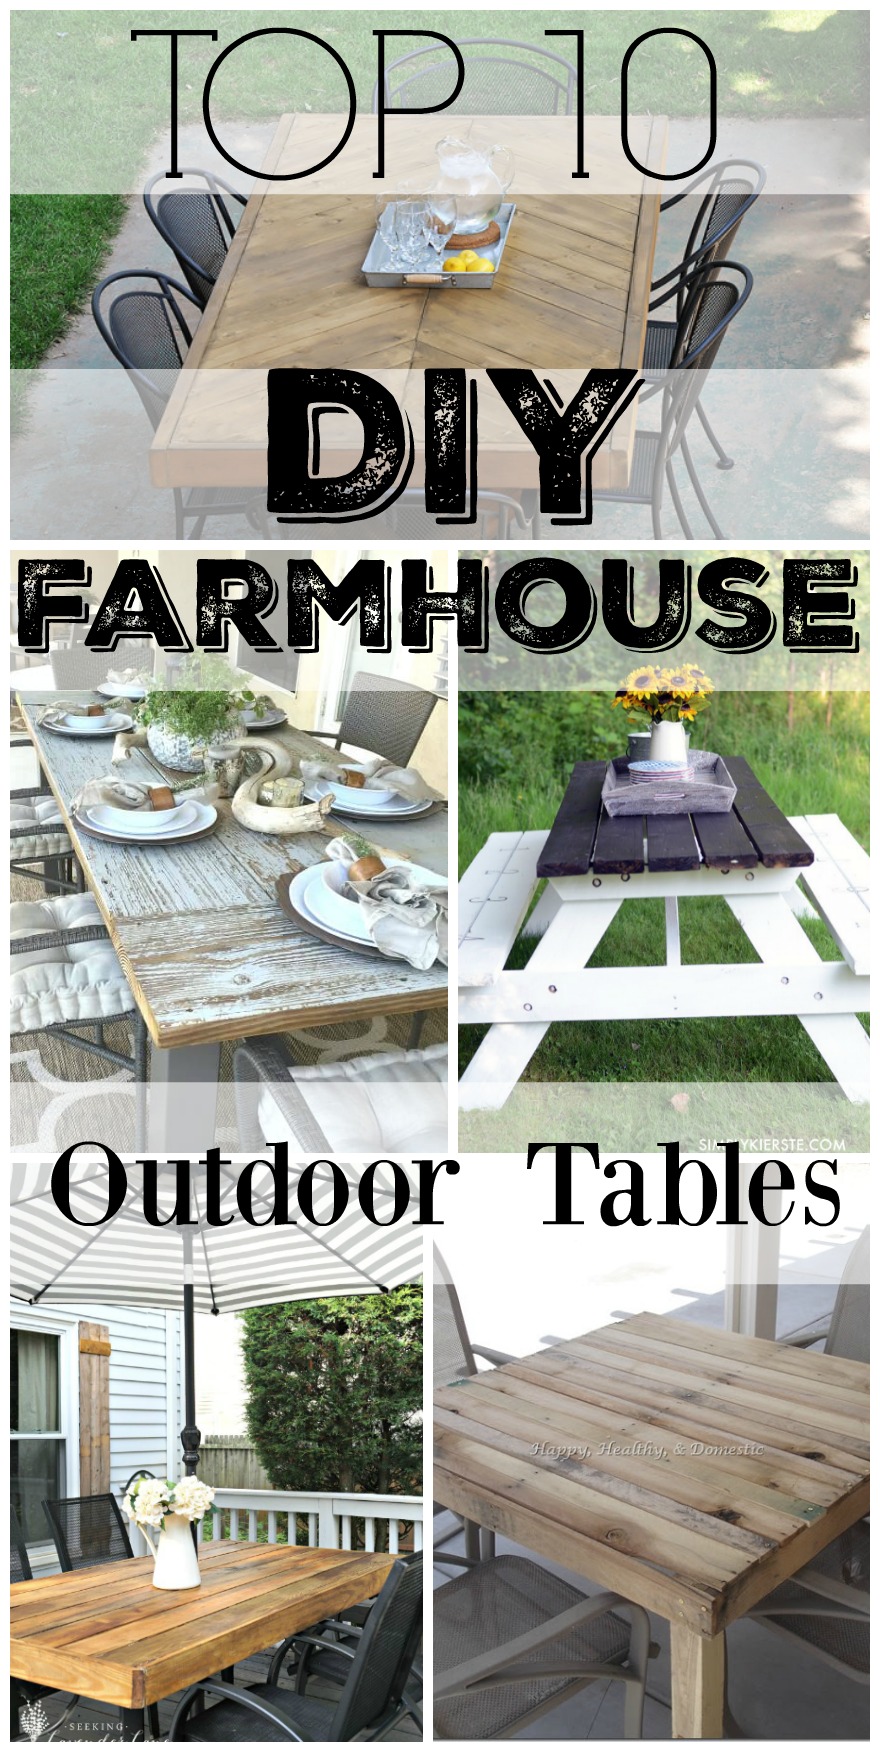
Want to see more DIY Patio Table Makeovers?
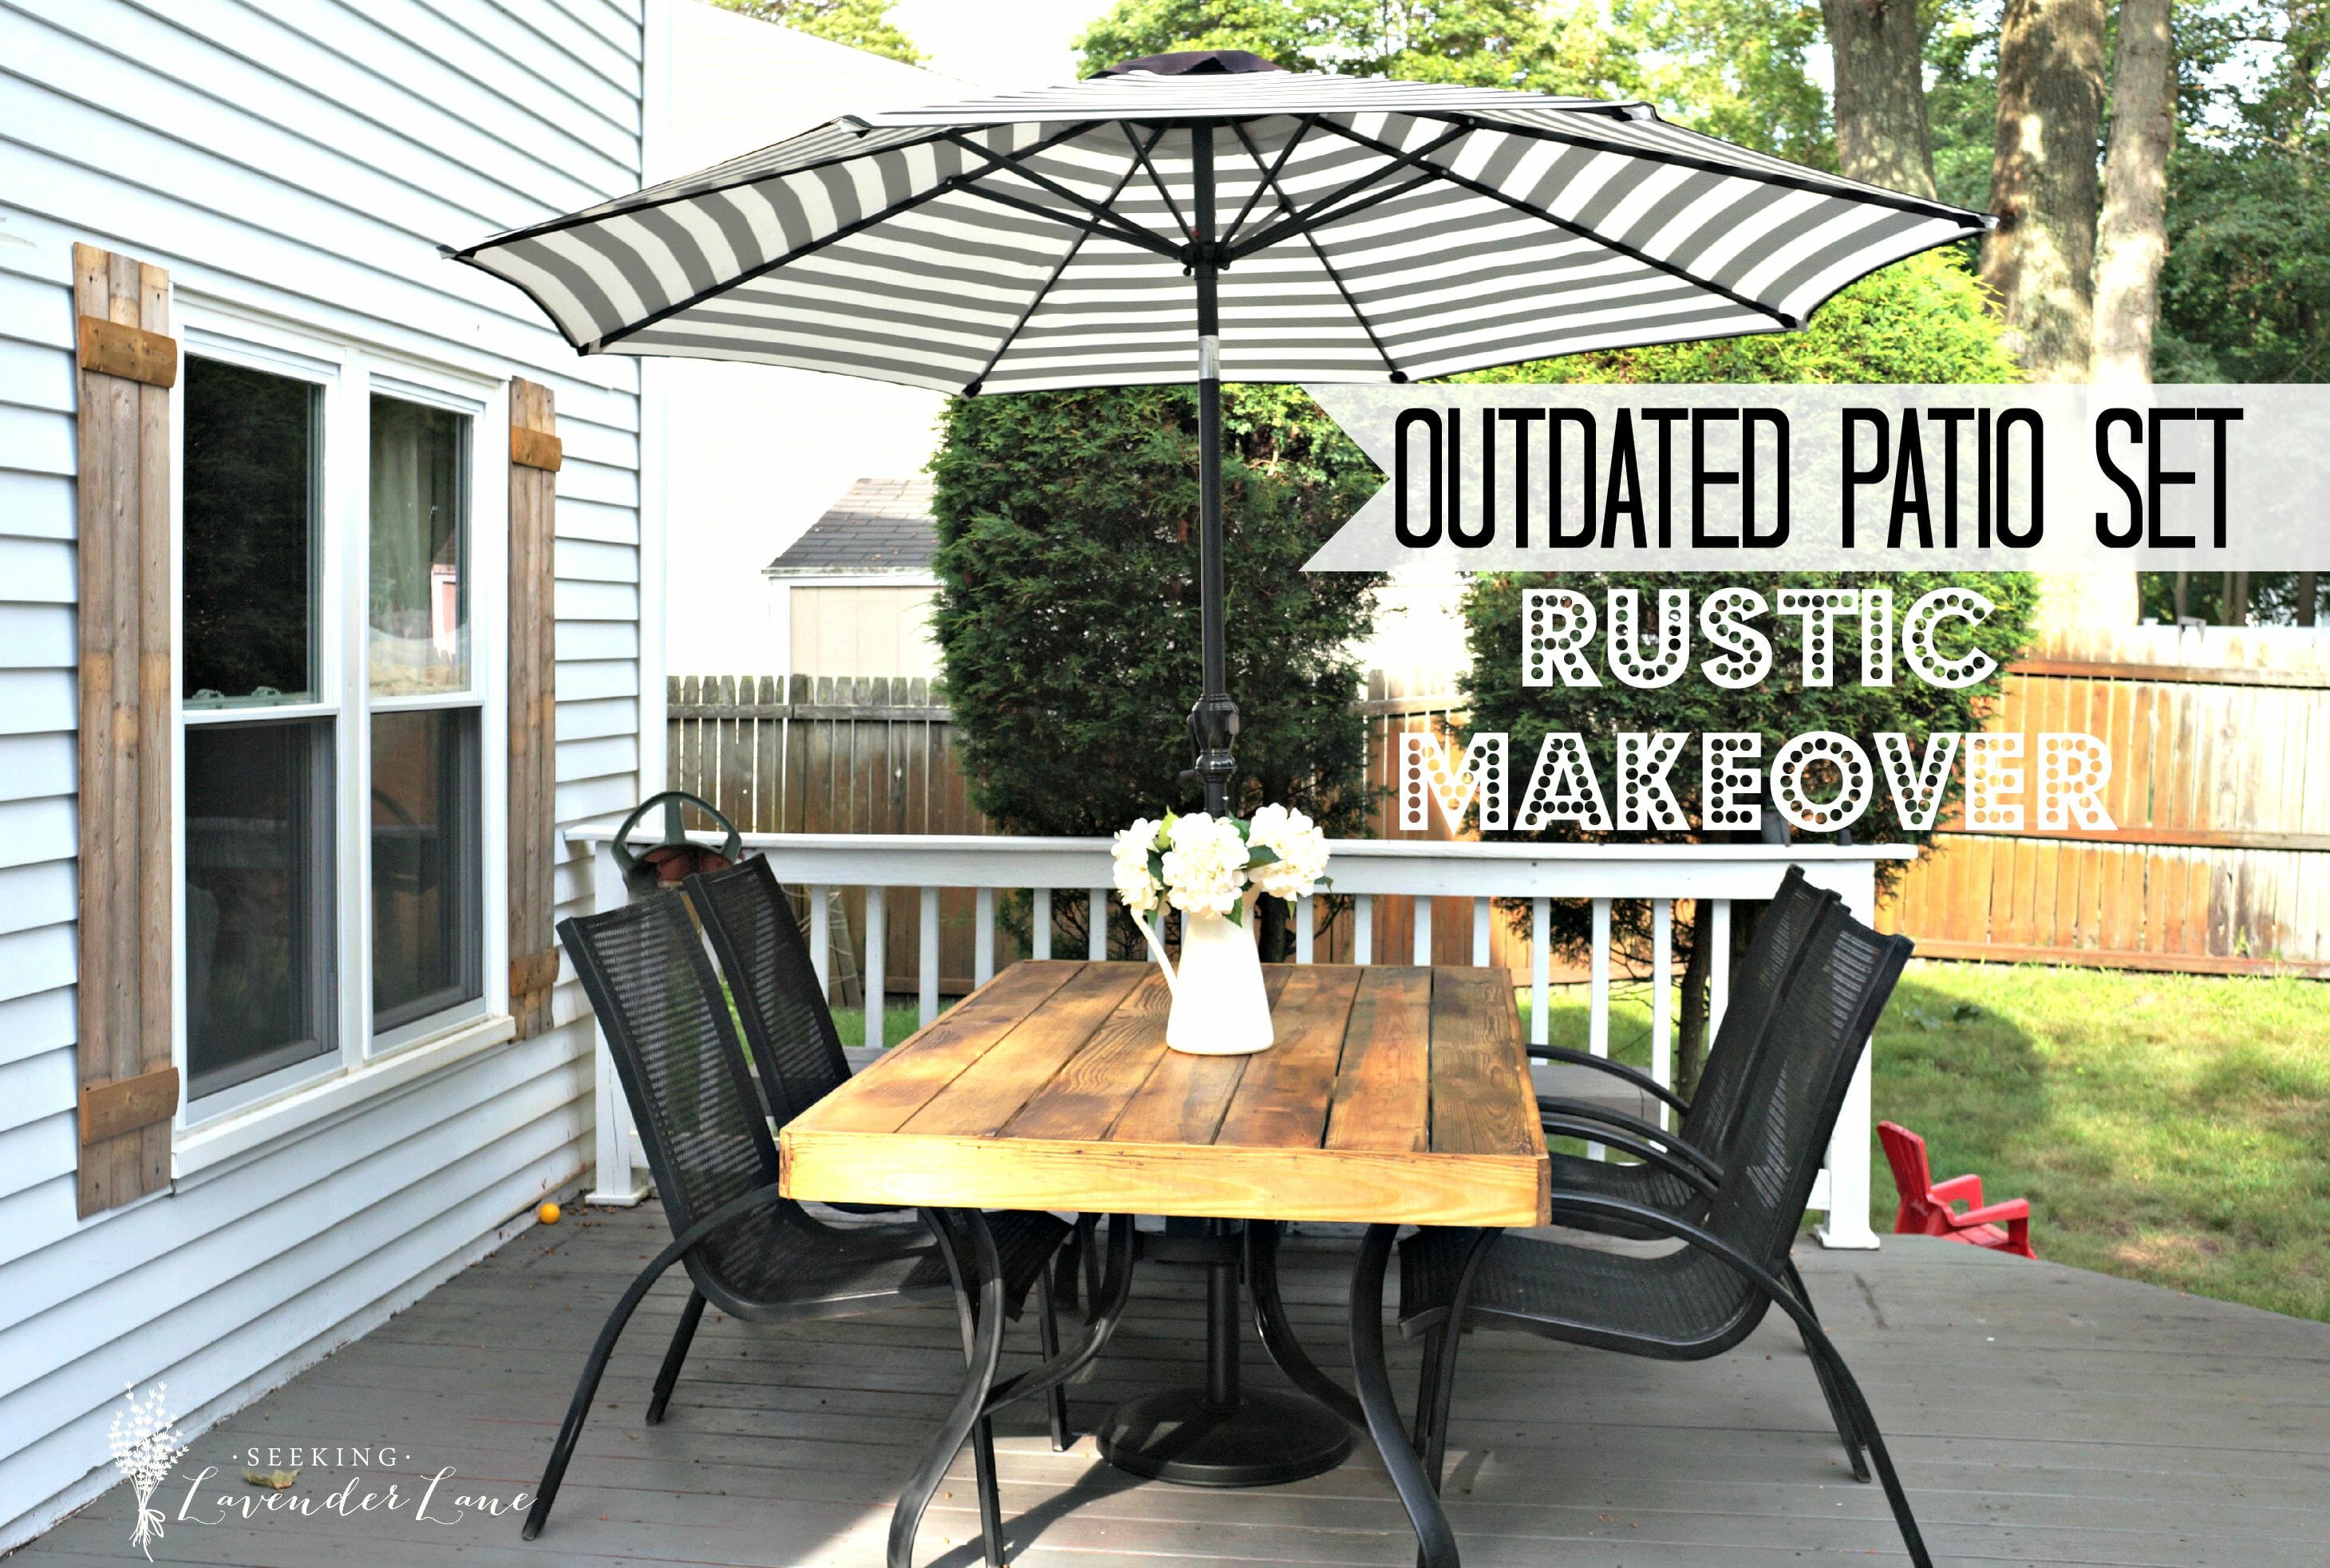
Outdated Patio Table Rustic Makeover
PLEASE STAY A WHILE


69 Responses
That turned out really beautiful! I sure hope it holds up in the weather! I just finished making a pallet table for my patio :o)
Tania
Thanks Tania! Yes, I plan to put this away for the winter (just in case)
What a great solution to updating your table! I am in love with those tiles!
Thank you so much Tracy! I know, I’ve had my eyes on these for a while…and was so excited to be able to use them in this project.
I LOVE how this turned out! What a great idea, Deb. I’m pinning this one for later!
Thanks so much Amanda!
This is an awesome makeover! Loooove the tiles! Great job (and persistence..with the rain and all!)
Thank you Natalie! Oh my it was one heck of a trial and error but we made it through.
I love how this turned out! I’ve been trying to figure out a way I can use that tile as well since I am absolutely in love with it!
Thank you Angela! Right, this was such an easy way…and it looks awesome outside!
Really pretty! I think the cuts on the end look better the way you did them. Great job!
Thank you Michelle! I actually agree with that. I was a little nervous it would look like we slacked and took the easy route, but I feel it does look intentionally and flows nicely.
What a creative way to transform an old patio table – it’s so beautiful Deb!
Thank you so much Sara! : )
You could go one step further and paint the legs of the table white to match the chairs….. it would stand out
Hi Leonie, that’s true, but I also like the black and white contrast. I originally spray painted the legs when I did our first update to the table two years ago. It was a silver color and then I sprayed them black. Either way would be awesome! Thanks for your advice : )
Hi there! This looks amazing!!
Did you permanently attach the top to the table or is it removable?
If it’s permanently attached, how did you do that?
Thank you!
Great job!!
Hi Emily,
Great question! It’s not permanently attached, but by building a frame around the table, it allows it to almost be like a slipcover top..if that makes sense. This way you can also remove it during the winter months to prevent from getting ruined. I hope this is helpful. If you have any more questions, feel free to email me dfoglia413 (at) gmail (dot) com
Hi! Love the table and you have given me a great idea for my outdoor patio table! Where did you purchase the tile? Loving the whole look!!
Hi Tracy,
You can see the link on my page. Depending on the size…if you have a similar table I purchased two boxes!
Oooh! I love this idea! My hubby and I are getting ready to make an outdoor table, so we might have to do something like this!
Oh How excting! Thanks for stopping by!
I’m completely obsessed with how this table turned out! I’m a designer at a tile distributor and work with this tile look on the daily. I’m so envious of those who get to call these tiles theirs, but like you..I have a budget. I love how you showed us how you can still enjoy these beauties without attaching them to your house.
Hi Heather! Thanks so much, Wow what an awesome comment and fun job you must have. Definitely have to pass this post on to some of your customers : ) Thank you again for stopping by and leaving me such a wonderful comment that!
I’m in love with your table! My son built me a farmhouse table for inside and I’ve been talking to him about building one for my screened porch. I wanted something a little different and I think this is it! Thank you for the inspiration. Pinning so I can show him what I want!
That is so awesome! I am so happy to hear that! Send me a photo after it’s made, I would love to see it!
What a great idea!
Thank you so much Judy!
Such an inspiration!!! Great work as always
Thanks Amanda!
What a beautiful table. I’m so in love with these printed tiles
thank you Bridgett!
Great Job Deb! This table makeover came out AMAZING!!!! I’ve been holding off on splurging on an outdoor patio set and this project has opened my eyes to a world of affordable possibilities! Thanks for sharing! Now time to get the hubby on board! Keep up the great work!!
Thanka Erika!
You would never know this is a DIY! You would think it’s a pottery barn table. You’re blog is motivating me to start doing DIY projects. I bet it will be nice for my husbands wallet as well!
Thank you Nadia! You are so sweet…that just made my day! Haha def…easier on the wallet!
I absolutely love this idea! I’m also obsessed with the style tile you chose to use. It’s gorgeous!
Thank you Ashley!
Brilliant idea Deb, it turned out amazing!
Roxanne recently posted…Bedroom Decorating Ideas
Thank you so much Roxanne!
I really cannot believe this transformation! You took sometjing drab and turned it into sometjing fab! This really changed the whole look and I love it!
Thank you Ashley! xoxo
Looks beautiful Deb! We’re moving in a few weeks and I’ll finally have a yard so maybe I can try something like this! Hope all is well with you!
Oh yay! How exciting! Thanks for stopping by Alyssa and leaving me a comment : )
Fantastic idea…. love the tile!!!! I wonder if using a wooden picnic bench would hold the weight of the tile and wood frame a little better….. I really like the idea!!!! BEAUTIFUL
Thanks Lori! The weight is actually fine! But that could be a great combo with a picnic bench table too. Love the wood and black and white together.
This is gorgeous my friend!!!! Loving the tiled look! Can I come over for a summer BBQ or two?
You are too funny! Stop on by anytime! Thank for stopping by and commenting.
Such a beautiful makeover!!!!
I love this table! I can’t wait to try this on my own.
Thanks Kerri!
Your table turned out beautiful!!! Now you get to enjoy all your hard work while eating meals with your family. Thanks for sharing!!!
Thanks Rebecca! Yes, love sitting and eating outside for the summer! Have a great week!
Love this Deb! It came out beautiful! Thanks for the inspo!
Thanks Ashley!
This project turned out beautifully! I love this tile too. I’m trying to figure out how to use it in our home.
Thanks Tammy! It’s such a gorgeous tile. Def love how you can think outside the lines with this one.
It looks so beautiful and that tile makes the table. Great job!
Thanks Alicia!
There is so much to love about this table. I *think* I could actually make it!
oh yay thanks Monica! I hope you do!
Nice job! I think the most important thing though is that you and your husband did it together. We moved into our new house in January and we are still getting things furnished . I wouldn’t mind tackeling together a table like this for our screened in porch.
Thanks?
Thanks Christina! That would be awesome for a screened in porch!
Absolutely beautiful! I love the idea and I think I might try but on a smaller scale. Baby steps! lol
oh that’s awesome Kelly! Yes, sometimes smaller is easier!
It was stunning and great. Very creative.
Thank you!
I didn’t see a discussion on the frame portion of the table. How did you attached this to the plywood?
Hi Abigail, we attached using a nail gun.