Thank you Lord for this Snow Day! I needed some time with my family, organizing, and of course DIYing!
After the roads were all plowed away we could not help but head over to our favorite store Lowes (of course) and pick up some wood for our next project. I believe most people were over there picking up salt, shovels, etc…to clean up after this mess we got here in NJ, but us…yep just some wood. I do believe we are the only crazy people thinking about buying wood on a day like today. Oh-well I look at it as a perfect opportunity to be home to get another lovely project checked off.
This past week I shared a post all about Adding Character to a Home. I rounded up some of my favorite ways other bloggers have added character in their homes and linking back to their pages, where they share their tutorials. It was a perfect opportunity to open up to today’s post, about adding Character to our Master Bedroom with a Faux Brick Chimney and Fireplace.
Step 1 in Adding Character to our Master Bedroom
Why Step 1? Well because this is going to be a work in progress. This is going to be a multi-step process and posts sharing how we are adding character to our room with a faux fireplace and more!
I have been dreaming since we moved in about adding a gorgeous Fireplace to our room. Something I have always wanted since I was a little girl, and our room is just big enough to add one. Of course…it can’t just be any fireplace…I wanted something Vintage!
Step 1: Finding a vintage mantel….wayyy to expensive!
Step 2: Finding a way to create a vintage feel to my mantle w/o spending too much money.
Step 3: Convince the Hubby to do it!
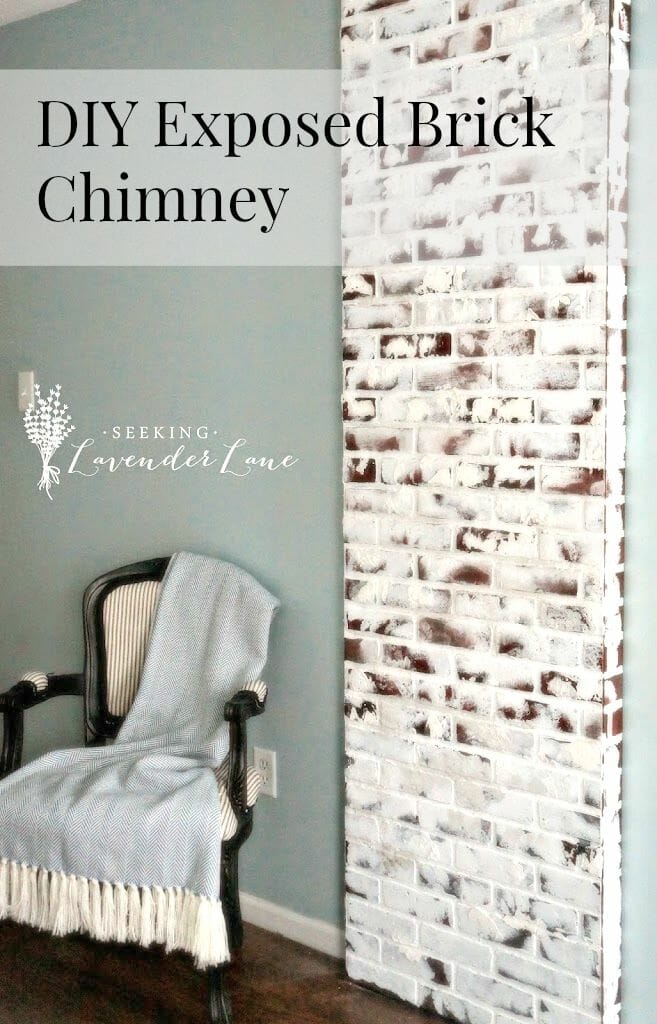
After googling and searching for ideas and photos I really gravitated to chippy/reclaimed brick. I especially love the look of exposed vintage chimneys. “Light Bulb” moment! Creating a Faux Reclaimed Chimney with a DIY Vintage Mantle!
Okay…I know sounds a little strange right? I still think it sounds a bit out there…but that’s my favorite kind of projects…ones that no one have done yet…original…daring…and all in my (non-stop creating) head lol.
So today I am sharing all about how we created our Reclaimed Exposed Chimney…and of course with a white chippy finish. The wood we picked up today from Lowes, is for Step 2 (our mantle) and I should be sharing that hopefully some time in the next week. So this means…if this does not work out…you will all know just as soon as I do. I do have faith in it working though. The idea behind it all is to create a faux look and not create a fireplace that looks like it works. I want it to seem as though we purchased one from a vintage store and added it to our reclaimed chimney…make sense?
So back to the “Exposed Chimney” and how we created this look….
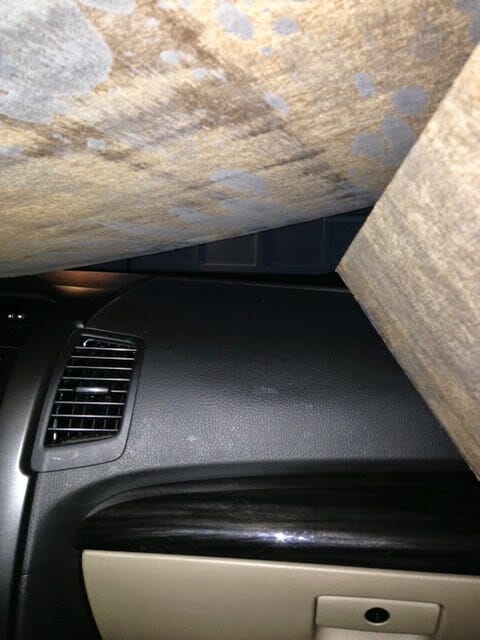
Lucky for us Lowes has Brick paneled boards…something I have been seeing all around blog land and it really is a great secret for a price of $25 a piece to create a wall of character. Lowes cut the brick into 3 separate pieces for us to create the “box” that would create our chimney.
After buying and traveling home with the piece…see below picture (yep that’s the drive home) I’m in the passenger seat haha…Now, it was time to install!
Once home, hubby had to build a frame for the brick to rest on. Lucky for us he just bought a new Stud Finder which helped to locate the studs to easily screw the wood into the wall.
Sorry for the poor picture quality…these are done with my camera phone.
next…
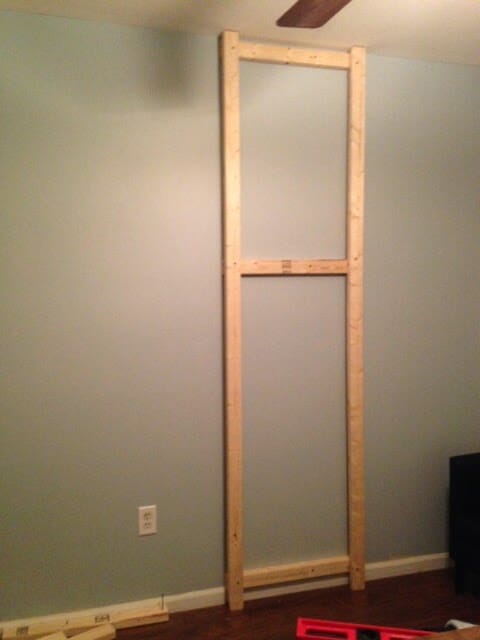
Creating the Frame
After deciding on the measurement of how wide you want the box to be, cut each piece horizontally, with 2×2 wood to the measurment of the desired width. Screw each piece into wall.
Add Long (7ft) wood 2×2’s on top of the horizontal pieces. (This allows the box/brick chimney to be 4 inches off of the wall, creating more depth)
Hint always use liquid nails to help secure wood. We use liquid nails in just about every project we do.
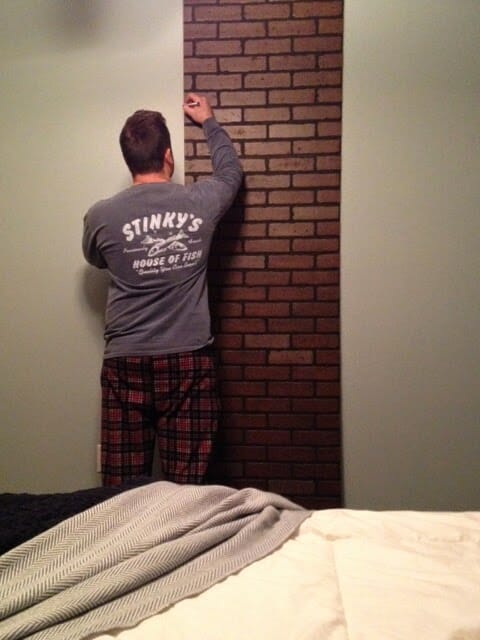
My man installing the brick wall.
Glue boards onto wood and complete with finishing nails. Wall should feel complete and secure once nails and glue are in place. On to my favorite part…painting!
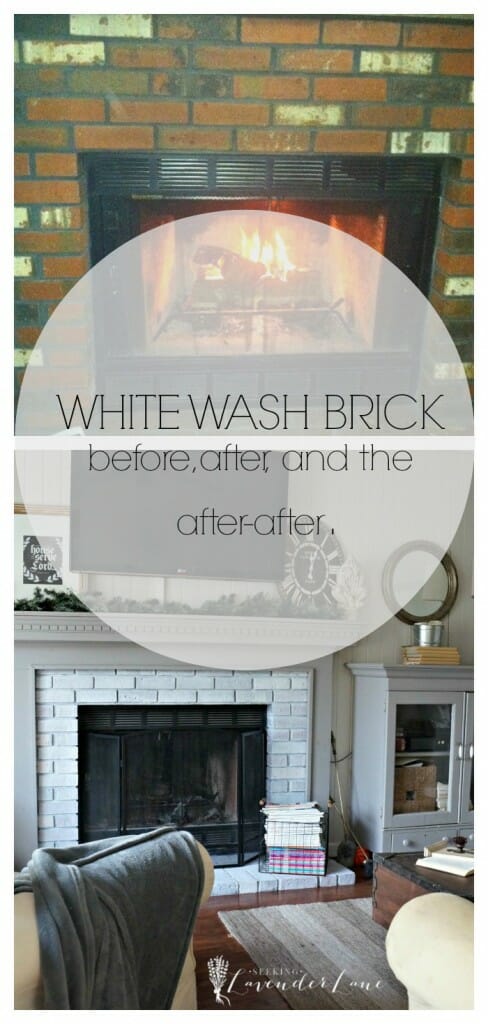
As you can see the Brick is pretty U-G-L-Y, with black grout and the deep red color. Not exactly what I was going for when looking through inspiration. I really want the brick to feel chippy, with white paint, red poking through, and texture. This leads me to the next step…
Accomplishing the Brick “Reclaimed” paint affect
First step to painting the Brick is to use a white grout combining Plaster of Paris and White Latex paint. If you remember I used the same combination to create my own DIY Chalk Paint for my Vintage Dresser. The difference here is I added a bit more plaster to create more of a texture to resemble a grout or painted concrete. I used my good ol’ pointer finger for this and spread the paint into each grout line…not being too perfect as to keep with the messy feel of reclaimed brick.
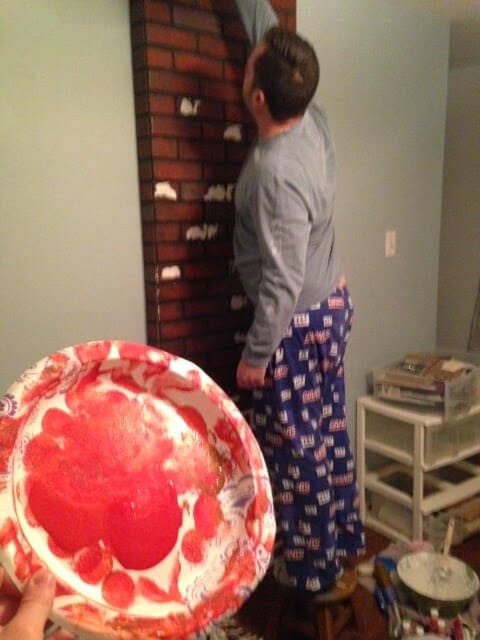
Next Step, I decided to paint the brick a redder shade since the current red was definitely too deep. I stopped over at Michaels Craft Store for some acrylic paint to help make this possible. A few shades of reds, orange, browns, and golds to create a brick with depth. I had a pack of sponge brushes to help with the faux painting technique. Combining in my Picaso paper dish I made sure to add a little of each color to my sponge without mixing the paints together in a swirling method.
The above photo you can see me with my “Picasso” plate while hubby was helping me out adding red to the bricks that were way too hard for me to reach (I’m only 5’1″).
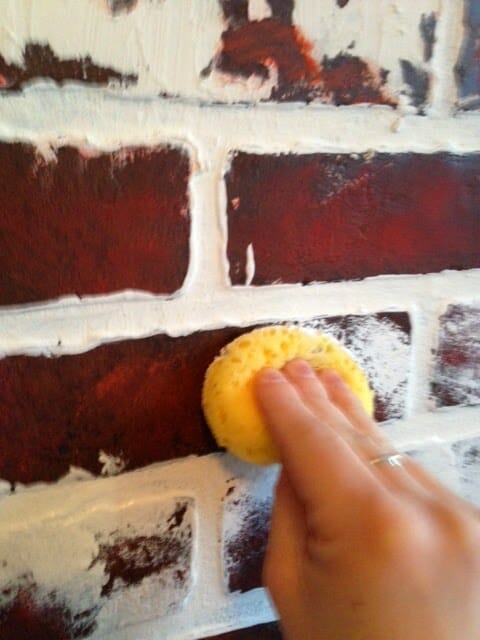
Following the red step, I used white paint onto a sponge (purchased at Michaels) to add the texture and plaster affect to the brick. I really wanted to keep the brick feeling light in color so adding this to the brick really helped to brighten it up. Dab the white sponge in a random pattern not completely covering each brick.
Once the paint it dry, I added Wood Filler to random areas to add texture…really completing the look of a worn textured authentic brick. Definitely be messy in this step leaving patches of textured areas to what looks like may be left behind after pulling off a plaster wall revealing the natural beauty of the brick.
Lastly, Sand each area with red sand paper. The red helped to lighten up some of the brick color without removing too much paint or altering the color. I really was aiming for a more natural feel so this step was important to fix all the humanly imperfections.
This was an incredibly fun project to do! Something so different than I have yet to do and there is nothing like taking something fake and making it seem real to the eye. I am so ready to create that mantel and complete this makeover. Even more so I am so excited to show ya’ll! (felt appropriate after watching Fixer Upper tonight) lol
Please stop by for Step 2 in completing the mantel…and all the other changes we plan to make in our Master for a charming romantic room.
I love a well designed home and I believe you can create this on every type of budget. Follow along here and join me for more seasonal inspiration, trend alerts, DIY , vintage styling, and our newest project, The Mountain Chateau.
LOVE how it’s turned out so far!! I had no idea they sold that brick paneling, such a clever and great secret! 🙂 I can’t wait to see how the rest of it turns out!!
LOVE how it’s turned out so far!! I had no idea they sold that brick paneling, such a clever and great secret! 🙂 I can’t wait to see how the rest of it turns out!!
Thanks so much Amanda! I’m looking forward to seeing how it turns out too lol. Hope you come back to see part 2!
this looks fabulous!! who knew they sold brick paneling!!? love the look of faux brick…saving this for a future project 🙂
That’s awesome…yea the Brick can be used for so many different projects!
What a great idea – love it! You just inspired me with an idea for a much needed backdrop for my photos – thanks! Marie@The Interior Frugalista
: ) looking forward to seeing how it turns out!
Gorgeous, Deb! I would love if you could shoot me an email at hannah@hometalk.com about an exciting opportunity! 🙂
Thanks so much Hannah…looking forward to the opportunity at Home Talk!
I love it! What a great idea 🙂
Thanks Angela!
This turned out great! Awesome Job!
Thanks you for your sweet comment!
Oooh so cool! I love it, can’t wait to see the rest!
Tania
Thanks Tania…looking forward to working on part 2 tonight and posting hopefully soon!
I love the look of exposed brick, and your wall looks fantastic! Yep, we spend weekends at Home Depot and Lowes, and both Hubs and I love Fixer Upper! 🙂
Hi Dee,
Thanks for your comment! Can’t help ourselves right…it’s an addiction to be at Lowes and start another project…right?
Great idea, and something I have NOT seen done before!! Thanks for sharing at Pin-Worthy Wednesday!
Thanks so much! So glad I could link up!
This is INSANE!!! In a good way! I LOVE it! I had no idea you could buy brick paneling like that. What you have done with it is fabulous. So wonderful. I totally love it. Pinning to my DIY Home Projects board. xo Bre @ Average But Inspired
Thanks so much Bre for pinning!
Oh that looks amazing and adds a lot of character to the room. I’ll have to look for that faux brick the next time I’m in Lowes/Home Depot. Thanks for sharing your project on Merry Monday.
Thanks Erlene! You definitely should pick some up…so many options to do with the paneling.
I love this! Simply amazing! I had a piece of that faux brick panel that I used in my studio years ago. So wish I had it now.
Thanks so much April!
I love this idea, how fun and great tutorial too. Thanks tons for linking to Inspire Me.
Hi Marty Thanks so much! Love linking up every week at Inspire Me!
Oh my goodness this is so cool. We are going to feature this on our Saturday Selections this week. Wow great job!
Thank you so much…that’s so exciting!
Deb, this is such a clever and creative idea! I love it! I’m featuring this at today’s Creative Spark link party. Thanks for sharing, and hope you’ll party with us again this week 🙂
Thanks Emily….so excited to be featured and definitely will come party again.
Deb- this is great! It’s a Friday Favorites feature over at http://notatrophywife.com this week. Party goes live on Thursday night. Would love you to join in party again and a social media shout out would be awesome!!! Love the chippy look!!!! laura
Hi Laura,
Thanks for the feature looking forward to joining a new party.
Sooo clever!! I love that this could be done in black or white or even gray too! (if only I had a two story house to make this legit haha. But so many do! I’ll be sharing this at Think & Make Thursday tomorrow on my blog at http://www.petitemodernlife.com/
cheers! Karisa
Thanks Karisa! I’ll stop on by!
Such a great idea!
Thanks Carmody!
LOVE this! Hubby and I are planning on using some of these to make a faux brick wall in our living room. I’m definitely inspired!
oooh I love it! Can’t wait to see how it turns out.
This is so awesome! I’m featuring you today at Friday Favorites. Thanks for linking up!
Thanks Heather for featuring : )
The whole room looks so great. I love the colour of the walls. Would you please advise which paint and colour you used? Thanks for sharing, Linda
Hi Linda, Thank you for your comment. The color of the walls is Yarmouth Blue from Benjamin Moore. Such a great color!
I love this!! How have I never seen that faux brick paneling at Lowe’s?! It turned out so great!!
Thanks so much Amy!
Great job! When I first looked at this I thought that it was real brick, would never know it was not.
Thanks so much Caroline! I think that’s the best comment I could get : )
Great job making the brick look authentic! We have a chimney under drywall and wood that I’ve been tempted to rip of and paint in our kitchen area. Maybe I’ll get the courage to do it this year 🙂 Thank you for sharing it and your moss heart wreath at What We Accomplished Wednesdays. Have a great week! Blessings, Deborah
Thanks so much Deborah! Oh you definitely should…sounds like a big project, but one that will turn out Amazing!
Love the faux chimney! A few years ago I thought I was really going to make a big statement in blogland with my new “discovery” of faux brick paneling! I used it in my kitchen and it looks amazing. I have used it for a faux brick fireplace and getting ready to cover my outdated tile on my real fireplace and make it look whitewashed. Now I want a faux chimney somewhere like you shared!!! Hubby is sitting beside me and we are cracking up. You husband looks exactly like mine, doing home improvement in his plaid pjs! So familiar! I love it! Real life!
Lol thank you Amber! That’s too funny…yep that’s how those projects get done. Love the brick paneling it really is such a great way to create texture and interest in any room. So glad you stopped by! Thanks so much for your sweet comment : )
This website uses cookies to improve your experience. We'll assume you're ok with this, but you can opt-out if you wish.AcceptRejectPrivacy Policy
Privacy & Cookies Policy
Privacy Overview
This website uses cookies to improve your experience while you navigate through the website. Out of these, the cookies that are categorized as necessary are stored on your browser as they are essential for the working of basic functionalities of the website. We also use third-party cookies that help us analyze and understand how you use this website. These cookies will be stored in your browser only with your consent. You also have the option to opt-out of these cookies. But opting out of some of these cookies may affect your browsing experience.
Necessary cookies are absolutely essential for the website to function properly. This category only includes cookies that ensures basic functionalities and security features of the website. These cookies do not store any personal information.
Any cookies that may not be particularly necessary for the website to function and is used specifically to collect user personal data via analytics, ads, other embedded contents are termed as non-necessary cookies. It is mandatory to procure user consent prior to running these cookies on your website.


53 Responses
What a great idea! I love it.
Thanks Robin!
LOVE how it’s turned out so far!! I had no idea they sold that brick paneling, such a clever and great secret! 🙂 I can’t wait to see how the rest of it turns out!!
LOVE how it’s turned out so far!! I had no idea they sold that brick paneling, such a clever and great secret! 🙂 I can’t wait to see how the rest of it turns out!!
Thanks so much Amanda! I’m looking forward to seeing how it turns out too lol. Hope you come back to see part 2!
this looks fabulous!! who knew they sold brick paneling!!? love the look of faux brick…saving this for a future project 🙂
That’s awesome…yea the Brick can be used for so many different projects!
What a great idea – love it! You just inspired me with an idea for a much needed backdrop for my photos – thanks!
Marie@The Interior Frugalista
: ) looking forward to seeing how it turns out!
Gorgeous, Deb! I would love if you could shoot me an email at hannah@hometalk.com about an exciting opportunity! 🙂
Thanks so much Hannah…looking forward to the opportunity at Home Talk!
I love it! What a great idea 🙂
Thanks Angela!
This turned out great! Awesome Job!
Thanks you for your sweet comment!
Oooh so cool! I love it, can’t wait to see the rest!
Tania
Thanks Tania…looking forward to working on part 2 tonight and posting hopefully soon!
I love the look of exposed brick, and your wall looks fantastic! Yep, we spend weekends at Home Depot and Lowes, and both Hubs and I love Fixer Upper! 🙂
Hi Dee,
Thanks for your comment! Can’t help ourselves right…it’s an addiction to be at Lowes and start another project…right?
Great idea, and something I have NOT seen done before!! Thanks for sharing at Pin-Worthy Wednesday!
Thanks so much! So glad I could link up!
This is INSANE!!! In a good way! I LOVE it! I had no idea you could buy brick paneling like that. What you have done with it is fabulous. So wonderful. I totally love it. Pinning to my DIY Home Projects board. xo Bre @ Average But Inspired
Thanks so much Bre for pinning!
Oh that looks amazing and adds a lot of character to the room. I’ll have to look for that faux brick the next time I’m in Lowes/Home Depot. Thanks for sharing your project on Merry Monday.
Thanks Erlene! You definitely should pick some up…so many options to do with the paneling.
I love this! Simply amazing! I had a piece of that faux brick panel that I used in my studio years ago. So wish I had it now.
Thanks so much April!
I love this idea, how fun and great tutorial too. Thanks tons for linking to Inspire Me.
Hi Marty Thanks so much! Love linking up every week at Inspire Me!
Oh my goodness this is so cool. We are going to feature this on our Saturday Selections this week. Wow great job!
Thank you so much…that’s so exciting!
Deb, this is such a clever and creative idea! I love it! I’m featuring this at today’s Creative Spark link party. Thanks for sharing, and hope you’ll party with us again this week 🙂
Thanks Emily….so excited to be featured and definitely will come party again.
Deb- this is great! It’s a Friday Favorites feature over at http://notatrophywife.com this week. Party goes live on Thursday night. Would love you to join in party again and a social media shout out would be awesome!!! Love the chippy look!!!! laura
Hi Laura,
Thanks for the feature looking forward to joining a new party.
Sooo clever!! I love that this could be done in black or white or even gray too! (if only I had a two story house to make this legit haha. But so many do! I’ll be sharing this at Think & Make Thursday tomorrow on my blog at http://www.petitemodernlife.com/
cheers! Karisa
Thanks Karisa! I’ll stop on by!
Such a great idea!
Thanks Carmody!
LOVE this! Hubby and I are planning on using some of these to make a faux brick wall in our living room. I’m definitely inspired!
oooh I love it! Can’t wait to see how it turns out.
This is so awesome! I’m featuring you today at Friday Favorites. Thanks for linking up!
Thanks Heather for featuring : )
The whole room looks so great. I love the colour of the walls. Would you please advise which paint and colour you used? Thanks for sharing, Linda
Hi Linda,
Thank you for your comment. The color of the walls is Yarmouth Blue from Benjamin Moore. Such a great color!
I love this!! How have I never seen that faux brick paneling at Lowe’s?! It turned out so great!!
Thanks so much Amy!
Great job! When I first looked at this I thought that it was real brick, would never know it was not.
Thanks so much Caroline! I think that’s the best comment I could get : )
Great job making the brick look authentic! We have a chimney under drywall and wood that I’ve been tempted to rip of and paint in our kitchen area. Maybe I’ll get the courage to do it this year 🙂 Thank you for sharing it and your moss heart wreath at What We Accomplished Wednesdays. Have a great week!
Blessings, Deborah
Thanks so much Deborah! Oh you definitely should…sounds like a big project, but one that will turn out Amazing!
Love the faux chimney! A few years ago I thought I was really going to make a big statement in blogland with my new “discovery” of faux brick paneling! I used it in my kitchen and it looks amazing. I have used it for a faux brick fireplace and getting ready to cover my outdated tile on my real fireplace and make it look whitewashed. Now I want a faux chimney somewhere like you shared!!! Hubby is sitting beside me and we are cracking up. You husband looks exactly like mine, doing home improvement in his plaid pjs! So familiar! I love it! Real life!
Lol thank you Amber! That’s too funny…yep that’s how those projects get done. Love the brick paneling it really is such a great way to create texture and interest in any room. So glad you stopped by! Thanks so much for your sweet comment : )